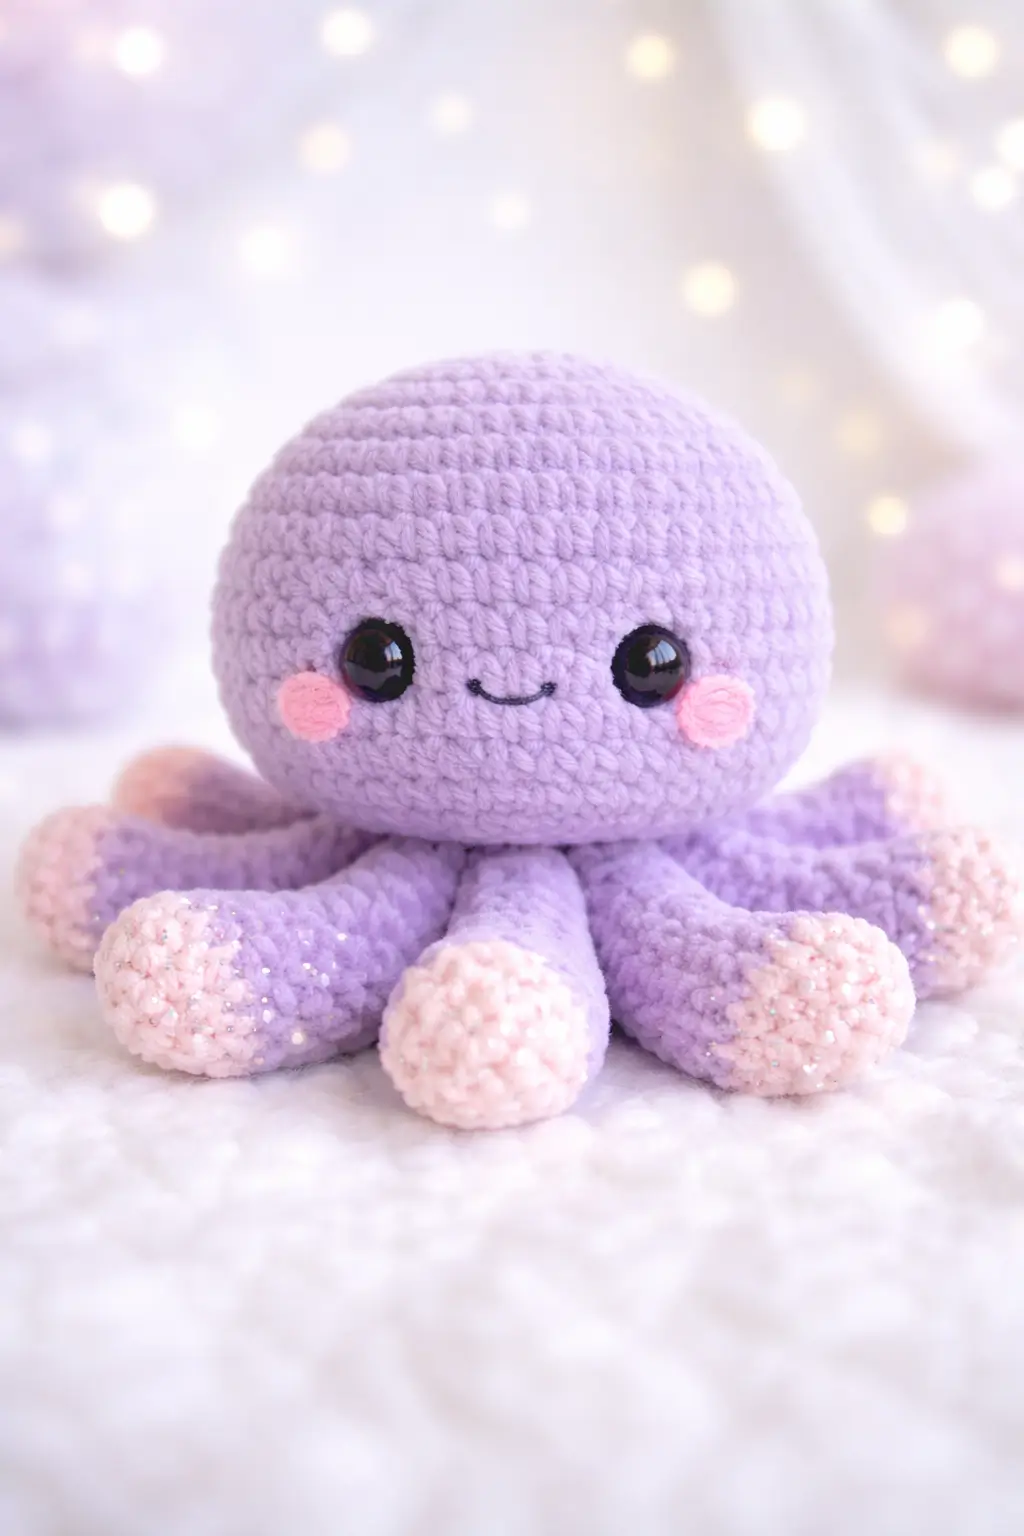
Eight tentacles force the base stitch count to divide cleanly by eight. This octopus amigurumi crochet pattern is written for chunky plush yarn, a 5 mm hook, and a finished toy around 15–17 cm tall, with a beginner-plus skill level and a stable sitting shape. The result works well as a shelf plush, market sample, or nursery display piece based on the pastel proportions shown in the photo.
The Design: What Makes This Octopus Different
This octopus uses a large dome head, a flatter underside, and stuffed tentacles with rounded contrast tips. That first choice matters because octopus plushies can collapse if the head and underside share the same curvature; the flatter base gives the toy a cleaner sitting line. The second choice is separate tentacles instead of quick chain curls. In this photographed style, that produces more weight at the edge and a softer drape across the front.
A third decision is the cheek appliqué. Small flat circles break up the face without changing the head geometry. Many top-ranking octopus posts lean toward the no-sew octopus crochet pattern format or the NICU-donation style with embroidered eyes and curl tentacles. This version tracks closer to a chunky yarn octopus amigurumi display plush. A common mistake with this character type is closing the underside too tightly, which pulls the tentacles upward and removes the low, puddled shape associated with kawaii octopus crochet.
Project Info at a Glance
| Skill Level | Time | Finished Size | Hook | Best For |
|---|---|---|---|---|
| Beginner-plus | 3–5 hours | 15–17 cm | 5 mm | Display plush, gift, market sample |
Comparable searched patterns place similar octopus projects between 12 cm and 17 cm depending on yarn weight and hook choice, with chunky plush versions commonly using 4.5–5 mm hooks.
Materials and Tools
Yarn
- Light lavender chunky chenille — bulky/chunky plush — about 85 g — brand suggestion: Sweet Snuggles Lite or Premier Parfait Chunky for a similar look
- Pale pink chunky chenille or sparkle plush — matching weight — leftover amount — brand suggestion: a matching chenille contrast for tentacle tips and cheeks
- Black embroidery floss or fine yarn — small amount — for smile
Tools
- Hook 5 mm
- Safety eyes 10–12 mm
- Polyester stuffing
- Yarn needle
- Stitch markers
- Pins or clips
A 5 mm hook and chunky chenille match the photographed texture more closely than DK cotton builds, though DK versions are also common in search results.
Abbreviations
MR / sc / inc / dec / sl st / ch / BLO / FLO
Invisible decrease keeps the head curve cleaner than a standard two-stitch decrease because the front loops stay aligned and reduce the ridge line on plush yarn.
Pattern — Step by Step
Continuous spiral unless noted. This pattern is a photo-based reconstruction written with standard amigurumi math, adapted to the plush shown. Counts are original to this article.
Head (Make 1)
Yarn: light lavender — Source: photo-based reconstruction + standard amigurumi math
R1: 6 sc in MR (6)
R2: inc x6 (12)
R3: (sc, inc) x6 (18)
R4: (2 sc, inc) x6 (24)
R5: (3 sc, inc) x6 (30)
R6: (4 sc, inc) x6 (36)
R7: sc around (36)
R8: sc around (36)
R9: sc around (36)
R10: sc around (36)
R11: sc around (36)
R12: sc around (36)
R13: (4 sc, dec) x6 (30)
R14: (3 sc, dec) x6 (24)
R15: (2 sc, dec) x6 (18)
Place safety eyes between R9 and R10, 7 stitches apart. Embroider the smile centered one round below the eyes. Add stuffing firmly before the opening narrows.
Fasten off. Leave a 25 cm tail.
Body Base (Make 1)
Yarn: light lavender — Source: photo-based reconstruction + standard amigurumi math
R1: 6 sc in MR (6)
R2: inc x6 (12)
R3: (sc, inc) x6 (18)
R4: (2 sc, inc) x6 (24)
R5: (3 sc, inc) x6 (30)
R6: sc around in BLO (30)
R7: sc around (30)
R8: sc around (30)
This shallow base keeps the toy low and stable instead of spherical.
Fasten off. Leave a 35 cm tail.
Front Tentacles (Make 2)
Yarn: pale pink then light lavender — Source: photo-based reconstruction + standard amigurumi math
R1: 6 sc in MR with pink (6)
R2: inc x6 (12)
R3: sc around (12)
R4: sc around (12)
R5: (sc, dec) x4 (8)
R6: change to lavender, sc around (8)
R7: sc around (8)
R8: sc around (8)
R9: sc around (8)
R10: sc around (8)
R11: sc around (8)
R12: sc around (8)
Stuff the pink tip firmly and the lavender shaft lightly so the tentacle bends instead of standing rigid.
Fasten off. Leave a 20 cm tail.
Side Tentacles (Make 4)
Yarn: pale pink then light lavender — Source: photo-based reconstruction + standard amigurumi math
R1: 6 sc in MR with pink (6)
R2: inc x6 (12)
R3: sc around (12)
R4: (sc, dec) x4 (8)
R5: change to lavender, sc around (8)
R6: sc around (8)
R7: sc around (8)
R8: sc around (8)
R9: sc around (8)
R10: sc around (8)
R11: sc around (8)
These sit slightly shorter so the face stays visible from the front.
Fasten off. Leave a 20 cm tail.
Back Tentacles (Make 2)
Yarn: pale pink then light lavender — Source: photo-based reconstruction + standard amigurumi math
R1: 6 sc in MR with pink (6)
R2: inc x6 (12)
R3: sc around (12)
R4: (sc, dec) x4 (8)
R5: change to lavender, sc around (8)
R6: sc around (8)
R7: sc around (8)
R8: sc around (8)
R9: sc around (8)
R10: sc around (8)
Stuff only the tip and first half of each back tentacle. That keeps the rear edge from pushing the plush forward.
Fasten off. Leave a 20 cm tail.
Center Tentacles (Make 2)
Yarn: pale pink then light lavender — Source: photo-based reconstruction + standard amigurumi math
R1: 6 sc in MR with pink (6)
R2: inc x6 (12)
R3: sc around (12)
R4: sc around (12)
R5: (sc, dec) x4 (8)
R6: change to lavender, sc around (8)
R7: sc around (8)
R8: sc around (8)
R9: sc around (8)
R10: sc around (8)
R11: sc around (8)
R12: sc around (8)
These sit in the middle front span. Keep them symmetrical so the head does not twist visually.
Fasten off. Leave a 20 cm tail.
Cheek Patches (Make 2)
Yarn: pale pink — Source: photo-based reconstruction + standard amigurumi math
R1: 6 sc in MR (6)
R2: inc x6 (12)
Sl st to first stitch.
Fasten off. Leave a 12 cm tail.
Tentacle Tip Caps (Optional Surface Detail, Make 8)
Yarn: pale pink sparkle plush — Source: photo-based reconstruction
R1: 6 sc in MR (6)
R2: inc x6 (12)
Use only if you want a separate stitched-on glitter cap rather than changing colors inside each tentacle.
Fasten off. Leave a 10 cm tail.
Smile Embroidery (Make 1)
Yarn: black embroidery floss — Source: photo-based reconstruction
Work a shallow curved smile 3–4 stitches wide centered below the eyes.
Fasten off at the back of the head.
Assembly
- Stuff the head until the sides stay rounded but the lower face remains soft.
- Pin the body base to the head opening and check that the base sits level on the table.
- Sew the two back tentacles evenly along the rear half of the base edge.
- Sew the four side tentacles next, spacing them so the joins divide the edge evenly.
- Sew the two center tentacles into the front middle area.
- Sew the two front tentacles last, angled slightly outward so they frame the face.
- Join the body base to the head, catching the tentacle tops inside the seam as you work around.
- Stitch the cheek patches one stitch lower than the eye line and one stitch outward from each eye.
- Recheck the smile placement and add one more short embroidery pass if the curve looks thin against chenille.
- Weave in every tail through at least three direction changes inside the plush.
The piece is complete when the underside sits flat and all eight tentacles rest outward without lifting the front edge.
7 Technical Tips
- Mark the first stitch of every round. Losing round starts on chenille usually shifts the decrease line, and the head will lean by R13.
- Keep head stuffing firmer than tentacle stuffing. A soft head dents around 10–12 mm eyes, while overstuffed tentacles stop draping across the surface.
- Use invisible decreases on the last three head rounds. Standard decreases leave a visible seam track on plush yarn, especially across lavender shades.
- Install eyes before the opening drops below 24 stitches. On this build, placing them after R14 compresses the face and widens the eye spacing unintentionally.
- Pin all eight tentacles before sewing any of them permanently. A single placement error of even 1 cm is enough to make the plush rotate when viewed from the front.
- Do not pack stuffing into the last 2 cm of each tentacle. That section needs flex so the tip can angle outward instead of pointing straight ahead.
- Weave chenille tails through dense seams, not empty stuffing. Loose tail weaving slides out faster on plush yarn because the fiber surface has less stitch definition to grip.
Conclusion
This octopus amigurumi crochet pattern works because the math serves the anatomy: a 36-stitch dome for the head, a flatter 30-stitch base, and eight separate tentacles that spread the weight around the edge. That structure matches the photographed plush more closely than a fast one-piece curl design. The next step is simple: make one sample in lavender and pink, then record the exact eye spacing and stuffing level before repeating it for additional colors. Share the finished piece on Pinterest and Instagram with the tag #PastelOctopusPattern. One question remains useful for future versions: should this octopus keep rounded tentacle tips, or would stitched suction details improve the silhouette?









