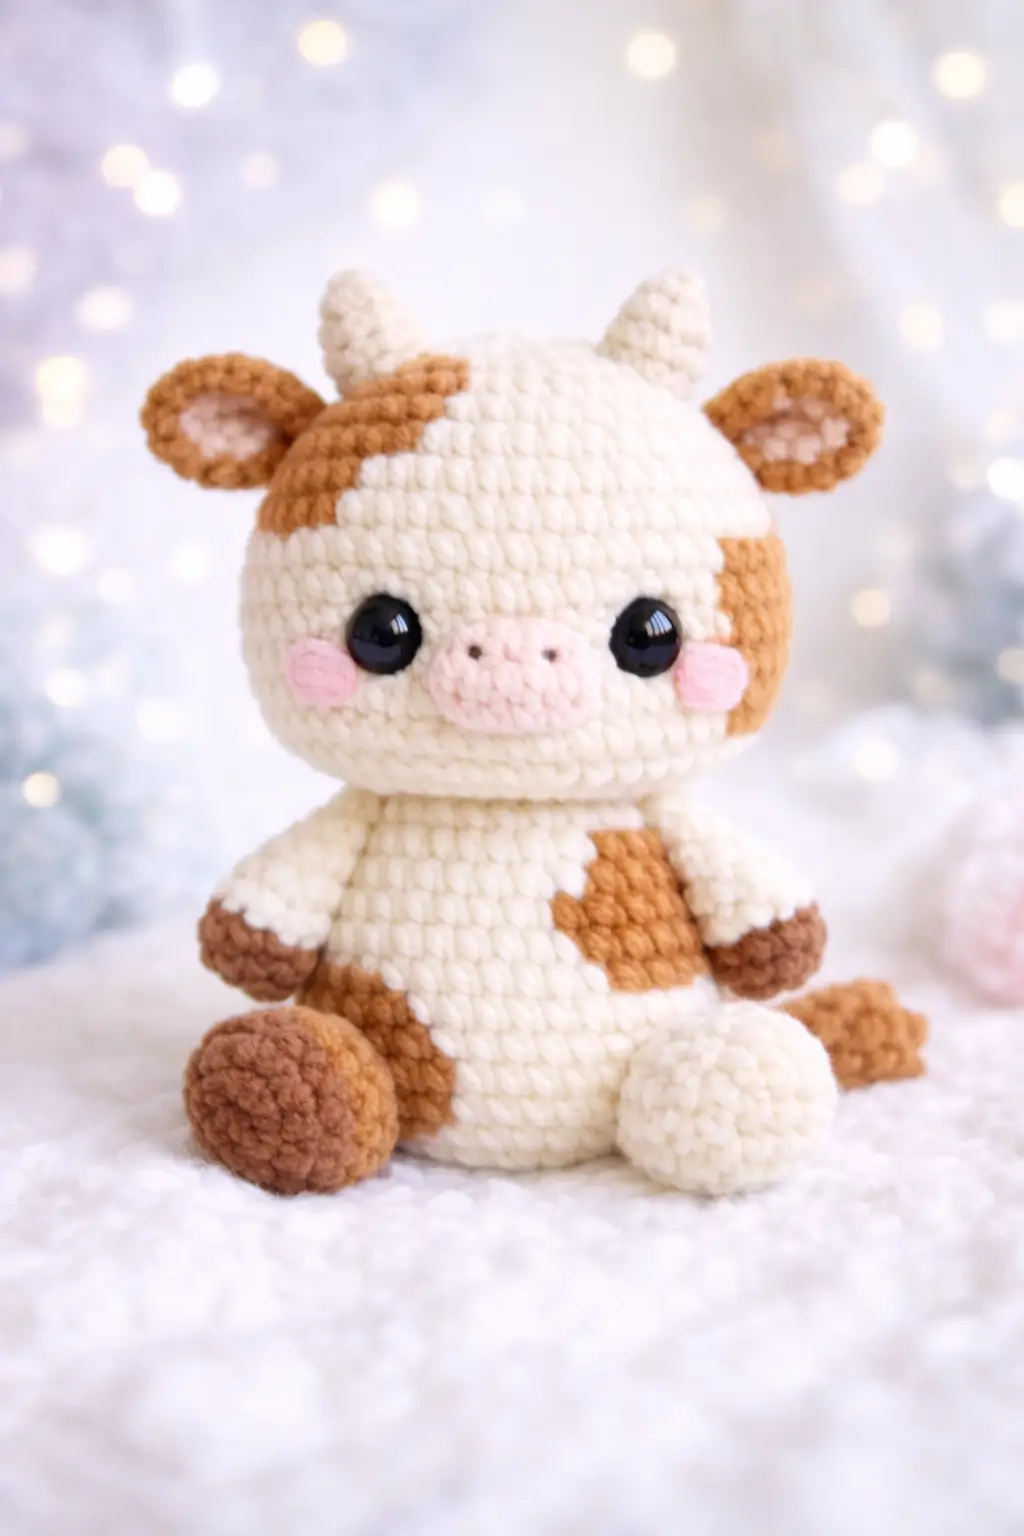
A cow only reads as a cow after the muzzle interrupts the sphere of the head. This cow amigurumi crochet pattern builds that interruption first with a raised snout, then supports it with worsted yarn, a 3.5 mm hook, and a compact seated body sized for shelf display or market stock. The project suits an intermediate maker who wants stable proportions instead of a long standing form.
The Design: What Makes This Cow Different
This photographed calf depends on proportion more than detail. The head is oversized, nearly globe-like, while the body stays short and slightly tapered so the toy can sit without a stand. That choice shifts visual weight upward. It also gives the sitting cow amigurumi profile that appears in current plush-style trends. The second structural choice is the muzzle. It projects from the face instead of being embroidered flat, which separates this toy from many basic crochet cow pattern tutorials. Finally, the legs are split into small front limbs and larger seated feet, creating a clear front/back hierarchy.
A common mistake with a cow is shrinking the snout and enlarging the horns. The result reads more like a bull caricature than a soft calf. Here the horns stay short, the ears stay rounded, and the patch placement remains asymmetrical so the silhouette stays clean from the front. Search results also show many popular listings favor standing bodies or shaggy highland variations rather than this smooth seated format.
Project Info at a Glance
| Skill Level | Time | Finished Size | Hook | Best For |
|---|---|---|---|---|
| Intermediate | 5–7 hours | about 17 cm sitting | 3.5 mm | markets, nursery shelf decor, gift crochet |
Finished-size and hook benchmarks are aligned to currently indexed cow patterns using worsted/aran yarn and seated cow listings.
Materials and Tools
Yarn
- Cream / white — worsted / aran — about 80–150 g — Stylecraft Special DK or similar for a smaller build; acrylic worsted for a fuller build
- Caramel brown — worsted — 10–15 g
- Medium brown — worsted — 10–15 g
- Pale pink — worsted — 10–15 g
- Light beige or cream — optional horn color, though the photo supports cream horns
Tools
- Hook 3.5 mm
- Safety eyes 12–15 mm; 15 mm is the verified worsted benchmark
- Polyester stuffing
- Tapestry needle
- Stitch markers
- Black embroidery thread for nostrils
Abbreviations
MR / sc / inc / dec / sl st / ch / BLO / FO = fasten off.
Use invisible decrease wherever a decrease appears. It reduces gap formation on pale yarn and keeps the face smoother than a standard single-crochet-two-together.
Pattern — Step by Step
Continuous spiral unless noted. The pattern below is an original photo-based reconstruction built with standard amigurumi stitch math, not a transcription of any source pattern.
Head (Make 1)
Yarn: cream — Source: standard amigurumi math + photo-based reconstruction
R1: 6 sc in MR (6)
R2: inc x6 (12)
R3: (sc, inc) x6 (18)
R4: (2 sc, inc) x6 (24)
R5: (3 sc, inc) x6 (30)
R6: (4 sc, inc) x6 (36)
R7–R13: sc around (36)
R14: (4 sc, dec) x6 (30)
R15: (3 sc, dec) x6 (24)
R16: (2 sc, dec) x6 (18)
Stuff firmly. Insert eyes between R9 and R10, about 8 stitches apart.
R17: (sc, dec) x6 (12)
R18: dec x6 (6)
FO. Close opening. Leave 25 cm tail.
Body (Make 1)
Yarn: cream — Source: standard amigurumi math + photo-based reconstruction
R1: 6 sc in MR (6)
R2: inc x6 (12)
R3: (sc, inc) x6 (18)
R4: (2 sc, inc) x6 (24)
R5: (3 sc, inc) x6 (30)
R6: (4 sc, inc) x6 (36)
R7–R10: sc around (36)
R11: (4 sc, dec) x6 (30)
R12–R14: sc around (30)
R15: (3 sc, dec) x6 (24)
R16: sc around (24)
Stuff lower half firmly, upper half moderately.
R17: (2 sc, dec) x6 (18)
FO. Leave 35 cm tail for sewing.
Arms / Front Legs (Make 2)
Yarn: medium brown then cream — Source: standard amigurumi math + photo-based reconstruction
R1: 6 sc in MR with brown (6)
R2: inc x6 (12)
R3–R4: sc around (12)
Change to cream.
R5–R9: sc around (12)
R10: flatten, sc through both sides across 6 sts (6)
FO. Leave 20 cm tail.
Back Legs / Sitting Feet (Make 2)
Yarn: one cream, one patched brown/cream to match photo — Source: standard amigurumi math + photo-based reconstruction
R1: 6 sc in MR (6)
R2: inc x6 (12)
R3: (sc, inc) x6 (18)
R4–R6: sc around (18)
R7: (sc, dec) x6 (12)
Stuff front of foot more than back to keep the seated shape rounded.
R8: sc around (12)
R9: flatten, sc through both sides across 6 sts (6)
FO. Leave 25 cm tail.
Ears (Make 2)
Yarn: caramel outer, pale pink inner optional — Source: standard amigurumi math + photo-based reconstruction
Outer ear:
R1: 6 sc in MR (6)
R2: inc x6 (12)
R3: (sc, inc) x6 (18)
R4: sc around (18)
Inner ear:
R1: 6 sc in MR (6)
R2: inc x6 (12)
R3: sc around (12)
Place inner ear on outer ear. Pinch base and sew lightly.
FO. Leave 18 cm tail.
Horns (Make 2)
Yarn: cream — Source: horn construction informed by verified cow pattern structures, adapted shorter for the photo.
R1: 6 sc in MR (6)
R2–R4: sc around (6)
R5: (2 sc, inc) x2 (8)
R6: sc around (8)
Lightly stuff. FO. Leave 15 cm tail.
Snout / Muzzle (Make 1)
Yarn: pale pink — Source: standard amigurumi oval math + photo-based reconstruction
Ch 6.
R1: inc in 2nd ch from hook, 3 sc, 4 sc in last ch, working back on opposite side 3 sc, inc in last ch (14)
R2: inc x2, 3 sc, inc x4, 3 sc, inc x2 (22)
R3: sc around (22)
R4: sc around (22)
FO. Leave 30 cm tail.
Embroider two nostrils after sewing.
Cheek Patches (Make 2)
Yarn: pale pink — Source: standard flat circle math
R1: 6 sc in MR (6)
R2: inc x6 (12)
Sl st to finish.
FO. Leave 12 cm tail.
Tail (Make 1)
Yarn: caramel — Source: tail length informed by verified cow tail constructions, adapted to the short seated photo form.
R1: 6 sc in MR (6)
R2–R6: sc around (6)
FO. Leave 20 cm tail.
Add a small tassel with 3 short yarn strands.
Head Spots (Make 2)
Yarn: caramel — Source: photo-based applique shapes
Small spot:
R1: 6 sc in MR (6)
R2: (sc, inc) x3 (9)
R3: sc around (9)
Large spot:
R1: 6 sc in MR (6)
R2: inc x6 (12)
R3: (sc, inc) x6 (18)
FO both. Leave long tails. Shape loosely while sewing instead of forcing a perfect circle.
Body Spots (Make 2)
Yarn: caramel — Source: photo-based applique shapes
Chest spot:
R1: 6 sc in MR (6)
R2: inc x6 (12)
R3: (sc, inc) x6 (18)
R4: work 10 sc only, turn
R5: dec, 6 sc, dec (8)
Side spot:
R1: 6 sc in MR (6)
R2: (sc, inc) x3 (9)
R3: work 7 sc only, turn
R4: dec, 3 sc, dec (5)
FO. Leave long tails.
Assembly
- Sew the head to the top center of the body using the long body tail.
- Attach the snout to the lower front of the head, centered below the eye line.
- Embroider the nostrils with black thread, spacing them evenly across the muzzle.
- Sew the cheek patches one stitch below the eyes, aligned to the outer corners of the snout.
- Attach the horns on the crown, about 5 stitches apart.
- Sew the ears slightly below and outside the horns, angling them outward.
- Attach the arms at the upper body sides, one round below the neck seam.
- Sew the back legs to the lower front body so the toy balances in a seated pose.
- Add the head and body spots, keeping the larger caramel patch on one forehead side and one chest-side patch offset, not mirrored.
- Sew the tail to the back center, low enough to remain visible when the cow sits.
The completed toy should sit upright with the head slightly forward and the feet projecting in front of the body.
7 Technical Tips
- Mark the first stitch of every round. Losing one increase round in the head changes the sphere into a dome and the cow stops matching the photo.
- Do not overstuff the top of the body. A too-hard neck seam pushes the head upward and removes the slight forward tilt that makes the seated calf look balanced.
- Use invisible decreases on all visible shaping rounds. Standard decreases leave small holes, which show sharply on cream yarn under direct light.
- Install the eyes before the head closes below 18 stitches. Trying to force 12–15 mm eyes through later rounds can stretch the face and shift the muzzle lower than intended.
- Pin the muzzle before sewing. The correct placement is centered and high enough that its top edge sits just below the eye line, not on the chin.
- Stuff the back legs unevenly. Firmer stuffing in the front half keeps the feet round, while a softer back half lets them flatten against the body.
- Weave spot tails in two directions. A single-direction weave can pull the applique edge inward and distort the irregular patch shape.
Conclusion
This cow amigurumi crochet pattern works because the muzzle, horns, ears, and seated feet are proportioned around a round head instead of added as afterthoughts. The photographed toy stays compact, so keep the body short, the horns small, and the patch layout uneven. Make the cream version first. Then test a second one with darker patches or a smaller eye size if you want a calmer face. Share the result on Pinterest and Instagram with #SittingSpottedCalf. One question matters with this character: did you place the forehead patch high enough to leave one horn visually clear?









