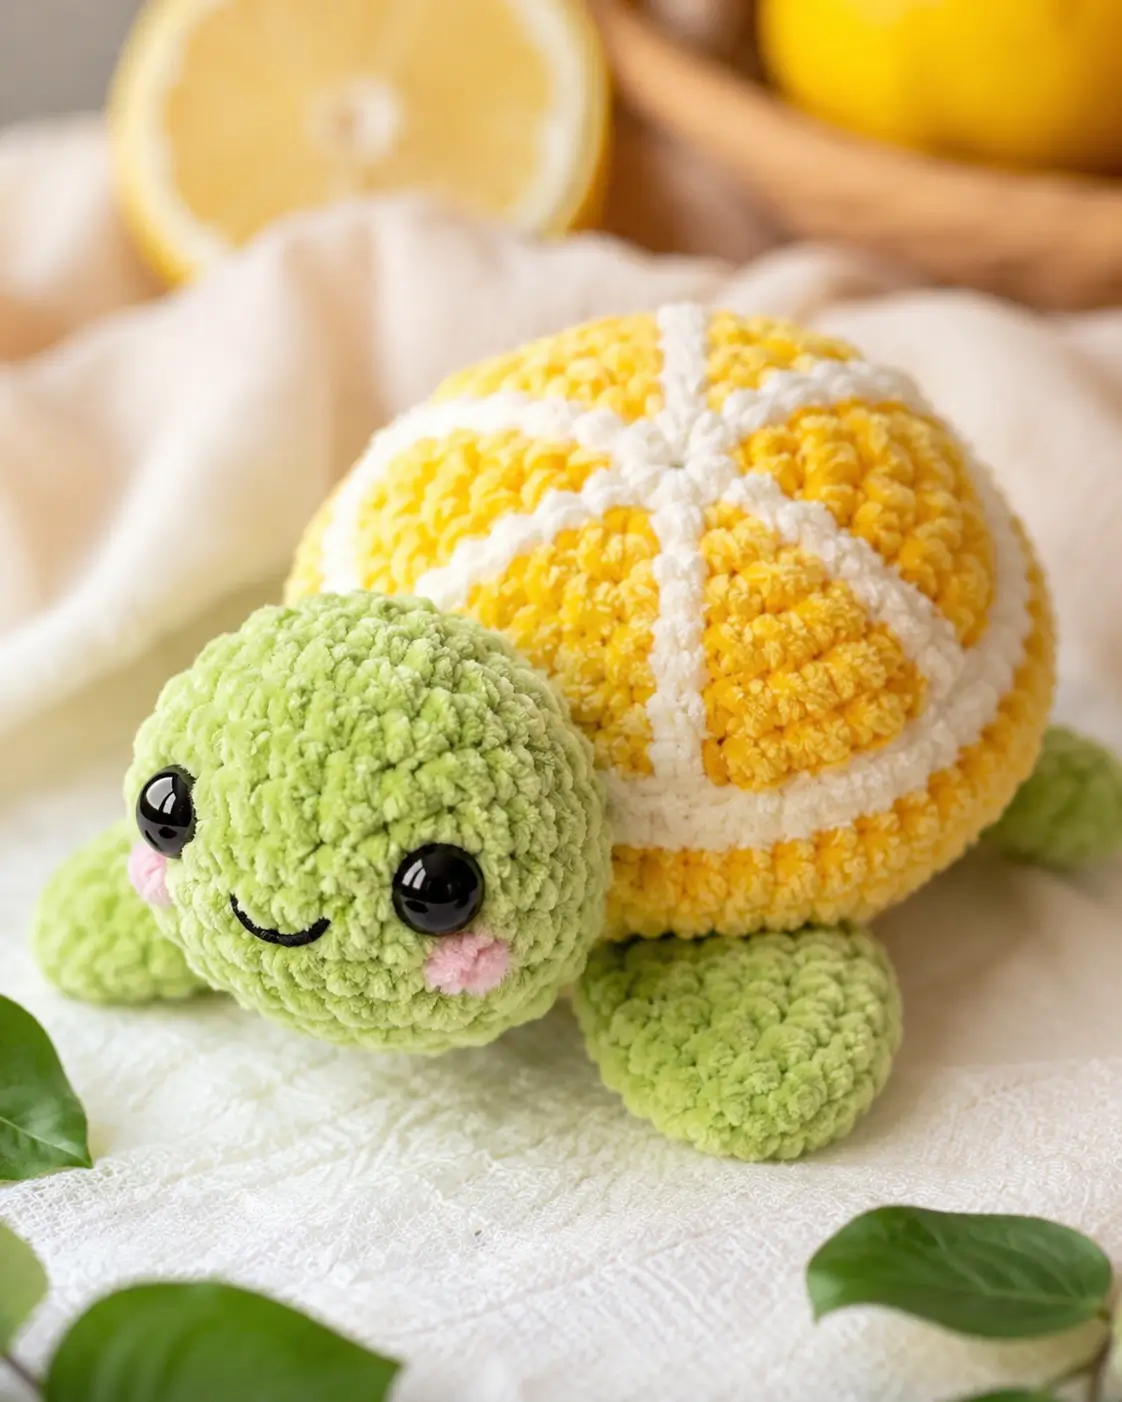
Lemon pith only reads as citrus when every white rib meets the shell center; this lemon turtle amigurumi crochet pattern builds that geometry into the toy. Use super bulky chenille, a 3.5 mm hook, 10 mm safety eyes, and medium stuffing tension to make a 12 cm plush. Skill level sits at intermediate. A flat belly keeps the turtle stable for market-table photos and desk display.
The Design: What Makes Lemon Turtle Different
This lemon turtle amigurumi crochet pattern has three structural jobs: keep the head low, make the shell look like a cut lemon, and stop the white lines from twisting. Public references place lemon turtles in chenille, velvet, or super bulky yarn, so this version keeps the stitch count compact and relies on a 36-stitch head plateau for density.
The shell is larger than the body because citrus sections need a wide surface. A 42-stitch dome gives enough room for six raised pith ribs without crowding the yellow panels. The common mistake is sewing the shell strips after stuffing has shifted the dome. Pin first. Sew from center outward. That keeps a crochet lemon turtle readable from the top and keeps the citrus turtle amigurumi balanced from the side.
Project Info at a Glance
| Skill Level | Time | Finished Size | Hook | Best For |
|---|---|---|---|---|
| Intermediate | 2–3 hours | Approx. 12 cm long | 3.5 mm | Market prep, display plush, fruit turtle collections |
Materials and Tools
Yarn
- Lime green — super bulky chenille/velvet — 45 g — Bernat Blanket, Himalaya Dolphin Baby, YarnArt Dolce, or Katia Velvet Mini
- Lemon yellow — super bulky chenille/velvet — 40 g — same yarn line as green
- White — super bulky chenille/velvet — 20 g — for pith ribs, center, and shell band
- Soft pink — chenille or worsted acrylic — 2 g — for cheek patches
- Black embroidery yarn — small length — for mouth
Tools
- Hook 3.5 mm
- 10 mm safety eyes
- Polyester stuffing
- Yarn needle
- Stitch markers
- Pins
- Scissors
Abbreviations
- MR = magic ring
- sc = single crochet
- inc = 2 sc in one stitch
- dec = single crochet decrease
- sl st = slip stitch
- ch = chain
- BLO = back loop only
- hdc = half double crochet
Invisible decrease: work through the front loops only of the next two stitches, then complete one single crochet so the decrease occupies one stitch.
Pattern — Step by Step
Work in a continuous spiral unless a row instruction says otherwise.
Head — Make 1
Yarn: lime green
R1: 6 sc in MR (6)
R2: inc ×6 (12)
R3: (sc, inc) ×6 (18)
R4: (2 sc, inc) ×6 (24)
R5: (3 sc, inc) ×6 (30)
R6: (4 sc, inc) ×6 (36)
R7–R10: sc around (36)
R11: (4 sc, dec) ×6 (30)
R12: (3 sc, dec) ×6 (24)
R13: (2 sc, dec) ×6 (18)
Place safety eyes between R8 and R9, about 7 stitches apart. Stuff the head firmly at the forehead and lightly at the lower jaw.
R14: (sc, dec) ×6 (12)
R15: dec ×6 (6)
Fasten off. Leave a 25 cm tail for sewing.
Body / Belly Base — Make 1
Yarn: lime green
R1: 6 sc in MR (6)
R2: inc ×6 (12)
R3: (sc, inc) ×6 (18)
R4: (2 sc, inc) ×6 (24)
R5: (3 sc, inc) ×6 (30)
R6: (4 sc, inc) ×6 (36)
R7–R9: sc around (36)
R10: (4 sc, dec) ×6 (30)
R11: (3 sc, dec) ×6 (24)
Stuff lightly. The belly must stay flat enough to sit under the shell.
R12: (2 sc, dec) ×6 (18)
R13: (sc, dec) ×6 (12)
R14: dec ×6 (6)
Fasten off. Weave the tail through the front loops of R14 and pull closed.
Shell Dome — Make 1
Yarn: lemon yellow
R1: 6 sc in MR (6)
R2: inc ×6 (12)
R3: (sc, inc) ×6 (18)
R4: (2 sc, inc) ×6 (24)
R5: (3 sc, inc) ×6 (30)
R6: (4 sc, inc) ×6 (36)
R7: (5 sc, inc) ×6 (42)
R8–R13: sc around (42)
R14: (5 sc, dec) ×6 (36)
R15: sc around BLO (36)
Stuff the dome lightly after attaching it to the belly base, not before. The shell should arch, not wobble.
Fasten off. Leave a 40 cm tail for sewing.
Front Flipper Wings — Make 2
Yarn: lime green
R1: 6 sc in MR (6)
R2: inc ×6 (12)
R3: (sc, inc) ×6 (18)
R4–R5: sc around (18)
R6: (sc, dec) ×6 (12)
Do not stuff. Flatten the piece with the decreases centered at the lower edge.
R7: sc through both layers across the opening (6)
Fasten off. Leave a 20 cm tail.
Back Legs — Make 2
Yarn: lime green
R1: 6 sc in MR (6)
R2: inc ×6 (12)
R3: (sc, inc) ×6 (18)
R4: sc around (18)
R5: (sc, dec) ×6 (12)
R6: sc through both layers across the opening (6)
Fasten off. Leave an 18 cm tail.
Tail — Make 1
Yarn: lime green
R1: 6 sc in MR (6)
R2: sc around (6)
R3: (sc, inc) ×3 (9)
R4: sc around (9)
Add a pinch of stuffing only at the base.
Fasten off. Leave a 15 cm tail.
Cheek Patches — Make 2
Yarn: soft pink
R1: 6 sc in MR (6)
R2: inc ×6 (12)
Sl st to first stitch (12)
Fasten off. Leave a 15 cm tail for sewing.
Lemon Shell Center — Make 1
Yarn: white
R1: 6 sc in MR (6)
R2: inc ×6 (12)
R3: sl st around (12)
Fasten off. Leave a 20 cm tail.
Raised Lemon Segment Ribs — Make 6
Yarn: white
Row 1: ch 9, starting in second ch from hook, sc across (8)
Row 2: ch 1, turn, sc across (8)
Fasten off. Leave a 15 cm tail on each strip.
For a smaller shell, make ch 8 for 7 sc. For a larger shell, make ch 10 for 9 sc. All six strips must match.
Outer White Pith Band — Make 1
Yarn: white
Row 1: ch 43, starting in second ch from hook, sc across (42)
Row 2: ch 1, turn, sc across (42)
Fasten off. Leave a 30 cm tail.
Wrap the band around R13 of the shell before sewing. Add or remove 2 stitches if your chenille tension changes the shell width.
Optional Lemon Leaf Prop — Make 1
Yarn: lime green or darker green
Row 1: ch 7, starting in second ch from hook: sc, sc, hdc, hdc, sc, sl st (6)
Row 2: work along the unused side of the chain: sl st, sc, hdc, hdc, sc, sl st (6)
Fasten off. Leave a 12 cm tail if attaching to the shell; weave in both ends if using as a photo prop.
Face Embroidery
Thread: black embroidery yarn
Insert the needle below the left eye, curve the mouth down one round and up under the right eye, then secure at the back of the head. Keep the smile no wider than 5 stitches. A wider mouth will crowd the cheek patches.
Assembly
- Pin the head to the front of the belly base, centered over R7–R10 of the body.
- Sew the head to the body with the tail from the head, then pull the final knot inside the body fabric.
- Place the shell dome over the belly base, with the BLO edge sitting just above the belly’s widest round.
- Sew the shell to the body, adding small pieces of stuffing under the dome before closing the final 3 cm gap.
- Sew the cheek patches one round below the eyes and 1 stitch outward from each eye edge.
- Stitch the mouth between the cheeks after the patches are fixed, not before.
- Attach the front flippers at the front sides of the body, angled slightly forward.
- Attach the back legs at the rear sides, then sew the tail at the center back under the shell rim.
- Sew the white center circle to the top of the shell, then sew six ribs from the center outward.
- Wrap the outer pith band around the shell edge, sew it flat, attach the optional leaf prop, and weave in all tails.
The lemon turtle is complete when all four flippers touch the table and the shell center sits directly above the body center.
7 Technical Tips
- Stitch marker drift: Move the stitch marker after every round, not every few rounds. A 2-stitch drift will make the six white shell ribs land off center.
- Stuffing firmness: Fill the head to about 85% firmness and the belly to about 60% firmness. Overstuffing the belly creates a rocking base.
- Invisible decrease gaps: Use invisible decreases on R11–R15 of the head. Standard decreases in chenille can leave dark holes near the face.
- Eye placement timing: Insert eyes after R13 of the head, before the opening narrows to 12 stitches. Late eye placement forces the washer against stuffing and can distort the muzzle.
- Velvet tension: Keep each single crochet about 6–7 mm wide with super bulky chenille. Loose loops make the yellow shell show stuffing between rounds.
- Pinning failure mode: Pin all six shell ribs before sewing the first one. Sewing one rib at a time without checking spacing can leave a narrow final lemon segment.
- Tail weaving: Weave chenille tails through at least 4 cm of fabric before trimming. Short woven tails can slide out because velvet yarn has low grip.
Conclusion
Check the shell before final sewing: the white center should sit at the highest point, and each rib should divide the yellow dome into even citrus panels. Work one test rib first if your chenille is thicker than the source yarn. After assembly, photograph the turtle from above and from eye level so the lemon-shell geometry is visible. Pin the finished project on Pinterest, then share the table-height photo on Instagram with #LemonTurtleAmigurumi. This lemon turtle amigurumi crochet pattern is ready for a fruit turtle collection. For the next version, should the shell become a lime wedge or an orange slice?









