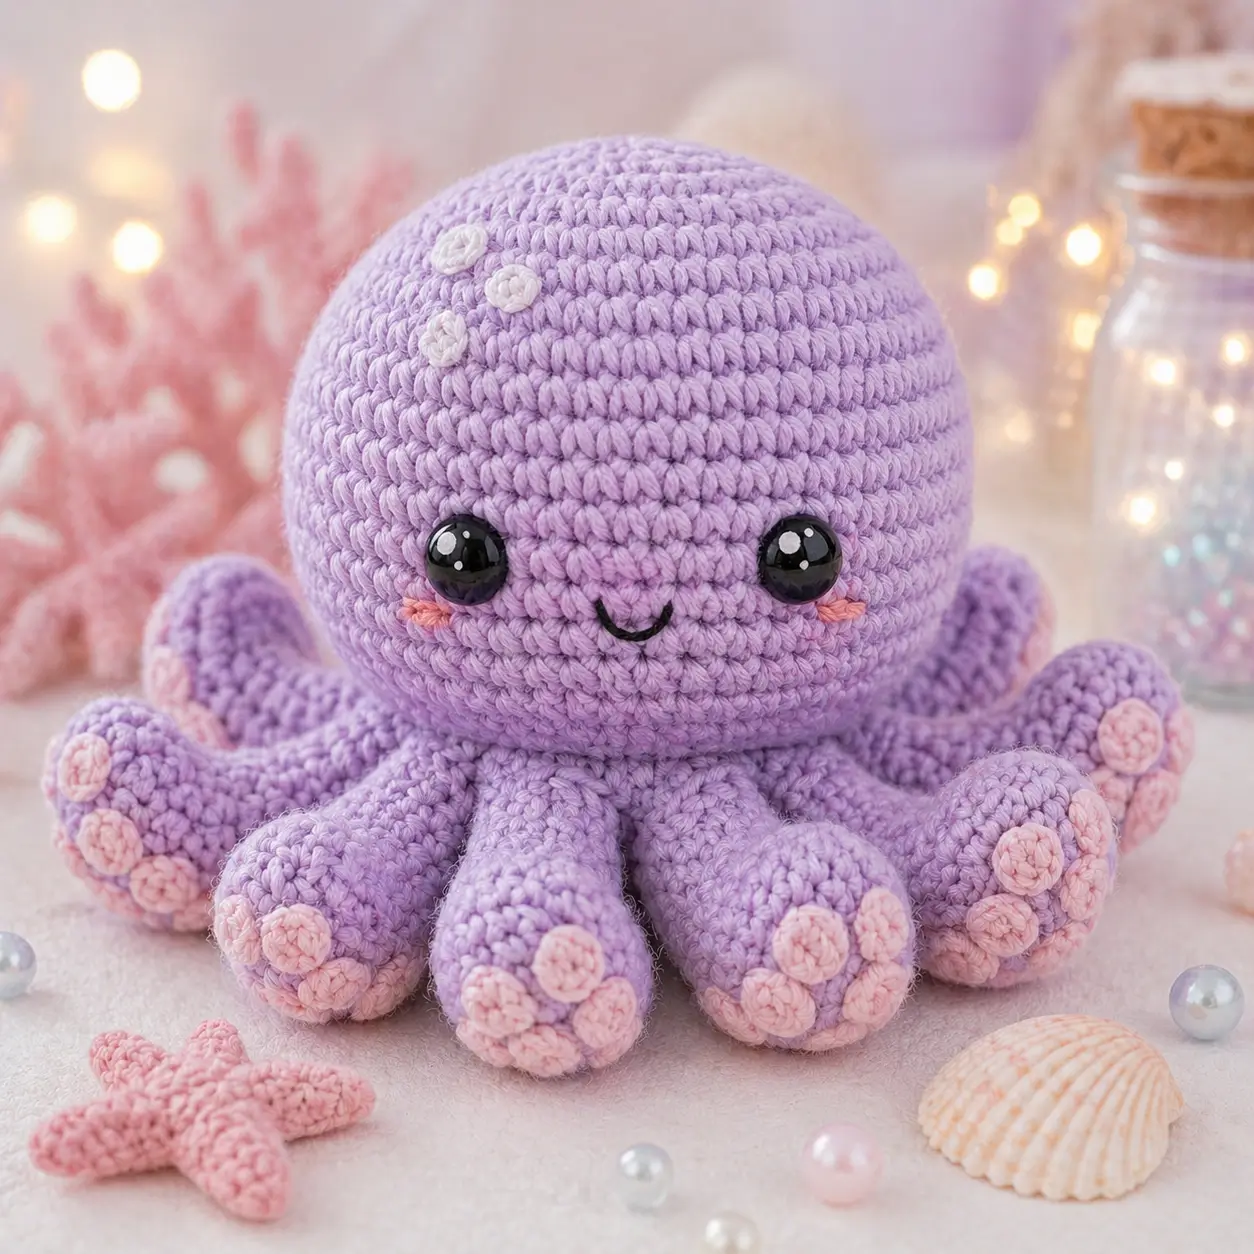
An octopus has eight arms, so this octopus amigurumi crochet pattern cannot stop at a lavender blob. You will work DK/light-worsted cotton, a 2.75 mm hook, 12 mm eyes, pastel suckers, and a separate starfish prop for a 15 cm confident-beginner display toy. Make it when you need a sea-creature pattern that shows the underside details instead of hiding them.
The Design: What Makes Lavender Octo Different
The mantle has to stay round without making the toy roll backward, so the head uses a 42-stitch crown and a shorter 36-stitch body base. That split gives the octopus a large face, a low sitting point, and enough surface for eight arms. A separate body also creates a clean seam line where the tentacles can be pinned before sewing.
The mistake to avoid: placing every arm flat in a straight circle. Real octopus silhouettes read better when side arms curl upward and front arms point forward. This crochet octopus pattern also adds pink flat-circle suckers, not just bobbles, because the photo shows visible underside spots. The white mantle dots keep the top from looking empty, while the cheek patches keep the face small enough for an amigurumi octopus pattern with large safety eyes.
Project Info at a Glance
| Skill Level | Time | Finished Size | Hook | Best For |
|---|---|---|---|---|
| Confident beginner | 5–6 hours | 15 cm sitting height | 2.75 mm | Display toy, nursery shelf, sea-creature photo prop |
Materials and Tools
Yarn
- Lavender — DK/light-worsted cotton — 70–80 g — suggested: Paintbox Cotton DK, Stylecraft Naturals Organic Cotton DK, or Scheepjes Catona after swatching
- Pastel pink — matching DK/light-worsted cotton — 10 g — for suckers, cheek patches, and starfish prop
- White — matching DK/light-worsted cotton — 3–5 g — for mantle spots
- Black embroidery thread — small amount — for the smile
Tools
- Hook 2.75 mm
- 12 mm black safety eyes
- Polyester fiberfill
- Tapestry needle
- Stitch markers
- Pins
- Scissors
For a child-safe version, embroider the eyes instead of adding plastic safety eyes.
Abbreviations
MR = magic ring; sc = single crochet; inc = 2 sc in next stitch; dec = single crochet decrease; sl st = slip stitch; ch = chain; BLO = back loop only.
Work invisible decrease by inserting the hook through the front loops of the next two stitches before pulling up a loop, which keeps the closing rounds from showing gaps.
Pattern — Step by Step
Continuous spiral unless noted. Place a stitch marker in the first stitch of each round.
Head
Yarn: lavender
R1: 6 sc in MR (6)
R2: inc ×6 (12)
R3: [sc, inc] ×6 (18)
R4: [2 sc, inc] ×6 (24)
R5: [3 sc, inc] ×6 (30)
R6: [4 sc, inc] ×6 (36)
R7: [5 sc, inc] ×6 (42)
R8–R15: sc around (42)
R16: [5 sc, dec] ×6 (36)
R17: sc around (36)
R18: [4 sc, dec] ×6 (30)
R19: [3 sc, dec] ×6 (24)
Place safety eyes between R12 and R13, 10 stitches apart. Embroider the smile between the eyes before stuffing becomes firm.
R20: [2 sc, dec] ×6 (18)
R21: [sc, dec] ×6 (12)
Stuff firmly, with extra fiberfill at the crown and less at the lower edge.
R22: dec ×6 (6)
Fasten off. Leave 15 cm tail and close through front loops.
Body
Yarn: lavender
R1: 6 sc in MR (6)
R2: inc ×6 (12)
R3: [sc, inc] ×6 (18)
R4: [2 sc, inc] ×6 (24)
R5: [3 sc, inc] ×6 (30)
R6: [4 sc, inc] ×6 (36)
R7–R9: sc around (36)
R10: [4 sc, dec] ×6 (30)
R11: sc around (30)
R12: [3 sc, dec] ×6 (24)
R13: sc around (24)
Stuff to a low dome. Keep the bottom flatter than the head.
R14: [2 sc, dec] ×6 (18)
R15: [sc, dec] ×6 (12)
R16: dec ×6 (6)
Fasten off. Leave 25 cm tail for sewing body to head.
Front Tentacles
Make 2. Yarn: lavender
R1: 6 sc in MR (6)
R2: inc ×6 (12)
R3: [sc, inc] ×6 (18)
R4–R8: sc around (18)
R9: [sc, dec] ×6 (12)
R10–R13: sc around (12)
Stuff the first half only. The open end must flatten under the body.
Fasten off. Leave 30 cm tail.
Rear Tentacles
Make 2. Yarn: lavender
R1: 6 sc in MR (6)
R2: inc ×6 (12)
R3: [sc, inc] ×6 (18)
R4–R9: sc around (18)
R10: [sc, dec] ×6 (12)
R11–R15: sc around (12)
Stuff lightly. Bend each rear tentacle behind the body before sewing.
Fasten off. Leave 30 cm tail.
Side Curl Tentacles
Make 4. Yarn: lavender
R1: 6 sc in MR (6)
R2: inc ×6 (12)
R3: [sc, inc] ×6 (18)
R4–R10: sc around (18)
R11: [sc, dec] ×6 (12)
R12–R17: sc around (12)
Stuff only the base. Curve two side tentacles upward and two outward, then pin before sewing.
Fasten off. Leave 35 cm tail.
Pink Suckers
Make 28. Yarn: pastel pink
R1: 6 sc in MR (6)
R2: inc ×6 (12)
Sl st to first stitch (12)
Fasten off. Leave 12 cm tail on each sucker. Sew three suckers to each front tentacle, three to each rear tentacle, and four to each visible side curl.
Cheek Patches
Make 2. Yarn: pastel pink
R1: 6 sc in MR (6)
Sl st to first stitch (6)
Fasten off. Leave 10 cm tail. Flatten each patch before sewing one stitch below each eye.
White Mantle Spots
Make 3. Yarn: white
R1: 6 sc in MR (6)
Sl st to first stitch (6)
Fasten off. Leave 10 cm tail. Sew the three spots on the upper-left head area in a loose vertical curve.
Smiling Mouth
Embroidery feature. Yarn: black embroidery thread
Thread a needle with black embroidery thread. Insert below the right eye, exit at the center low point, reinsert one stitch above that point, and exit below the left eye. Catch the center strand with one small anchoring stitch to form a shallow U. Knot inside the head opening before final head closure when possible.
Starfish Prop
Yarn: pastel pink
R1: 6 sc in MR (6)
R2: inc ×6 (12)
R3: [sc, inc] ×6 (18)
R4: [2 sc, inc] ×6 (24)
R5: [3 sc, inc] ×6 (30)
Work five points over 6 stitches each.
Point Row 1: sc across 6, turn (6)
Point Row 2: dec, 2 sc, dec, turn (4)
Point Row 3: dec ×2, turn (2)
Point Row 4: dec (1)
Repeat for all five points. Sl st around the edge, adding 2 sl st at each point tip. Fasten off. Leave 15 cm tail and weave to the back.
Assembly
- Pin the head to the top of the body, with the face centered over one 6-stitch section.
- Sew the body to the head using the body tail, passing through both layers every stitch.
- Attach the front tentacles at the front base, spaced 3 stitches apart.
- Sew the rear tentacles behind the body, angled outward so the toy sits without tipping.
- Pin the four side curl tentacles evenly between front and rear arms.
- Sew side curl tentacles with the open ends flattened and hidden under the body edge.
- Add the pink suckers to the tentacles after all arms are stable.
- Sew cheek patches one round below the eyes, keeping them outside the smile curve.
- Attach white mantle spots to the upper-left head surface.
- Place the starfish beside the octopus or tack it lightly under one front tentacle.
The finished octopus sits on the body base and tentacle ring with all eight arms visible.
7 Technical Tips
- Stitch marker drift: A missed marker shift can move the face off center by 6–8 stitches. Reset the marker after every increase round on the head.
- Stuffing firmness: Overstuffing the tentacle tips makes them point like tubes instead of resting flat. Pack only the first 50% of each tentacle and leave the final rounds soft.
- Invisible decrease gaps: A normal decrease on R20–R22 of the head can leave white stuffing visible through lavender stitches. Use invisible decreases on every closing round from 18 stitches down.
- Eye placement timing: Safety eyes must be locked before R20 closes the head opening. Place them between R12 and R13, 10 stitches apart, then check the smile arc before adding washers.
- Cotton tension: DK cotton can stretch at the 42-stitch head plateau if the hook is too large. A 2.75 mm hook should produce firm stitches with no stuffing color showing.
- Pinning order: Sewing arms without pins usually creates one crowded side and one bare side. Pin all eight tentacles first, then rotate the toy at table height to check spacing.
- Tail weaving: Short sucker tails can pull through after handling. Leave at least 12 cm on every sucker and weave through three underside stitches before trimming.
Conclusion
Block the starfish flat first, then set the octopus on its tentacle ring and check whether the rear arms touch the table. The main correction point is balance, not decoration. This octopus amigurumi crochet pattern depends on a round head, a low body, and eight pinned arms that read clearly from the front. Share the finished lavender octopus on Pinterest and Instagram with the side curls visible, not tucked behind the body. Use #LavenderOctoPattern for the finished project. Which arm will carry the most pink suckers on your version: the front-left display arm or the raised side curl?









