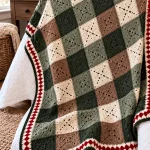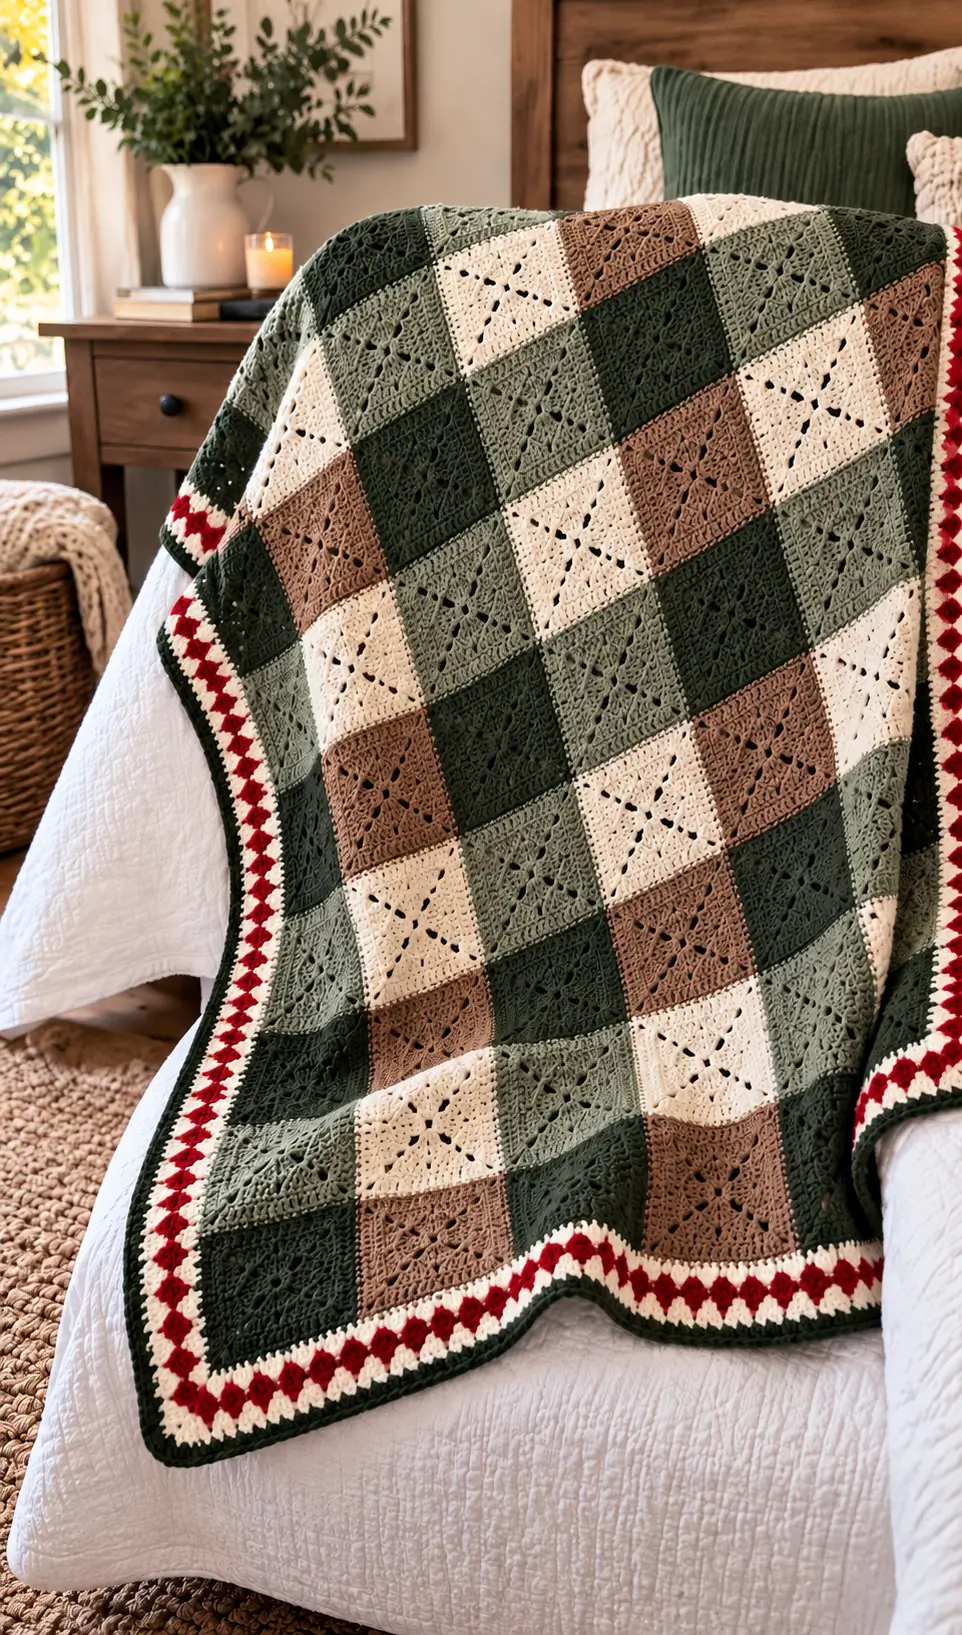
A red-and-cream border changes this forest-green square blanket from a standard motif grid into a strongly framed patchwork. This granny square blanket pattern uses DK yarn, a 4 mm hook and openwork motifs to target a throw around 100 × 130 cm. It suits an intermediate crocheter comfortable with double crochet and chain spaces. Modular construction makes damaged or mismatched squares replaceable before final assembly.
The Design: What Makes This Forest Patchwork Different
The blanket depends on three structural decisions. First, the square centers contain deliberate open spaces rather than dense granny clusters; those openings keep the large grid from reading as a solid checkerboard. Second, dark forest green appears repeatedly between sage, cream and taupe motifs, creating enough visual continuity to hold the crochet patchwork blanket together.
The border makes the third decision. Cream separates the main field from the red accent, while dark green finishes the outer edge. That sequence prevents red from competing directly with every interior color.
A frequent mistake in a green granny square blanket is random color placement without checking neighboring squares. Several identical colors can accidentally form a large block. Lay out every motif before joining. You can then redistribute repeated shades while preserving the irregular appearance of the design.
Project Info at a Glance
| Skill Level | Time | Finished Size | Hook | Best For |
|---|---|---|---|---|
| Intermediate | 25–35 hours | Approx. 100 × 130 cm | 4 mm | Throw / large lap blanket |
The finished measurement is a target for this photo-inspired construction rather than an exact measurement taken from the photographed blanket. Final dimensions depend on yarn, tension, motif size, joining method and blocking.
Materials and Tools
Yarn
Use one DK yarn line for all five colors where possible. Keeping the yarn weight and fiber consistent helps the motifs block to comparable dimensions.
- Deep forest green — DK — approximately 350 g
- Sage/olive green — DK — approximately 250 g
- Cream — DK — approximately 250 g
- Warm taupe/brown — DK — approximately 200 g
- Deep red — DK — approximately 75–100 g
These quantities are planning estimates. The actual amount depends on motif gauge, finished dimensions and border depth. Make and weigh a test square before purchasing yarn for a large blanket.
Tools
- 4 mm crochet hook
- Tapestry needle
- Locking stitch markers
- Scissors
- Blocking mats
- Rust-resistant blocking pins
- Tape measure
Abbreviations
- MR — magic ring
- ch — chain
- sl st — slip stitch
- sc — single crochet
- hdc — half double crochet
- dc — double crochet
- sp — space
- ch-sp — chain space
- rep — repeat
- RS — right side
- WS — wrong side
This blanket does not require invisible decreases because its construction consists of flat crochet motifs rather than shaped three-dimensional pieces.
Forest Patchwork Granny Square Pattern
The motif below is an original construction based on the visible structure and color arrangement of the reference blanket. It should not be treated as an exact transcription of an unidentified commercial or designer pattern.
Openwork Forest Square
Make in deep forest green, sage green, cream or taupe.
Round 1: Make an MR. Ch 3, 2 dc into ring, ch 3; repeat 3 dc into ring, ch 3 three more times. Join with sl st to the top of the beginning ch 3.
Count: 12 dc and four ch-3 corner spaces.
Pull the magic ring closed enough to stabilize the center while retaining the small central opening.
Round 2: Sl st across to the first corner. Ch 3, 2 dc, ch 3, 3 dc in the same corner. Repeat ch 2, (3 dc, ch 3, 3 dc) in the next corner three times. Ch 2 and join.
Count: 24 dc, four ch-3 corner spaces and four ch-2 side spaces.
Round 3: Sl st to the corner. Ch 3, 2 dc, ch 3, 3 dc in the corner. Repeat ch 2, 3 dc in the next ch-2 space, ch 2, (3 dc, ch 3, 3 dc) in the next corner three times. Ch 2, 3 dc in the final side space, ch 2 and join.
Count: 36 dc plus chain spaces.
Round 4: Sl st to the corner. Work (ch 3, 2 dc, ch 3, 3 dc) in the corner. Repeat ch 1, 3 dc in the first side space, ch 2, 3 dc in the second side space, ch 1, (3 dc, ch 3, 3 dc) in the next corner around. Join.
Count: 48 dc plus chain spaces.
Round 5: Ch 1. Sc in each dc. Work 2 sc in each ch-1 space, 3 sc in each ch-2 space and (2 sc, ch 2, 2 sc) in every corner. Join with sl st.
Fasten off. Leave approximately 15 cm of yarn if the tail will be incorporated into the seam.
How Many Granny Squares to Make
For a large throw, make enough squares for an 8 × 10 layout, giving a total of 80 crochet squares.
- Deep forest green: 24 squares
- Sage/olive green: 20 squares
- Cream: 18 squares
- Taupe/brown: 18 squares
The photograph does not show every square unobstructed, so these quantities create a balanced interpretation rather than an exact count of the photographed blanket.
Blocking the Granny Squares
Complete one test motif before producing the entire batch. With DK yarn and a 4 mm hook, target approximately 11–12 cm per blocked square.
Place the motif on a blocking mat and pin each corner at approximately 90 degrees. Measure horizontally and vertically through the center. All motifs should finish close to the same dimensions before assembly.
Do not rely on aggressive blocking to correct an incorrect gauge. If a motif naturally measures only 10 cm but the project requires 12 cm, adjust the hook or yarn before making dozens of additional squares.
Planning the Color Layout
Arrange all blocked motifs on a large flat surface before joining.
Use forest green as the recurring anchor color. Spread the cream squares throughout the grid so they do not form an unintended pale block. Taupe should interrupt the greens periodically, while sage provides a transition between the darkest and lightest motifs.
Check the arrangement from several feet away. Color concentrations that are difficult to notice while working directly over the blanket become much more apparent at a distance.
Photograph the final arrangement before picking up any squares. Use that image as the assembly chart.
Joining the Granny Squares
Use deep forest green or a matching seam color.
Arrange two motifs with their edges aligned. Join the yarn at one corner and work slip stitches through the corresponding back loops of both squares.
Keep the joining tension slightly relaxed. A seam that is substantially tighter than the edge of the motif will pull both squares inward.
Continue to the opposite corner and fasten off.
Join the motifs into horizontal rows first. For the proposed layout, each row contains eight squares. After completing ten rows, join those rows together using the same method.
Check every four-square intersection before continuing. The corners should meet without one motif extending significantly beyond its neighbors.
Crochet Blanket Border
Foundation Border
Use deep forest green.
Round 1: Join yarn near the center of any blanket side. Ch 1 and sc evenly around the entire blanket. At each outer corner work (sc, ch 2, sc). Join with sl st.
Do not automatically add extra stitches over every motif seam. The first border round must lie flat.
A rippling edge indicates excessive stitches. An edge that pulls inward indicates insufficient stitches or excessive tension.
Cream Border
Change to cream.
Round 2: Join cream in a corner. Ch 3, 2 dc, ch 2, 3 dc in the same corner.
Work granny-style 3-dc groups evenly around each side. Use ch 1 between groups where required to maintain spacing.
At every corner work (3 dc, ch 2, 3 dc). Join and fasten off.
Red Accent Border
Change to deep red.
Round 3: Join the red yarn between two cream clusters. Ch 3 and work 2 dc in the same space. Ch 1, move to the next suitable space and work 3 dc.
Continue the cluster sequence around the blanket.
At each corner work (3 dc, ch 2, 3 dc).
Keep the red section narrow. Its function is to provide a strong accent line between the cream and dark-green sections rather than becoming the dominant border color.
Second Cream Border
Change back to cream.
Round 4: Work granny-style cream clusters between the red groups from the previous round.
Maintain the same spacing along each side. Work the same corner sequence at all four corners so the blanket remains rectangular.
Dark Green Finishing Edge
Change to deep forest green.
Round 5: Ch 1 and sc in every available stitch and chain space around the blanket. At each corner work (2 sc, ch 1, 2 sc).
Round 6: Sl st loosely in each sc around.
Fasten off. Weave the yarn tail through at least 5 cm of matching-color stitches. Reverse direction once before trimming the remaining yarn.
Assembly
- Block all 80 granny squares to the same target dimensions before joining.
- Arrange the motifs in an 8 × 10 grid and redistribute colors until large accidental blocks are removed.
- Photograph the approved arrangement before moving the squares.
- Join eight motifs to create each horizontal row, checking corner alignment after every seam.
- Join the ten completed rows and inspect the blanket diagonally for distortion after every second long seam.
- Work the dark-green foundation border around the complete motif field.
- Add the cream cluster round while keeping all four corners identical.
- Add the red accent round followed by the second cream round.
- Complete the dark-green finishing edge and weave every remaining yarn tail securely into matching stitches.
- Wet-block or gently steam-block according to the yarn manufacturer’s care instructions. Square the corners and allow the blanket to reach its final dimensions before removing the pins.
The completed blanket should form a flat rectangular patchwork grid framed by a narrow cream-and-red accent and a dark-green outer edge.
7 Technical Tips for a Flatter Granny Square Blanket
- Control motif-size drift. A difference of only 5 mm per square becomes obvious across a row containing eight motifs. Measure every fifth square against the blocked master motif.
- Watch for rounded corners. Missing part of a corner sequence gradually changes the shape of the motif. Place a stitch marker in all four corner spaces if the openwork construction makes them difficult to identify.
- Prevent join puckering. A tight slip-stitch seam shortens the joined edge. Lay each completed seam flat and remake it with looser tension if the two motifs buckle toward one another.
- Check four-square intersections. Misalignment greater than approximately one stitch width becomes more visible as additional rows are attached. Pin each major intersection before working a long joining seam.
- Correct border rippling immediately. Waves along the foundation border usually indicate too many stitches. Remove excess stitches around motif seams rather than expecting later rounds to flatten the edge.
- Do not overstretch during blocking. Stretching a 10 cm motif to 12 cm changes the fabric structure instead of correcting gauge. Adjust the hook during the test-square stage when the natural blocked measurement is substantially wrong.
- Leave adequate yarn tails. Very short tails can work free after repeated washing. Leave approximately 15 cm, weave through matching-color stitches, reverse direction once and trim after final blocking.
Final Finishing
Inspect the blanket from both sides before the final blocking. Look specifically for loose yarn ends, missed corner stitches, tight joining sections and areas where the border begins to ripple.
Measure the two long sides. Then measure the two short sides and both diagonals. Small differences can normally be corrected during blocking, while substantial differences usually indicate uneven joining or border tension.
Wash or steam the blanket only according to the care instructions for the selected yarn. Acrylic, wool and cotton respond differently to heat and moisture, so the yarn label should determine the finishing method.
Allow the blanket to dry completely in its final rectangular shape before folding or using it.
Conclusion
Finish one test motif before buying the full yarn quantity for this granny square blanket pattern. Block it, record its finished width and weigh it; multiplying that yarn consumption across the planned 80-square grid provides a better material estimate than judging requirements from a photograph. Next, prepare the four interior colors and complete one full layout row before batch production begins. Save the finished blanket to your Pinterest project board and share the completed grid on Instagram with #ForestPatchworkBlanket. For the final arrangement, decide one design detail before joining: should the cream squares remain irregularly scattered like the reference blanket, or follow a controlled diagonal repeat?