Introduction
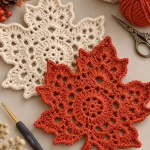
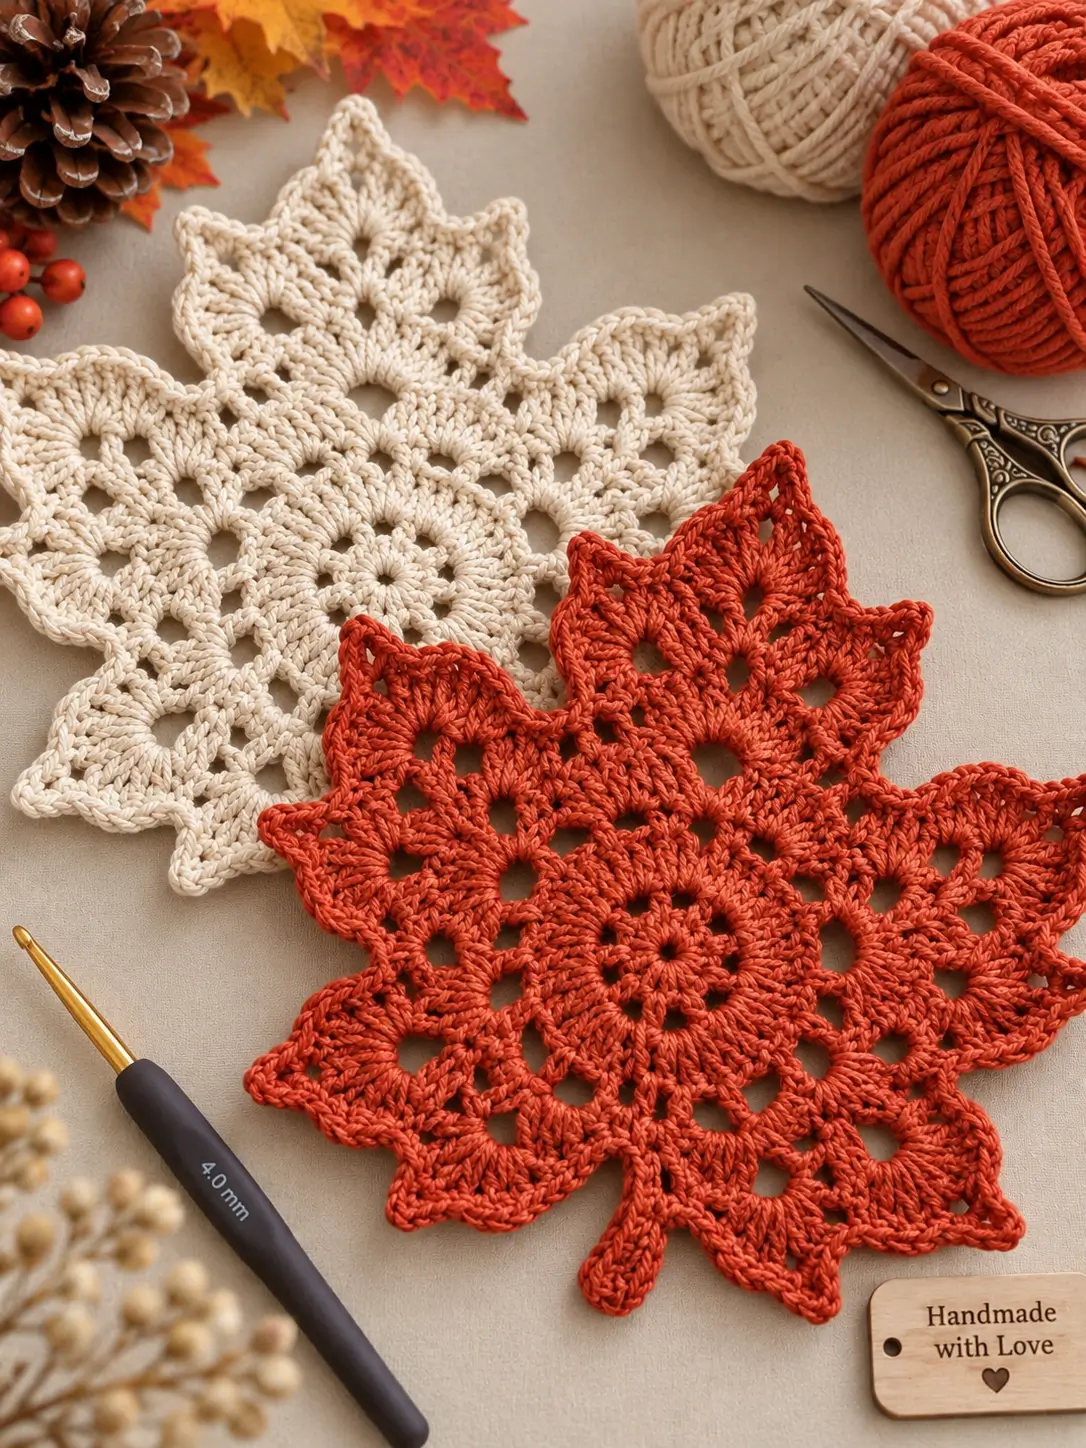
Seven pointed lobes and open vein spaces are what make this motif read as a maple leaf instead of a generic crochet doily. This crochet maple leaf doily pattern uses cotton yarn and a 4 mm hook to build the leaf outward from a compact circular center. Worked in cream, rust or burnt orange, it creates flat autumn table decor that can also function as a placemat or centerpiece layer.
The Design: What Makes This Crochet Maple Leaf Different
The construction begins in the center rather than at the stem. Increasing rounds establish a circular foundation, while chain spaces divide the outer section into seven major lobes. Those spaces are important because they separate the solid stitch groups and create the open vein effect visible in the reference image.
The second structural feature is graduated stitch height. Single crochet, half double crochet, double crochet and treble crochet are combined so each lobe rises toward a pointed tip and then falls back toward the valley.
A final stem extends from the lower lobe without requiring a separate piece. The main failure mode in a crochet fall leaf motif is excessive outer-round tension. If the chain spaces are too tight, the points pull inward and the finished leaf refuses to lie flat.
Project Info at a Glance
| Skill Level | Construction | Approx. Size | Hook | Best For |
|---|---|---|---|---|
| Intermediate | Center-out, joined rounds | Approximately 25–30 cm after blocking | 4 mm | Fall table decor, placemats and centerpieces |
The final diameter depends on yarn weight, hook size and blocking. Make one complete motif before calculating yarn requirements for a coordinated table set.
Materials and Tools
Yarn
- Burnt orange cotton yarn — DK or light worsted — approximately 45–60 g per large leaf.
- Cream cotton yarn — DK or light worsted — approximately 45–60 g per large leaf.
- Rust cotton yarn — optional alternative color.
- Mustard cotton yarn — optional accent color for a mixed autumn set.
A firm cotton or cotton-blend yarn gives the points better definition than a highly elastic fiber. The yarn should still have enough flexibility to open during blocking.
Tools
- 4 mm crochet hook
- Yarn needle
- Scissors
- Locking stitch markers
- Blocking mat
- Rust-resistant blocking pins
- Tape measure
Abbreviations
- MR — magic ring
- ch — chain
- sl st — slip stitch
- sc — single crochet
- hdc — half double crochet
- dc — double crochet
- tr — treble crochet
- st / sts — stitch / stitches
- sp — space
- rep — repeat
Chain stitches do not automatically count as stitches in this pattern unless the instructions specifically identify them as part of a repeat.
Crochet Maple Leaf Doily Pattern
The motif is worked from the center outward in joined rounds. Seven repeating sections establish the main leaf architecture. The final rounds convert those sections into pointed lobes and valleys.
Center Ring
Yarn: burnt orange, cream or selected autumn color.
Round 1: Make MR. Ch 3, work 13 dc into ring. Join with sl st to first dc. (14 dc)
Pull the center ring firmly closed.
Round 2: Ch 1. Work 2 sc in each st around. Join with sl st. (28 sc)
The 28 stitches divide evenly into seven sections of four stitches.
Establishing the Seven Leaf Sections
Round 3: Ch 3. Dc in next 3 sts, ch 2, skip no stitches. *Dc in next 4 sts, ch 2.* Repeat around until seven groups have been formed. Join with sl st.
You should now have 7 solid groups separated by 7 chain-2 spaces.
Round 4: Sl st to the first chain space. Ch 3. Work 5 dc in same ch-sp, ch 3. *Work 6 dc in next ch-sp, ch 3.* Repeat around. Join with sl st.
Each six-stitch fan becomes the base of one major leaf section.
Opening the Vein Spaces
Round 5: Sl st to the center of the first fan. Ch 3, 2 dc in same area, ch 3, 3 dc in same area. Ch 2.
*In the center of the next fan work 3 dc, ch 3, 3 dc; ch 2.* Repeat around.
Join with sl st.
The chain-3 spaces form the central opening of each lobe. The chain-2 spaces between groups establish the valleys.
Building the Main Lobes
Round 6: Sl st into first ch-3 sp. Ch 3, work 3 dc, ch 3, 4 dc in the same space. Ch 3.
*Work 4 dc, ch 3, 4 dc in next ch-3 sp; ch 3.* Repeat around.
Join with sl st.
Keep the chain spaces loose. Tight chains at this stage can pull the seven sections toward the center.
Separating the Leaf Points
Round 7: Sl st to first ch-3 point space.
Work sc, hdc, 2 dc, 2 tr, ch 3, sl st in first ch, 2 tr, 2 dc, hdc, sc into the same space.
Sl st into the next valley space.
Repeat the pointed group in each remaining major point space.
Join with sl st.
Seven pronounced points should now be visible around the motif.
Shaping the Maple Leaf Outline
The photograph shows a more complex maple silhouette than a seven-point star. Secondary points are therefore added beside the major lobes.
First Side of Each Lobe
Beginning at a valley, work:
Sl st in next st, sc in next, hdc in next, dc in next, tr in next.
In the following stitch work:
(dc, tr, ch 2, sl st in second ch from hook, tr, dc)
This creates a small secondary point.
Continue with:
Tr in next st, dc in next, hdc in next.
Main Point
At the central tip of the lobe work:
2 tr, ch 3, sl st in first ch, 2 tr
The ch-3 picot forms the sharp outer tip.
Second Side of Each Lobe
Mirror the first side:
Hdc in next, dc in next, tr in next.
Work another secondary point:
(dc, tr, ch 2, sl st in second ch from hook, tr, dc)
Continue with:
Tr in next, dc in next, hdc in next, sc in next, sl st toward the valley.
Repeat the shaping sequence around the remaining lobes.
Do not force every stitch if your gauge places the point slightly earlier or later. Maintaining symmetry between opposite sides of each lobe is more important than compressing stitches into an overcrowded section.
Creating Deeper Valleys
At each space between major lobes, work one slip stitch into the lowest available chain space.
Pull this stitch slightly firmer than the stitches on the lobe itself.
The tighter valley stitch draws neighboring sections inward and makes the pointed outline more distinct.
Do not tighten enough to pucker the center. Place the motif on a flat surface after every two or three valleys to check the overall shape.
Crochet Leaf Stem
The stem is worked directly from the lower center of the leaf.
Choose one valley as the bottom of the motif.
Join yarn at that valley if necessary.
Stem Foundation: Ch 16.
Starting in the second ch from hook, sl st in next 3 chains.
Sc in next 4 chains.
Hdc in next 4 chains.
Sc in remaining chains.
Sl st into the base of the leaf.
Turn and work sl st back along one side of the stem if additional firmness is required.
Fasten off with a 15 cm tail.
Optional Thicker Stem
For a larger table mat, a single chain stem can appear too narrow beside the broad leaf.
Ch 18.
Row 1: Sc in second ch from hook and across. (17)
Row 2: Ch 1, turn. Sl st in first 3 sts, sc in next 11 sts, sl st in final 3 sts.
Fasten off and sew the broad end securely into the lower valley of the leaf.
This version produces a flatter, wider stem closer to the proportions of the large motifs visible in the reference photograph.
Blocking the Crochet Maple Leaf
Blocking is part of the construction rather than an optional finishing detail. The pointed outline will usually look compressed immediately after crocheting.
Wet-block or steam-block according to the yarn manufacturer’s care instructions.
Place the leaf face up on a blocking mat.
Pin the center first.
Pull the seven major points outward evenly and pin each tip.
Pin every secondary point separately.
Next, push the valleys slightly toward the center and secure them with pins. This increases the contrast between peaks and indentations.
Finally, straighten and pin the stem.
Measure from opposite points before the motif dries. If one side is more than approximately 1 cm longer than the opposite side, reposition the pins while the fibers are still damp.
Leave the piece pinned until completely dry.
Making the Cream Version
Use the same construction for the cream leaf shown in the reference image.
Cream yarn makes stitch definition particularly visible, so maintain consistent loop height throughout the treble-crochet sections.
If the pale yarn produces a softer fabric than the orange yarn, move down from a 4 mm hook to a 3.5 mm hook rather than adding extra stitches.
Both motifs should have comparable point proportions even if their finished dimensions differ slightly.
Making a Smaller Maple Leaf
For a smaller coaster or decorative motif, stop after the first major pointed round rather than adding the full secondary-point shaping.
Use DK cotton with a 3.5 mm hook.
Shorten the stem foundation from 16 chains to approximately 10–12 chains.
The resulting motif has a simpler outline but retains the open center and seven-point structure.
Making a Larger Placemat
To increase the finished size without changing the shape, use a heavier worsted cotton yarn and a 4.5–5 mm hook.
Do not simply add uncontrolled stitches to the outer lobes. Extra stitches alter the relationship between the points and valleys and can produce severe ruffling.
If additional diameter is required beyond what heavier yarn provides, insert one expansion round before the final shaping round.
In each major lobe space, work:
5 dc, ch 3, 5 dc
Increase the chains between lobes from ch 3 to ch 4.
Then work the final point shaping into those expanded sections.
Color Ideas for an Autumn Leaf Set
A coordinated table set does not require every leaf to match. Use cream as the neutral color, then add burnt orange, rust, mustard, burgundy and olive.
For four place settings, make two saturated leaves and two neutral leaves. For six settings, distribute three warm colors between three cream or oatmeal motifs.
Avoid changing color within a single motif if the goal is to reproduce the clean graphic appearance in the reference image. The openwork and pointed outline already provide substantial visual detail.
Using the Leaves as Table Decor
A large blocked motif can sit beneath a centerpiece, small serving bowl or decorative arrangement. When used as a placemat, confirm that the finished dimensions provide enough flat surface for the intended plate.
Do not place hot cookware directly on the motif unless the selected yarn is specifically suitable for that temperature. Synthetic fibers can respond differently to heat than cotton.
For a centerpiece arrangement, overlap two or three leaves by approximately 3–5 cm. Rotate each stem in a different direction rather than stacking all points in alignment.
Smaller versions can also be attached to an autumn garland or used beneath candles that are contained inside suitable heat-resistant holders.
7 Technical Tips for Crisp Crochet Maple Leaves
- Mark all seven sections before shaping. If one lobe accidentally receives an extra stitch group, the finished maple leaf will become visibly asymmetric after blocking.
- Keep chain-3 spaces loose. A chain space that is more than about 20 percent shorter than its neighbors pulls the adjacent lobe inward and reduces the open vein effect.
- Use the correct stitch height near each point. Replacing a treble crochet with a double crochet shortens the tip and can make one lobe appear blunt.
- Tighten valley stitches selectively. The slip stitch at a valley can be firm, but tightening the surrounding dc or tr stitches creates puckering that blocking may not remove.
- Pin every major tip individually. Leaving two neighboring points under one blocking pin rounds the edge instead of producing separate maple-style points.
- Check the motif after three lobes. If the outer edge begins to form waves greater than approximately 1–2 cm high, reduce the outer stitch count before completing the full round.
- Weave tails toward the center. Run each yarn end through at least 4–5 cm of dense stitches instead of weaving through the open chain sections, where the tail can remain visible.
Troubleshooting a Wavy Leaf
If the finished motif develops strong waves around the outside edge, the outer rounds contain too much fabric for the circumference established by the center.
First check whether the problem disappears under light blocking tension. Minor rippling is normal before blocking.
If the edge still forms deep waves, remove the final shaping round and reduce one stitch from each side of every major lobe. Across seven sections, even a small reduction removes a substantial number of stitches.
Do not correct severe ruffling by aggressively stretching the center. That changes the openwork geometry without addressing the excess fabric at the edge.
Troubleshooting a Cupped Leaf
A motif that forms a bowl rather than lying flat has the opposite problem: the outer circumference is too short.
Check the chain spaces first. Tight chains are a frequent cause because they restrict expansion between the solid stitch groups.
Redo the affected round with deliberately relaxed chains. If additional space is still required, add one extra chain to each valley section rather than increasing every solid group.
Blocking can correct mild cupping, but a strongly cupped motif should be adjusted before finishing.
Finishing
Inspect the front and back after blocking.
Weave remaining tails through dense stitch groups near the center or stem attachment. Avoid carrying dark yarn behind large open spaces when making pale motifs.
Trim the tails only after pulling the fabric gently in several directions. If an end begins to emerge, weave it through another section before trimming.
Store the finished leaves flat. Folding a heavily blocked point for long periods can leave a crease across the outer lobe.
Conclusion
Build the center first, divide it accurately into seven sections, and treat the outer points as shaping rather than decoration added at random. Loose chain spaces provide room for the lobes to expand, while firm valley stitches create the recognizable maple outline. Complete the stem only after choosing which lobe will form the bottom of the motif, then block every major and secondary point individually. Make the first crochet maple leaf doily pattern in one color before producing a full autumn set. Save the pattern to Pinterest and share finished leaves with #CrochetMapleLeafDoily. For your table, would you combine the cream and burnt-orange leaves or make every motif in a different fall color?