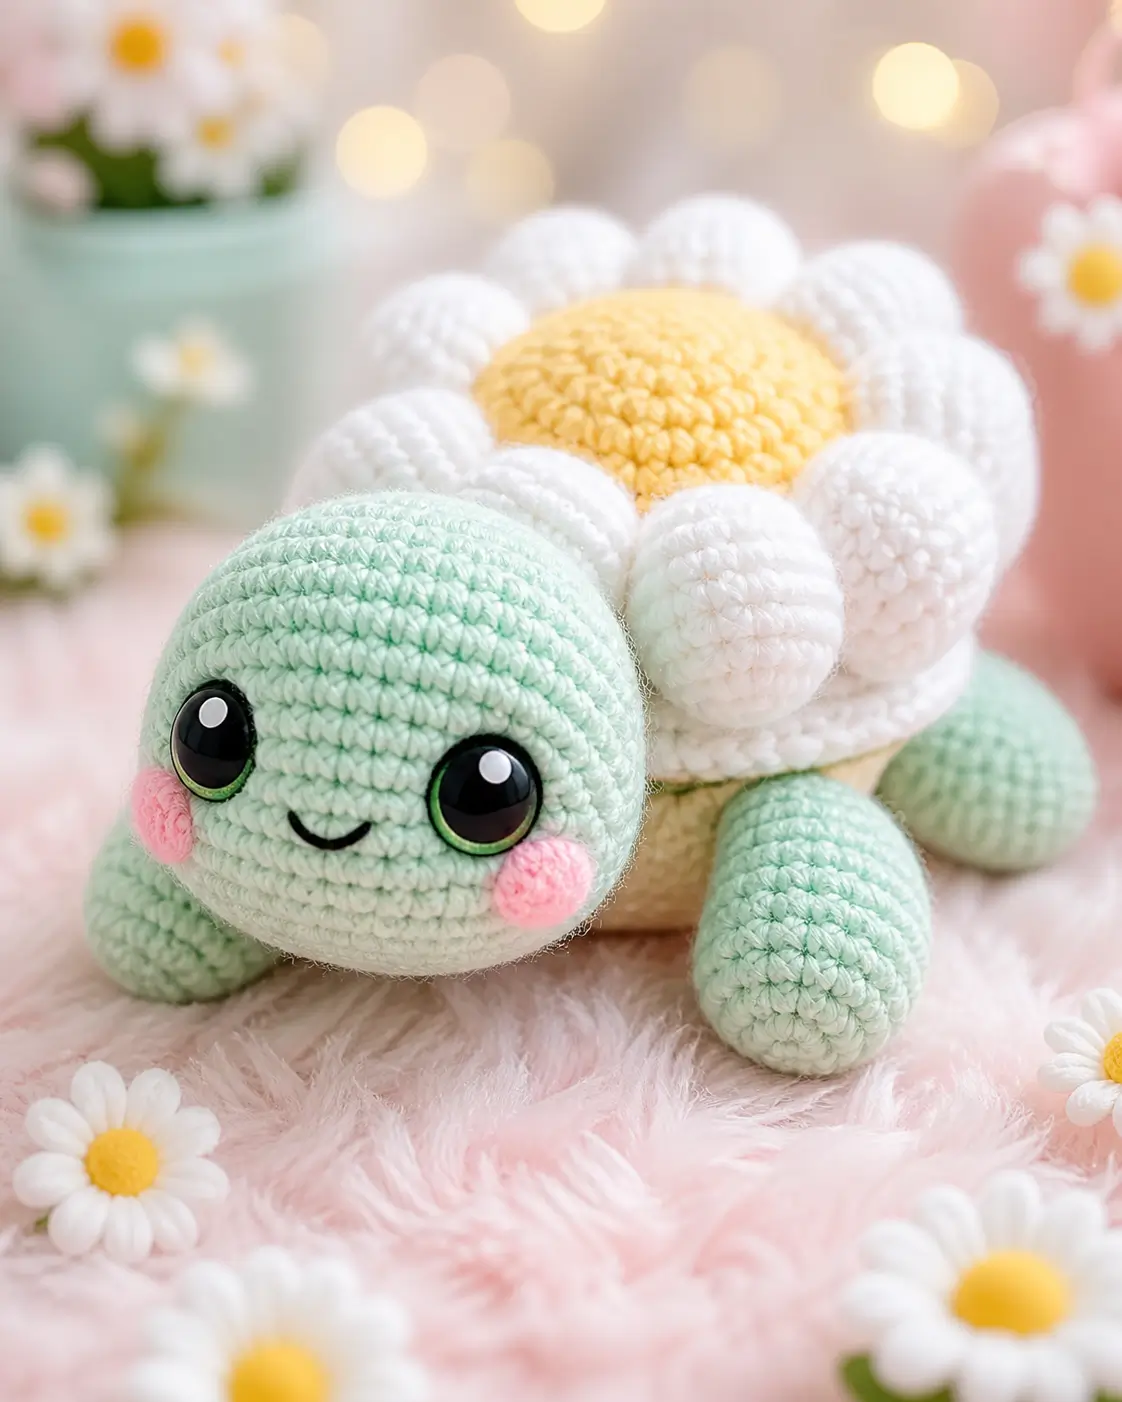
A daisy turtle carries its flower above the spine, so the shell has to read as both shell and blossom. This daisy turtle amigurumi crochet pattern uses worsted yarn, a 3.5 mm hook, 16 mm eyes, and finishes near 12 cm. The skill level is advanced beginner. Make it for spring display tables where low, stable toys photograph cleanly.
The Design: What Makes Daisy Different
The turtle is built low because the daisy shell adds height before the face is attached. A 36-stitch head gives enough width for 16 mm eyes without turning the muzzle into a sphere. The body uses the same medium plateau, then compresses under a stuffed yellow flower center; that keeps the toy from tipping backward. Petals are separate ovals, not a scalloped border, because the photo shows raised white lobes with small gaps around the center.
For a flower turtle crochet pattern, that separation matters. One common mistake is sewing the petals flat against the shell rim; the daisy turtle crochet pattern loses its crown shape when those seams sit too low. Pin them first, then stitch only the inner third.
Project Info at a Glance
| Skill Level | Time | Finished Size | Hook | Best For |
|---|---|---|---|---|
| Advanced beginner | About 1.5–2 hours | 11–12 cm high | 3.5 mm | Spring market table, shelf display, photo prop |
Materials and Tools
Yarn
- Mint green — Aran/worsted #4 — 35 g — Red Heart Super Saver, Paintbox Simply Aran, or similar
- White — Aran/worsted #4 — 15 g — same brand as body yarn
- Yellow — Aran/worsted #4 — 15 g — same brand as body yarn
- Pink — Aran/worsted #4 — 2–5 g — cheek patches
- Black embroidery thread — small amount — smile only
Tools
- Hook 3.5 mm
- Safety eyes 16 mm
- Polyester fiberfill
- Yarn needle
- Stitch markers
- Pins
- Scissors
Abbreviations
MR = magic ring; sc = single crochet; inc = 2 sc in next stitch; dec = single crochet decrease; sl st = slip stitch; ch = chain; BLO = back loop only; FO = fasten off.
An invisible decrease catches the front loops of the next two stitches before completing one sc, reducing the surface hole.
Pattern — Step by Step
Continuous spiral unless noted. Use a stitch marker at the first stitch of every round.
Head
Make 1 with mint green yarn.
R1: 6 sc in MR (6)
R2: inc ×6 (12)
R3: (sc, inc) ×6 (18)
R4: (2 sc, inc) ×6 (24)
R5: (3 sc, inc) ×6 (30)
R6: (4 sc, inc) ×6 (36)
R7: sc around (36)
R8: sc around (36)
R9: sc around (36)
R10: sc around (36)
R11: sc around (36)
R12: sc around (36)
R13: sc around (36)
Place 16 mm safety eyes between R9 and R10, 8 stitches apart. Start stuffing after R13.
R14: (4 sc, dec) ×6 (30)
R15: (3 sc, dec) ×6 (24)
R16: (2 sc, dec) ×6 (18)
R17: (sc, dec) ×6 (12)
Finish stuffing firmly, especially under the eyes.
R18: dec ×6 (6)
Fasten off. Leave 20 cm tail and close the hole.
Body
Make 1 with mint green yarn.
R1: 6 sc in MR (6)
R2: inc ×6 (12)
R3: (sc, inc) ×6 (18)
R4: (2 sc, inc) ×6 (24)
R5: (3 sc, inc) ×6 (30)
R6: (4 sc, inc) ×6 (36)
R7: sc around (36)
R8: sc around (36)
R9: sc around (36)
R10: sc around (36)
R11: (4 sc, dec) ×6 (30)
R12: sc around (30)
R13: (3 sc, dec) ×6 (24)
Stuff lightly. The underside should be flat, not round.
R14: (2 sc, dec) ×6 (18)
R15: (sc, dec) ×6 (12)
R16: dec ×6 (6)
Fasten off. Leave 25 cm tail.
Front Legs / Flippers
Make 2 with mint green yarn.
R1: 6 sc in MR (6)
R2: inc ×6 (12)
R3: (sc, inc) ×6 (18)
R4: sc around (18)
R5: sc around (18)
R6: sc around (18)
R7: sc around (18)
R8: (sc, dec) ×6 (12)
R9: sc around (12)
R10: sc around (12)
Stuff only the front half so the sewn edge stays flat.
Flatten the opening. Work 6 sc through both layers (6).
Fasten off. Leave 25 cm tail.
Back Legs / Flippers
Make 2 with mint green yarn.
R1: 6 sc in MR (6)
R2: inc ×6 (12)
R3: (sc, inc) ×6 (18)
R4: sc around (18)
R5: sc around (18)
R6: sc around (18)
R7: (sc, dec) ×6 (12)
R8: sc around (12)
Do not overstuff. Back legs should sit lower than the front legs.
Flatten the opening. Work 6 sc through both layers (6).
Fasten off. Leave 25 cm tail.
Daisy Shell Center
Make 1 with yellow yarn.
R1: 6 sc in MR (6)
R2: inc ×6 (12)
R3: (sc, inc) ×6 (18)
R4: (2 sc, inc) ×6 (24)
R5: (3 sc, inc) ×6 (30)
R6: (4 sc, inc) ×6 (36)
R7: sc around (36)
R8: sc around (36)
R9: BLO (4 sc, dec) ×6 (30)
Stuff into a shallow dome. The top should stay rounded, not pointed.
R10: (3 sc, dec) ×6 (24)
Fasten off. Leave 35 cm tail for sewing to the body.
Daisy Petals
Make 10 with white yarn.
R1: 6 sc in MR (6)
R2: inc ×6 (12)
R3: (sc, inc) ×6 (18)
R4: sc around (18)
R5: sc around (18)
R6: sc around (18)
R7: (sc, dec) ×6 (12)
R8: sc around (12)
Stuff lightly at the rounded tip only.
Flatten the opening. Work 6 sc through both layers (6).
Fasten off. Leave 25 cm tail on each petal.
Cheek Patches
Make 2 with pink yarn.
R1: 6 sc in MR (6)
R2: inc ×6 (12)
Join with sl st to first stitch.
Fasten off. Leave 18 cm tail for sewing.
Tail
Make 1 with mint green yarn.
R1: 6 sc in MR (6)
R2: sc around (6)
R3: sc around (6)
R4: sc around (6)
Flatten the opening. Work 3 sc through both layers (3).
Fasten off. Leave 18 cm tail.
Embroidered Smile
Make 1 with black embroidery thread.
Thread the needle with one strand folded double. Insert below the left eye at R12, exit below the right eye at R12, and catch one center stitch at R13 to form a shallow curve. Knot inside the head opening before final closure when possible.
Loose Daisy Prop
Optional. Make 1–3 with white and yellow yarn.
Center, yellow: R1: 6 sc in MR (6). R2: inc ×6 (12). Join with sl st and fasten off.
Petal ring, white: attach to any front loop of R2. Repeat around: ch 4, sl st in second ch from hook, sc in next ch, hdc in next ch, sl st into next center stitch. Make 12 small petals. Fasten off and weave ends.
Assembly
- Pin the head to the front of the body with the eye line facing slightly upward.
- Sew through 8–10 body stitches and 8–10 head stitches, then repeat the path once for neck strength.
- Pin the yellow shell center on top of the body, with its front edge starting just behind the head seam.
- Sew the yellow center to the body through R10 of the shell center; add a little stuffing before closing the final 3 cm.
- Place 5 white petals on each side of the yellow center, overlapping each petal by 3–4 mm.
- Sew only the inner third of each petal to keep the outer lobes raised.
- Attach front legs between the head seam and shell edge, angled forward at about 30 degrees.
- Attach back legs behind the shell, angled outward so the turtle rests on four points.
- Sew cheek patches beside the eyes between R11 and R13, then embroider the smile below them.
- Attach the tail at the back center, directly below the rear petal gap.
The finished turtle has a forward-facing head, four grounded legs, and a raised daisy shell.
7 Technical Tips
- Stitch marker drift: Move the marker into the first stitch of each new round. If it shifts more than 2 stitches across the head, the eyes will sit on a diagonal.
- Eye placement timing: Insert 16 mm eyes after R13 of the head, before the decreases make access tight. A spacing of 8 stitches leaves room for the smile and two cheek patches.
- Stuffing firmness: The head needs firm stuffing under the eyes, but the body needs lighter stuffing. If the body becomes a ball, the turtle will rock instead of sitting flat.
- Invisible decrease holes: Use invisible decreases on R14–R18 of the head. Standard decreases can leave six visible gaps around the face closure.
- Petal seam height: Sew petals only along the inner third, about 8–10 mm from the yellow center edge. A full-length seam flattens the daisy and hides the rounded petal shape.
- Velvet tension check: If you switch to velvet yarn, reduce tugging on the magic ring after R2. Pulling too hard can snap the core thread and loosen the center.
- Tail weaving: Weave each petal tail through the body for at least 4 cm before trimming. Shorter tails can work loose because the raised petals are handled during posing.
Conclusion
Block the petal ring before sewing if your white ovals twist; a pinned ring gives a cleaner shell line than adjusting each petal after stuffing. This daisy turtle amigurumi crochet pattern depends on three checks: a 36-stitch head, eye placement before the final decreases, and petals sewn at the inner third only. Next, crochet one test petal and compare it against the yellow center before making the remaining nine. Share the finished turtle on Pinterest and Instagram with #DaisyTurtleAmigurumi. Which detail changed your turtle most: the height of the yellow center, the spacing between white petals, or the angle of the back legs?









