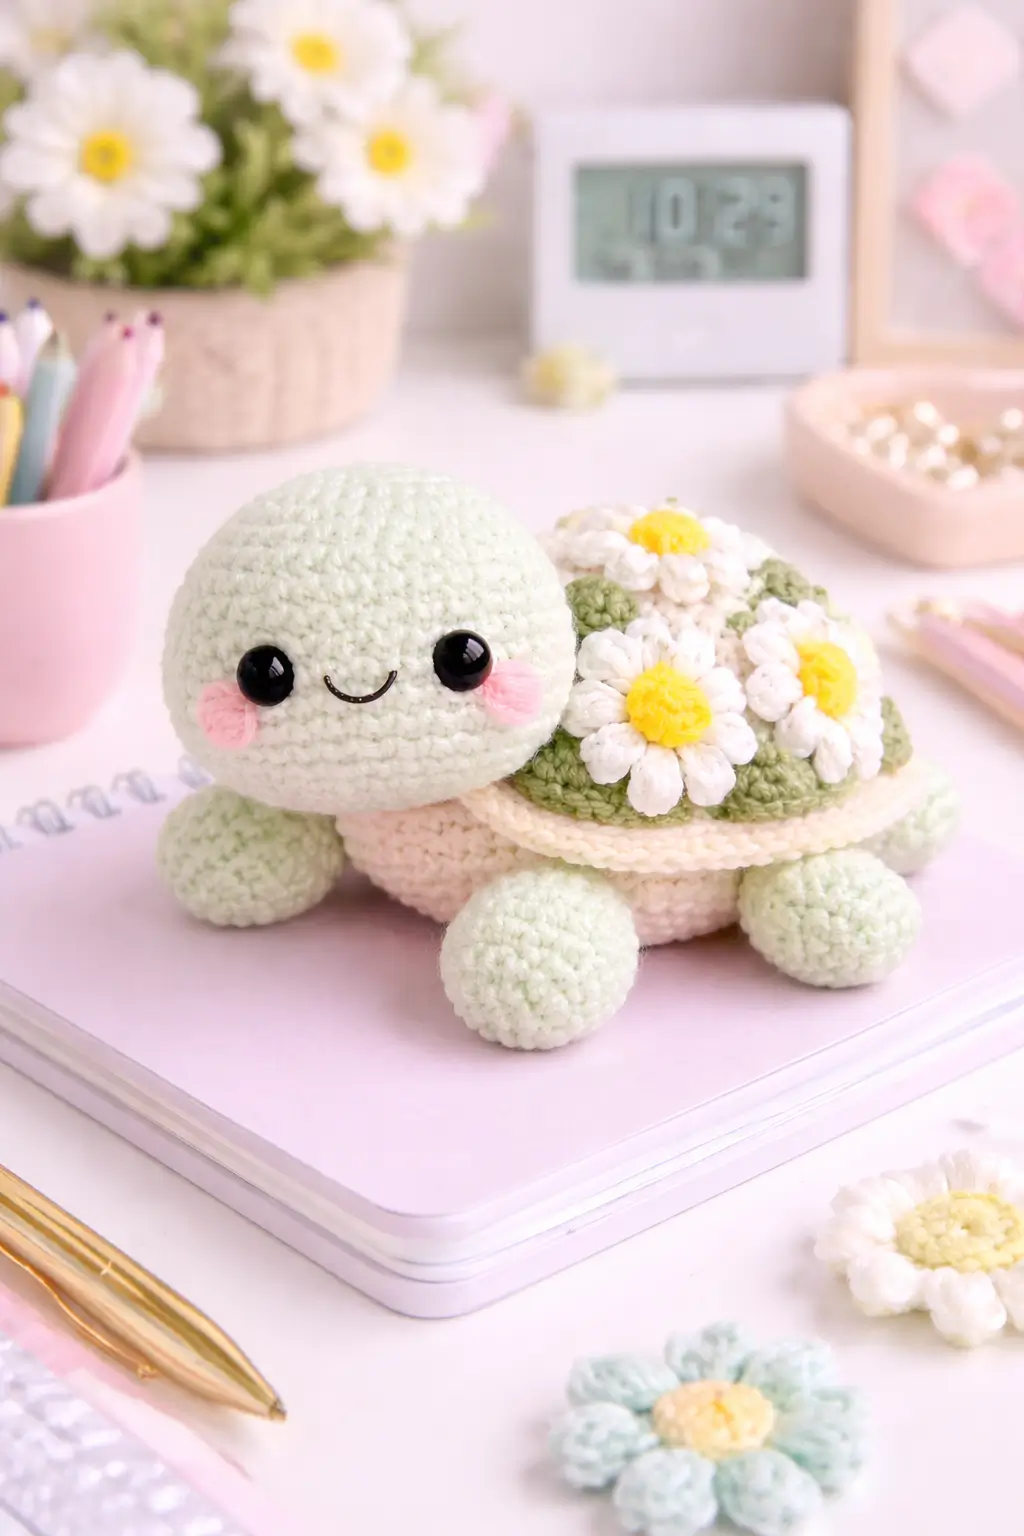
A daisy turtle fails fast when the shell flowers sit taller than the head. This daisy turtle amigurumi crochet pattern is built to keep the profile low, the shell broad, and the face open. Use bulky chenille or velvet yarn, a 4.0 mm hook, and 10 mm to 12 mm safety eyes for a plush turtle that suits confident beginners and small gift production runs.
The Design: What Makes This Daisy Turtle Different
The shell does most of the visual work here, not the body. That changes the crochet plan. A flower turtle needs a flatter upper dome so the daisies read as shell texture rather than a bouquet dropped on top. It also needs a wider body-to-head ratio than a plain sea turtle, because the eye line has to stay visible once the floral layer is attached. You place the head lower and farther forward; the turtle reads softer and younger at once. The maker also gets a cleaner front view, which matters in a daisy turtle crochet pattern built for display photos.
The second structural choice is a separate shell cover. That keeps the cream body intact and adds the green shell as a controlled overlay. In a flower turtle amigurumi, this is easier to adjust than trying to color-change across a curved stuffed form. The third choice is six-petal daisies worked as small appliqués. Fewer petals look sparse at this scale. More petals start to buckle. A common mistake with a turtle amigurumi pattern like this one is overstuffing the body until the shell tilts upward. Once that happens, the face drops into shadow and the flower spacing looks uneven.
Project Info at a Glance
| Skill Level | Time | Finished Size | Hook | Best For |
|---|---|---|---|---|
| Advanced beginner | 3 to 5 hours | About 20 cm in plush yarn | 4.0 mm | Spring gifts, desk decor, market stock |
Verified references used for this build basis: Passionate Crafter lists super bulky chenille/velvet yarn with a 4 mm hook and 15 g yellow, 15 g white, and 35 g green for the daisy version; Yarn Over with Natasha lists around 20 cm finished size; Ravelry lists bulky yarn, 4.0 mm hook, and 25 cm for another plush interpretation.
Materials and Tools
Yarn
- Pale mint green — bulky chenille or velvet — about 45 g — for head, legs, and tail
- Soft cream — bulky chenille or velvet — about 35 g — for body underside
- Leaf green — bulky chenille or velvet — about 35 g — for shell cover
- White — bulky chenille or velvet — about 15 g — for daisy petals
- Yellow — bulky chenille or velvet — about 15 g — for daisy centers
- Pink — small scrap — for cheek patches
- Black or dark brown embroidery thread — small scrap — for smile
Tools
- Hook 4.0 mm
- Safety eyes 10 mm to 12 mm
- Polyester stuffing
- Tapestry needle
- Stitch markers
- Scissors
Material direction is based on plush turtle references that use chenille or velvet yarn and a 4.0 mm hook. One video tutorial result lists 10 mm eyes with bulky yarn; Passionate Crafter lists 4 mm hook with plush yarn for the daisy version.
Sources: Passionate Crafter, YouTube tutorial listing, Ravelry
Abbreviations
MR = magic ring, sc = single crochet, inc = increase, dec = decrease, sl st = slip stitch, ch = chain, BLO = back loop only, FLO = front loop only, dc = double crochet.
For invisible decrease, insert the hook through the front loop of the next two stitches, yarn over, pull through both front loops, then complete one single crochet.
Pattern — Step by Step
Work in continuous spiral rounds unless noted.
Head (Make 1)
Yarn: pale mint green — adapted to the photo using standard amigurumi math with a medium 30-stitch plateau.
R1: 6 sc in MR (6)
R2: inc x6 (12)
R3: (sc, inc) x6 (18)
R4: (2 sc, inc) x6 (24)
R5: (3 sc, inc) x6 (30)
R6-R10: sc around (30)
R11: (3 sc, dec) x6 (24)
R12: (2 sc, dec) x6 (18)
R13: (sc, dec) x6 (12)
R14: dec x6 (6)
Insert safety eyes between R8 and R9, about 7 stitches apart. Embroider the smile one round below the eyes before final stuffing. Stuff firmly at the cheeks and lightly at the crown.
Fasten off. Leave a 20 cm tail.
Body (Make 1)
Yarn: soft cream — adapted to the photo using standard amigurumi math with a medium 36-stitch plateau.
R1: 6 sc in MR (6)
R2: inc x6 (12)
R3: (sc, inc) x6 (18)
R4: (2 sc, inc) x6 (24)
R5: (3 sc, inc) x6 (30)
R6: (4 sc, inc) x6 (36)
R7-R9: sc around (36)
R10: BLO sc around (36)
R11-R12: sc around (36)
R13: (4 sc, dec) x6 (30)
R14: (3 sc, dec) x6 (24)
R15: (2 sc, dec) x6 (18)
R16: (sc, dec) x6 (12)
R17: dec x6 (6)
Stuff the lower half first. Keep the top flatter than the belly so the shell cover sits level.
Fasten off. Close the opening.
Front Legs (Make 2)
Yarn: pale mint green — standard amigurumi ball-leg shaping.
R1: 6 sc in MR (6)
R2: inc x6 (12)
R3: (sc, inc) x6 (18)
R4-R5: sc around (18)
R6: (sc, dec) x6 (12)
R7: dec x6 (6)
Stuff lightly. Do not overfill; the front legs need to flatten slightly against the surface.
Fasten off. Leave a 20 cm tail.
Back Legs (Make 2)
Yarn: pale mint green — same shaping as front legs for the rounded toy look in the photo.
R1: 6 sc in MR (6)
R2: inc x6 (12)
R3: (sc, inc) x6 (18)
R4-R5: sc around (18)
R6: (sc, dec) x6 (12)
R7: dec x6 (6)
Stuff lightly. The rear pair should sit wider than the front pair.
Fasten off. Leave a 20 cm tail.
Shell Cover (Make 1)
Yarn: leaf green, then soft cream — adapted to match the daisy shell and pale rim seen in the photo.
R1: 6 sc in MR (6)
R2: inc x6 (12)
R3: (sc, inc) x6 (18)
R4: (2 sc, inc) x6 (24)
R5: (3 sc, inc) x6 (30)
R6: (4 sc, inc) x6 (36)
R7: (5 sc, inc) x6 (42)
Change to soft cream.
R8: BLO sc around (42)
R9: sc around (42)
The cream rounds form the visible shell edge. Do not stuff this piece.
Fasten off. Leave a 30 cm tail.
Daisy Motifs (Make 5)
Yarn: yellow center, white petals — photo-based shell decoration.
Center, R1: 6 sc in MR (6)
Join with sl st.
Attach white in any stitch.
In each stitch around work: (sl st, ch 3, 2 dc, ch 3, sl st) in same stitch.
Repeat 6 times total to make 6 petals.
Flatten each daisy with your fingers before sewing. Keep the petals short; long petals hide the shell edge.
Fasten off. Leave a 15 cm tail on each motif.
Tail (Make 1)
Yarn: pale mint green — photo-inspired small pointed tail.
Ch 4.
Starting in the second chain from hook: sc, hdc, dc.
Fasten off. Leave a 15 cm tail.
Cheek Patches (Make 2)
Yarn: pink — flat circles sized for a plush face.
R1: 6 sc in MR (6)
Join with sl st.
Steam is not required. Finger-flatten after fastening off.
Fasten off. Leave a 12 cm tail.
Assembly
- Sew the head to the front upper third of the body, keeping the lower edge of the head just above the belly centerline.
- Stitch the front legs to the underside, one on each side of the head, angled slightly forward.
- Attach the back legs farther apart than the front pair so the turtle sits broad and stable.
- Sew the tail at the rear center of the body.
- Position the shell cover on the back so the cream rim is visible all the way around.
- Sew the shell cover only around its outer edge, not across the center, so the overlay stays smooth.
- Arrange three daisies across the upper shell and two along the side line, then pin before stitching.
- Sew each daisy through the yellow center first, then catch one or two petal points so they do not lift.
- Attach the cheek patches below and slightly outside each eye, then secure the smile if it needs a second pass.
- Weave in every tail through stuffed areas or under the shell cover and trim flush.
The finished turtle should sit level, with the shell line lower than the top of the head from a front-facing view.
7 Technical Tips
- Mark the first stitch of every round. Missing one increase on the shell cover shifts the daisy layout and leaves the cream rim uneven on one side.
- Do not stuff the body to full sphere density. Stop when the belly is rounded but the back still presses flat under your thumb by about 1 cm.
- Use invisible decreases on the head after the eye round. Standard decreases leave notches that show under plush yarn and distort the cheek line.
- Install the eyes before the final two decrease rounds. On this size, placing them after R10 makes the face pinch inward and shortens the smile area.
- Keep chenille tension slightly tighter on the shell cover than on the body. Loose shell stitches let the cream body flash through the green layer.
- Pin all five daisies before sewing any of them down. A shell this width looks balanced when the gaps between flower centers stay close to 1.5 cm to 2 cm.
- Weave yarn tails in at two angles, not one straight line. Plush fiber sheds less around the exit point when the tail changes direction inside the stuffing.
Conclusion
This build keeps the flower layer controlled, the head visible, and the body low enough to read as a turtle from every angle. The pattern relies on ordinary stitch counts, but the proportion work matters more than any single round. Follow the shell placement first, then adjust the daisies, then check the leg spread before tying off. That order gives the cleanest finish on a daisy turtle amigurumi crochet pattern. Next, make a second version with a sage shell or butter yellow body and compare the face width after eye placement. Share the result on Pinterest and Instagram with #DaisyTurtlePattern. Which shell layout looks better for this character: three daisies on top with two side flowers, or a tighter five-flower cluster?









