Introduction
A strawberry coaster fails fast at the top edge if the shoulders are too narrow. This crochet strawberry coaster pattern solves that by widening the upper body, adding a separate scalloped border, and topping the piece with a layered leaf cap. The sample suits medium-weight cotton, a 4.0 mm hook, and a confident beginner to intermediate maker. It works well as a mug rug because the wide upper section gives better cup coverage than a plain round coaster.
The Design: What Makes This Strawberry Different
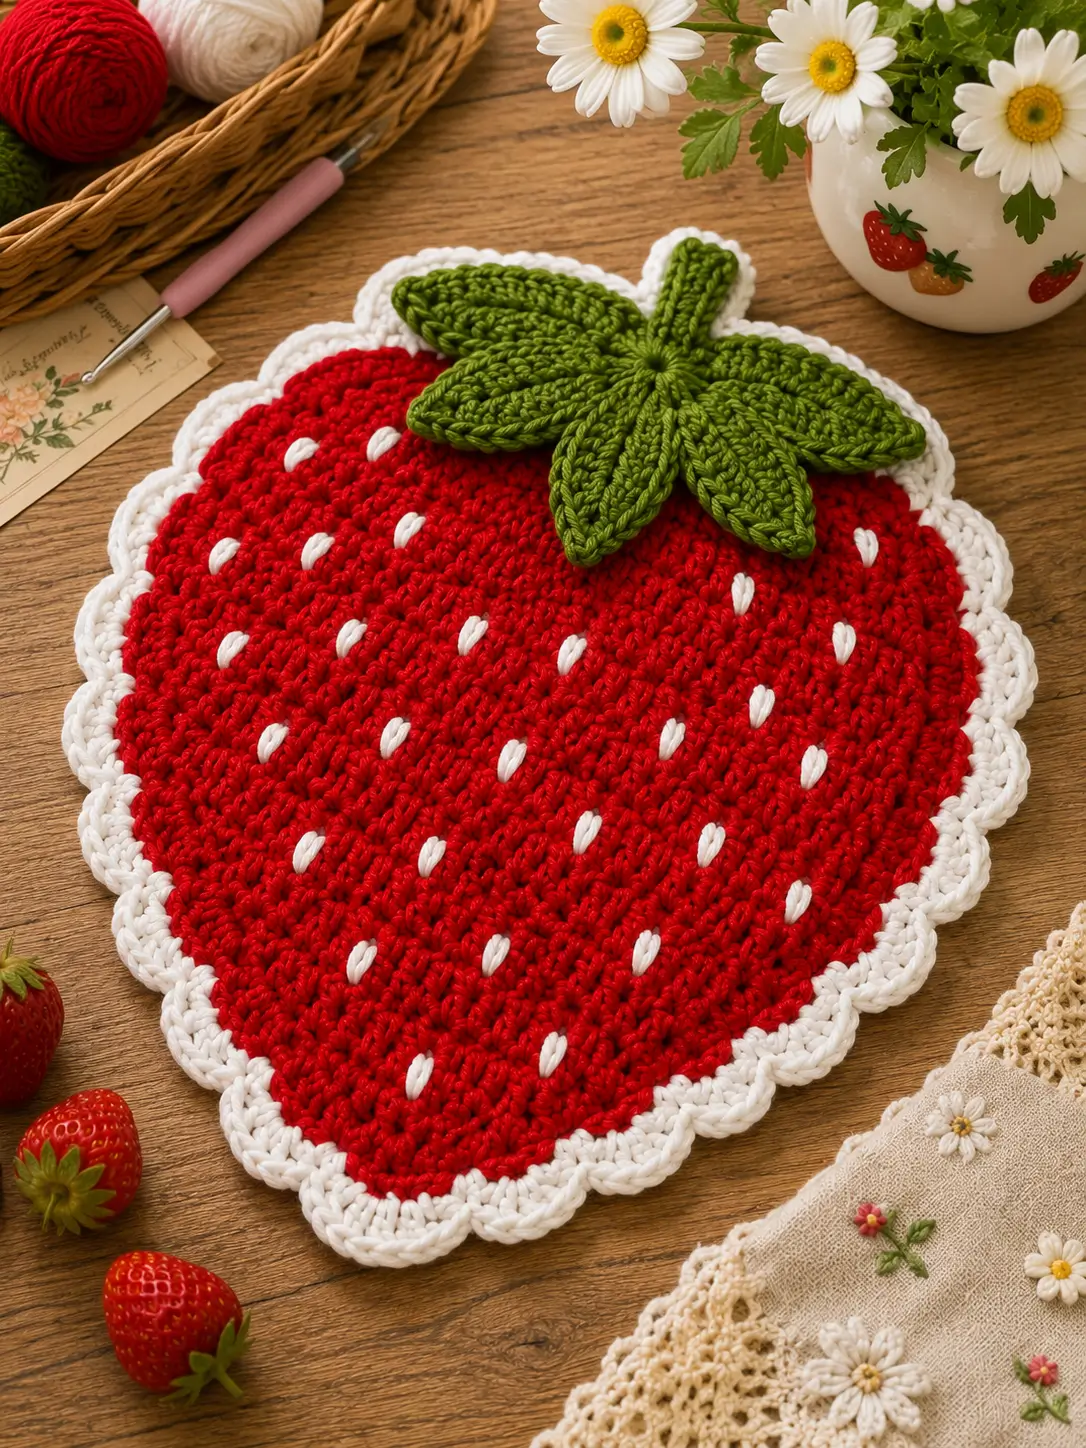
This version is built as a flat shaped coaster, not a stuffed motif. That changes everything. The lower point has to stay centered, the shoulders need enough spread to read as a strawberry, and the leaf cap has to sit broad enough to cover the flat top without buckling. The white scallop edge matters too; it breaks the red silhouette cleanly and gives the piece the lace-like finish visible in the photo.
One common mistake with a strawberry mug rug crochet design is over-increasing early, which turns the body into a circle. Another is using soft acrylic for a tabletop piece. Cotton holds the edge better, absorbs condensation, and tolerates warm cups more reliably than acrylic. A strong cotton crochet coaster pattern needs structure first, then surface detail.
Project Info at a Glance
| Skill Level | Time | Finished Size | Hook | Best For |
|---|---|---|---|---|
| Confident beginner / intermediate | 2–3 hours | 15 × 12 cm | 4.0 mm | Mug rug, small trivet, summer table decor |
Materials and Tools
Yarn
- Red cotton — medium weight 4 / aran family — 28–35 g — Lily Sugar’n Cream or similar kitchen cotton
- White cotton — same weight — 2–4 g — any smooth cotton for border and seed embroidery
- Green cotton — same weight — 5–8 g — bright leaf green for the topper
Tools
- Hook 4.0 mm
- Tapestry needle
- Stitch markers
- Small scissors
- Blocking pins and mat if you want a flatter finish
Abbreviations
MR / ch / sc / hdc / dc / tr / inc / dec / sl st / BLO
Use invisible decrease only where noted; it reduces bulk at the lower point and keeps the red body from puckering.
Pattern — Step by Step
Continuous rounds are used for the red base unless noted. The border and leaf cap are added separately. This is an original reconstruction from the photo, with sizing and material choices checked against published strawberry coaster patterns.
Red Body (Make 1)
Yarn: red — based on standard flat-coaster math and photo reconstruction
R1: 6 sc in MR (6)
R2: inc ×6 (12)
R3: (sc, inc) ×6 (18)
R4: (2 sc, inc) ×6 (24)
R5: (3 sc, inc) ×6 (30)
R6: (4 sc, inc) ×6 (36)
R7: (5 sc, inc) ×6 (42)
R8: (6 sc, inc) ×6 (48)
R9: sc in each st (48)
R10: 10 sc, inc, 12 sc, inc, 10 sc, inc, 12 sc, inc (52)
R11: sc in each st (52)
R12: 12 sc, inc, 13 sc, inc, 12 sc, inc, 13 sc, inc (56)
R13: sc in each st (56)
R14: 22 sc, dec, 10 sc, dec, 20 sc (54)
R15: 20 sc, dec, 10 sc, dec, 20 sc (52)
R16: 18 sc, dec, 10 sc, dec, 18 sc (50)
R17: 16 sc, dec, 10 sc, dec, 16 sc (48)
R18: 14 sc, dec, 8 sc, dec, 14 sc, dec, 8 sc (44)
R19: 12 sc, dec, 8 sc, dec, 12 sc, dec, 8 sc (40)
R20: 10 sc, dec, 8 sc, dec, 10 sc, dec, 8 sc (36)
R21: 8 sc, dec, 6 sc, dec, 8 sc, dec, 6 sc (32)
R22: sc in each st (32)
R23: 6 sc, dec, 4 sc, dec, 6 sc, dec, 4 sc (28)
R24: 5 sc, dec, 3 sc, dec, 5 sc, dec, 3 sc (24)
R25: sc in each st (24)
Flatten the lower end gently with fingers. The top should stay broad; the bottom should taper to a berry point.
Fasten off. Leave a 20 cm tail.
White Scalloped Border (Make 1)
Yarn: white — photo reconstruction with scallop edge inspired by common coaster finishing methods
Join white at the upper shoulder. Work evenly around the red body.
Rnd 1: sc evenly around entire body, placing 3 sc at the bottom point and 2 sc in the top shoulder corners as needed to keep the edge flat. Join with sl st.
Rnd 2: (sc, hdc, 3 dc, hdc, sc) in next 5 sts, sl st in next st, repeat around, adjusting one stitch at the upper curves if needed so the scallops land symmetrically.
Do not pull the scallops tight. Loose outer arches match the photo better than stiff picots.
Fasten off. Leave a 12 cm tail.
Leaf Cap Base (Make 1)
Yarn: green — widened to match the photo topper
Ch 7.
Row 1: Starting in 2nd ch from hook, sc 2, hdc 2, dc 2.
Working on opposite side of foundation ch: dc 2, hdc 2, sc 2.
Sl st to first sc to close the leaf lobe.
Do not fasten off.
Leaf Cap — Lobes 2 to 6
Yarn: green — standard repeated lobe construction
For each new lobe:
Ch 7, sl st into center join point, then work the same leaf shape:
sc 2, hdc 2, dc 2 along one side of the chain; dc 2, hdc 2, sc 2 on the opposite side; sl st back into the center.
Repeat until you have 6 lobes.
Stem
Yarn: green — photo reconstruction
From center point of leaf cap:
Ch 6.
Row 1: Starting in 2nd ch from hook, sl st 1, sc 2, hdc 1, dc 1.
Fasten off. Leave a 10 cm tail.
Seed Embroidery
Yarn: white — placement based on the photo
Using a tapestry needle, embroider 18–22 small vertical satin stitches across the red body. Keep them angled slightly upward, not perfectly straight. Start near the lower third and spiral outward.
Each seed should be about 0.5–0.8 cm long.
Assembly
- Block the red body lightly so the top edge spreads wider than the bottom tip.
- Add the white border first and check that the strawberry silhouette still reads clearly from a distance.
- Place the green leaf cap across the top third of the coaster, not at the exact edge.
- Center the stem vertically over the top midpoint.
- Pin all six leaf lobes before sewing so the left and right spread matches.
- Sew the leaf cap only through the center circle and inner lobe bases.
- Leave the outer lobe tips free so they sit layered and slightly raised.
- Embroider the seeds after the leaf cap is fixed; this avoids crowding near the top.
- Steam or wet block the finished coaster again and smooth the scallops by hand.
- Weave tails into same-color stitches on the back and trim flush.
The finished piece should lie flat, measure close to 15 × 12 cm, and hold the pointed berry shape without curling.
7 Technical Tips
- Use a marker at the first stitch of every round. The failure mode here is drift; once the top widens, a shifted beginning stitch makes the berry lean to one side.
- Keep the red body slightly firmer than garment tension. Loose stitches leave gaps under mugs and weaken the lower point.
- Do not over-handle the flat fabric while sewing. Stretching the coaster during seed embroidery can distort the center.
- Work the border with one half-size looser hand if your scallops cup. Tight scallops pull the white edge inward and make the coaster bowl.
- Pin the leaf cap before sewing. A 2–3 mm shift off center is visible because the stem acts like a vertical reference line.
- Keep seed stitches short. Once seed embroidery passes about 8 mm, the white details stop reading as seeds and start looking like slashes.
- Weave tails along color blocks only. A dark red tail shadowing through the white scallop edge is one of the fastest ways to make the finish look uneven.
Conclusion
This crochet strawberry coaster pattern works because the shaping is handled in layers: a broad red base, a contrast scallop edge, then a separate leaf cap that covers the flat top cleanly. That sequence gives a result much closer to the uploaded photo than a simple circle with a leaf stitched on later. The next step is practical: make one sample, check flatness under a mug, then adjust either the border tension or leaf spread before batching a set. Share the finished version on Pinterest and Instagram with #StrawberryCoasterPattern. One useful comparison question remains: did your berry read better with six leaf lobes or five?









