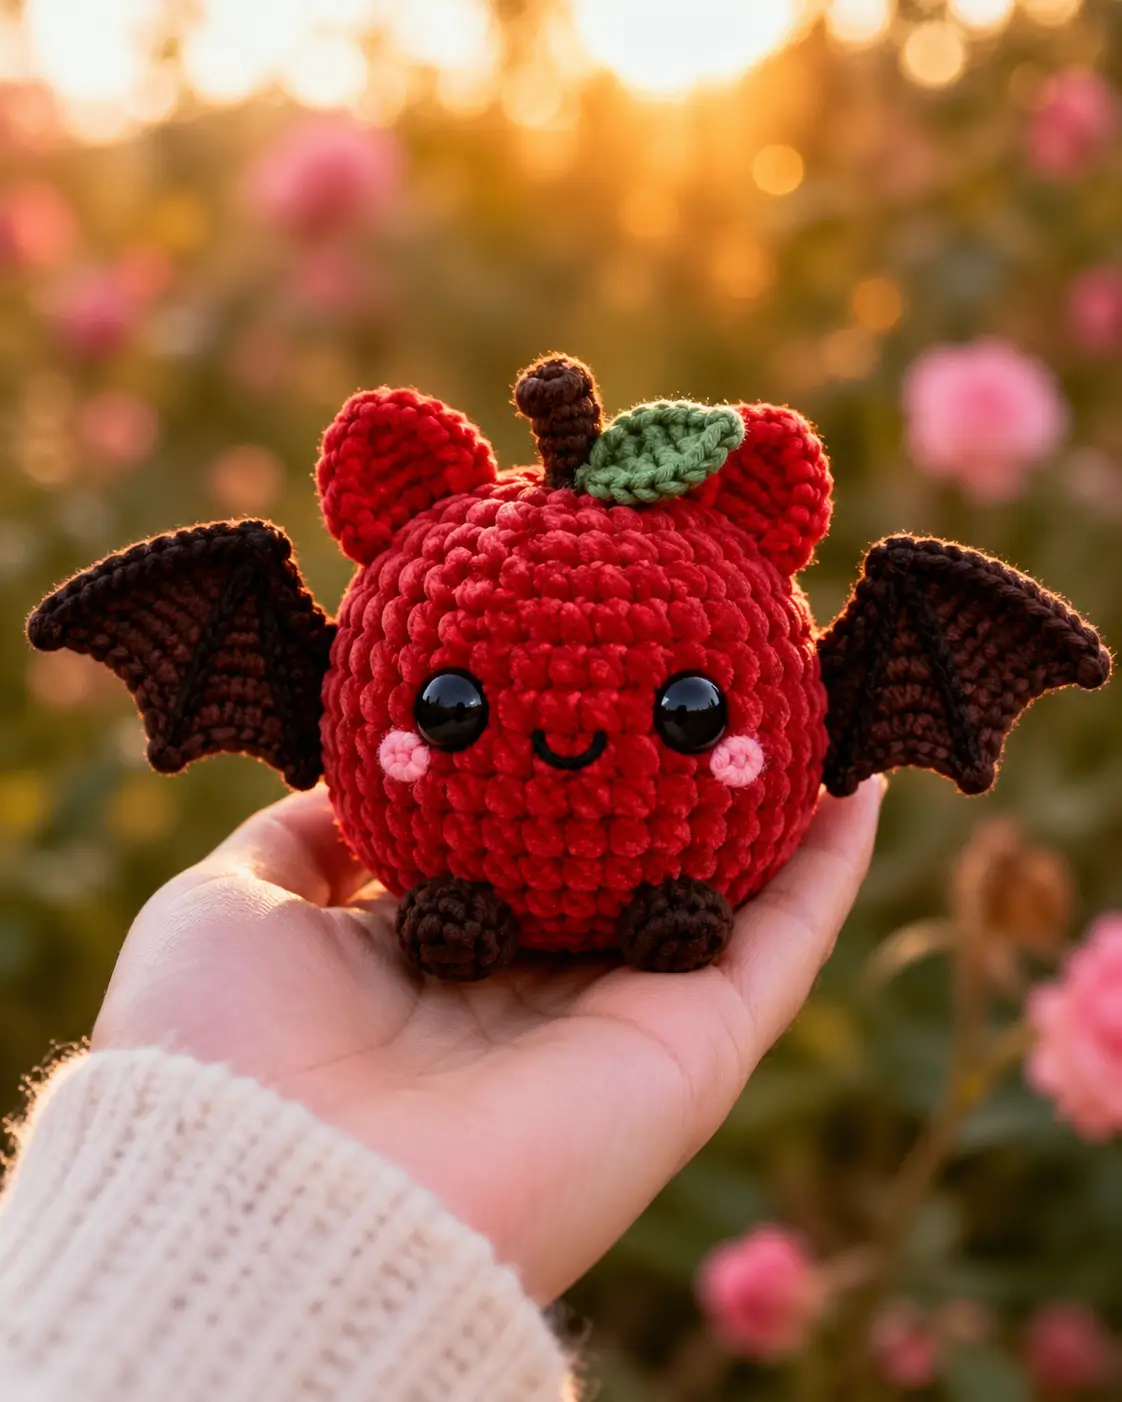
An apple bat has two silhouettes fighting for control: fruit roundness and wing span. This apple bat amigurumi crochet pattern uses bulky velvet yarn, a 4 mm hook, 14 mm safety eyes, and a 15 cm display height. Work it as an intermediate amigurumi with separate wings, stem, leaf, cheeks, feet, and ear lobes. The finished piece sits flat enough for a Halloween desk display.
The Design: What Makes the Apple Bat Different
The body must read as an apple before the wings are added, so the main globe uses a 42-stitch plateau instead of a narrow animal head. A smaller underside pad works as the hidden body base; it stops the round fruit from rolling forward after the wings are sewn on. Bat wings need width, not bulk, so they are worked flat in dark brown and attached toward the back edge. Stem and leaf placement matters because the top details mark the fruit identity.
One common mistake with a crochet apple bat is placing the eyes too high; the maker gets a red bat head, not a fruit character. This Halloween fruit bat crochet layout keeps the face low, the wings wide, and the velvet apple bat plush stable.
Project Info at a Glance
| Skill Level | Time | Finished Size | Hook | Best For |
|---|---|---|---|---|
| Intermediate | Not published by sources | 15 cm × 20 cm | 4 mm | Halloween desk display, market plush, fruit-bat set |
Materials and Tools
Yarn
- Red — bulky/category 5 velvet or chenille — 45–55 g — Bernat Velvet or similar category 5 plush yarn
- Dark brown — bulky/category 5 velvet or chenille — 15–18 g — for wings, feet, and stem
- Green — bulky/category 5 velvet or chenille — 3–5 g — for the leaf
- Pink — bulky/category 5 velvet or chenille — 2–3 g — for cheek patches
- Black embroidery yarn — small length — for the mouth
Tools
- Hook 4 mm
- Safety eyes 14 mm, two
- Fiberfill stuffing
- Yarn needle
- Locking stitch markers
- Pins
- Scissors
Abbreviations
MR = magic ring; sc = single crochet; inc = increase; dec = decrease; sl st = slip stitch; ch = chain; BLO = back loop only; hdc = half double crochet; dc = double crochet. For an invisible decrease, work through the front loops of the next two stitches before completing one sc so the closing rounds keep the apple surface smooth.
Pattern — Step by Step
Continuous spiral unless noted. Counts appear at the end of every round or row.
Head / Apple Globe
Yarn: red
R1: 6 sc in MR (6)
R2: inc ×6 (12)
R3: (sc, inc) ×6 (18)
R4: (2 sc, inc) ×6 (24)
R5: (3 sc, inc) ×6 (30)
R6: (4 sc, inc) ×6 (36)
R7: (5 sc, inc) ×6 (42)
R8: sc around (42)
R9: sc around (42)
R10: sc around (42)
R11: sc around (42)
R12: sc around (42)
R13: sc around (42)
R14: sc around (42)
Place safety eyes between R10 and R11, 8 stitches apart. Position the mouth between them over R12. Start stuffing after R15.
R15: (5 sc, dec) ×6 (36)
R16: (4 sc, dec) ×6 (30)
R17: (3 sc, dec) ×6 (24)
R18: (2 sc, dec) ×6 (18)
R19: (sc, dec) ×6 (12)
R20: dec ×6 (6)
Fasten off. Leave a 20 cm tail and close the final opening.
Body Base / Sitting Pad
Yarn: red
R1: 6 sc in MR (6)
R2: inc ×6 (12)
R3: (sc, inc) ×6 (18)
R4: (2 sc, inc) ×6 (24)
R5: (3 sc, inc) ×6 (30)
R6: sc around (30)
R7: sc around (30)
R8: sc around (30)
R9: (3 sc, dec) ×6 (24)
R10: (2 sc, dec) ×6 (18)
R11: (sc, dec) ×6 (12)
R12: dec ×6 (6)
Stuff lightly. This pad should flatten, not become another ball.
Fasten off. Leave a 25 cm tail for sewing under the apple globe.
Front Paws
Make 2. Yarn: dark brown
R1: 6 sc in MR (6)
R2: inc ×6 (12)
R3: sc around (12)
R4: sc around (12)
R5: dec ×6 (6)
Add a pinch of stuffing only. Overstuffed paws tilt the face backward.
Fasten off. Leave a 15 cm tail on each paw.
Back Feet / Hidden Stabilizers
Make 2. Yarn: dark brown
R1: 6 sc in MR (6)
R2: inc ×6 (12)
R3: sc around (12)
R4: dec ×6 (6)
These sit behind the front paws and act as a rear brace.
Fasten off. Leave a 15 cm tail on each foot.
Red Ear Lobes
Make 2. Yarn: red
R1: 6 sc in MR (6)
R2: inc ×6 (12)
R3: (sc, inc) ×6 (18)
R4: sc around (18)
R5: sc around (18)
R6: (sc, dec) ×6 (12)
Do not stuff firmly. Flatten the opening so each lobe forms a soft rounded ear shape.
Fasten off. Leave a 20 cm tail.
Bat Wings
Make 2. Yarn: dark brown
Row 1: ch 7, sc in 2nd ch from hook and across (6)
Row 2: ch 1, turn, inc, 4 sc, inc (8)
Row 3: ch 1, turn, sc across (8)
Row 4: ch 1, turn, inc, 6 sc, inc (10)
Row 5: ch 1, turn, sc across (10)
Row 6: ch 1, turn, inc, 8 sc, inc (12)
Row 7: ch 1, turn, sc across (12)
Row 8: ch 1, turn, dec, 8 sc, dec (10)
Row 9: ch 1, turn, dec, 6 sc, dec (8)
Border: ch 1, rotate, work 10 sc along the side edge, 3 sc in the wing tip, 10 sc along the opposite side edge, sl st to finish (23).
For a scalloped lower edge, replace every third border sc with ch 2, sl st into same edge space. Keep the top edge plain for sewing.
Fasten off. Leave a 30 cm tail on each wing.
Stem
Yarn: dark brown
R1: 6 sc in MR (6)
R2: BLO sc around (6)
R3: sc around (6)
R4: sc around (6)
R5: sc around (6)
R6: sc around (6)
Do not stuff. The tight tube should stand from stitch density alone.
Fasten off. Leave a 20 cm tail.
Leaf
Yarn: green
Ch 8.
Round 1: sl st in 2nd ch from hook, sc, hdc, dc, hdc, sc, 3 sc in last ch; work on the opposite side of the chain: sc, hdc, dc, hdc, sc, sl st (15).
Pinch the first and last stitches together at the stem base before sewing.
Fasten off. Leave a 20 cm tail.
Cheek Patches
Make 2. Yarn: pink
R1: 6 sc in MR (6)
R2: inc ×6, sl st to first stitch (12)
Pull the center tight and flatten the circle before sewing.
Fasten off. Leave a 15 cm tail on each patch.
Mouth
Yarn: black embroidery yarn
Thread the needle with 25 cm of black yarn. Insert under the left eye, make a shallow U-shaped stitch over R12, and exit under the right eye. Anchor the curve with one tiny vertical stitch at the center.
Fasten off inside the head or bury the tail through the apple globe.
Assembly
- Place the closed apple globe with the eye line facing forward and the final closure centered at the bottom back.
- Sew the red body base under the globe, keeping the flattest side against the table.
- Attach the safety eyes before final head closure if they are not already installed.
- Sew the pink cheek patches one round below the eyes and one stitch outward from each eye edge.
- Stitch the mouth between the cheeks with a shallow curve, not a deep smile.
- Sew the front paws at the lower front, spaced 3–4 stitches apart.
- Attach the back feet behind the front paws so the apple rests without rolling.
- Pin the wings to the left and right back edges from R9 to R13, then sew through the plain top edge only.
- Sew the red ear lobes on the upper sides between R5 and R8, angled slightly outward.
- Attach the stem at the top center, sew the leaf beside it, weave all tails through at least 6 stitches, and trim.
The apple bat is complete when the globe sits upright and both wing tips clear the table.
7 Technical Tips
- Marker drift over 2 stitches changes the face angle. Move the marker back to the first stitch of the round after every increase or decrease round.
- Loose stuffing creates a dent under the stem. Fill the apple globe until it rebounds after a 2 cm finger press, then stop before the stitches stretch.
- Visible decrease holes show strongly in red velvet yarn. Use invisible decreases on R15–R20 and keep the hook tip under the front loops only.
- Eye placement must happen before R15. Set 14 mm eyes between R10 and R11, 8 stitches apart, because the opening becomes too small after R18.
- Velvet tension fails when loops are pulled tall. Keep each sc about 5–6 mm high with a 4 mm hook so the stuffing does not show through.
- Unpinned wings often sit unevenly. Pin each wing from R9 to R13 and check that both wing tips land at the same height before sewing.
- Short tails pull out of chenille yarn. Leave 15–30 cm tails, weave through at least 6 stitches, reverse direction once, then bury the end inside the globe.
Conclusion
This pattern is built around proportion: a large red apple globe, low-set face, flat dark wings, and a small stem-leaf pair that makes the fruit shape clear. Check the eye placement before closing the globe, then pin both wings before any final stitches are made. Use this apple bat amigurumi crochet pattern as the base for a fruit-bat series by changing the body color, leaf shape, and cheek placement. Save the finished project to Pinterest and post the front-and-side view on Instagram with #AppleBatAmigurumi. For this character, would you angle the green leaf toward the left wing or center it directly behind the brown stem?









