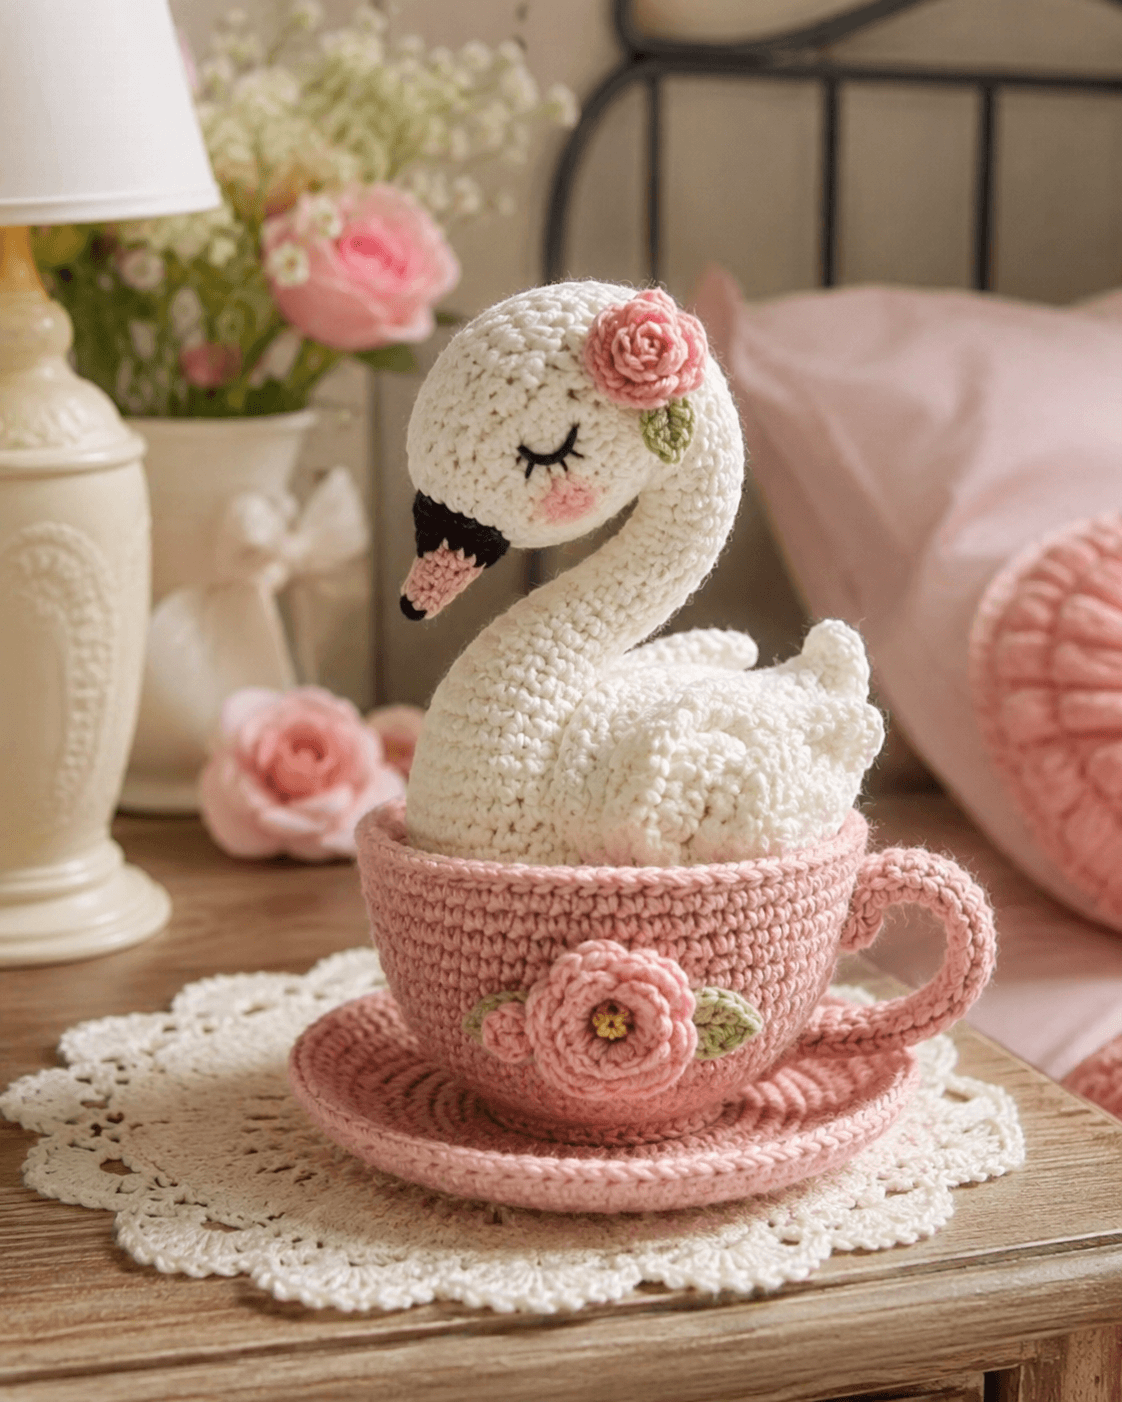
Introduction
A swan neck can curve elegantly on its own. A swan in a teacup has to stop before it topples. This swan in teacup amigurumi crochet pattern uses DK-to-worsted proportions, a 3.0–3.5 mm hook range, and a compact body sized to sit securely inside a display cup. The project suits an intermediate maker who wants table décor that stores as one stable piece.
The Design: What Makes Swan in Teacup Different
You are not building a full standing bird here. You are building a curve, a rim fit, and a visible face angle. That changes the priorities. The neck must read as swan before the viewer even notices the cup. Then the body has to sink low enough that the teacup looks intentional, not accidental. The piece also relies on a sleeping expression instead of safety eyes, which softens the face and keeps the floral styling from fighting with glossy plastic hardware. Published swan patterns often use separate wings and medium-to-large head shaping, and that matters in this adaptation because the wings still need definition even when half the body is hidden inside the cup. A common mistake with a swan amigurumi crochet pattern is making the neck too cylindrical and stuffing it too hard. The curve then looks like a pipe, not a bird. A second error appears in many crochet swan pattern remakes: the cup gets oversized and the swan disappears into it.
Project Info at a Glance
| Skill Level | Time | Finished Size | Hook | Best For |
|---|---|---|---|---|
| Intermediate | 6–8 hours | 17–20 cm display height | 3.0–3.5 mm | shelf décor, nursery styling, tea-themed gifts |
Materials and Tools
Yarn
- White — DK or light worsted — one full skein buffer — body, neck, head, wings, tail
- Black — small amount — beak patch and lashes
- Soft pink — small amount — cup, saucer, cheek patches, flowers
- Sage green — very small amount — leaves
- Golden yellow — tiny amount — flower center
Tools
- Hook 3.0–3.5 mm
- Stuffing
- Tapestry needle
- Stitch markers
- Pins
- Black embroidery thread
Abbreviations
MR / sc / inc / dec / sl st / ch / BLO / FO
Invisible decrease keeps the neck curve and the cup rim cleaner than a standard decrease, which matters on pale yarn where shadows expose every notch.
Pattern — Step by Step
Continuous spiral unless noted.
Head
Yarn: white
R1: 6 sc in MR (6)
R2: inc ×6 (12)
R3: [sc, inc] ×6 (18)
R4: [2 sc, inc] ×6 (24)
R5: [3 sc, inc] ×6 (30)
R6: [4 sc, inc] ×6 (36)
R7–10: sc around (36)
R11: [4 sc, dec] ×6 (30)
R12: [3 sc, dec] ×6 (24)
R13: [2 sc, dec] ×6 (18)
Stuff firmly but keep the lower front slightly flatter for the beak join.
R14: [sc, dec] ×6 (12)
R15: dec ×6 (6)
Fasten off. Leave 20 cm tail.
Neck
Yarn: white
R1: 6 sc in MR (6)
R2: [sc, inc] ×3 (9)
R3–12: sc around (9)
R13: [2 sc, inc] ×3 (12)
R14–24: sc around (12)
Stuff lightly at the top and more firmly through the middle. Bend into an S-curve while filling.
Fasten off. Leave 25 cm tail.
Body
Yarn: white
R1: 6 sc in MR (6)
R2: inc ×6 (12)
R3: [sc, inc] ×6 (18)
R4: [2 sc, inc] ×6 (24)
R5: [3 sc, inc] ×6 (30)
R6: [4 sc, inc] ×6 (36)
R7–11: sc around (36)
R12: [4 sc, dec] ×6 (30)
R13: [3 sc, dec] ×6 (24)
R14: [2 sc, dec] ×6 (18)
Stuff the upper back firmly but keep the lower half compact enough to sink into the cup.
Fasten off. Leave 25 cm tail.
Wings (Make 2)
Yarn: white
R1: 6 sc in MR (6)
R2: inc ×6 (12)
R3: [sc, inc] ×6 (18)
R4: [2 sc, inc] ×6 (24)
R5: sc around (24)
R6: [2 sc, dec] ×6 (18)
R7: sc around (18)
R8: [sc, dec] ×6 (12)
Flatten lightly. Add 3 shallow scallops along the outer edge with surface slip stitches if you want extra feather definition.
Fasten off. Leave 20 cm tail.
Tail
Yarn: white
R1: 6 sc in MR (6)
R2: inc ×6 (12)
R3: sc around (12)
R4: [sc, inc] ×6 (18)
R5: sc around (18)
R6: [2 sc, dec] ×4, 2 sc (14)
Flatten.
Fasten off. Leave 18 cm tail.
Upper Beak
Yarn: pink
R1: 4 sc in MR (4)
R2: [sc, inc] ×2 (6)
R3: [2 sc, inc] ×2 (8)
R4: sc around (8)
Fasten off. Leave 15 cm tail.
Lower Beak Tip
Yarn: black
R1: 4 sc in MR (4)
R2: sc around (4)
Fasten off. Leave 12 cm tail.
Beak Base Patch
Yarn: black
Row 1: ch 7
Row 2: starting in 2nd ch from hook, 6 sc (6)
Fasten off. Leave 15 cm tail.
Cheek Patches (Make 2)
Yarn: soft pink
R1: 6 sc in MR (6)
R2: [sc, inc] ×3 (9)
Fasten off. Leave 12 cm tail.
Head Rose
Yarn: soft pink
Row 1: ch 16
Row 2: starting in 2nd ch from hook, [2 hdc in each ch] across
Roll into a rose and stitch base closed.
Leave 15 cm tail.
Head Leaf
Yarn: sage green
Ch 7
Work back along chain: sl st, sc, hdc, dc, hdc, sc
Fasten off. Leave 10 cm tail.
Teacup Body
Yarn: soft pink
R1: 6 sc in MR (6)
R2: inc ×6 (12)
R3: [sc, inc] ×6 (18)
R4: [2 sc, inc] ×6 (24)
R5: [3 sc, inc] ×6 (30)
R6: [4 sc, inc] ×6 (36)
R7: BLO sc around (36)
R8–14: sc around (36)
R15: [5 sc, inc] ×6 (42)
R16: sc around (42)
Lightly shape the rim outward while blocking by hand.
Fasten off. Leave 25 cm tail.
Cup Handle
Yarn: soft pink
Ch 18
R1: sl st in 2nd ch from hook and each ch across
R2: ch 1, turn, sc across (17)
Curve into a handle before sewing.
Fasten off. Leave 18 cm tail.
Saucer
Yarn: soft pink
R1: 6 sc in MR (6)
R2: inc ×6 (12)
R3: [sc, inc] ×6 (18)
R4: [2 sc, inc] ×6 (24)
R5: [3 sc, inc] ×6 (30)
R6: [4 sc, inc] ×6 (36)
R7: [5 sc, inc] ×6 (42)
R8: BLO sc around (42)
R9: [6 sc, inc] ×6 (48)
Fasten off. Leave 22 cm tail.
Cup Flower Center
Yarn: soft pink
R1: 6 sc in MR (6)
R2: inc ×6 (12)
Fasten off. Leave 12 cm tail.
Cup Flower Petals
Yarn: soft pink
Join to flower center edge.
R1: [sl st, ch 2, 2 dc, ch 2, sl st] in every 2 stitches around for 6 petals.
Fasten off. Leave 12 cm tail.
Cup Flower Leaves (Make 2)
Yarn: sage green
Ch 6
Work back along chain: sl st, sc, hdc, dc, sc
Fasten off. Leave 10 cm tail.
Flower Center Knot
Yarn: golden yellow
Wrap yarn 4–5 times around the petal center and knot behind. Trim neatly.
Assembly
- Sew the neck to the lower back half of the head so the face tips downward slightly.
- Attach the upper beak to the head front, then sew the black tip to the beak end.
- Add the black beak-base patch where the beak meets the head.
- Embroider one closed eyelash line and a small mouth curve.
- Sew the cheek patches low on both sides of the face.
- Join the neck to the body and hold the curve while tightening the seam.
- Sew the wings to the upper body sides and attach the tail at the rear.
- Stitch the rose and leaf to the head just above the eye side.
- Sew the handle to the teacup body, then attach the flower applique and leaves to the cup front.
- Place the swan body into the cup, tack it in place, and center the cup on the saucer.
The completed piece should sit upright with the cup carrying the base stability and the swan neck carrying the silhouette.
7 Technical Tips
- Neck collapse: Stuff the middle third of the neck firmer than the top third. A uniformly soft neck folds forward and loses the swan profile.
- Cup fit: Test the body inside the cup before sewing on the wings. If the body width exceeds the rim, the piece will bunch instead of nest.
- Face angle: Attach the neck slightly behind the head center, not directly underneath. A centered join makes the swan stare outward instead of downward into the cup.
- Rim flare: Work the cup rim increase round at 42 stitches exactly. A tighter rim traps the body; a wider rim makes the cup look bowl-shaped.
- Cheek scale: Keep each cheek patch at 9 stitches. Larger blush circles start competing with the beak and eye embroidery.
- Wing height: Pin both wings before sewing and keep them slightly behind the body midpoint. Forward wings crowd the cup wall and hide the body curve.
- Saucer stability: Flatten the saucer completely before attaching the cup. A domed saucer lifts one side and makes the whole display lean.
Conclusion
This swan in teacup amigurumi crochet pattern works because the swan stays readable even after half the body disappears into the cup. The neck curve does most of that work. Then the small face, sleeping eye, restrained wings, and floral details finish the scene without overloading it. Start by making the cup and body first, then test the fit before committing to the neck angle. After that, pin the rose and leaves and check the front view from table height. Share the finished piece on Pinterest and Instagram with #SwanInTeacupPattern. One question decides whether this character landed: does the neck still read as swan when the cup hides almost everything else?









