Introduction
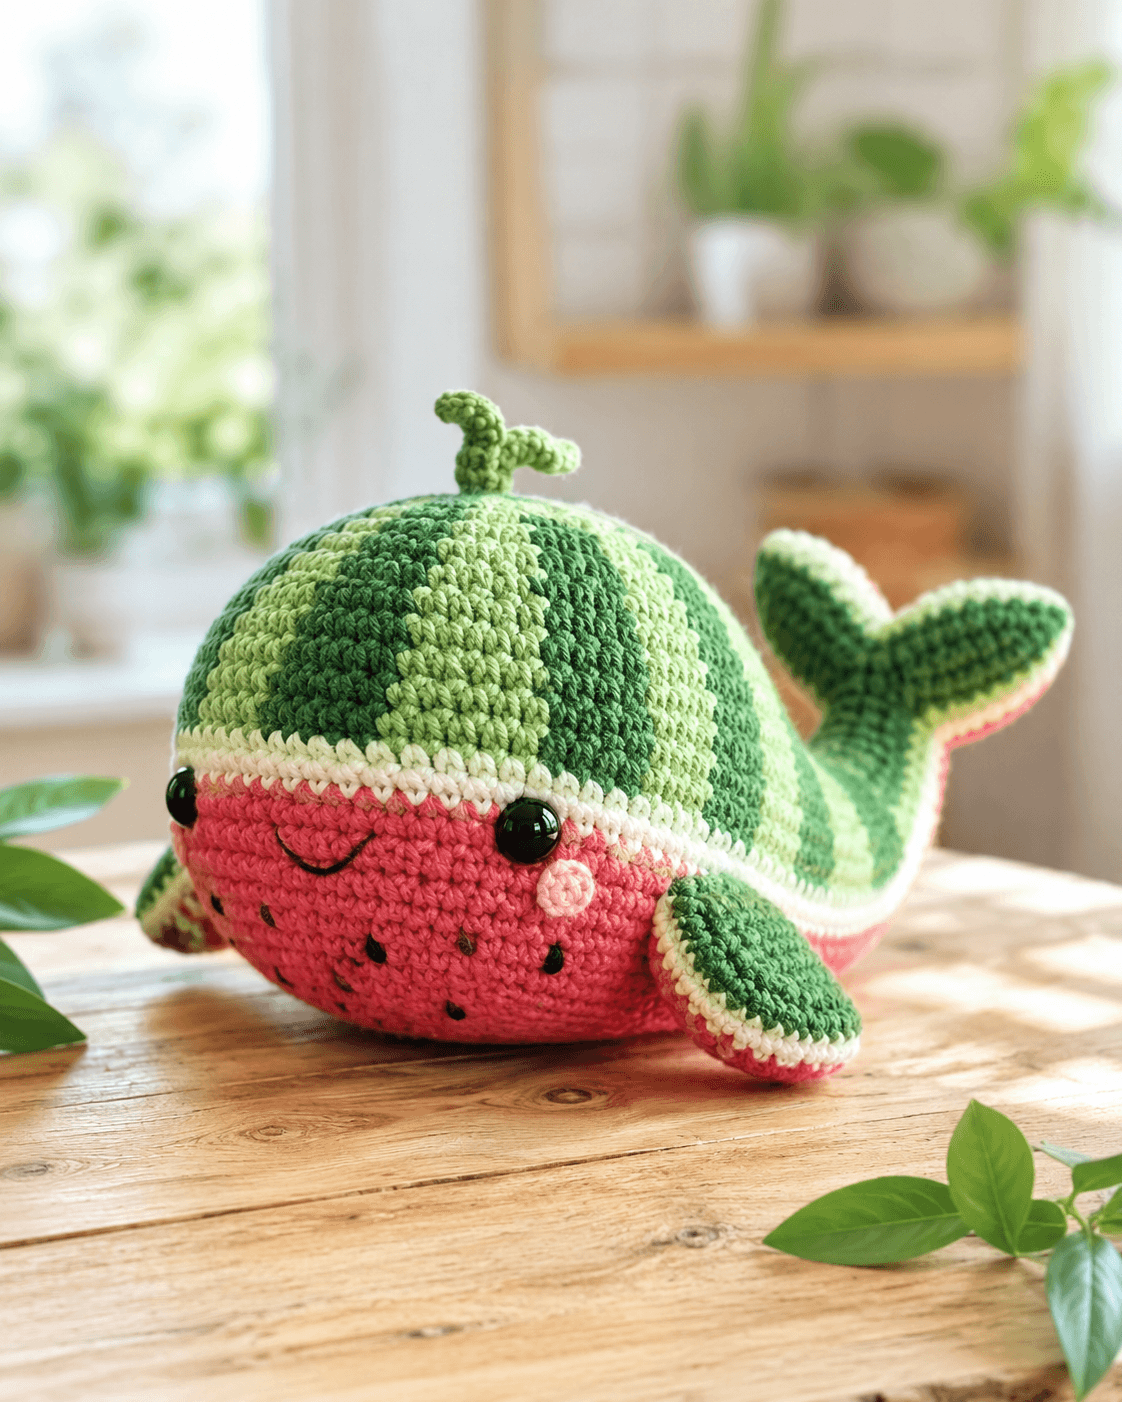
A whale only becomes a watermelon when the white rind stripe sits dead level. This watermelon whale amigurumi crochet pattern builds that line into a rounded whale body, then adds fins, tail flukes, seed stitches, and a short sprout for the top. Expect a small-to-medium project in cotton-style yarn with a 4.0 mm reference hook and a finished size near 10 cm in common free-pattern benchmarks. It works for summer markets, desk decor, and quick gift stock.
The Design: What Makes This Watermelon Whale Different
This character works because two shapes have to read at once. First, it has to remain a whale. That means a domed forehead, side fins, tail flukes, and a low face. Second, it has to read as fruit from every angle. That requires a clean white rind band, alternating green sections across the crown, and black seed marks placed only on the red front panel.
The stripe is the structural decision that matters most. Tilt it upward and the face shrinks. Drop it too low and the whale loses the rind effect. Fin scale matters too. Small fins keep the round body dominant, which is why a fruit whale amigurumi looks better with stubby side paddles than realistic long flippers.
A common mistake is overloading the front with seeds. This crochet whale plush needs negative space around the smile or the face turns busy. That issue appears often in novelty whale crochet tutorial content.
Project Info at a Glance
| Skill Level | Time | Finished Size | Hook | Best For |
|---|---|---|---|---|
| Intermediate | 4–6 hours | ~10 cm reference, photo version may run larger | 4.0 mm reference | Summer market makes, shelf decor, gift plush |
Materials and Tools
Yarn
- Pink-red — DK or light worsted cotton look — about 25–30 g — YarnArt Jeans or similar
- White — same weight — about 8–10 g — for rind band
- Light green — same weight — about 12–15 g — rind segment
- Dark green — same weight — about 12–15 g — rind segment, fins, tail, sprout
- Black — small amount — seeds, smile, optional mouth outline
- Pale pink — small amount — cheek circle
Tools
- Hook 4.0 mm reference
- Safety eyes 9–10 mm
- Stuffing
- Yarn needle
- Stitch markers
- Pins for stripe placement
Abbreviations
MR / sc / inc / dec / sl st / ch / hdc / dc / BLO
Invisible decrease keeps the white rind band and the closing rounds flatter than a standard decrease, which matters on a striped whale body.
Pattern — Step by Step
Continuous spiral unless noted.
Head-Body Main Piece
Yarn: pink-red, white, light green, dark green
R1: 6 sc in MR (6)
R2: inc x6 (12)
R3: (1 sc, inc) x6 (18)
R4: (2 sc, inc) x6 (24)
R5: (3 sc, inc) x6 (30)
R6: (4 sc, inc) x6 (36)
R7-R11: sc around (36)
Change to white
R12: BLO sc around (36)
Change to alternating light green and dark green wedges as preferred
R13-R16: sc around (36)
Insert eyes between R9 and R10, about 8 sts apart. Begin stuffing.
R17: (4 sc, dec) x6 (30)
R18: (3 sc, dec) x6 (24)
R19: (2 sc, dec) x6 (18)
R20: (1 sc, dec) x6 (12)
R21: dec x6 (6)
Fasten off. Leave 20 cm tail.
Belly Panel
Yarn: pink-red
Ch 8
R1: starting in 2nd ch from hook, 6 sc, 3 sc in last ch, working on other side 5 sc, inc in last ch (16)
R2: inc, 5 sc, 3 inc, 5 sc, 2 inc (22)
R3: sc around (22)
Fasten off. Leave 20 cm tail.
Side Fins (Make 2)
Yarn: pink-red, white, green
R1: 6 sc in MR (6)
R2: inc x6 (12)
R3: sc around in pink-red (12)
Change to white
R4: sc around (12)
Change to green
R5: (4 sc, dec) x2 (10)
R6: sc around (10)
Flatten lightly.
Fasten off. Leave 18 cm tail.
Tail Flukes (Make 2)
Yarn: green with white edge optional
R1: 6 sc in MR (6)
R2: inc x6 (12)
R3: (1 sc, inc) x6 (18)
R4-R5: sc around (18)
R6: (1 sc, dec) x6 (12)
R7: sc around (12)
Flatten into a teardrop lobe.
Fasten off. Leave 20 cm tail.
Tail Join Piece
Yarn: green
R1: 6 sc in MR (6)
R2: sc around (6)
R3: (1 sc, inc) x3 (9)
Fasten off. Leave 20 cm tail.
Sprout / Spout
Yarn: green
R1: 4 sc in MR (4)
R2-R4: sc around (4)
Make 2 small bends by lightly stuffing only the base and curving the tips during sewing.
Fasten off. Leave 15 cm tail.
Cheek Patch (Make 1)
Yarn: pale pink
R1: 6 sc in MR (6)
R2: inc x6 (12)
Sl st to finish.
Fasten off. Leave 12 cm tail.
Seed Stitches
Yarn: black
Embroider 5 to 7 short vertical seed marks across the pink-red front belly zone. Keep them below the smile line and spaced irregularly.
Smile
Yarn: black
Embroider a shallow upward curve centered between the eyes, ending before the cheek circle.
Assembly
- Sew the belly panel to the lower front of the main body.
- Mark the center front before fixing facial details.
- Place the eyes between R9 and R10, about 8 stitches apart.
- Embroider the smile one round below the eye line.
- Sew the cheek circle on one side of the face, slightly below eye level.
- Add 5 to 7 seed stitches across the pink-red lower panel.
- Attach the fins on each side at the white stripe, angled slightly downward.
- Sew the two tail lobes together at their narrow ends.
- Cover that join with the tail join piece, then sew the tail to the back center of the body.
- Attach the sprout at the top center where the green wedges meet.
The completed plush should sit low at the front and lift slightly at the tail, with the rind stripe reading as one continuous band.
7 Technical Tips
- Mark the start of every color round. A drifting round start will break the white rind band by one stitch and the misalignment will show from the front.
- Place the eyes before the final decrease sequence. On a compact whale body, even one closing round can crowd the forehead and pull the eyes too high.
- Keep the white stripe to exactly one round if using DK cotton. Two full white rounds often make the rind look too thick compared with the photographed plush.
- Limit seed embroidery to 5 to 7 stitches on this size. More than that clutters the face zone and competes with the smile.
- Pin the fins so their lower edge touches the stripe but does not sink under it. If they sit too low, the whale reads flat and the fruit line disappears.
- Stuff the front belly firmly and the back crown slightly softer. That difference keeps the face broad while letting the tail end taper cleanly.
- Join the tail lobes before sewing to the body. Trying to attach two separate lobes directly to the whale usually leaves a gap at the center seam.
Conclusion
This watermelon whale amigurumi crochet pattern depends on control more than complexity. The whale shape is simple. The rind band is not. Keep that stripe level, keep the fins small, and leave room around the face so the fruit details do not crowd the expression. Verified examples on the web skew small, quick, and beginner-friendly, but the supplied image supports a more polished cotton-look version with sharper striping and a broader shelf-sitter form. Post the finished plush to Pinterest and Instagram with #WatermelonWhalePattern. The next step is to swatch the white band against both greens before starting the body. One useful question remains: did your tail read more clearly as a whale after narrowing the join piece by one round?









