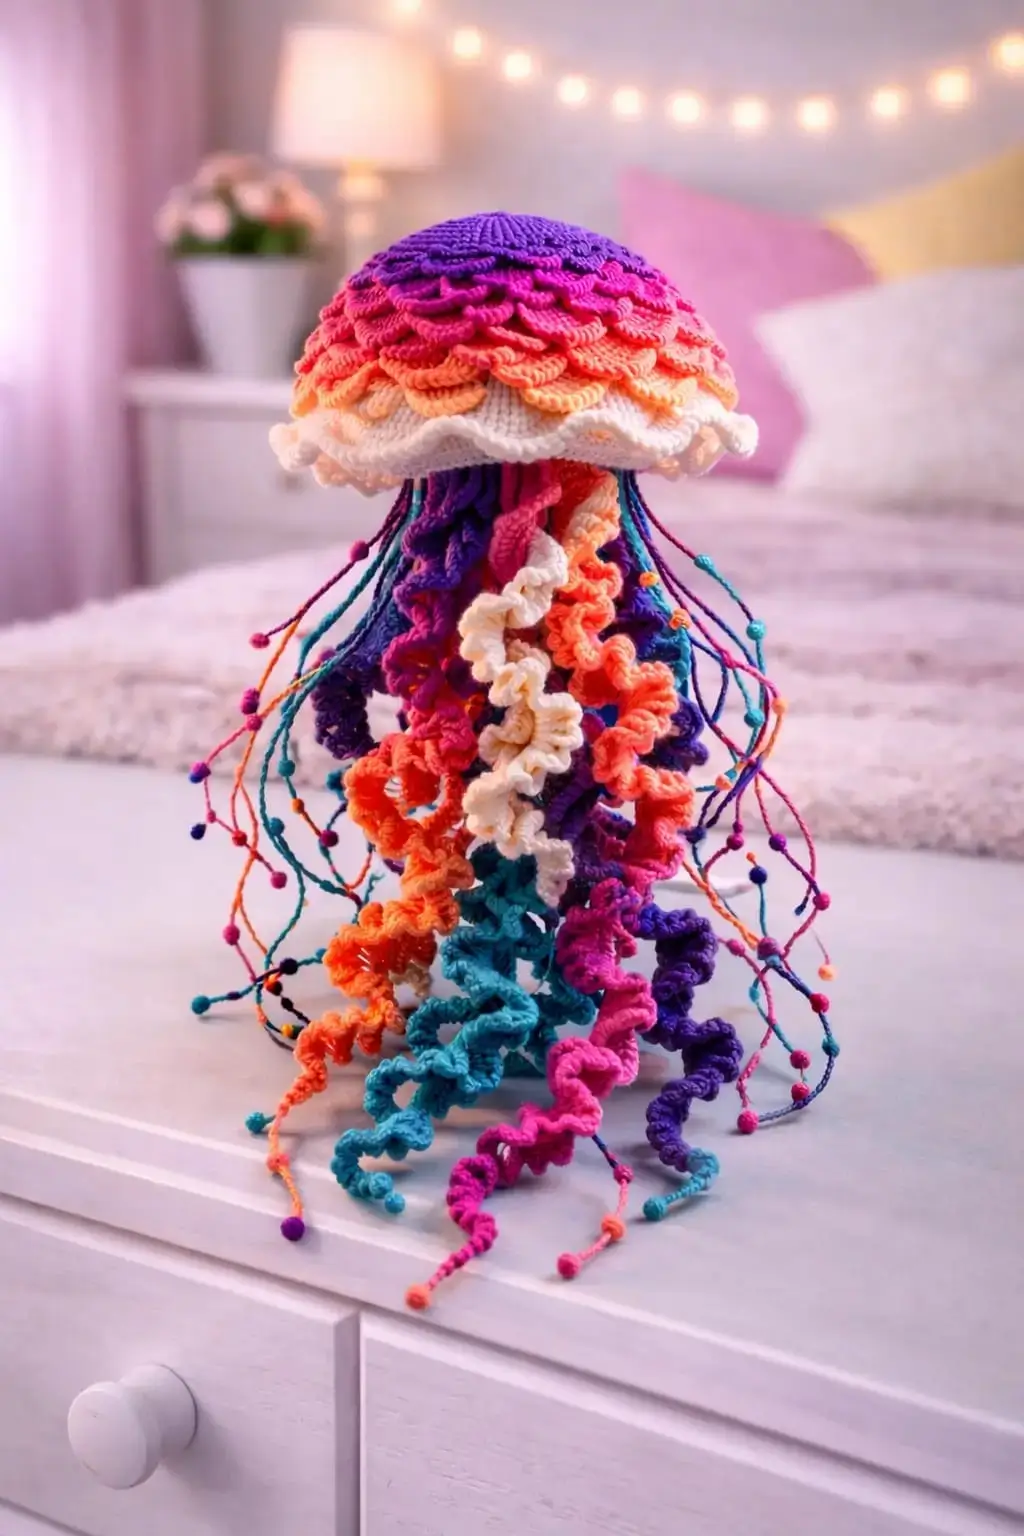
A jellyfish bell is not a ball; the jellyfish amigurumi crochet pattern has to hold a flattened dome, scalloped rim, and loose tentacles without turning into an octopus. This version uses sport/DK cotton-acrylic yarn, a 3.0 mm hook, and an advanced beginner skill set to reach about 25.5 cm tall. Make it for a hanging nursery mobile, desk display, or ocean-themed pattern set.
The Design: What Makes This Jellyfish Different
The structure starts with a 42-stitch dome rather than a narrow sphere because the bell needs width before it needs height. Published jellyfish patterns commonly expand to 42 sts before the first decrease sequence, which gives enough circumference for a broad rim and tentacle attachment zone. The layered cap is handled as surface shell rows, not color changes inside the dome, so the purple, pink, coral, and cream bands sit like overlapping scales. That choice adds texture without distorting the stuffed core.
The tentacles use three systems: thick spiral oral arms, thin filaments, and bead-like end knots. A common maker mistake is attaching every strand in one dense center clump; the jellyfish then hangs like a tassel instead of a bell-shaped sea animal. This crochet jellyfish pattern fixes that with an underside core, outer spacing marks, and a separate scalloped rim for the free jellyfish amigurumi pattern finish.
Project Info at a Glance
| Skill Level | Time | Finished Size | Hook | Best For |
|---|---|---|---|---|
| Advanced beginner | Not consistently source-stated | 25.5 cm tall × 9 cm wide | 3.0 mm | Hanging mobile, room decor, sea animal set |
Materials and Tools
Yarn
Use sport or DK cotton-acrylic for a firm bell.
- Deep purple — sport/DK — 20 g — YarnArt Jeans, Paintbox Cotton DK, or King Cole Dollymix DK
- Magenta — sport/DK — 15 g — YarnArt Jeans or Paintbox Cotton DK
- Hot pink — sport/DK — 12 g — YarnArt Jeans or Paintbox Cotton DK
- Coral orange — sport/DK — 15 g — YarnArt Jeans or Paintbox Cotton DK
- Cream white — sport/DK — 20 g — YarnArt Jeans or Paintbox Cotton DK
- Teal, blue, violet, red remnants — sport/DK — 5–10 g each — any smooth cotton-acrylic remnant
Tools
- Hook 3.0 mm
- Optional safety eyes 8–9 mm, omitted for the photo-matching version
- Polyester stuffing
- Yarn needle
- Locking stitch markers
- Sharp scissors
- Pins for assembly spacing
Abbreviations
- MR = magic ring
- sc = single crochet
- inc = 2 sc in one stitch
- dec = single crochet decrease
- sl st = slip stitch
- ch = chain
- BLO = back loop only
- FLO = front loop only
- hdc = half double crochet
- dc = double crochet
- surface sl st = slip stitch worked onto the outside fabric
Invisible dec means working through the front loops of two stitches before completing one sc; it reduces underside gaps during stuffed rounds.
Pattern — Step by Step
Continuous spiral unless noted. The dome uses a large 42-stitch plateau.
Dome Head / Bell
Yarn: deep purple to magenta to coral.
R1: 6 sc in MR (6)
R2: inc ×6 (12)
R3: (sc, inc) ×6 (18)
R4: (2 sc, inc) ×6 (24)
R5: (3 sc, inc) ×6 (30)
R6: (4 sc, inc) ×6 (36)
R7: (5 sc, inc) ×6 (42)
R8: sc around in deep purple (42)
R9: sc around in deep purple (42)
R10: sc around in magenta (42)
R11: sc around in magenta (42)
R12: sc around in coral pink (42)
R13: sc around in coral orange (42)
R14: (5 sc, dec) ×6 in cream (36)
R15: sc around in cream (36)
R16: (4 sc, dec) ×6 (30)
R17: (3 sc, dec) ×6 (24)
R18: (2 sc, dec) ×6 (18)
Stuff the dome firmly enough to hold a bell curve, not a ball.
R19: (sc, dec) ×6 (12)
R20: dec ×6 (6)
Fasten off. Leave a 20 cm tail, thread through front loops of the last 6 sts, pull closed, and weave inside the head.
Underside Body Core
Yarn: cream white.
R1: 6 sc in MR (6)
R2: inc ×6 (12)
R3: (sc, inc) ×6 (18)
R4: sc around (18)
R5: sc around (18)
R6: (sc, dec) ×6 (12)
Stuff lightly; this core anchors the oral arms under the bell.
R7: dec ×6 (6)
Fasten off. Leave a 30 cm tail for sewing to the lower center of the dome.
Front Spiral Oral Arms — Make 2
Yarn: coral orange and cream.
Ch 44.
Row 1: 3 sc in 2nd ch from hook and in each ch across (129)
The curl should coil by itself. Do not block it flat.
Fasten off. Leave a 25 cm tail.
Back Spiral Oral Arms — Make 2
Yarn: teal and hot pink.
Ch 50.
Row 1: 3 sc in 2nd ch from hook and in each ch across (147)
Make these 6 chains longer than the front arms so the silhouette staggers.
Fasten off. Leave a 25 cm tail.
Side Bell Wings — Make 2
Yarn: cream white.
R1: 6 sc in MR (6)
R2: inc ×6 (12)
R3: (sc, inc) ×6 (18)
R4: sc around (18)
Flatten the circle.
R5: sc through both layers across the folded edge (9)
Fasten off. Leave a 20 cm tail. Sew one wing at each side of the cream rim so it reads as a small side flare, not an ear.
Layered Bell Scales
Yarn: deep purple, magenta, hot pink, coral orange, cream.
Work on the outside of the finished dome.
Layer 1, deep purple: Surface sl st around R8, spacing 42 anchor sts (42). Then work [skip 2 sts, 5 dc in next st, skip 2 sts, sl st in next st] ×7 (7 shells).
Layer 2, magenta: Surface sl st around R10, spacing 42 anchor sts (42). Then work [skip 2 sts, 5 dc in next st, skip 2 sts, sl st in next st] ×7 (7 shells).
Layer 3, hot pink: Surface sl st around R11, spacing 42 anchor sts (42). Then work [skip 2 sts, 5 dc in next st, skip 2 sts, sl st in next st] ×7 (7 shells).
Layer 4, coral orange: Surface sl st around R12, spacing 42 anchor sts (42). Then work [skip 2 sts, 5 dc in next st, skip 2 sts, sl st in next st] ×7 (7 shells).
Layer 5, cream lower skirt: Surface sl st around R15, spacing 36 anchor sts (36). Then work [skip 2 sts, 5 dc in next st, skip 2 sts, sl st in next st] ×6 (6 shells).
Fasten off each layer and bury tails under nearby shells.
Outer Fine Filaments — Make 12
Yarn: teal, violet, magenta, orange, blue, red.
Make 6 short filaments: Ch 56, sl st in 2nd ch from hook and each ch across (55).
Make 6 long filaments: Ch 64, sl st in 2nd ch from hook and each ch across (63).
Attach short and long strands alternately around the lower rim. The outer ring should look sparse, not bundled.
Fasten off each with a 15 cm tail.
Cheek Patches — Make 2
Yarn: hot pink.
R1: 6 sc in MR (6)
R2: inc ×6 (12)
Sl st to first st (12)
Fasten off. Leave a 15 cm tail. For the photo-matching version, keep these off the face and sew them as tiny hidden color spots under the front rim. For a kawaii face version, sew them below optional safety eyes.
Beaded End Knots
Yarn: mixed remnants.
Cut twenty 12 cm yarn lengths. Tie two tight overhand knots at one end of each filament, 4–6 mm from the tip. Trim the loose ends to 5 mm. For larger bead knots, wrap the yarn around the filament once before the second knot.
Optional Hanging Loop
Yarn: cream white.
Ch 24.
Row 1: sl st in 2nd ch from hook and each ch across (23).
Fasten off. Leave both tails for sewing to the top center of the dome.
Assembly
- Place the dome head upside down and mark six equal points around the lower cream area.
- Sew the underside body core to the center bottom of the dome, using the 30 cm tail.
- Attach the two front spiral oral arms to the front half of the body core.
- Attach the two back spiral oral arms behind the front pair, 1 cm farther from the center.
- Pin the side bell wings at the left and right edges of the cream rim, then sew them flat.
- Add the outer fine filaments around the rim, alternating short and long strands.
- Tie or sew each filament tail through the underside fabric twice so it does not pull free.
- Add cheek patches only if a face version is being made; keep them under the rim for the no-face version.
- Add beaded end knots to selected filament tips after all strands are attached.
- Sew the optional hanging loop to the top center and test the balance before trimming tails.
The finished jellyfish has a closed stuffed bell, a separate underside anchor, five shell-scale layers, and mixed tentacle lengths.
7 Technical Tips
- Mark the first stitch of every dome round; the failure mode is a shifted decrease line that pulls the bell into a spiral cone. Move the marker after each round, not every few rounds.
- Keep stuffing density medium-firm at R18; the failure mode is a spherical head when the dome is packed too hard. The top should resist finger pressure while the lower cream rim stays slightly flat.
- Use invisible dec on R16–R20; the failure mode is six visible holes around the underside. Front-loop decreases reduce gaps where the body core sits.
- Decide eye placement before R16 if adding a face; the tested range for similar jellyfish patterns is 8–9 mm eyes. For this photo version, leave the face blank and put color detail into the bell.
- For long filaments, keep each sl-st chain at 55 or 63 returned stitches; the failure mode is uneven drag on one side of the rim. Place heavy colors opposite each other for balance.
- Pin the scale layers before sewing in tails; the failure mode is a twisted rainbow band that climbs diagonally around the dome. Seven shells over 42 anchor stitches keeps each layer level.
- Weave each tentacle tail through at least two fabric paths; the failure mode is a strand pulling out when the jellyfish is handled. A 15–25 cm starting tail gives enough length for locking the attachment.
Conclusion
This rainbow jellyfish is built around one technical problem: the bell has to stay broad while the tentacles stay light. Keep the 42-stitch dome, attach the underside core before the outer filaments, and treat the shell rows as surface texture rather than body shaping. That sequence gives the jellyfish amigurumi crochet pattern a stable cap, visible gradient, and separated strands. Your next step is to test one full filament set before cutting every color, because strand length changes the balance. Pin the finished jellyfish to Pinterest, share the underside view on Instagram, and tag it with #RainbowJellyfish. Which tentacle color should sit at the front: teal, coral, or cream?









