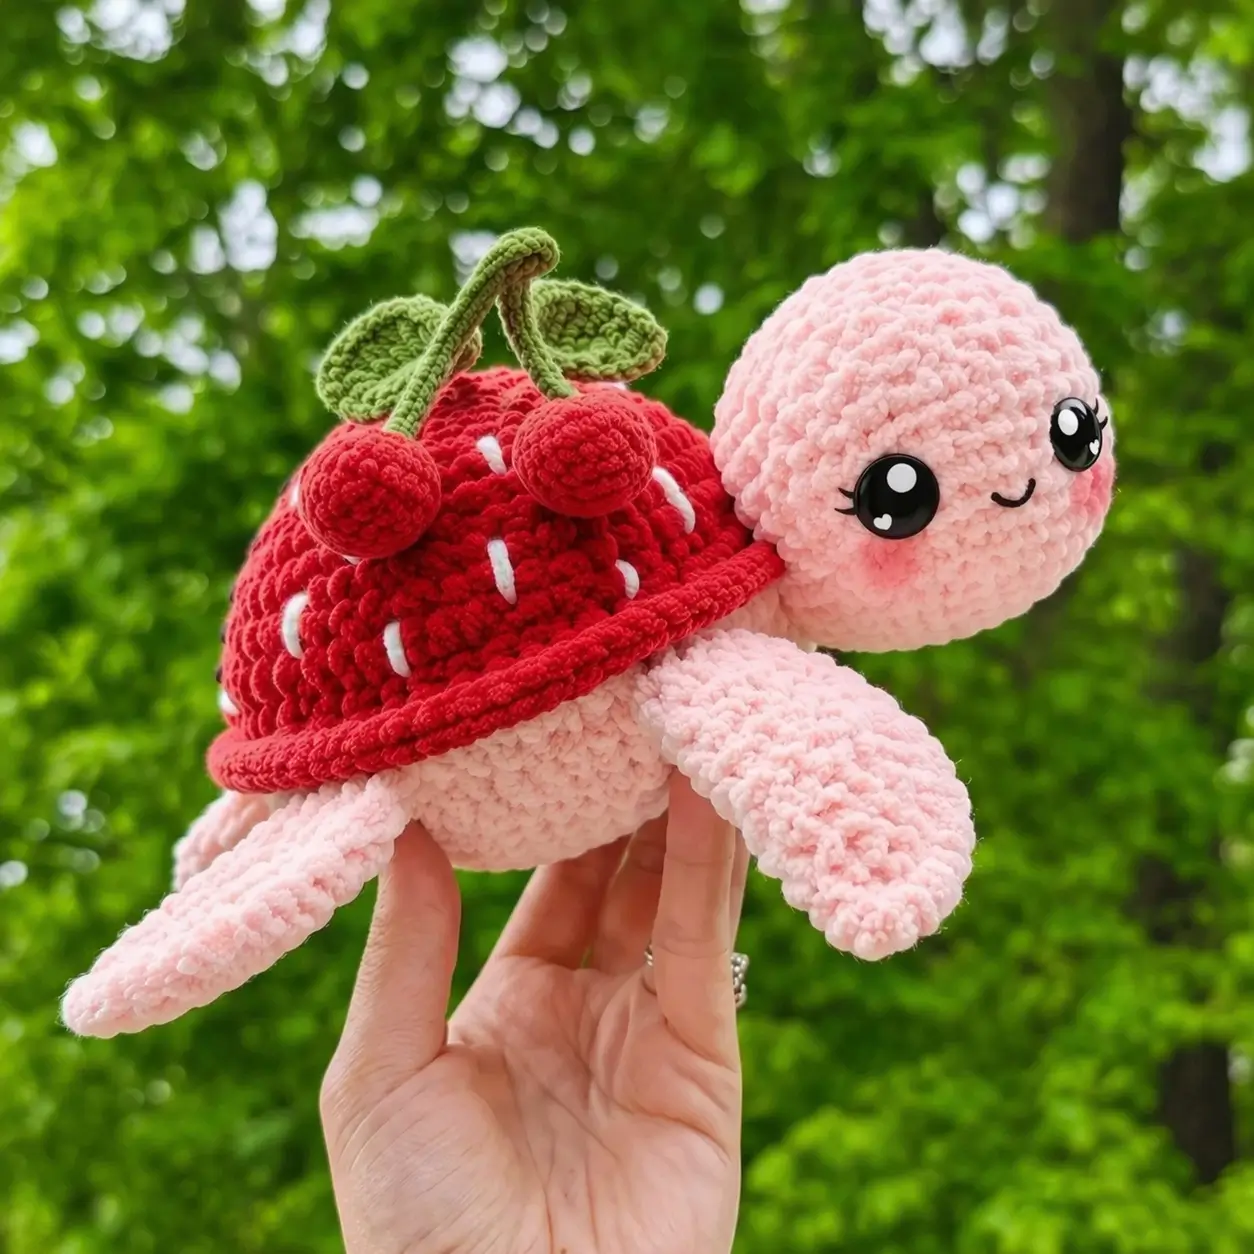
A strawberry shell changes the engineering of a turtle immediately: the rim has to flare far enough to read as fruit without covering the flippers. This strawberry turtle amigurumi crochet pattern is built for plush yarn, a medium-size body, and a display-friendly finish with cherry trim. The sample in the photo reads as intermediate because the shell, topper, and face placement all need proportion control. Verified small-format references commonly use DK to bulky yarn, 3.5–4 mm hooks, and 8 mm eyes.
The Design: What Makes Strawberry Turtle Different
You need three structural choices here, not one. First, the head has to sit forward and slightly low, because a tall neck pushes the shell backward and breaks the berry illusion. Second, the shell cannot be a plain dome. It needs a lower crown and a flared rim so the red section reads as strawberry flesh rather than a standard turtle carapace. Third, the decorative top has to stay light. Heavy cherries pull the shell off-center on a plush body.
That is where most makers miss this character type. They treat it like a normal sea turtle with fruit colors. The result looks like a turtle wearing a hat. A stronger strawberry turtle crochet pattern widens the shell edge, spaces the seed embroidery vertically, and keeps the face clean. In search terms, that is what separates a simple fruit turtle crochet pattern from a recognizable strawberry turtle amigurumi. Competition pages rarely explain that proportion problem.
Project Info at a Glance
| Skill Level | Time | Finished Size | Hook | Best For |
|---|---|---|---|---|
| Intermediate | 4–6 hours | 18–22 cm photo-style plush; verified small versions 10–12 cm in DK | 4.5 mm for this plush sample; verified 3.5 mm for DK reference | Display plush, spring market table, themed gift |
Verified reference size/hook data comes from published strawberry turtle patterns; this article scales the design up to match the photo’s plush look.
Materials and Tools
Yarn
- Pale pink — plush/velvet, bulky to super bulky feel — about 90 g — Himalayan Dolphin Baby, Premier Parfait Chunky, or similar
- Red — plush/velvet — about 70 g — same yarn family for shell
- Green — plush or smooth worsted for stems/leaves — about 15 g
- White — smooth yarn for seed embroidery — under 5 g
- Black — smooth yarn for smile/eyelash embroidery — under 3 g
- Pink — optional blush — under 3 g
Tools
- Hook 4.5 mm for plush body and shell
- Safety eyes 16 mm for the enlarged photo-style sample
- Stuffing
- Tapestry needle
- Stitch markers
- Sewing pins
- Small scissors
Published strawberry turtle patterns commonly use 3.5 mm with DK yarn and 8 mm eyes for compact versions, or 4 mm with bulky yarn for minis; the larger eye and hook here are scaled to the image rather than copied from a single source.
Abbreviations
MR = magic ring, sc = single crochet, inc = increase, dec = invisible decrease, sl st = slip stitch, ch = chain, BLO = back loop only, FLO = front loop only, hdc = half double crochet, dc = double crochet.
Use invisible decrease for all closing rounds on the head, body, and cherries. It reduces gaps that show stuffing through plush yarn.
Pattern — Step by Step
Continuous spiral unless noted.
Head (Make 1)
Yarn: pale pink — Source: Standard amigurumi math adapted from photo proportions
R1: 6 sc in MR (6)
R2: inc x6 (12)
R3: (1 sc, inc) x6 (18)
R4: (2 sc, inc) x6 (24)
R5: (3 sc, inc) x6 (30)
R6: (4 sc, inc) x6 (36)
R7: sc around (36)
R8: sc around (36)
R9: sc around (36)
R10: sc around (36)
Insert 16 mm eyes between R8 and R9, 10 stitches apart. Embroider eyelashes before backing washers if needed.
R11: (4 sc, dec) x6 (30)
R12: (3 sc, dec) x6 (24)
R13: (2 sc, dec) x6 (18)
Stuff firmly, especially the cheeks and front muzzle area.
R14: (1 sc, dec) x6 (12)
R15: dec x6 (6)
Fasten off. Leave 30 cm tail.
Body (Make 1)
Yarn: pale pink — Source: Standard amigurumi math adapted from photo proportions
R1: 6 sc in MR (6)
R2: inc x6 (12)
R3: (1 sc, inc) x6 (18)
R4: (2 sc, inc) x6 (24)
R5: (3 sc, inc) x6 (30)
R6: (4 sc, inc) x6 (36)
R7: sc around (36)
R8: sc around (36)
R9: sc around (36)
R10: sc around (36)
R11: BLO sc around (36)
This round creates the shell seating line.
R12: (4 sc, dec) x6 (30)
R13: (3 sc, dec) x6 (24)
R14: (2 sc, dec) x6 (18)
Stuff the back heavily, but keep the top seam line level.
R15: (1 sc, dec) x6 (12)
R16: dec x6 (6)
Fasten off. Leave 25 cm tail.
Front Flippers (Make 2)
Yarn: pale pink — Source: Standard amigurumi math adapted from photo proportions
R1: 6 sc in MR (6)
R2: inc x6 (12)
R3: (1 sc, inc) x6 (18)
R4: sc around (18)
R5: sc around (18)
R6: (1 sc, dec) x6 (12)
R7: sc around (12)
R8: sc around (12)
R9: sc around (12)
R10: sc around (12)
Light stuffing only in the shoulder end.
Flatten. Fasten off. Leave 20 cm tail.
Back Flippers (Make 2)
Yarn: pale pink — Source: Standard amigurumi math adapted from photo proportions
R1: 6 sc in MR (6)
R2: inc x6 (12)
R3: sc around (12)
R4: sc around (12)
R5: sc around (12)
R6: sc around (12)
Flatten. Fasten off. Leave 18 cm tail.
Tail (Make 1)
Yarn: pale pink — Source: Standard amigurumi math adapted from photo proportions
R1: 6 sc in MR (6)
R2: sc around (6)
R3: sc around (6)
Flatten lightly. Fasten off. Leave 12 cm tail.
Strawberry Shell Cap (Make 1)
Yarn: red — Source: Standard amigurumi math adapted from photo proportions
R1: 6 sc in MR (6)
R2: inc x6 (12)
R3: (1 sc, inc) x6 (18)
R4: (2 sc, inc) x6 (24)
R5: (3 sc, inc) x6 (30)
R6: (4 sc, inc) x6 (36)
R7: sc around (36)
R8: sc around (36)
R9: BLO sc around (36)
R10: sc around (36)
R11: FLO (5 sc, inc) x6 (42)
R12: sc around (42)
R13: sc around (42)
Fasten off. Leave 35 cm tail.
Shell Rim Cord (Make 1)
Yarn: red — Source: Standard amigurumi finishing adapted from photo
Ch 56.
Row 1: Starting in second ch from hook, sl st across (55)
Fasten off. Leave 20 cm tail.
White Seed Embroidery
Yarn: white — Source: Photo-based styling + standard embroidery placement
Cut 10 to 12 short strands.
Embroider vertical satin-like seed dashes across the shell in staggered columns.
Keep seeds off the brim edge and off the cherry placement area.
Cheek Patches (Make 2)
Yarn: blush pink — Source: Standard amigurumi math
R1: 6 sc in MR (6)
R2: inc x6 (12)
Fasten off. Leave 10 cm tail.
Cherries (Make 2)
Yarn: red — Source: Standard amigurumi math adapted from photo accessory
R1: 6 sc in MR (6)
R2: inc x6 (12)
R3: sc around (12)
R4: sc around (12)
R5: dec x6 (6)
Stuff lightly before closing.
Fasten off. Leave 20 cm tail.
Cherry Stems (Make 2)
Yarn: green — Source: Standard crochet shaping
Ch 10.
Row 1: Starting in second ch from hook, sl st across (9)
Fasten off. Leave 12 cm tail at each end.
Strawberry Top Stem (Make 1)
Yarn: green — Source: Standard crochet shaping adapted from photo
Ch 14.
Row 1: Starting in second ch from hook, sl st across (13)
Fasten off. Leave 15 cm tail.
Leaves (Make 3)
Yarn: green — Source: Standard leaf shaping adapted from photo
Ch 6.
Work on one side of chain: sl st, sc, hdc, dc, hdc.
Rotate to opposite side of foundation: hdc, dc, hdc, sc, sl st.
Fasten off. Leave 15 cm tail.
Assembly
- Sew the head to the front third of the body, slightly angled upward but not vertical.
- Attach the front flippers to rounds 7–10 of the body, one stitch row below the shell seating line.
- Sew the back flippers near the rear curve of the body, angled slightly outward.
- Attach the tail centered between the back flippers.
- Sew the strawberry shell cap over the top of the body, matching R9 of the shell to the BLO seat on the body.
- Stitch the shell rim cord around the outer lower edge of the shell to create the thick brim seen in the photo.
- Add the white seed embroidery in staggered vertical marks across the red shell.
- Sew the cheek patches below the eyes; embroider the smile centered between them with black yarn.
- Join each cherry to a stem, then anchor both cherries to the top front of the shell; add the longer top stem between them.
- Sew the three leaves around the stem cluster, shaping them so two angle outward and one sits behind.
The finished plush should rest level on the body and flippers, with the shell reading as a strawberry cap rather than a separate hat.
7 Technical Tips
- Use a marker at the first stitch of every round. The failure mode here is shell drift: one missed stitch shifts the brim seam and the seed embroidery no longer lines up with the turtle’s centerline.
- Keep head stuffing firmer than body stuffing. A soft head collapses behind the safety eyes, and the face loses the rounded front that makes the turtle readable from profile.
- Work invisible decreases tightly on rounds 11–15 of the head. Loose decreases on plush yarn open white gaps, and those gaps show stuffing most clearly around the jaw.
- Install the eyes before the head drops below 24 stitches. Waiting too long forces the washers into a tighter opening and often tilts the eyes upward or too close together.
- Do not overstuff the shell cap. The exact failure is mushrooming: the shell crown rises too high, the brim tips up, and the strawberry shape disappears.
- Pin all shell accessories before sewing. Two cherries placed more than 2 cm off center can pull the shell visually to one side even when the actual weight difference is small.
- Weave tails into structural seams, not random stuffing paths. On plush yarn, loose tail weaving works free faster, especially on flippers that are handled during display or play.
Conclusion
This version of the strawberry turtle amigurumi crochet pattern works because the proportions do specific jobs: the head stays low, the body stays broad, and the shell flares before it domes. That sequence matters more than the yarn brand. Next step: make the body and shell first, pin them together dry, and confirm the brim clears both front flippers before sewing. When the plush is finished, share one overhead photo for Pinterest and one side profile for Instagram so the shell silhouette reads clearly. Use #StrawberryTurtlePattern. One detail is worth comparing across builds: did you place the cherries closer to the shell center or toward the forehead line?









