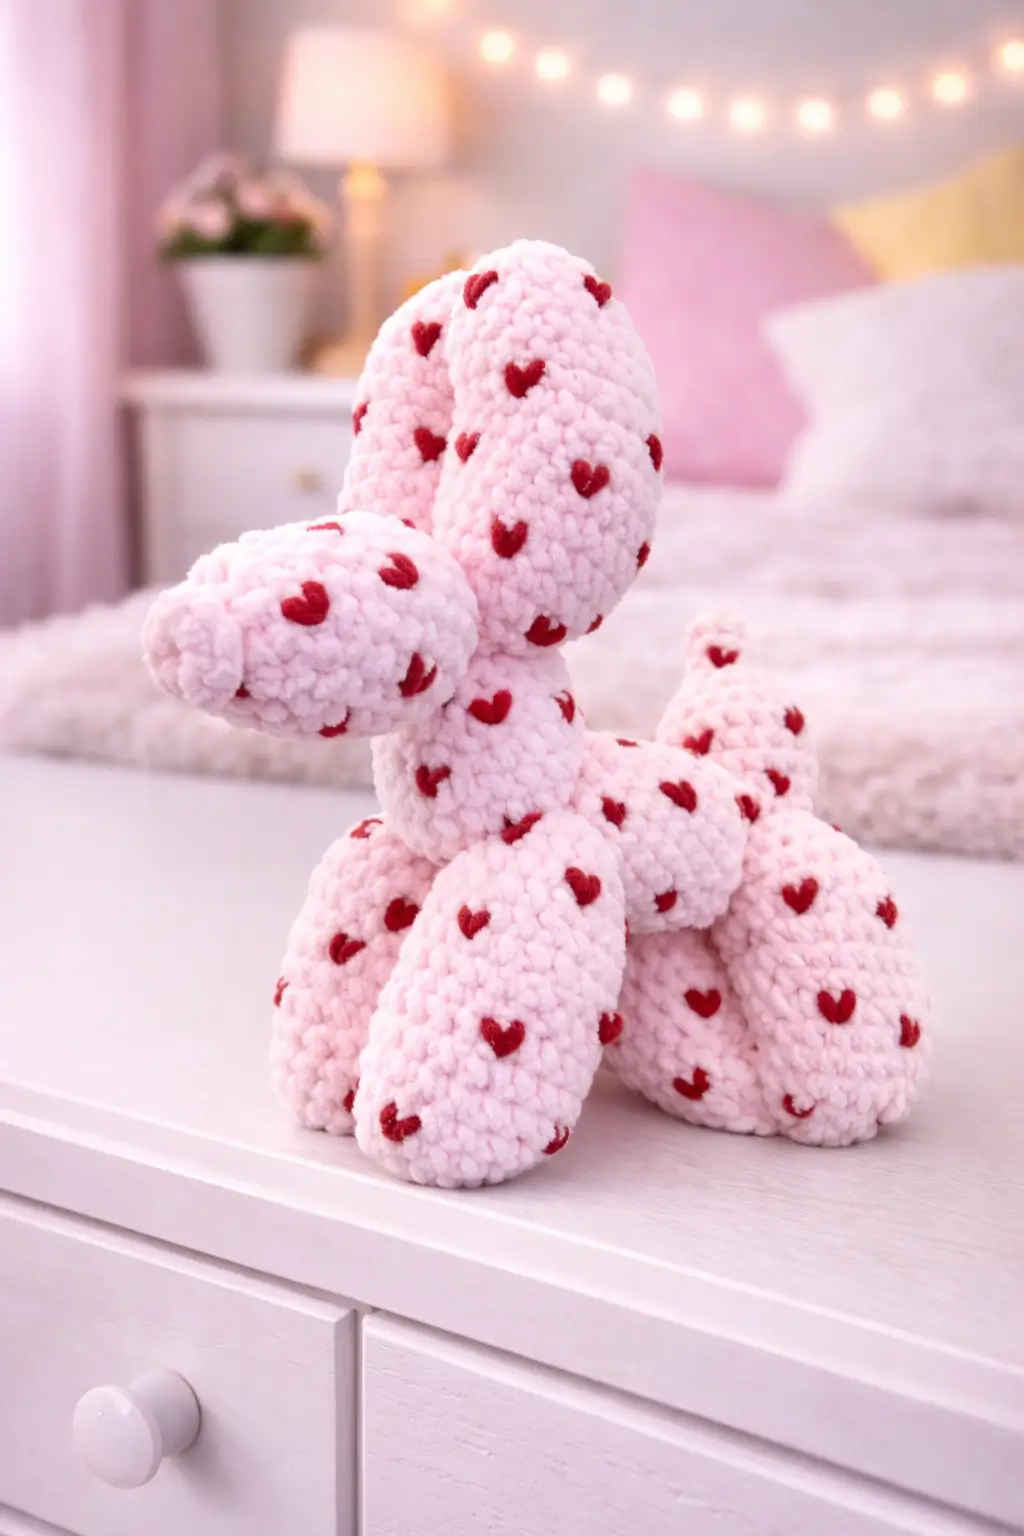
A balloon dog only works when the neck, ears, and legs stay tubular after assembly. This balloon dog amigurumi crochet pattern gives you verified size, hook baseline, and a full segmented build adapted to the plush heart-covered dog in the photo. You get the head, muzzle, ears, neck, body, four legs, tail, and heart appliqué placement plan. The practical gain is clear. One pattern shape can produce multiple colorways fast.
The Design: What Makes Heart Balloon Dog Different
This design depends on proportion more than decoration. A crochet puppy can absorb small shaping errors and still read as a dog. A balloon dog cannot. Every segment is exposed. The body has to look like inflated tubes linked together, which means each section needs firm stuffing and clean tapering at the joints. That is the first structural decision.
The second decision is the surface treatment. The photographed version uses plush pink yarn with scattered red hearts instead of a plain party-balloon finish. That changes the visual density without changing the silhouette. Good choice. A common mistake with a balloon animal dog crochet pattern is making the ears too short. Then the figure starts reading as a llama or deer from profile. Another frequent error is over-tightening the neck join, which bends the head downward and kills the upright balloon-animal posture.
Project Information at a Glance
| Skill Level | Time | Finished Size | Hook | Best For |
|---|---|---|---|---|
| Advanced beginner to intermediate | 2–3 hours | 18–20 cm | 4.5 mm baseline | Desk decor, gifts, Valentine market stock |
Materials and Tools
Yarn
- Light pink plush yarn — plush chenille adaptation — about 100g — Himalaya Dolphin Baby or similar chenille
- Red yarn — scrap amount — for embroidered or stitched heart spots
- Black yarn — scrap amount — optional for tiny nose or smile if desired
Tools
- 4.5 mm crochet hook — verified published baseline for balloon dog builds in standard yarn
- Fiberfill stuffing
- Yarn needle
- Stitch markers
- Pins
- Small scissors
Crochet Abbreviations
MR / sc / inc / dec / sl st / ch / BLO / FLO
Use invisible decrease on the closing rounds only; on tubular balloon-animal sections, standard decreases leave sharp dents that interrupt the inflated look.
Step-by-Step Heart Balloon Dog Crochet Pattern
Work in continuous spiral rounds unless noted.
Head (Make 1)
Yarn: light pink
Source: Standard amigurumi math
R1: 6 sc in MR (6)
R2: inc x6 (12)
R3: (sc, inc) x6 (18)
R4: (2 sc, inc) x6 (24)
R5: (3 sc, inc) x6 (30)
R6: sc around (30)
R7: sc around (30)
R8: sc around (30)
R9: (3 sc, dec) x6 (24)
R10: (2 sc, dec) x6 (18)
Stuff firmly. The head must hold a rounded balloon shape from all angles.
R11: (sc, dec) x6 (12)
R12: dec x6 (6)
Fasten off. Leave a 25 cm tail.
Muzzle / Nose Tube (Make 1)
Yarn: light pink
Source: Standard amigurumi math
R1: 6 sc in MR (6)
R2: sc around (6)
R3: sc around (6)
R4: sc around (6)
R5: sc around (6)
R6: (sc, inc) x3 (9)
R7: sc around (9)
Stuff lightly, mainly toward the base.
Fasten off. Leave a 20 cm tail.
Neck (Make 1)
Yarn: light pink
Source: Standard amigurumi math
R1: 6 sc in MR (6)
R2: (sc, inc) x3 (9)
R3: sc around (9)
R4: sc around (9)
R5: sc around (9)
R6: sc around (9)
Stuff very firmly. A soft neck collapses after assembly.
Fasten off. Leave a 25 cm tail.
Body Tube (Make 1)
Yarn: light pink
Source: Standard amigurumi math
R1: 6 sc in MR (6)
R2: inc x6 (12)
R3: sc around (12)
R4: sc around (12)
R5: sc around (12)
R6: sc around (12)
R7: sc around (12)
R8: sc around (12)
R9: sc around (12)
R10: sc around (12)
R11: sc around (12)
R12: sc around (12)
Stuff firmly all the way through. This section carries the whole silhouette.
Fasten off. Leave a 30 cm tail.
Front Legs (Make 2)
Yarn: light pink
Source: Standard amigurumi math
R1: 6 sc in MR (6)
R2: inc x6 (12)
R3: sc around (12)
R4: sc around (12)
R5: sc around (12)
R6: (4 sc, dec) x2 (10)
R7: sc around (10)
Stuff very firmly. Balloon-dog legs must look inflated, not floppy.
Fasten off. Leave a 25 cm tail.
Back Legs (Make 2)
Yarn: light pink
Source: Standard amigurumi math
R1: 6 sc in MR (6)
R2: inc x6 (12)
R3: sc around (12)
R4: sc around (12)
R5: sc around (12)
R6: (4 sc, dec) x2 (10)
R7: sc around (10)
Match the stuffing density of the front legs so the dog stands level.
Fasten off. Leave a 25 cm tail.
Ears (Make 2)
Yarn: light pink
Source: Standard amigurumi math informed by separate-ear balloon dog construction references
R1: 6 sc in MR (6)
R2: (sc, inc) x3 (9)
R3: sc around (9)
R4: sc around (9)
R5: sc around (9)
R6: sc around (9)
R7: sc around (9)
R8: sc around (9)
R9: sc around (9)
R10: sc around (9)
Stuff firmly but leave the last 1 cm slightly softer for easier positioning.
Fasten off. Leave a 30 cm tail.
Tail (Make 1)
Yarn: light pink
Source: Standard amigurumi math
R1: 4 sc in MR (4)
R2: sc around (4)
R3: sc around (4)
R4: sc around (4)
R5: (sc, inc) x2 (6)
R6: sc around (6)
Stuff lightly at the base only.
Fasten off. Leave a 20 cm tail.
Heart Spots (Make 18–24 or embroider)
Yarn: red
Source: Standard amigurumi math
Option 1: embroider tiny heart shapes directly with red yarn.
Option 2: ch 4, work 2 dc in 3rd ch from hook, 2 dc in next ch, sl st to base to create a micro heart.
Fasten off. Leave short tails for sewing.
Scatter the hearts irregularly across the head, ears, neck, body, legs, and tail.
Assembly Instructions
- Sew the muzzle to the front of the head, centered low enough to preserve the balloon-dog profile.
- Attach the neck to the bottom center of the head and reinforce the join with a second pass of sewing.
- Sew the neck to the front third of the body tube so the head projects slightly forward.
- Attach the front legs close together under the front half of the body.
- Sew the back legs under the rear half of the body, matching the front-leg spacing for balance.
- Position the ears vertically behind the head and angle them slightly inward so they read as balloon loops, not floppy dog ears.
- Attach the tail to the back center of the body and tip it upward slightly.
- Set the whole dog on a flat surface and adjust all four legs before tightening the final stitches.
- Add 18 to 24 red heart spots across the full figure with uneven spacing.
- Check the profile from nose to tail, then add a tiny nose or leave the face blank to match the minimalist photo style.
The heart balloon dog is complete.
7 Technical Tips for Cleaner Amigurumi
- Stuff every tube firmer than you think. Soft stuffing makes the neck buckle and the legs bow inward within a few hours of standing.
- Mark the front and back of the body tube. A body rotated even 90 degrees can throw off the leg spacing and make the dog lean.
- Use invisible decreases only on the taper rounds. Regular decreases create pinched segments that stop the plush from looking like an inflated balloon.
- Match leg length carefully. A difference of even 5 mm between front legs makes the finished dog rock on a hard surface.
- Reinforce the neck join twice. The longest unsupported section in this design is the head-to-body line, and it loosens first under handling.
- Keep the ears long enough to clear the head. Short ears collapse into the silhouette and make the character look less like a balloon animal.
- Add heart spots after full assembly. Sewing them on earlier makes it harder to judge spacing once the dog is posed upright.
Conclusion
This balloon dog amigurumi crochet pattern works because the shaping stays disciplined and tubular from nose to tail. Use the verified 4.5 mm baseline hook, roughly 18 to 20 cm finished size, and the segmented balloon-animal construction as your guide, then adapt the yarn choice to match the plush look in the photo. Post the finished piece on Pinterest and Instagram with #HeartBalloonDog so the side profile and heart spacing both show clearly. One design choice matters for the next version: are you keeping the red hearts, or turning the second dog into a plain pastel balloon-animal pair?









