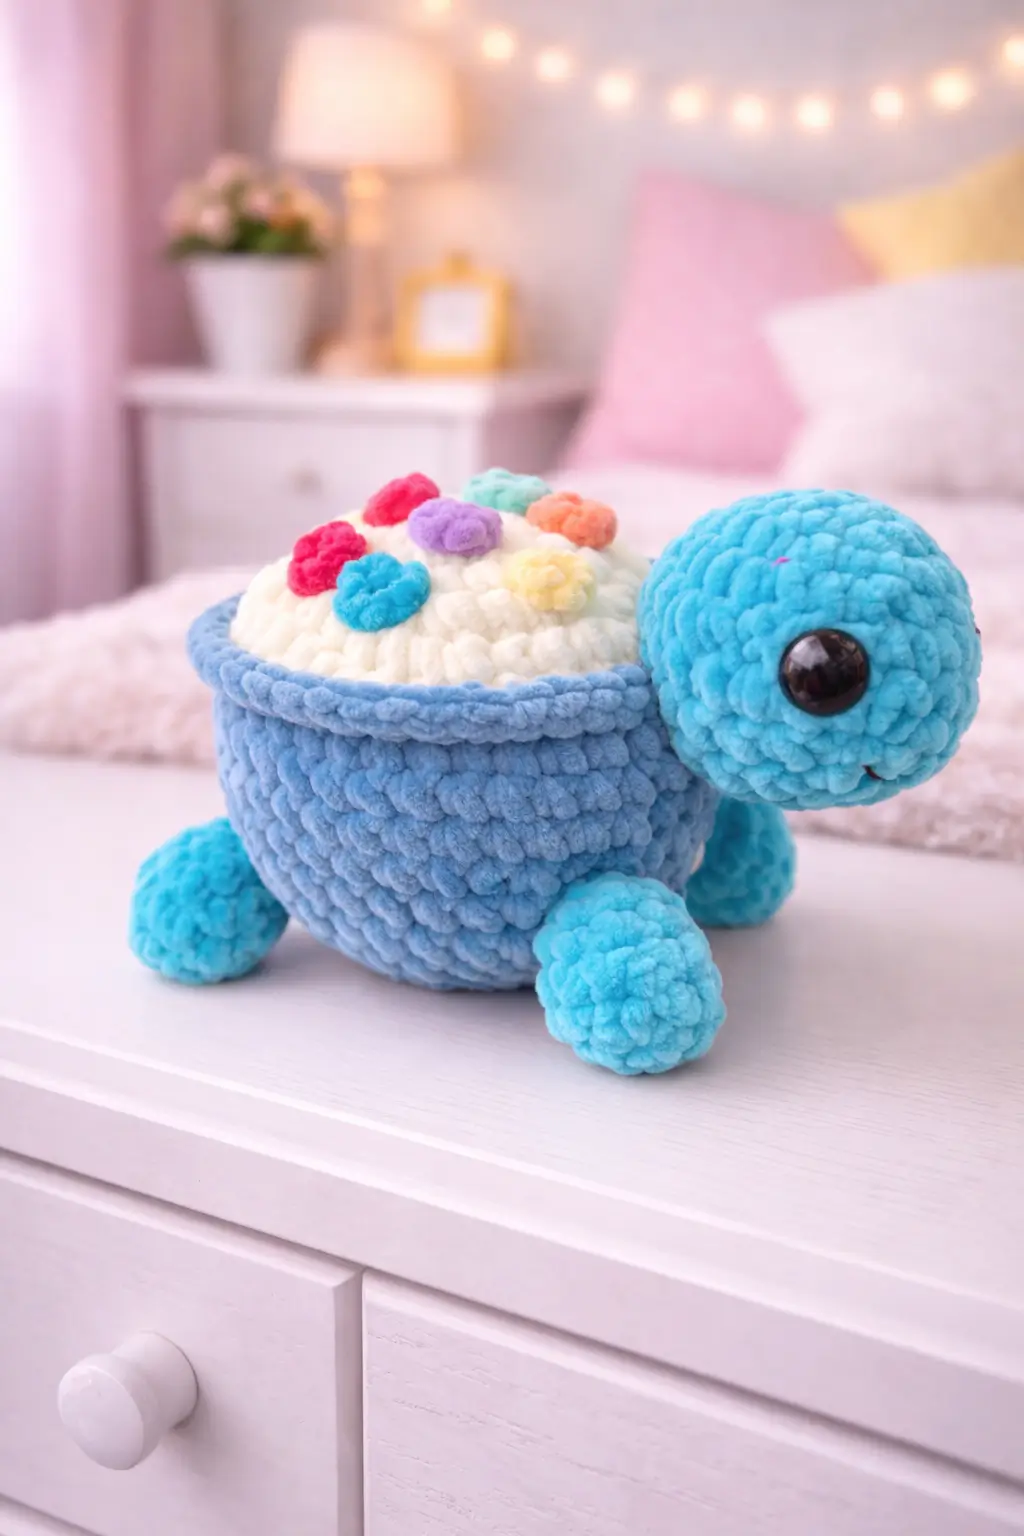
A turtle with a cupcake shell only works when the wrapper reads as structure, not decoration. This cupcake turtle crochet pattern gives you verified size, hook, yarn type, and a full round-by-round build for a compact chenille plush. You get the head, body cup, four legs, frosting dome, and sprinkle toppers. The practical payoff is clear. The shell design hides joins better than a standard turtle dome while staying easy to batch-make.
The Design: What Makes Cupcake Turtle Different
This turtle is not built like a normal sea turtle with a decorative shell on top. The body itself has to read like a cupcake wrapper. That changes the shaping sequence. A typical turtle amigurumi crochet pattern uses a rounded upper shell and a flatter lower plate, but this design needs a straighter side wall before the frosting dome goes on. Otherwise the turtle looks like a turtle wearing a hat, not a turtle baked into a cupcake.
The second design choice is the frosting silhouette. The white dome has to stay soft and slightly mounded, not tall and peaked. Too much stuffing ruins the cupcake read. Too little, and the top caves around the sprinkle appliqués. A common failure mode in chenille turtle plush builds is over-rounding the base so the wrapper loses its vertical line. That weakens the whole dessert concept. Here, the compact legs keep the figure grounded while the rim edge separates wrapper from frosting. That one edge does a lot of work.
Project Information at a Glance
| Skill Level | Time | Finished Size | Hook | Best For |
|---|---|---|---|---|
| Advanced beginner | 1.5–2 hours | 12–15 cm | 4.5 mm | Markets, desk decor, dessert-themed gifts |
Materials and Tools
Yarn
- Sky blue chenille yarn — super bulky / size 6 — 65g — Premier Parfait Chunky or similar plush chenille
- White chenille yarn — super bulky / size 6 — 35g — for frosting dome
- Pastel pink chenille yarn — scrap amount — for sprinkle puffs
- Pastel purple chenille yarn — scrap amount — for sprinkle puffs
- Pastel yellow chenille yarn — scrap amount — for sprinkle puffs
- Pastel mint chenille yarn — scrap amount — for sprinkle puffs
- Pastel peach chenille yarn — scrap amount — for sprinkle puffs
- Black yarn — scrap amount — for optional mouth embroidery
Tools
- 4.5 mm crochet hook
- 16 mm safety eyes
- Fiberfill stuffing
- Yarn needle
- Stitch markers
- Pins
- Small scissors
Crochet Abbreviations
MR / sc / inc / dec / sl st / ch / BLO / FLO
Use invisible decrease on the closing rounds only. Plush yarn opens under pressure, and a standard decrease leaves visible slits around the head and frosting edge.
Step-by-Step Cupcake Turtle Crochet Pattern
Work in continuous spiral rounds unless noted.
Head (Make 1)
Yarn: sky blue
Source: Standard amigurumi math
R1: 6 sc in MR (6)
R2: inc x6 (12)
R3: (sc, inc) x6 (18)
R4: (2 sc, inc) x6 (24)
R5: (3 sc, inc) x6 (30)
R6: sc around (30)
R7: sc around (30)
R8: sc around (30)
Insert 16 mm safety eyes between R6 and R7, about 8 stitches apart.
R9: (3 sc, dec) x6 (24)
R10: (2 sc, dec) x6 (18)
Stuff firmly. Pack the lower face first so the head keeps a clean forward shape.
R11: (sc, dec) x6 (12)
R12: dec x6 (6)
Fasten off. Leave a 25 cm tail.
Cupcake Body / Wrapper Base (Make 1)
Yarn: sky blue
Source: Standard amigurumi math
R1: 6 sc in MR (6)
R2: inc x6 (12)
R3: (sc, inc) x6 (18)
R4: (2 sc, inc) x6 (24)
R5: (3 sc, inc) x6 (30)
R6: (4 sc, inc) x6 (36)
R7: BLO sc around (36)
R8: sc around (36)
R9: sc around (36)
R10: sc around (36)
R11: (4 sc, dec) x6 (30)
Stuff lightly. The wrapper should stay shaped, not balloon outward.
Fasten off. Leave a 30 cm tail.
Front Legs (Make 2)
Yarn: sky blue
Source: Standard amigurumi math
R1: 6 sc in MR (6)
R2: inc x6 (12)
R3: sc around (12)
R4: sc around (12)
R5: (4 sc, dec) x2 (10)
Stuff the foot only. Leave the top soft for easier sewing.
Fasten off. Leave a 20 cm tail.
Back Legs (Make 2)
Yarn: sky blue
Source: Standard amigurumi math
R1: 6 sc in MR (6)
R2: inc x6 (12)
R3: sc around (12)
R4: sc around (12)
R5: sc around (12)
R6: (4 sc, dec) x2 (10)
Stuff the lower half more firmly than the upper half.
Fasten off. Leave a 20 cm tail.
Tail (Optional, Make 1)
Yarn: sky blue
Source: Standard amigurumi math
R1: 4 sc in MR (4)
R2: (sc, inc) x2 (6)
R3: sc around (6)
R4: sc around (6)
Fasten off. Leave a 12 cm tail.
Frosting Dome (Make 1)
Yarn: white
Source: Standard amigurumi math
R1: 6 sc in MR (6)
R2: inc x6 (12)
R3: (sc, inc) x6 (18)
R4: (2 sc, inc) x6 (24)
R5: (3 sc, inc) x6 (30)
R6: (4 sc, inc) x6 (36)
R7: sc around (36)
R8: sc around (36)
R9: (4 sc, dec) x6 (30)
Stuff very lightly. The dome should stay soft enough to support the sprinkle puffs without looking like a second head.
Fasten off. Leave a 30 cm tail.
Wrapper Rim Edge (Make 1)
Yarn: sky blue
Source: Standard amigurumi math
R1: ch 31
R2: starting in 2nd ch from hook, sc across (30)
R3: ch 1, turn, sc across (30)
Fasten off. Leave a 25 cm tail.
Sprinkle Puff Appliqués (Make 6)
Yarn: pastel colors
Source: Standard amigurumi math
R1: 6 sc in MR (6)
R2: (sc, inc) x3 (9)
Fasten off. Leave a 10 cm tail.
Make 2 pink, 1 purple, 1 mint, 1 peach, and 1 yellow, or vary colors as desired.
Mouth Detail (Optional)
Yarn: black
Source: Standard amigurumi math
Embroider a tiny curved smile low on the head.
Keep it under 1 cm wide. The side view already reads through eye placement.
Assembly Instructions
- Sew the head to the front upper section of the wrapper body, keeping the face slightly forward from center.
- Attach the front legs low and slightly outward so the turtle sits wide rather than tall.
- Sew the back legs farther apart than the front pair to support the weight of the frosting dome.
- Add the optional tail at the rear center if you want a clearer turtle silhouette from profile.
- Place the frosting dome on top of the wrapper body and pin it before sewing.
- Sew the wrapper rim edge around the join between the blue body and the white frosting dome.
- Position the sprinkle puff appliqués across the frosting top with uneven spacing. Do not align them in a ring.
- Tack the sprinkle puffs down with short invisible stitches so they keep their rounded shape.
- Check the turtle from both side angles and press the stuffing lightly at the wrapper base if it leans.
- Weave all tails through at least 4 cm of stuffing path inside the plush.
The cupcake turtle is complete.
7 Technical Tips for Cleaner Amigurumi
- Mark the 36-stitch wrapper round immediately. Missing one increase before R6 leaves an uneven side wall, and the frosting dome will not sit flat.
- Stuff the head firmer than the wrapper body. If both sections are equally dense, the turtle starts leaning backward once the dome is attached.
- Use invisible decrease only on the head and dome closing rounds. Standard decreases in chenille leave open cuts that show stuffing fast, especially on white yarn.
- Keep the frosting dome lightly packed. Too much fill lifts the top by more than 5 mm and makes the turtle look top-heavy.
- Pin the rim edge before sewing the last quarter. Wrapper bands drift easily, and even a 1 cm shift makes the body line look crooked from the side.
- Do not place sprinkle puffs symmetrically. Perfect spacing makes the frosting look mechanical instead of like scattered topping.
- Bury plush tails deeper than usual. Anything shorter than 4 cm can slip loose from the dome after repeated handling.
Conclusion
This cupcake turtle crochet pattern works because the structure stays disciplined while the dessert theme carries the charm. Use the verified 4.5 mm hook, size 6 chenille yarn, 16 mm eyes, and 12–15 cm target size as the baseline. Then fix stuffing density and topper placement, not the stitch math, if the first sample looks off. Post the finished plush on Pinterest and Instagram with #CupcakeTurtle so the frosting dome and wrapper edge both read in profile. One design question remains: are you keeping the pastel sprinkles, or turning the next turtle into a cherry-topped birthday version?









