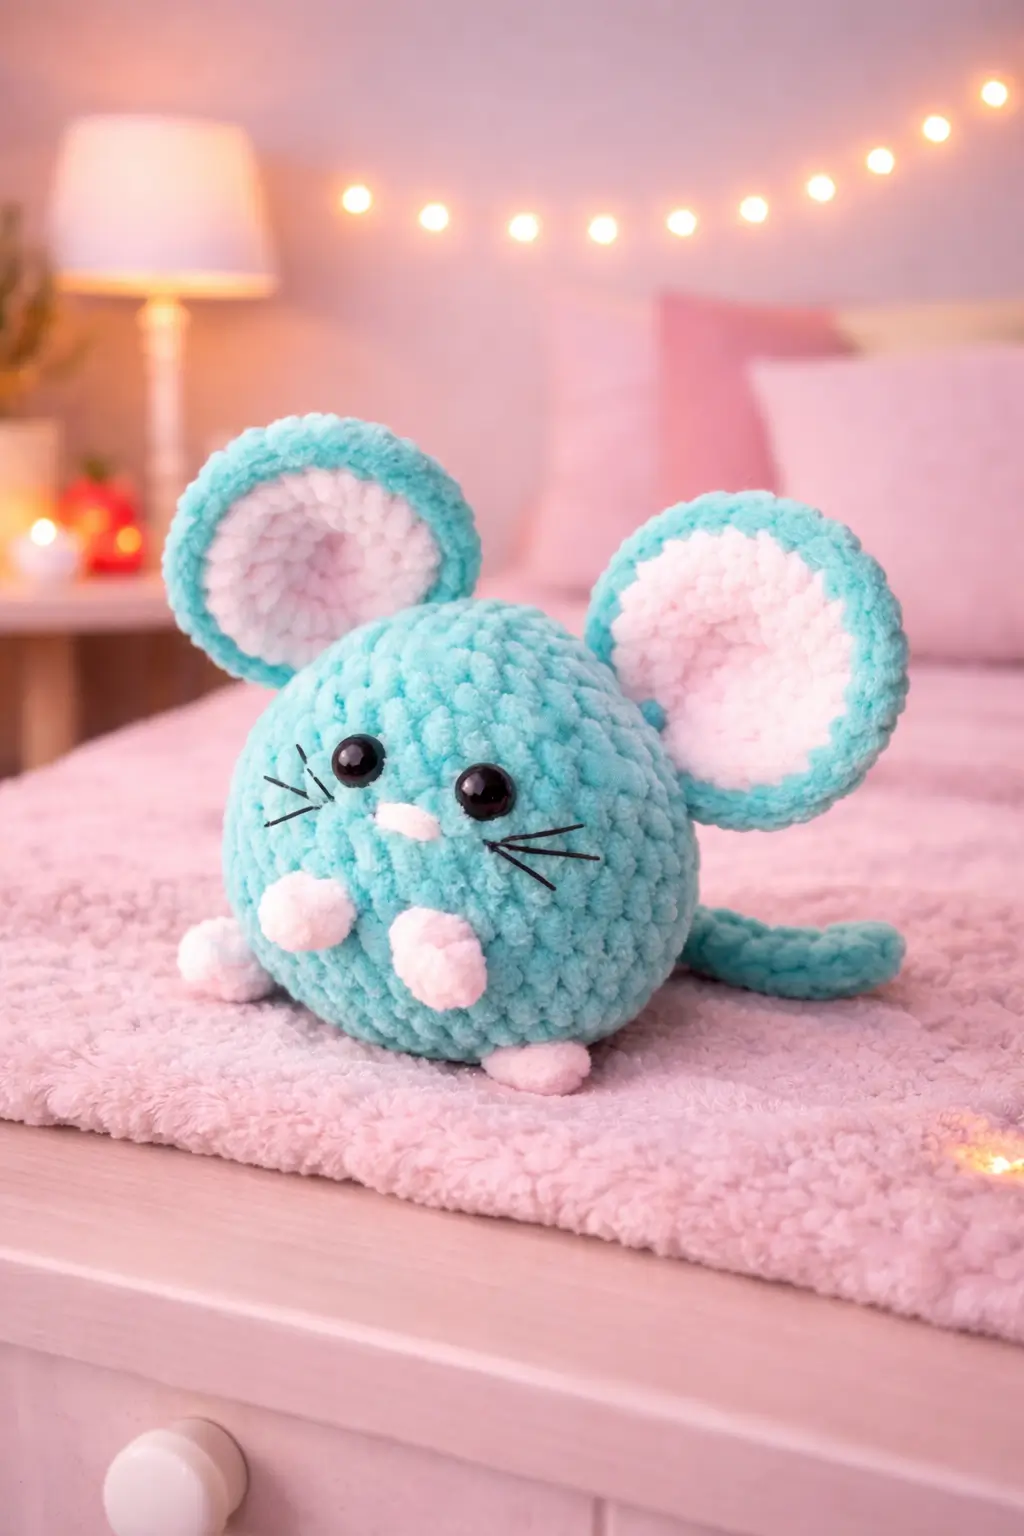
A mouse this small only works when the ears stay oversized and the body stays almost perfectly round. This tiny mouse crochet pattern gives you the full plush build for the mouse in the photo, including body, ears, tail, feet, paws, nose, and whiskers. It is useful because the same pattern can become a shelf plush, keychain-sized gift, or market make simply by changing yarn thickness and hook size.
The Design: What Makes This Mouse Different
This mouse is built around compression. The body is nearly spherical, the limbs are minimal, and the ears do most of the species work from the front view. That matters. A longer body would make it read more like a rat or hamster, while smaller ears would weaken the mouse silhouette immediately. The second design decision is restraint in the face. The eyes are close, the nose is tiny, and the whiskers are short stitched lines rather than long loose threads. That keeps the expression clean and stops the toy from looking cluttered. Then there is the tail. It is thin and secondary, which is correct for this rounded kawaii shape. Common mistake: crocheters overstuff the lower body and flatten the sphere. Then the plush loses its pebble-like silhouette and starts looking lumpy.
Project Information at a Glance
| Skill Level | Time | Finished Size | Hook | Best For |
|---|---|---|---|---|
| Easy | 1–2 hours | 10–11 cm / 4 in with chenille yarn | 4–5 mm | Quick gifts, desk plush, market makes |
Materials and Tools
Yarn
- Bright aqua / turquoise — super bulky chenille yarn — 35g — Himalaya Dolphin Baby or similar
- White — super bulky chenille yarn — 8g — for inner ears, paws, feet, and nose
- Pale pink — chenille or velvet scrap — 2g — for soft paw accents if desired
- Black — embroidery floss — 1g — for whiskers
Tools
- 4 mm to 5 mm crochet hook
- 6 mm to 8 mm safety eyes
- Fiberfill stuffing
- Yarn needle
- Stitch markers
- Small sharp scissors
Crochet Abbreviations
MR / sc / inc / dec / sl st / ch / BLO / hdc
Use invisible decrease on the closing rounds only. Standard decreases leave dents that show clearly on a smooth round mouse body.
Step-by-Step Tiny Mouse Crochet Pattern
Work in continuous spiral rounds unless noted.
Body (Make 1)
Yarn: bright aqua
Source: Standard amigurumi math
R1: 6 sc in MR (6)
R2: inc x6 (12)
R3: (sc, inc) x6 (18)
R4: (2 sc, inc) x6 (24)
R5: (3 sc, inc) x6 (30)
R6: sc around (30)
R7: sc around (30)
R8: sc around (30)
Insert 6–8 mm eyes between R6 and R7, about 7 stitches apart.
R9: (3 sc, dec) x6 (24)
R10: (2 sc, dec) x6 (18)
Stuff firmly but keep the shape round, not hard.
R11: (sc, dec) x6 (12)
R12: dec x6 (6)
Fasten off. Leave 20 cm tail.
Ears (Make 2)
Yarn: bright aqua outer, white inner
Source: Standard amigurumi math
Outer ear:
R1: 6 sc in MR (6)
R2: inc x6 (12)
R3: (sc, inc) x6 (18)
R4: sc around (18)
Fasten off. Leave 14 cm tail.
Inner ear:
R1: 6 sc in MR in white (6)
R2: inc x6 (12)
R3: (sc, inc) x6 (18)
Fasten off. Leave 10 cm tail.
Sew the white inner ear onto the center of the aqua outer ear, then curve the base slightly before attaching.
Front Paws (Make 2)
Yarn: white
Source: Standard amigurumi math
R1: 4 sc in MR (4)
R2: sc around (4)
Fasten off. Leave 10 cm tail.
Feet (Make 2)
Yarn: white
Source: Standard amigurumi math
R1: 5 sc in MR (5)
R2: sc around (5)
Fasten off. Leave 10 cm tail.
Flatten lightly so they sit under the body instead of sticking outward.
Nose (Make 1)
Yarn: white
Source: Standard amigurumi math
R1: 4 sc in MR (4)
Fasten off. Leave 8 cm tail.
Shape into a tiny horizontal oval when sewing.
Tail (Make 1)
Yarn: bright aqua
Source: Standard amigurumi math
R1: ch 12
R2: sl st back across (12)
Fasten off. Leave 10 cm tail.
Whiskers (Make 6 stitched lines)
Yarn: black embroidery floss
Source: Standard amigurumi math
Embroider 3 short whisker lines on each side of the nose.
Keep each whisker under 1 cm long. Longer whiskers look messy on such a small face.
Assembly Instructions
- Sew the two ears high on the body so they frame the top half of the mouse immediately.
- Attach the white nose low and centered between the eyes.
- Embroider the whiskers after the nose is fixed in place.
- Sew the two front paws low on the front body, close to the center line.
- Attach the two feet to the underside front edge so the mouse sits upright.
- Sew the tail to the lower rear center, angled slightly to one side.
- Check the plush from the front and side before tightening the ear seams.
- Keep the ears symmetrical. Even a small tilt difference is obvious on this design.
- Weave every yarn tail at least 4 cm into the stuffing path.
- Trim only after the mouse sits evenly on a flat surface.
The tiny mouse is complete.
More Small Animal Crochet Patterns You’ll Love
- Mini Bunny Plush — Similar rounded body build with longer ears — [INTERNAL LINK NEEDED: bunny crochet pattern]
- Tiny Hamster Amigurumi — Another compact desk-size rodent plush — [INTERNAL LINK NEEDED: hamster crochet pattern]
- Pocket Bear Pattern — Good follow-up if you want a round-bodied animal with simpler ears — [INTERNAL LINK NEEDED: bear crochet pattern]
- Kawaii Animal Bundle — Useful if you want multiple small plushies at matching scale — [INTERNAL LINK NEEDED: kawaii crochet bundle]
Conclusion
This mouse amigurumi crochet pattern works because the structure stays disciplined: rounded body, oversized ears, tiny paws, short stitched whiskers, and a thin tail that never steals attention from the face. Use current plush mouse references as the baseline for size, eye range, and hook range, then refine the final look through ear placement, stuffing density, and whisker length rather than random stitch changes. Photograph the finished mouse from a front three-quarter angle so the ears, paws, nose, and tail all remain visible in one frame. Share it on Pinterest and Instagram with #TinyMouseAmigurumi. Will your next mouse stay aqua, or switch to lilac and cream for a softer pastel shelf set?









