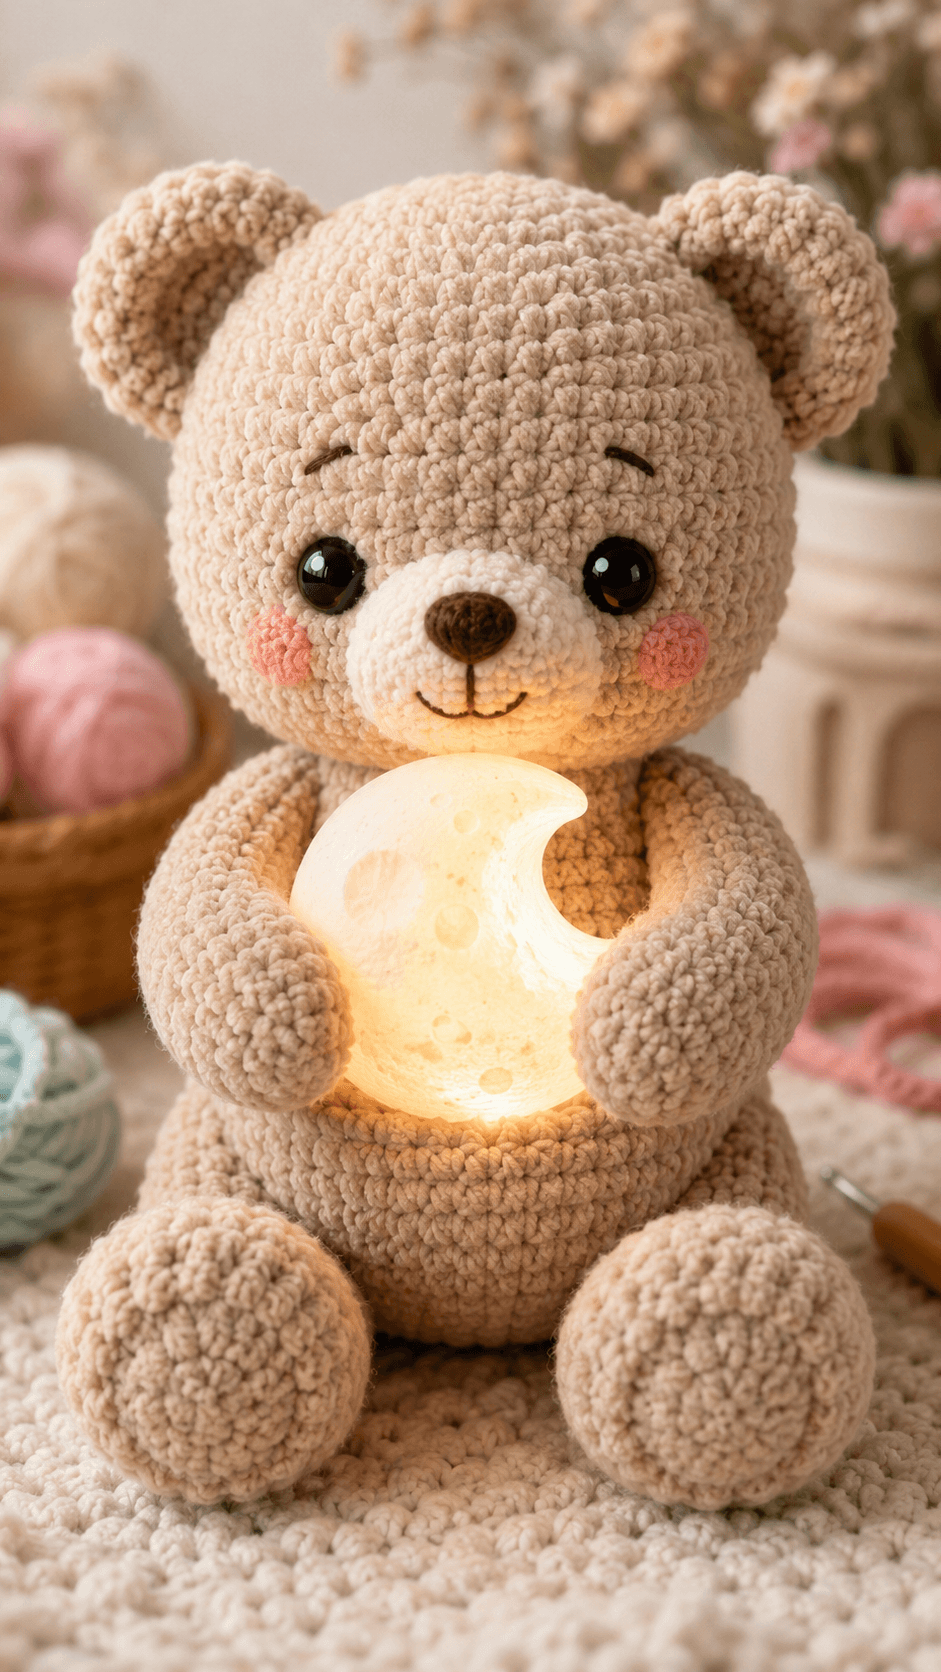
A teddy bear stops reading as a bear the moment the muzzle sits too high. This teddy bear amigurumi crochet pattern fixes that first, then builds the rest around chunky chenille yarn, a 4.0 mm hook, and a seated 22 cm scale. Skill level is advanced beginner to intermediate. The moon accessory gives the finished piece a clear nursery or shelf purpose instead of leaving it as a generic plush.
The Design: What Makes This Bear Different
You need three proportion choices to make this bear match the photo. First, the head must dominate the silhouette, so it is drafted one size larger than the torso. Second, the muzzle has to project forward rather than sit flat, because a flat snout makes chenille bears look like rounded cats. Third, the legs must be weighted visually at the front so the seated shape stays stable around the moon prop. In practice, the maker is controlling face recognition more than toy anatomy. That is why this chenille teddy bear crochet pattern uses a separate muzzle, flat cheek circles, and low-set ears instead of sewing everything onto a plain sphere. A common mistake with any plush teddy bear crochet pattern is placing the eyes too high or too wide, which makes the expression drift from sleepy bear to cartoon frog.
Project Info at a Glance
| Skill Level | Time | Finished Size | Hook | Best For |
|---|---|---|---|---|
| Advanced beginner / intermediate | 5–7 hours | 22 cm seated | 4.0 mm | Nursery decor, gift plush, shelf display |
Materials and Tools
Yarn
- Light beige — bulky chenille/velvet (#5) — 141 g — Juicy Couture Luxe Velour or similar plush chenille
- Cream — bulky chenille/velvet (#5) — 9 g — matching contrast chenille for muzzle
- Pink — small scrap amount — cheek patches
- Dark brown — small scrap amount — nose and brows
- Warm white / pale yellow — small scrap amount or alternate yarn for moon edging if desired
Tools
- Hook 4.0 mm
- 15 mm safety eyes
- Stuffing
- Tapestry needle
- Stitch markers
- Small amount of black or brown embroidery thread for smile detailing
- Optional battery moon light or firmly stuffed crocheted moon insert
Abbreviations
MR = magic ring
sc = single crochet
inc = 2 sc in same stitch
dec = invisible decrease
sl st = slip stitch
ch = chain
BLO = back loop only
Invisible decrease is worked through the front loops of the next two stitches so the decrease line stays tighter on plush yarn.
Pattern — Step by Step
Continuous spiral unless noted.
Head
Yarn: light beige
R1: 6 sc in MR (6)
R2: inc x6 (12)
R3: (1 sc, inc) x6 (18)
R4: (2 sc, inc) x6 (24)
R5: (3 sc, inc) x6 (30)
R6: (4 sc, inc) x6 (36)
R7: (5 sc, inc) x6 (42)
R8–R15: sc around (42)
R16: (5 sc, dec) x6 (36)
R17: (4 sc, dec) x6 (30)
Insert safety eyes between R11 and R12, 8 stitches apart. Start stuffing.
R18: (3 sc, dec) x6 (24)
R19: (2 sc, dec) x6 (18)
R20: (1 sc, dec) x6 (12)
R21: dec x6 (6)
Fasten off. Thread tail through front loops and close. Leave 18 cm tail.
Body
Yarn: light beige
R1: 6 sc in MR (6)
R2: inc x6 (12)
R3: (1 sc, inc) x6 (18)
R4: (2 sc, inc) x6 (24)
R5: (3 sc, inc) x6 (30)
R6: (4 sc, inc) x6 (36)
R7–R12: sc around (36)
R13: (4 sc, dec) x6 (30)
R14: sc around (30)
R15: (3 sc, dec) x6 (24)
Stuff firmly, especially the lower front belly.
R16: (2 sc, dec) x6 (18)
R17: sc around (18)
Fasten off. Leave 25 cm tail for sewing.
Arms (Make 2)
Yarn: light beige
R1: 6 sc in MR (6)
R2: inc x6 (12)
R3–R5: sc around (12)
R6: (1 sc, dec) x4 (8)
R7–R12: sc around (8)
Stuff lower half only so the arm can bend around the moon.
Flatten top edge and sc through both layers across 4 stitches.
Fasten off. Leave 20 cm tail.
Back Legs / Feet (Make 2)
Yarn: light beige
R1: 6 sc in MR (6)
R2: inc x6 (12)
R3: (1 sc, inc) x6 (18)
R4–R6: sc around (18)
R7: (1 sc, dec) x6 (12)
R8–R11: sc around (12)
Stuff firmly at the foot, lightly in the upper section.
Flatten top edge and sc through both layers across 6 stitches.
Fasten off. Leave 22 cm tail.
Ears (Make 2)
Yarn: light beige
R1: 6 sc in MR (6)
R2: inc x6 (12)
R3: (1 sc, inc) x6 (18)
R4: (2 sc, inc) x6 (24)
R5: sc around (24)
Fasten off. Fold in half. Leave 18 cm tail.
Muzzle / Snout
Yarn: cream
Ch 6.
R1: starting in 2nd ch from hook, 4 sc, 3 sc in last ch, working on opposite side 3 sc, inc in last st (12)
R2: inc, 3 sc, inc x3, 3 sc, inc x2 (18)
R3: (1 sc, inc), 3 sc, (1 sc, inc) x3, 3 sc, (1 sc, inc) x2 (24)
R4–R5: sc around (24)
Fasten off. Leave 25 cm tail.
Stuff lightly during sewing so the muzzle protrudes.
Cheek Patches (Make 2)
Yarn: pink
R1: 6 sc in MR (6)
R2: inc x6 (12)
Sl st to first stitch.
Fasten off. Leave 12 cm tail.
Crescent Moon Accessory
Yarn: warm white or pale yellow
Make 2.
R1: 6 sc in MR (6)
R2: inc x6 (12)
R3: (1 sc, inc) x6 (18)
R4: (2 sc, inc) x6 (24)
R5: (3 sc, inc) x6 (30)
R6: (4 sc, inc) x6 (36)
R7: (5 sc, inc) x6 (42)
R8–R10: sc around (42)
Fasten off first circle. Make second circle the same, but do not fasten off. Hold circles together with 10 stitches overlapped to create the crescent bite. Sc through both layers around the outer edge for 32 stitches, then continue around the full outer edge of the second circle for 22 stitches, then around the remaining exposed edge of the first circle for 22 stitches. Total joining edge: (76)
R11–R12: sc around (76)
Begin stuffing or insert a small LED moon light.
R13: (17 sc, dec) x4 (72)
R14: (16 sc, dec) x4 (68)
R15: (15 sc, dec) x4 (64)
Stuff evenly, keeping the inner crescent curve defined.
R16: (6 sc, dec) x8 (56)
R17: (5 sc, dec) x8 (48)
Fasten off. Leave 30 cm tail.
For a display-only plush, skip heavy stuffing and stitch the arms around the moon after placement.
Embroidered Nose
Yarn: dark brown
Wrap satin stitches over 4 center stitches of the muzzle to form a horizontal oval nose about 2.5 cm wide.
Add one vertical stitch down from center nose to the smile split.
Brows and Smile
Yarn: dark brown
Embroider two short curved brows above the eyes, each spanning about 3 stitches.
Add a shallow U-shaped smile under the muzzle center split.
Assembly
- Sew the head to the body, matching the head center to the front belly center.
- Pin the muzzle low on the face so its top edge sits below the eyes, then sew and stuff lightly before closing.
- Attach the safety eyes if not already inserted, then embroider the nose, vertical line, smile, and brows.
- Sew the cheek patches slightly below and outward from the eyes.
- Fold each ear and sew them to the upper side quadrants of the head, not at the top center.
- Attach the back legs to the lower front body so the bear sits with the feet projecting forward.
- Sew the arms high on the body sides, angled inward.
- Place the crescent moon between the arms and belly, then tack each wrist to the moon at two points.
- Add extra belly stuffing from the remaining opening areas if the bear tips backward.
- Weave in all tails inside the body and head, then shape the muzzle and cheeks by hand.
The finished toy should sit upright with the moon held in front of the torso.
7 Technical Tips
- Mark the first stitch of every round with a hard stitch marker, not a scrap strand. Chenille hides the join line, and one missed increase round will shift the whole face.
- Keep head stuffing firmer than body stuffing. A soft head collapses around 15 mm eyes and makes the muzzle tilt downward.
- Work invisible decreases only through the front loops. Standard decreases leave open pits that show badly on plush yarn under side light.
- Insert eyes before the head closes past 30 stitches. Waiting until 18 stitches or less turns a 15 mm eye post into a forcing job that can split the yarn core.
- Pin the muzzle so the top edge lands roughly 2 rounds below the eyes. Higher placement erases the bear look and creates a seal-like face.
- Stuff only the lower half of each arm. Fully stuffed arms cannot curve around the crescent moon and will push the accessory outward.
- Weave tails through at least 5 cm of internal path before trimming. Short buried tails slip out faster in chenille because the pile reduces yarn-on-yarn grip.
Conclusion
This teddy bear amigurumi crochet pattern works because the face placement, seated leg angle, and forward-held moon are drafted as one system. Change one of those without adjusting the others and the silhouette weakens fast. Crochet the head first, test the muzzle position before sewing, then build the hold around the moon instead of forcing the arms later. Share the finished bear on Pinterest and Instagram with one front photo and one side profile so the seated shaping is visible. Hashtag: #MoonBearPattern. What eye spacing gave your bear the best sleepy expression without losing the teddy look?









