Introduction
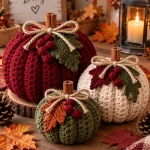
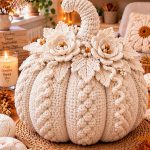
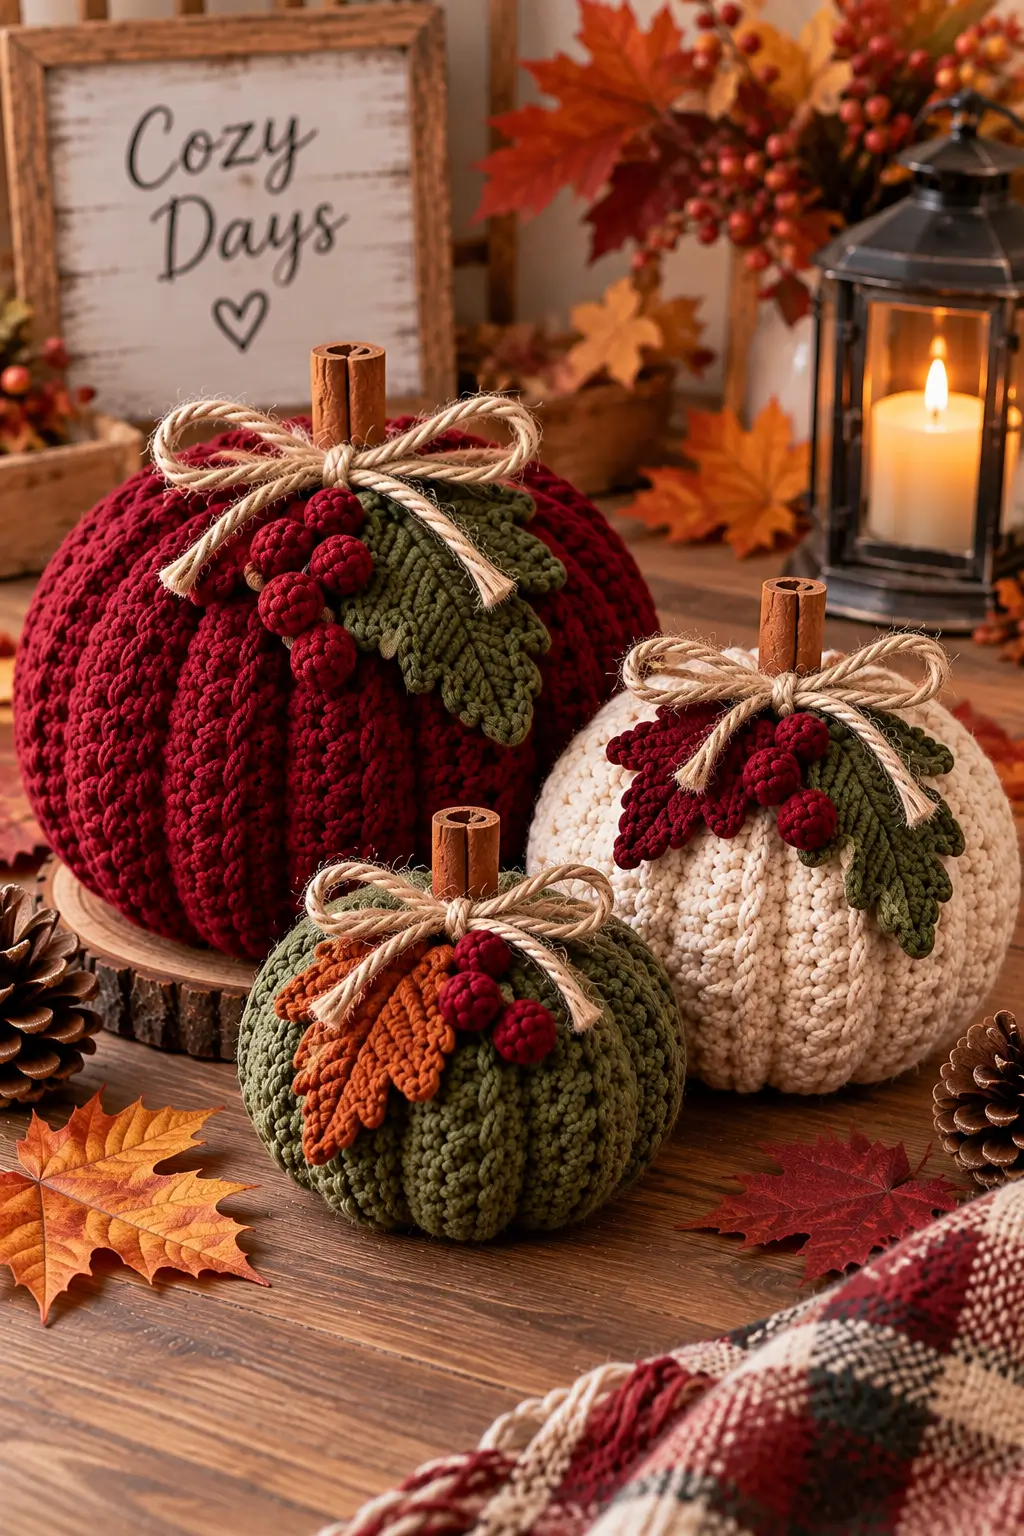
A cinnamon stick can form a convincing pumpkin stem only when the crocheted crown closes tightly enough to grip it. This ribbed crochet pumpkin pattern uses super-bulky yarn, pronounced vertical ribs, fiberfill, crochet leaves, berries and a natural stem. Three adjustable sizes create the grouped arrangement shown in the reference image. The construction is worked flat, making the finished dimensions easy to modify.
The Design: What Makes These Crochet Pumpkins Different
The vertical ribs control the shape of these pumpkins. Instead of crocheting a sphere in continuous rounds, each pumpkin begins as a textured rectangle. The short edges are joined to form a tube, the bottom is gathered, and stuffing converts that tube into a rounded pumpkin.
A second shaping stage creates the deeper lobes visible in the photograph. Long strands pass from the bottom to the crown and compress the body at regular intervals. This gives the chunky crochet pumpkin more definition than ribbing alone.
The decoration is concentrated around the crown. Olive leaves, burgundy berries, natural twine and a cinnamon-stick stem form one compact cluster without hiding the ribbed body. A common failure is excessive stuffing. An overfilled pumpkin becomes spherical and resists the indentation required at the top and bottom.
Project Info at a Glance
| Skill Level | Construction | Sizes | Hook | Best For |
|---|---|---|---|---|
| Advanced Beginner / Intermediate | Flat ribbed rectangle, seamed and gathered | Small, Medium, Large | 9 mm reference hook | Fall tables, mantels, shelves and centerpieces |
A 9 mm hook is a practical reference size for super-bulky pumpkin yarn. The exact dimensions depend on yarn thickness, tension and stuffing density, so measure the crocheted panel before assembly.
Materials and Tools
Yarn
- Burgundy super-bulky yarn — approximately 120–180 g for a large pumpkin.
- Cream super-bulky yarn — approximately 80–120 g for a medium pumpkin.
- Olive super-bulky yarn — approximately 50–80 g for a small pumpkin.
- Olive worsted yarn — approximately 15–25 g for leaves.
- Rust worsted yarn — approximately 10–15 g for optional accent leaves.
- Burgundy worsted yarn — approximately 15–20 g for berries.
- Brown yarn — small quantity for berry stems if required.
The yarn quantities above are working estimates for this photo-adapted three-size set. Actual consumption changes with yarn density, dimensions and gauge.
Tools and Finishing Materials
- 9 mm crochet hook for the pumpkin bodies
- 4–5 mm crochet hook for leaves and berries
- Polyester fiberfill
- Long tapestry or doll needle
- Standard yarn needle
- Stitch markers
- Scissors
- Tape measure
- Cinnamon sticks for stems
- Natural jute or cotton twine for bows
Abbreviations
- MR — magic ring
- ch — chain
- sc — single crochet
- hdc — half double crochet
- dc — double crochet
- sl st — slip stitch
- inc — increase
- dec — decrease
- BLO — back loop only
- st / sts — stitch / stitches
For stuffed berries, work an invisible decrease through the front loops of the next two stitches before completing one single crochet.
Ribbed Crochet Pumpkin Pattern
The pumpkin bodies are worked flat rather than in continuous rounds. Back-loop stitches create flexible vertical ribs that remain visible after the rectangle is seamed, gathered and stuffed.
Small Olive Pumpkin
Yarn: olive super bulky.
Foundation: Ch 17.
Row 1: Hdc in second ch from hook and in each ch across. Turn. (16)
Row 2: Ch 1. Hdc BLO in each st across. Turn. (16)
Rows 3–32: Repeat Row 2. (16)
Do not fasten off immediately. Fold the rectangle so the first and final rows meet.
Sl st through both layers across the short edge to form a tube.
Fasten off with a 50 cm tail.
Medium Cream Pumpkin
Yarn: cream super bulky.
Foundation: Ch 21.
Row 1: Hdc in second ch from hook and across. Turn. (20)
Row 2: Ch 1. Hdc BLO in each st across. Turn. (20)
Rows 3–40: Repeat Row 2. (20)
Fold the rectangle with the first and last rows aligned.
Sl st through both layers to form a tube.
Fasten off with a 60 cm tail.
Large Burgundy Pumpkin
Yarn: burgundy super bulky.
Foundation: Ch 27.
Row 1: Hdc in second ch from hook and across. Turn. (26)
Row 2: Ch 1. Hdc BLO in each st across. Turn. (26)
Rows 3–52: Repeat Row 2. (26)
Fold the rectangle so the first and final rows meet.
Sl st through both layers across the edge to create a tube.
Fasten off with a 70 cm tail.
Closing and Stuffing the Pumpkin
The same finishing method applies to all three sizes.
Thread the long yarn tail onto a tapestry needle.
Run the needle in and out around one open edge of the tube, catching approximately one stitch or row end at each rib.
Pull firmly to gather the opening.
Pass the yarn across the opening several times before knotting it securely. Turn the pumpkin so the closed edge becomes the bottom.
Add polyester fiberfill gradually.
Place most of the stuffing around the outer wall rather than forcing a dense mass into the center. The middle should remain compressible because the final shaping strand must pull the top and bottom toward one another.
Continue stuffing until the ribs are supported but the stitches are not visibly stretched.
Thread another long strand of matching yarn around the open crown.
Do not close the crown completely yet.
Creating the Pumpkin Lobes
Cut a length of matching yarn approximately four times the circumference of the pumpkin.
Thread it onto a long tapestry or doll needle.
Insert the needle through the center of the bottom and bring it out through the center of the crown.
Carry the yarn down the outside of the pumpkin along one ribbed valley.
Insert the needle through the bottom center again and bring it back through the crown.
Pull until the strand begins to indent the pumpkin wall.
Repeat this process around the pumpkin to create approximately 6–8 major sections.
Keep the tension consistent. One excessively tight sculpting strand produces a noticeably narrower lobe than the others.
After the final section, secure the shaping yarn inside the crown opening.
Cinnamon Stick Stem
Use a cinnamon stick approximately 7–10 cm long, adjusting the exposed height to suit the pumpkin size.
For the small pumpkin, approximately 3–4 cm can remain visible.
For the medium pumpkin, leave approximately 4–5 cm visible.
For the large pumpkin, approximately 5–6 cm can remain above the crown.
Insert the lower portion of the cinnamon stick into the center opening and push it into the stuffing.
Pull the gathering yarn tightly around the stem.
Pass the yarn across opposite sides of the opening several times, then knot securely.
The stem should stand vertically without requiring the crocheted crown to carry its entire weight.
Crochet Autumn Leaf
Make approximately 2–3 leaves per pumpkin using olive, burgundy or rust yarn.
Foundation: Ch 12.
Starting in the second ch from hook:
Side 1: Sl st in first ch, sc in next, hdc in next, dc in next 2, tr in next 2, dc in next 2, hdc in next, sc in final ch.
Tip: Ch 2, sl st into second ch from hook.
Rotate the work and crochet into the unused loops on the opposite side of the foundation chain.
Side 2: Sc in first available loop, hdc in next, dc in next 2, tr in next 2, dc in next 2, hdc in next, sc in next and sl st at the base.
Stem: Ch 5. Sl st in second ch from hook and in each remaining ch.
Fasten off with a 20 cm sewing tail.
Textured Leaf Edging
For the more irregular leaves visible in the reference image, add a second edging round.
Join yarn at the base of the leaf.
Work *sl st, ch 2, sl st* at selected intervals along the outer edge to create small pointed projections.
Keep the center tip longer than the side points.
Fasten off and block the leaf before attaching it to the pumpkin.
Small Crochet Berries
Make 3–5 berries for each pumpkin.
Use burgundy yarn and the smaller hook.
R1: 6 sc in MR. (6)
R2: Inc ×6. (12)
R3: Sc around. (12)
R4: Sc around. (12)
Add a small amount of stuffing.
R5: Dec ×6. (6)
Fasten off, close the remaining opening and leave a 15 cm sewing tail.
Adding Texture to the Berries
For the segmented berry appearance shown in the photograph, thread the yarn tail through the center of the berry.
Bring it around the outside and pass it through the center again.
Pull gently to create one indentation.
Repeat at three or four evenly spaced points around the berry.
Do not pull tightly enough to flatten the sphere.
Knot the yarn at the back and retain the remaining tail for assembly.
Twine Bow
Cut several strands of natural twine approximately 35–45 cm long.
Hold two or three strands together to reproduce the substantial bow shown in the photograph.
Wrap the center around the cinnamon-stick stem once.
Tie a bow with two approximately equal loops.
Trim the tails after the leaves and berries have been positioned.
The twine should sit above the crochet decorations rather than trapping the leaves tightly against the pumpkin.
Assembly
- Complete, seam, stuff and sculpt the pumpkin body before adding any decorative pieces.
- Insert the cinnamon-stick stem through the center crown and secure the gathered opening around it.
- Position the largest crochet leaf beside the stem, allowing its tip to extend over one pumpkin lobe.
- Add a second leaf at a different angle so the two leaves do not form a symmetrical V shape.
- Sew each leaf through its stem and lower section while leaving the outer portion free.
- Arrange three to five burgundy berries near the base of the cinnamon stick.
- Sew the berries individually so the cluster remains dimensional rather than forming one flat row.
- Tie the multi-strand natural twine around the stem and position the bow above the berry cluster.
- Turn the pumpkin through 360 degrees and redistribute stuffing if any lobe appears noticeably flatter than the others.
- Weave all yarn tails through the dense underside or crown stitches and trim them after the decorations are secure.
The finished pumpkin should have clearly defined vertical ribs, a recessed crown, balanced lobes and one concentrated leaf-and-berry cluster around the cinnamon-stick stem.
Making a Three-Pumpkin Set
Use scale as well as color to reproduce the grouped display. The largest burgundy pumpkin should carry most of the visual weight. Place the medium cream pumpkin slightly behind or beside it, then position the small olive pumpkin toward the front.
Avoid making all three pumpkins identical except for color. The photographed arrangement works because diameter, height and decoration vary between pieces.
Use approximately 2 leaves and 3 berries on the small pumpkin, 2–3 leaves and 4 berries on the medium pumpkin, and 3 leaves and 5 berries on the large version.
The leaves can also change color. Olive works well against burgundy and cream, while rust leaves provide stronger contrast against the green pumpkin.
Adjusting the Pumpkin Size
The starting chain primarily controls pumpkin height. The number of rows controls the circumference.
For a taller pumpkin, add foundation chains before beginning the ribbed panel. For a wider pumpkin, add rows without changing the foundation chain.
A useful starting proportion for this construction is to make the rectangle roughly twice as wide as it is tall before seaming. Similar ribbed pumpkin methods use this relationship because enough width is required for the tube to expand after stuffing.
Do not judge the final dimensions from the flat panel alone. Gathering the top and bottom reduces height, while stuffing expands the circumference.
7 Technical Tips for Ribbed Crochet Pumpkins
- Count every ribbed row. A missing row makes the seam interrupt the regular ridge spacing, particularly on the smaller pumpkin where each rib represents a larger percentage of the circumference.
- Keep BLO placement consistent. Accidentally working through both loops creates a flat horizontal interruption that remains visible after stuffing.
- Leave the center stuffing slightly softer. Packing the center firmly prevents the crown from sinking and produces a ball instead of a pumpkin profile.
- Use 6–8 shaping sections. Fewer strands create oversized lobes, while too many shaping strands can hide the original crochet ribbing.
- Check stem depth before closing the crown. Insert approximately 3–4 cm of the cinnamon stick into the stuffing so the stem does not tip sideways.
- Do not flatten the berry cluster. Sew each berry at one or two points only; stitching around its entire base compresses the dimensional shape.
- Leave at least 15–20 cm on decoration tails. Short leaf and berry tails are difficult to weave securely through super-bulky crown stitches.
Color Variations
Burgundy, cream and olive reproduce the strongest color relationships in the reference image, but the same construction works with burnt orange, mustard, brown, oatmeal and muted sage.
Keep at least one repeated color across the set. For example, three differently colored pumpkins can all use olive leaves and burgundy berries. That repeated detail makes the individual pieces read as one coordinated display.
For a more neutral set, make the pumpkin bodies in cream, oatmeal and taupe while retaining brown cinnamon stems and natural twine. For stronger autumn contrast, combine rust, mustard and dark olive bodies with burgundy berry clusters.
Stuffing and Shaping
Stuffing density determines the final silhouette as much as the crochet itself. Add fiberfill around the outer wall first and rotate the pumpkin after every handful.
Press the bottom against a flat surface periodically. A pumpkin intended for tabletop decoration needs a sufficiently broad lower surface to stand without rolling.
Once the body holds its shape, press the crown downward with one hand while supporting the base with the other. If the center compresses without distorting the outer ribs, the stuffing density is suitable for final sculpting.
After adding the shaping strands, inspect the pumpkin from directly above. The major lobes should have approximately equal widths even though the crochet ribs remain more numerous.
Conclusion
Finish the pumpkin body completely before attaching the crown decorations. Seam the ribbed rectangle, gather the base, add fiberfill gradually and create the sculpted sections before closing the top around the cinnamon stick. Crochet the leaves and berries separately so their placement can be tested before sewing. For a three-piece display, vary both size and body color while repeating the same stem, twine and berry details across the set. Save this ribbed crochet pumpkin pattern to Pinterest and share the completed arrangement on Instagram with #RibbedAutumnPumpkins. For your set, which pumpkin would you make largest: burgundy, cream or olive? “`1