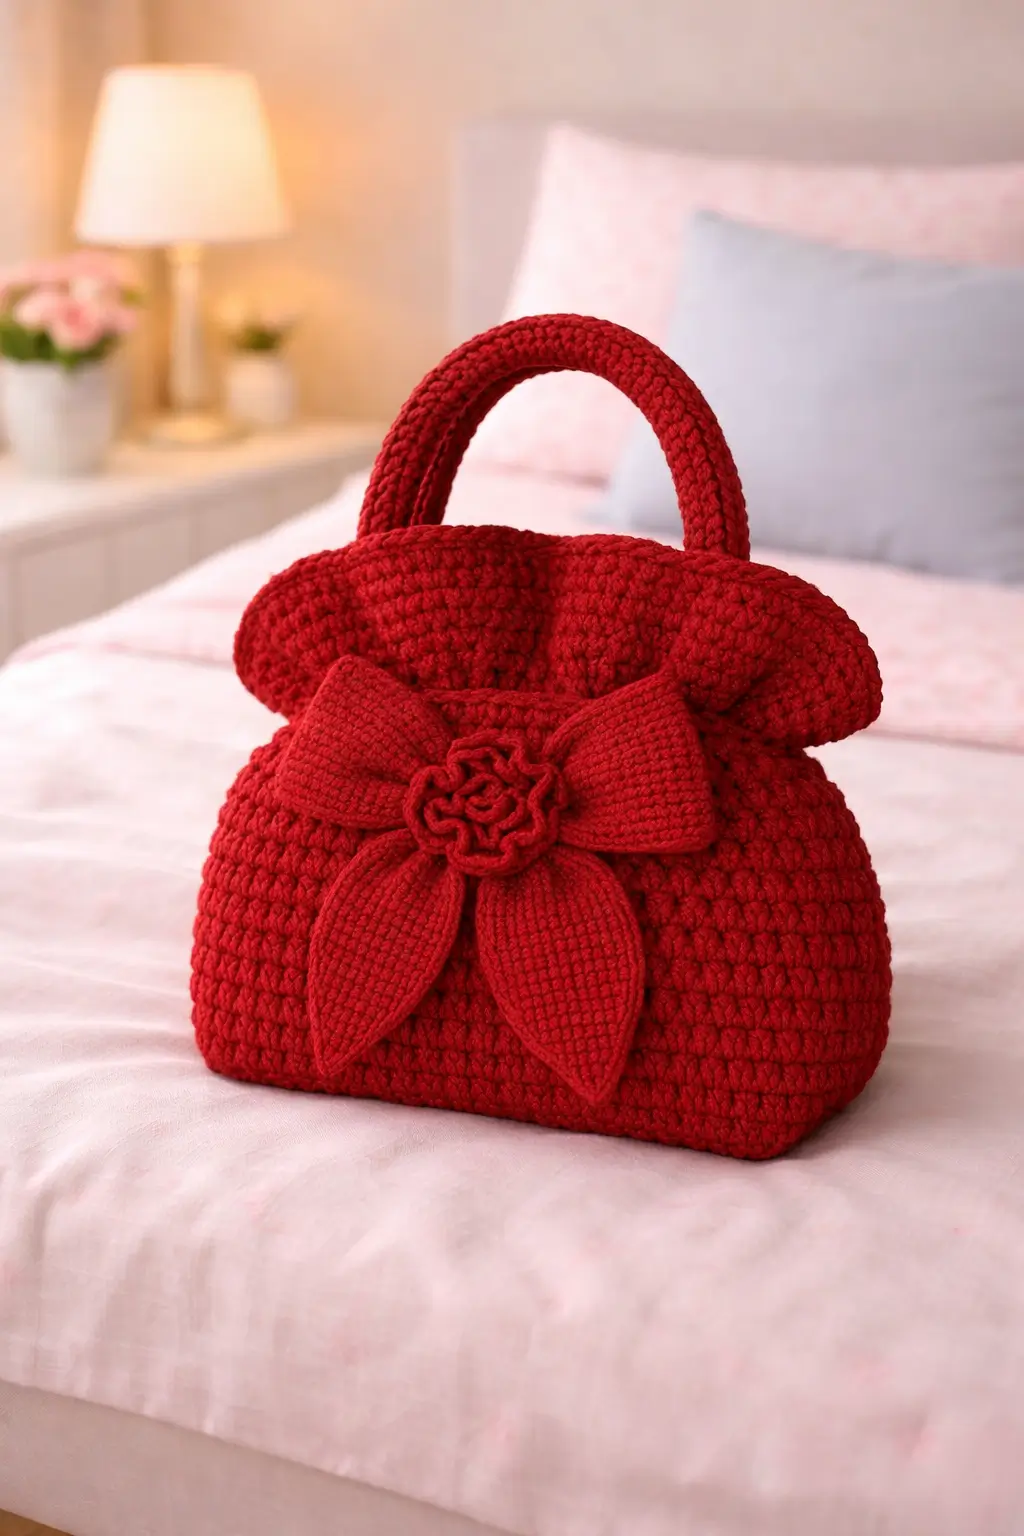
A bag like this works because the shape stays structured while the bow carries the drama. This red crochet bag pattern gives you the full build for the handbag in the photo, including the base, body, top edge, rounded handles, oversized bow, and rose center detail. It is a strong project for gifting, holiday styling, and boutique-style handmade accessories.
The Design: What Makes This Bag Different
This design does not rely on color alone. The body is clean and architectural, with a slightly gathered upper edge that softens the boxy base. Then the oversized bow takes control of the front panel and turns a simple purse into a statement piece. That matters. Without the bow, the bag reads as a standard crochet handbag. Without the structured body, the bow looks heavy and unbalanced. The monochrome red palette keeps everything cohesive, while the floral knot at the center gives the front detail a finished focal point. Common mistake: making the bow too floppy. Then the bag loses its polished look immediately.
Project Information at a Glance
| Skill Level | Time | Finished Size | Hook | Best For |
|---|---|---|---|---|
| Intermediate | 5–7 hours | Small to medium handbag | 4.0–5.0 mm | Gift bags, date-night styling, statement accessories |
Materials and Tools
Yarn
- Deep red — cotton cord or firm t-shirt yarn — 220g — for body, handles, drawstring top, bow, and flower center
Tools
- 4.0 mm to 5.0 mm crochet hook
- Yarn needle
- Stitch markers
- Sharp scissors
- Optional bag lining
- Optional magnetic snap
Crochet Abbreviations
MR / sc / inc / dec / sl st / ch / BLO / hdc / dc
Keep the stitches tight and even. A loose fabric weakens the structure and makes the bow collapse forward.
Step-by-Step Red Crochet Bag Pattern
Work the bag from the base upward unless noted.
Base (Make 1)
Yarn: deep red
Source: Standard crochet bag math
R1: ch 21
Row 1: starting in 2nd ch from hook, sc 19, 3 sc in last ch, rotate, sc 18, inc in final ch (42)
R2: inc, sc 18, inc x3 across curve, sc 18, inc x2 across curve (48)
R3: inc, sc 20, inc x3 across curve, sc 20, inc x2 across curve (54)
R4: sc around (54)
R5: sc around (54)
This creates a rounded rectangular base.
Body Walls (Make 1 continuous section)
Yarn: deep red
Source: Standard crochet bag math
R1: BLO sc around (54)
R2: sc around (54)
R3: sc around (54)
R4: sc around (54)
R5: sc around (54)
R6: sc around (54)
R7: sc around (54)
R8: sc around (54)
R9: sc around (54)
R10: sc around (54)
R11: sc around (54)
R12: sc around (54)
Fasten off.
Add 2–3 extra rounds if you want a taller crochet purse pattern.
Upper Gather Band (Make 1)
Yarn: deep red
Source: Standard crochet bag shaping
R1: join yarn, sc around (54)
R2: (7 sc, dec) x6 (48)
R3: sc around (48)
R4: sc around (48)
Fasten off.
This narrows the top opening slightly and gives the bag its gathered crown.
Top Edge Finish (Make 1)
Yarn: deep red
Source: Standard crochet edging
R1: reverse sc or tight sl st around (48)
Fasten off. Leave 15 cm tail.
Round Handles (Make 2)
Yarn: deep red
Source: Standard crochet handle math
R1: ch 36
Row 1: starting in 2nd ch from hook, sc across (35)
Row 2: ch 1, turn, sc across (35)
Row 3: ch 1, turn, sc across (35)
Roll each strip lengthwise and seam it into a padded tube handle.
Fasten off. Leave long tails for sewing.
Bow Loops (Make 2)
Yarn: deep red
Source: Standard bow shaping
R1: ch 23
Row 1: starting in 2nd ch from hook, sc across (22)
Row 2: ch 1, turn, sc across (22)
Row 3: ch 1, turn, sc across (22)
Row 4: ch 1, turn, sc across (22)
Fasten off. Leave 18 cm tail.
Fold and pinch each piece into a rounded loop.
Bow Tails (Make 2)
Yarn: deep red
Source: Standard bow shaping
R1: ch 19
Row 1: starting in 2nd ch from hook, sc across (18)
Row 2: ch 1, turn, sc across (18)
Row 3: ch 1, turn, dec, sc 14, dec (16)
Row 4: ch 1, turn, dec, sc 12, dec (14)
Row 5: ch 1, turn, dec, sc 10, dec (12)
Fasten off. Leave 18 cm tail.
Shape the lower ends into gentle points.
Bow Center Wrap (Make 1)
Yarn: deep red
Source: Standard bow shaping
R1: ch 8
Row 1: starting in 2nd ch from hook, sc across (7)
Row 2: ch 1, turn, sc across (7)
Fasten off. Leave long tails.
Rose Center Detail (Make 1)
Yarn: deep red
Source: Standard crochet rose shaping
R1: ch 21
Row 1: starting in 2nd ch from hook, *(2 dc in next st, 1 dc in next st)* repeat across
Row 2: roll the strip into a spiral rose and stitch through the base to secure
Fasten off. Leave 14 cm tail.
Assembly Instructions
- Sew the two padded handles evenly to the upper edge of the bag.
- Check the handle spacing from the front before tightening the final stitches.
- Pin the two bow loops at the center front of the bag.
- Attach the two bow tails beneath the loops so they angle downward evenly.
- Wrap the center band around the bow middle and secure it tightly.
- Sew the crochet rose directly over the wrapped center.
- Add an optional lining if you want more structure inside the handmade crochet handbag.
- Add an optional snap or inner tie closure if needed.
- Weave in every yarn tail securely and deeply.
- Steam lightly if needed, but do not flatten the bow.
The red crochet handbag is complete.
7 Technical Tips for Cleaner Crochet Bags
- Keep the base firm. A soft base makes the whole bag lean forward once the bow is attached.
- Count every body round. One missed stitch changes the handle spacing and throws off the front center.
- Use a structured yarn. Soft stretchy yarn makes the bow droop and weakens the overall crochet bag pattern.
- Pin all bow parts before sewing. Uneven loop height is obvious immediately on a centered design.
- Reinforce the handles twice. The handle joins carry the highest stress during real use.
- Do not overstuff or pad the bow. A bulky bow looks stiff instead of elegant.
- Use a lining for daily wear. A lining helps the bag keep shape and protects the body from stretching over time.
Conclusion
This crochet bag pattern works because the structure stays simple while the oversized bow creates the full identity of the piece. The gathered upper edge softens the silhouette. The padded handles keep it practical. The rose center finishes the front without needing extra embellishment. Use this build as a base, then change the color, rose size, or handle width instead of rewriting the whole handbag. Photograph the finished bag from a front-facing angle so the body shape, bow, rose center, and handle curve all stay visible in one frame. Share it on Pinterest and Instagram with #RedBowCrochetBag. Will your next version stay classic red, or switch to ivory for a bridal-inspired finish?









