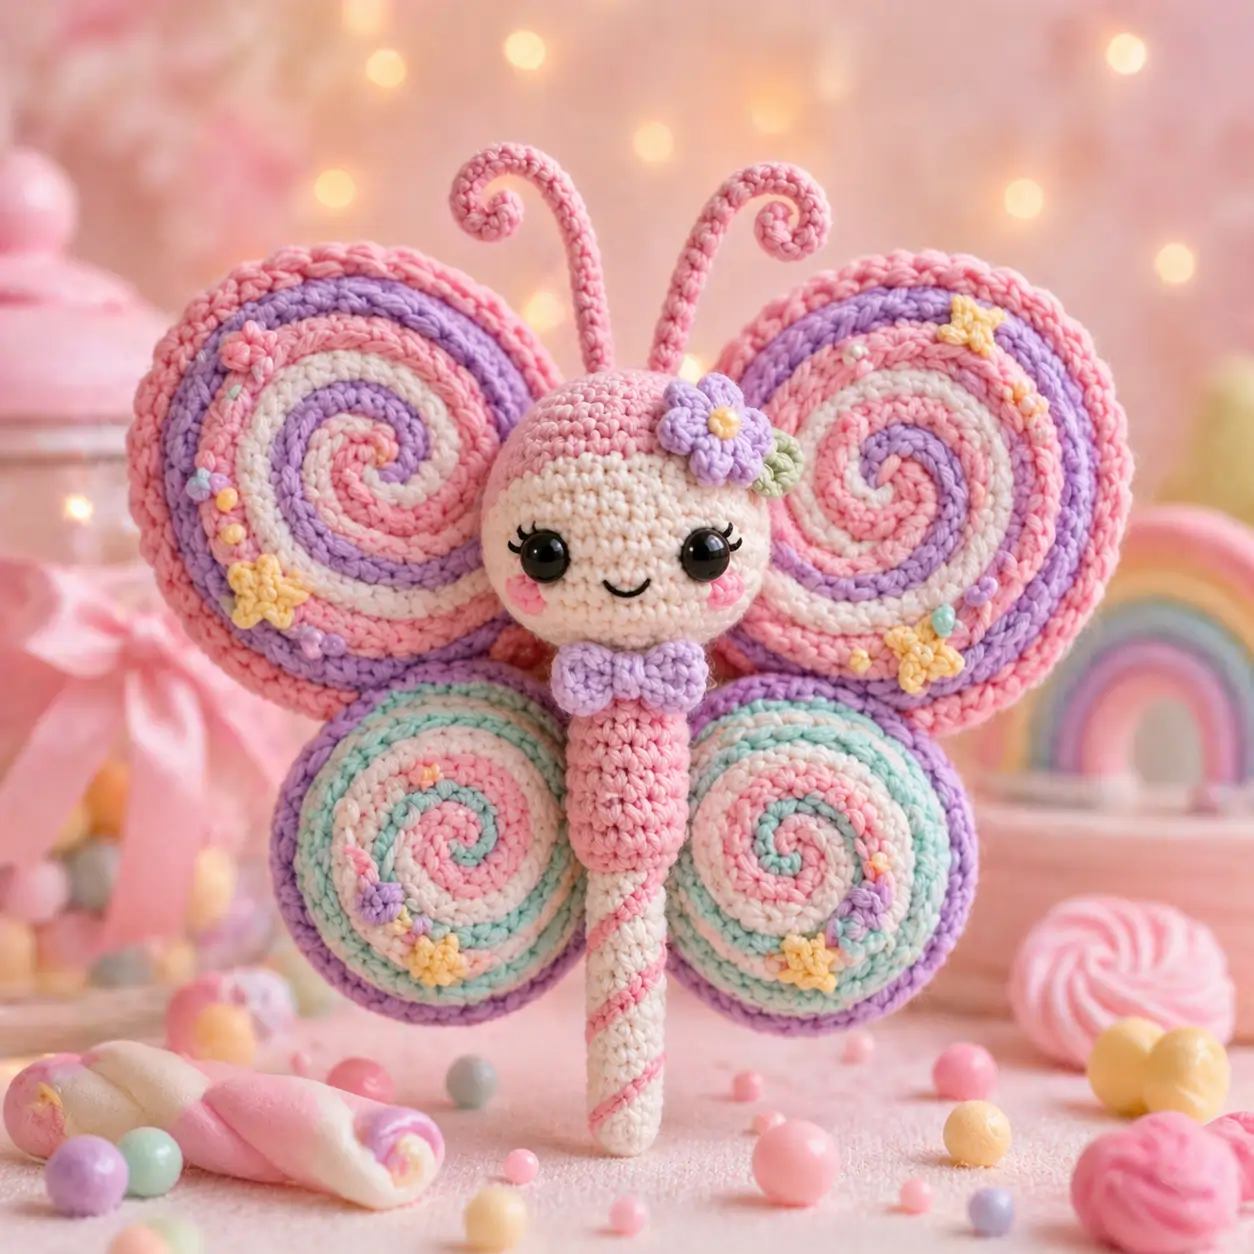
Butterfly wings don’t mirror perfectly in nature; that asymmetry influences how the spiral panels are balanced in this butterfly amigurumi crochet pattern. This design uses worsted cotton yarn, a 2.5–3.0 mm hook, and basic shaping to create a structured toy approximately 18 cm tall. The build suits intermediate makers who need controlled tension for layered wings. It works well as a nursery mobile element due to its flat wing profile.
The Design: What Makes This Butterfly Different
The wings rely on spiral discs rather than flat color rows. That decision prevents visible jog lines and distributes color evenly across the surface. Each wing is built as a continuous increase circle, then edged for rigidity. Without that edge round, the wings curl inward under their own tension.
The body uses a narrow cylinder that transitions into a tapered tail. This keeps the center of gravity low, which stabilizes the toy when seated. A common mistake is overstuffing the head while leaving the body soft, causing forward tilt.
Another structural choice is the use of separate appliqué details like flowers and stars. These are stitched after assembly to avoid distorting the wing tension during construction.
Project Info at a Glance
| Skill Level | Time | Finished Size | Hook | Best For |
|---|---|---|---|---|
| Intermediate | 6–8 hours | 18 cm | 2.5–3.0 mm | Decor / Mobile |
Materials and Tools
Yarn
- Pink — Worsted — 50g — cotton blend
- Lavender — Worsted — 30g — cotton blend
- Mint — Worsted — 30g — cotton blend
- Cream — Worsted — 40g — cotton blend
- Yellow accents — Worsted — 10g
Tools
- Hook 2.5–3.0 mm
- 8–10 mm safety eyes
- Polyester stuffing
- Yarn needle
- Stitch markers
Abbreviations
MR (magic ring), sc (single crochet), inc (increase), dec (decrease), sl st (slip stitch), ch (chain), BLO (back loop only). Invisible decrease is used to reduce stitch count without visible gaps on the surface.
Pattern — Step by Step
Head (Make 1)
Yarn: Cream
- R1: 6 sc in MR (6)
- R2: inc ×6 (12)
- R3: (sc, inc) ×6 (18)
- R4: (2 sc, inc) ×6 (24)
- R5: (3 sc, inc) ×6 (30)
- R6–R10: sc around (30)
- R11: (3 sc, dec) ×6 (24)
- R12: (2 sc, dec) ×6 (18)
- Insert eyes between R7–R8
- R13: (sc, dec) ×6 (12)
- R14: dec ×6 (6)
Fasten off.
Body (Make 1)
Yarn: Pink
- R1: 6 sc in MR (6)
- R2: inc ×6 (12)
- R3: (sc, inc) ×6 (18)
- R4–R8: sc around (18)
- R9: (sc, dec) ×6 (12)
- R10–R14: sc around (12)
Stuff lightly.
Tail (Make 1)
Yarn: Cream + Pink stripe
- R1: 6 sc in MR (6)
- R2–R12: sc around (6)
Alternate colors every 2 rounds.
Upper Wings (Make 2)
Yarn: Pink / Lavender / Cream spiral
- R1: 6 sc in MR (6)
- R2: inc ×6 (12)
- R3: (sc, inc) ×6 (18)
- R4: (2 sc, inc) ×6 (24)
- R5: (3 sc, inc) ×6 (30)
- R6: (4 sc, inc) ×6 (36)
Edge with single crochet in contrasting color.
Lower Wings (Make 2)
Yarn: Mint / Cream / Pink spiral
- R1: 6 sc in MR (6)
- R2: inc ×6 (12)
- R3: (sc, inc) ×6 (18)
- R4: (2 sc, inc) ×6 (24)
- R5: (3 sc, inc) ×6 (30)
Antennae (Make 2)
- Ch 10, sc back along chain
Cheek Patches (Make 2)
- MR, 6 sc, sl st
Flower Appliqué
- MR, (ch 2, sl st) ×5
Assembly
- Sew head to body.
- Attach tail centered at base.
- Position eyes and embroider mouth.
- Sew upper wings to back.
- Attach lower wings beneath.
- Add antennae to top of head.
- Attach cheek patches.
- Sew flower detail.
- Check symmetry of wings.
- Weave in all ends.
The structure holds upright due to balanced wing placement and firm stuffing.
7 Technical Tips
- Use a stitch marker every round. Missing one increase shifts the spiral alignment permanently.
- Control stuffing density in the head. Overfilling stretches stitches and exposes stuffing.
- Apply invisible decreases only on visible sections. Standard decreases leave small gaps.
- Place eyes before final closing. Late insertion distorts the stitch grid.
- Maintain even tension in spiral wings. Loose stitches flatten the curvature.
- Pin wings before sewing. Misalignment causes imbalance when standing.
- Weave tails back through dense areas. Short tails unravel with handling.
Conclusion
This butterfly amigurumi crochet pattern combines spiral construction with structural shaping for stability and visual balance. The finished piece maintains its form due to consistent stitch counts and controlled assembly. For best results, complete one wing pair first and verify symmetry before attaching. Share your finished butterfly on Pinterest or Instagram using #RainbowButterflyAmigurumi. How did your spiral alignment hold across both wings?









