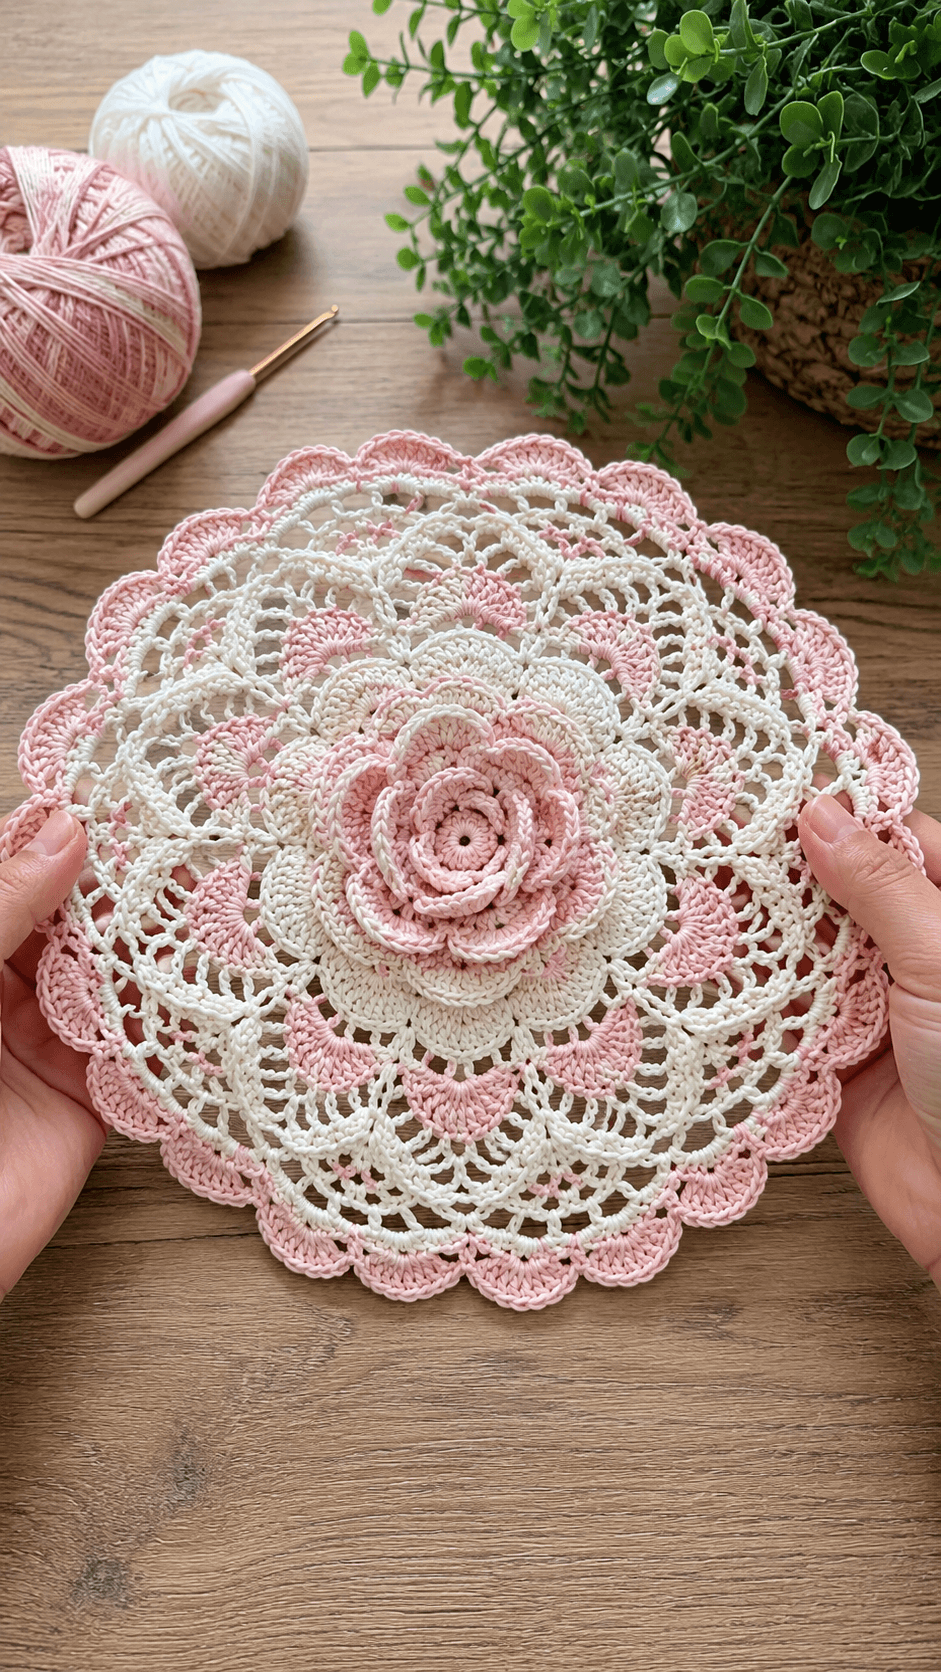
Layered rose petals change the structure of a doily from flat lace to relief lace. That single shift is what defines this pink rose crochet doily pattern. The sample shown here uses fine cotton thread in white and blush pink, a small steel hook, and repeated shell sections to build a floral center with a scalloped edge. It suits intermediate crocheters who are comfortable reading round-based lace instructions and keeping stitch counts stable across openwork sections.
The Design: What Makes This Rose Doily Different
A rose doily depends on depth at the center and air in the outer rounds. The layered flower in the middle is not decorative filler. It creates the visual anchor, so the first design choice is a raised petal stack rather than a flat rosette. That keeps the center from disappearing once the lace rounds expand.
The second choice is color separation. White carries the open lattice and makes the negative space legible. Pink is reserved for petal bands, scallops, and the center rose, which keeps the floral structure readable from a distance. In a floral crochet doily, too many color changes can blur the repeat. Too few can flatten the entire piece.
The third choice is edge control. A wide scalloped border gives the round shape a clean finish and helps the doily block evenly. One common mistake with a crochet rose doily is adding chain space too loosely in the outer rounds. That produces a wavy border before blocking and distorts the petal rhythm around the edge.
Project Info at a Glance
| Skill Level | Time | Finished Size | Hook | Best For |
|---|---|---|---|---|
| Intermediate | 8–12 hours | Approx. 28–40 cm / 11–16 in | 1.5–1.75 mm steel hook | Tray styling, side tables, dresser tops, gift sets |
Materials and Tools
Yarn
- White crochet cotton thread — size 10 — approx. 60–80 g
- Blush pink crochet cotton thread — size 10 — approx. 40–60 g
Tools
- Steel crochet hook 1.5 mm or 1.75 mm
- Small scissors
- Tapestry needle
- Rust-proof pins for blocking
- Blocking mat or thick towel
- Spray bottle or starch, optional
Abbreviations
- MR = magic ring
- ch = chain
- sl st = slip stitch
- sc = single crochet
- hdc = half double crochet
- dc = double crochet
- tr = treble crochet
- sp = space
- rep = repeat
For this type of lace, consistent chain tension matters more than speed. A visibly tight chain arch beside a loose arch will show immediately after blocking.
Construction Overview
This doily is worked from the center outward in joined rounds. The center begins as a compact rose. From there, petal rounds alternate with open lace rounds, then transition into broader shell repeats and an outer scalloped border. Color changes are optional, but the pink-and-white arrangement works well because it separates the flower from the mesh background.
Round-by-Round Pattern Framework
This is a practical build map for reproducing the look of the photographed piece rather than a chart-specific transcription from a published pattern.
Center Ring
- Make an MR, ch 1, work 12 sc into ring. Join with sl st.
- Ch 2, work 2 dc in each stitch around. Join. You now have 24 stitches.
- Work a foundation petal round with alternating chain spaces: (sc in next stitch, ch 3) around.
Inner Rose Petals
- Into each chain space, work (sc, hdc, 3 dc, hdc, sc) to form narrow petals.
- On the back of the petal round, create a second support round with chain arches worked behind the first petals.
- Into each back-loop arch, work larger petals such as (sc, hdc, 5 dc, hdc, sc).
- Repeat once more for a third layer if extra depth is needed.
The center should look cupped before blocking. That is expected. The surrounding lace rounds will flatten and frame it.
Petal Base Round
- Join white thread behind the outer rose layer.
- Work chain arches evenly around the flower base, using the same repeat count all the way through.
- Check symmetry before moving to shells. A missed arch here shifts every outer motif.
First Shell Round
- Into each arch, work a fan or shell group such as 7 dc or sc, 5 dc, sc depending on the density you want.
- Separate shell groups with a small chain gap to preserve curvature.
- If using pink, this is a strong round for the first outer color change.
Open Lace Transition
- Work one round of chain arches over the shell tops.
- Follow with a round that anchors each arch with sc or hdc.
- Repeat the arch-and-anchor sequence once more to widen the doily without adding visual bulk.
Secondary Petal Bands
- Switch back to pink.
- Work grouped shells into every second or third arch to create spaced petal clusters.
- Keep the repeat count exact. In floral lace, one extra shell is enough to force the border off-round.
Mesh Expansion Rounds
- Return to white.
- Build taller arches using combinations such as ch 5, sc in next joining point.
- Add a stabilizing round with small shell accents or V-stitches between arches.
- Continue until the diameter reaches the desired size.
Outer Scallop Border
- Join pink for the edge.
- Work one sc foundation round to regularize the final repeat count.
- Create scallops by working shell groups into marked intervals, for example skip 2 stitches, 7 dc in next stitch, skip 2 stitches, sc in next stitch.
- Adjust skipped stitches only if required to keep the border flat.
Color Placement Notes
Use pink for the center rose, selected shell rounds, and the final scalloped edge. Keep the mesh rounds white. That balance matches the photographed sample and prevents the lace from looking visually crowded. For a softer contrast, substitute ecru for the white. For a more vintage finish, use variegated rose thread at the center and solids outside it.
Blocking and Finishing
- Weave in all thread tails before wet blocking.
- Soak or lightly mist the doily until evenly damp.
- Lay it flat on a blocking board or towel.
- Pin the center first.
- Pin opposite points on the outer edge to keep the round balanced.
- Shape each scallop individually.
- Open all chain arches with your fingers before the piece dries.
- Apply light starch only if you want a firmer tabletop finish.
- Let the doily dry completely.
A rose doily usually looks unfinished before blocking. The lace definition appears after the arches are opened and the scallops are set.
Common Failure Points
- Center buckling: The petal base round has too many stitches. Reduce one repeat segment and check again.
- Ruffling outer lace: Chain arches are too long for the number of anchors. Shorten each arch by one chain across the full round.
- Cupping border: Too few stitches were added before the scallop round. Add a balancing foundation round.
- Uneven petals: Mixed stitch height or inconsistent tension inside shells. Count each petal group before moving on.
- Visible color jumps: Join new thread in a hidden anchor point behind a shell or petal base rather than in an open arch.
Where This Doily Works Best
This style works well on round side tables, vanity tops, serving trays, and under ceramic vases. It also scales well as a gift project because color changes can be adapted to bridal, spring, or vintage palettes without changing the core structure. A smaller version can be turned into a centerpiece mat. A larger version can be blocked stiff and displayed under glass.
Conclusion
A pink rose crochet doily succeeds when the center flower stays dimensional and the lace outside it stays controlled. Focus on repeat accuracy, balanced chain spacing, and firm blocking. That combination gives the piece its floral definition and keeps the scalloped edge clean. For the closest match to the photographed sample, start with size 10 cotton thread in white and blush pink, keep the center compact, and let the outer lace expand in measured stages. After that, block aggressively enough to open every arch and separate every scallop.









