SEO Meta
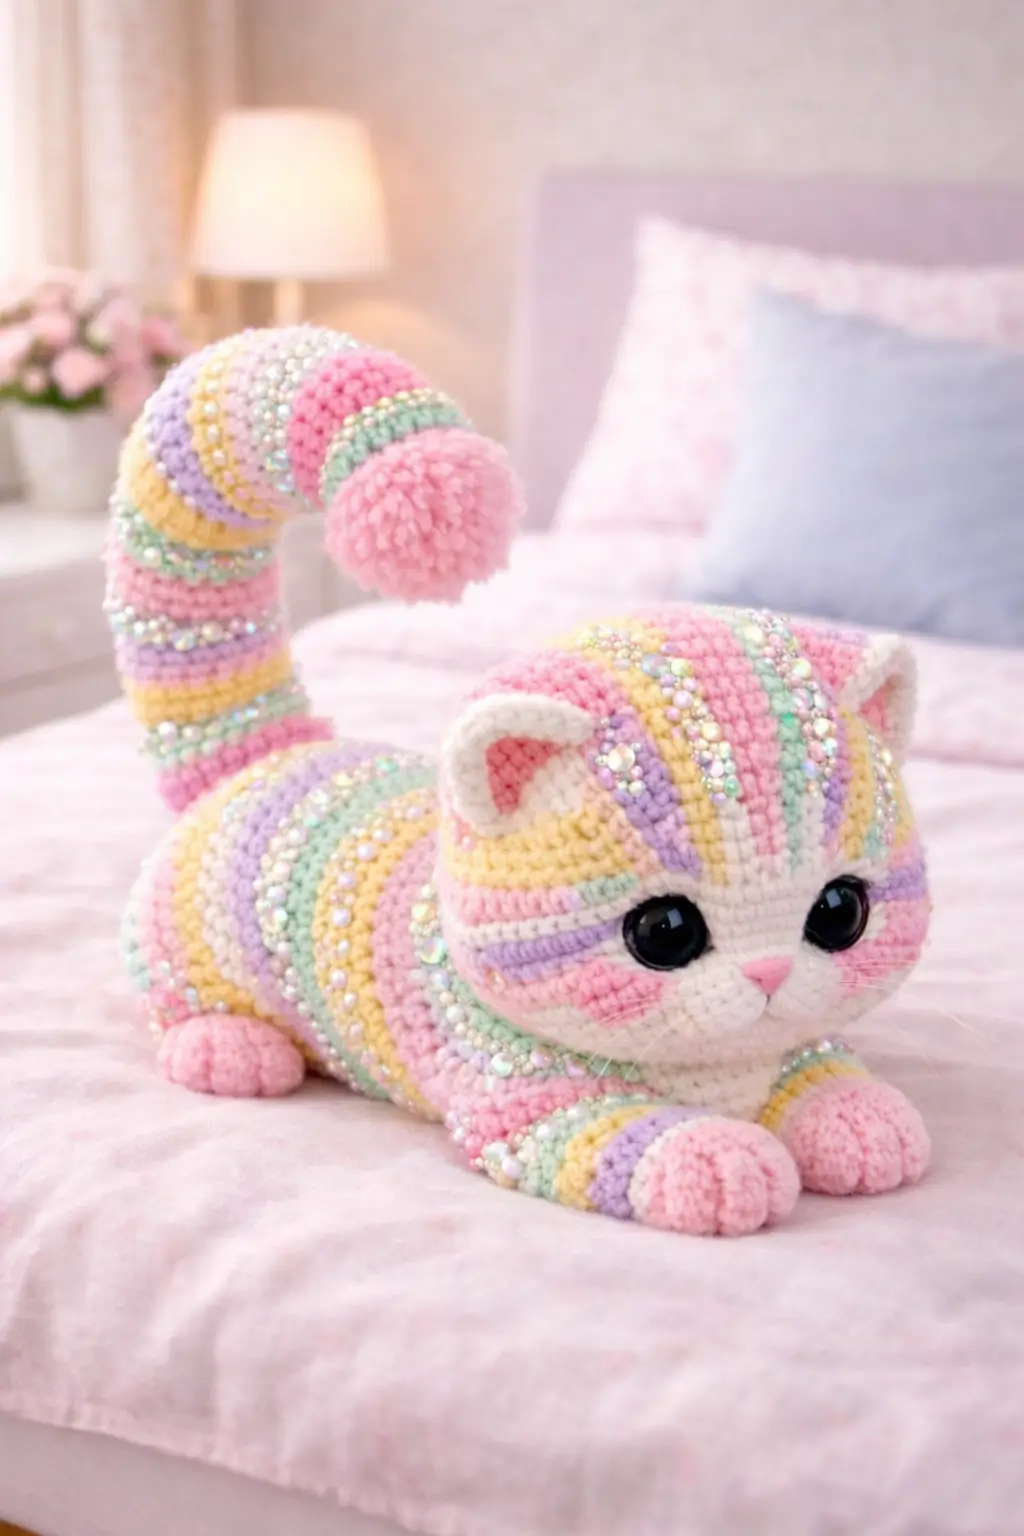
A striped cat like this fails in one place first: the color rhythm. Not the head. Not the tail. The color rhythm. This pastel cat amigurumi crochet pattern is designed around the exact visual logic in the photo, with soft rainbow striping, oversized black eyes, a rounded body, short legs, upright ears, and a curled tail finished with a pom-pom tip.
Why This Cat Design Works
This plush reads as decorative rather than realistic because the proportions stay compact. The head is broad, the muzzle is very short, and the paws are rounded into the body instead of separated into long limbs. Good choice. Longer legs would pull the design toward a standing toy cat, which is not what the photo shows. The appeal comes from the low body, wide face, and oversized eyes.
The pastel striping does most of the visual work. That means the shaping has to stay simple. If the body were covered in extra sculpted details, the color flow would break apart. Here the stripes wrap across the forehead, torso, legs, and tail in a continuous candy-like sequence. That is why the cream face patch matters. It interrupts the striping just enough to frame the eyes and nose.
The tail is also doing more than decoration. It curves high and ends in a large pom-pom, which changes the silhouette immediately. Without that top-heavy tail finish, the toy would read as a standard lying cat. With it, the plush becomes distinctly stylized and display-driven.
Project Snapshot
| Item | Pattern Target |
|---|---|
| Character type | Pastel striped kawaii cat |
| Skill level | Intermediate |
| Yarn | DK cotton or soft acrylic in multiple pastel shades |
| Hook size | 2.75 mm to 3.25 mm |
| Safety eyes | 14 mm to 18 mm |
| Finished size | Approx. 22–28 cm long including tail |
Materials and Tools
- Main yarn colors: pastel pink, lavender, mint, pale yellow, cream
- Detail yarn: pink for nose, white for whiskers if desired
- Hook: 2.75 mm for tighter stitches or 3.25 mm for softer shaping
- Safety eyes: 16 mm works well for the oversized look in the photo
- Stuffing: polyester fiberfill
- Tapestry needle
- Stitch markers
- Straight pins
- Small pom-pom maker or cardboard template for tail tip
- Soft blush or pink yarn for cheek tint
Abbreviations
MR = magic ring
sc = single crochet
inc = increase
dec = invisible decrease
sl st = slip stitch
ch = chain
hdc = half double crochet
dc = double crochet
st = stitch
Use invisible decrease throughout. Standard decreases show hard diagonal marks across striped sections and disrupt the clean pastel color bands.
Character Breakdown From the Photo
- large rounded head
- cream face patch
- oversized black safety eyes
- small pink nose
- pink cheek blush
- two upright ears with pink inner detail
- rounded low body
- two visible front paws
- rear body with tucked back paws
- high curved tail
- large fluffy pom-pom tail tip
- multi-color pastel striping with bead-like embellishment effect
Step-by-Step Pastel Cat Pattern
This custom pattern is written to match the photographed plush and uses standard amigurumi shaping. Change colors every 2 to 4 rounds, or more often in short sections, to create the striped pastel effect. The decorative pearl-like highlights shown in the image can be added after assembly with beads or surface embroidery if desired.
Head (Make 1)
Yarn: Start with cream, then alternate pastel shades
Source: Standard amigurumi math
R1: 6 sc in MR (6)
R2: inc x6 (12)
R3: (sc 1, inc) x6 (18)
R4: (sc 2, inc) x6 (24)
R5: (sc 3, inc) x6 (30)
R6: (sc 4, inc) x6 (36)
R7: (sc 5, inc) x6 (42)
R8-R13: sc around (42)
Change colors as desired while keeping the lower muzzle area cream.
R14: (sc 5, dec) x6 (36)
R15: (sc 4, dec) x6 (30)
Insert eyes between R10 and R11, spaced 8 stitches apart.
R16: (sc 3, dec) x6 (24)
Stuff firmly.
R17: (sc 2, dec) x6 (18)
R18: (sc 1, dec) x6 (12)
R19: dec x6 (6)
Fasten off. Leave 25 cm tail.
Face Patch (Optional Overlay, Make 1)
Yarn: Cream
Source: Standard amigurumi math
R1: ch 7, starting in 2nd ch from hook sc 5, 3 sc in last ch, working on opposite side sc 4, inc in final st (14)
R2: inc, sc 4, inc x3, sc 4, inc x2 (20)
R3: sc around (20)
Fasten off. Leave 20 cm tail.
Sew centered under the eyes if you want sharper separation between the striped head and the cream muzzle area.
Ears (Make 2)
Yarn: Outer in pastel stripe sequence, inner ear in soft pink
Source: Standard amigurumi math
R1: 4 sc in MR (4)
R2: inc x4 (8)
R3: (sc 1, inc) x4 (12)
R4-R5: sc around (12)
Flatten slightly.
Fasten off. Leave 15 cm tail.
For inner ear detail, embroider or sew a small pink triangle inside each ear.
Body (Make 1)
Yarn: Alternate pastel shades in curved stripe sections
Source: Standard amigurumi math
R1: 6 sc in MR (6)
R2: inc x6 (12)
R3: (sc 1, inc) x6 (18)
R4: (sc 2, inc) x6 (24)
R5: (sc 3, inc) x6 (30)
R6: (sc 4, inc) x6 (36)
R7-R12: sc around (36)
Change colors every 2 rounds or use uneven stripe sections for a painterly effect.
R13: (sc 4, dec) x6 (30)
R14-R16: sc around (30)
R17: (sc 3, dec) x6 (24)
R18: sc around (24)
Stuff firmly through the center and lower body.
Fasten off. Leave 30 cm tail.
Front Paws (Make 2)
Yarn: Soft pink with pastel striping at upper section
Source: Standard amigurumi math
R1: 6 sc in MR (6)
R2: inc x6 (12)
R3-R4: sc around (12)
R5: (sc 1, dec) x4 (8)
R6-R9: sc around (8)
Stuff lightly at the paw only.
Flatten and fasten off. Leave 18 cm tail.
Back Paws (Make 2)
Yarn: Soft pink with pastel striping if desired
Source: Standard amigurumi math
R1: 6 sc in MR (6)
R2: inc x6 (12)
R3-R5: sc around (12)
R6: (sc 1, dec) x4 (8)
R7-R10: sc around (8)
Stuff lightly and flatten.
Fasten off. Leave 18 cm tail.
Tail (Make 1)
Yarn: Alternate pastel shades in narrow stripes
Source: Standard amigurumi math
R1: 4 sc in MR (4)
R2: inc x4 (8)
R3-R6: sc around (8)
R7: (sc 3, inc) x2 (10)
R8-R24: sc around (10)
Change colors every 2 rounds for candy-striped effect.
Stuff firmly at the base and lightly through the upper curve.
Fasten off. Leave 25 cm tail.
Pom-Pom Tail Tip (Make 1)
Yarn: Soft pink plush or matching pastel yarn
Source: Standard craft construction
Make one dense pom-pom approximately 5 to 7 cm wide. Trim evenly, then stitch securely to the tail tip.
Nose (Make 1 embroidered detail)
Yarn: Pink
Embroider a small upside-down triangle nose centered below the eyes.
Cheek Tint (Optional, Make 2 areas)
Material: pink blush, pastel chalk, or embroidery
Add one blush patch beneath each eye.
Pearl or Bead Embellishment (Optional)
Material: small iridescent beads or faux pearls
Sew scattered beads along selected stripe lines after assembly. Keep spacing irregular so the body does not look grid-based.
Assembly
- Sew the face patch to the lower front of the head if using it.
- Insert or confirm the safety eyes before final closure.
- Embroider the nose and add blush beneath the eyes.
- Attach the ears high on the head, angled slightly outward.
- Sew the head to the front of the body with the face tilted slightly downward.
- Attach the front paws low and forward so the cat rests in a crouched pose.
- Sew the back paws under the rear body, partly hidden from the side view.
- Attach the tail high at the back and curve it upward before closing the final stitches.
- Sew the pom-pom securely to the tail tip.
- Add beads or pearl embellishment last, keeping them away from seam joins and eye placement.
Technical Tips That Actually Matter
Color planning:
Map the stripe order before you start the body. Random switching sounds flexible, but it often creates two identical colors meeting at the shoulder line.
Face contrast:
Keep the cream muzzle area broader than you think. If the pastel stripes run too close to the nose, the eyes lose their framed look.
Tail support:
Stuff the base of the tail harder than the upper section. A uniformly soft tail will not hold the upright curve once the pom-pom is attached.
Pom-pom scale:
Do not undersize the tail tip. A pom-pom below about 5 cm wide looks accidental rather than intentional on a cat this chunky.
Eye placement:
Set both eyes before attaching the head to the body. Even a 2 mm mismatch becomes obvious on a face with symmetrical cream framing.
Bead placement:
Add embellishment only after all major seams are done. Sewing body parts through beaded rows is slower and can twist the stripe lines.
Paw spacing:
Pin both front paws before sewing either one. Narrow spacing makes the cat look stiff, while overly wide placement weakens the crouched silhouette.
SEO Notes and Search Positioning
This design fits a strong decorative plush niche. The best target phrase is pastel cat amigurumi crochet pattern, supported by terms like cat crochet pattern pdf, striped cat amigurumi, kawaii cat crochet pattern, and crochet cat plush pattern. Use those naturally in product descriptions, image alt text, and FAQ sections. The distinctive tail pom-pom and pastel striping already give the page strong specificity.
Conclusion
This pastel cat amigurumi crochet pattern works because the structure stays restrained while the color does the styling. The head remains broad, the paws stay short, the cream face patch frames the eyes, and the pom-pom tail changes the silhouette completely. Keep the shaping simple, control the stripe sequence, and add embellishment only after the plush is fully assembled. Share the finished cat on Pinterest and Instagram with #PastelCatPattern.
Question for the post comments: would you keep the pearl-studded pastel stripes, or simplify this same cat into a clean rainbow version without embellishment?










Do you have a printable PDF version of this? It is so cute!