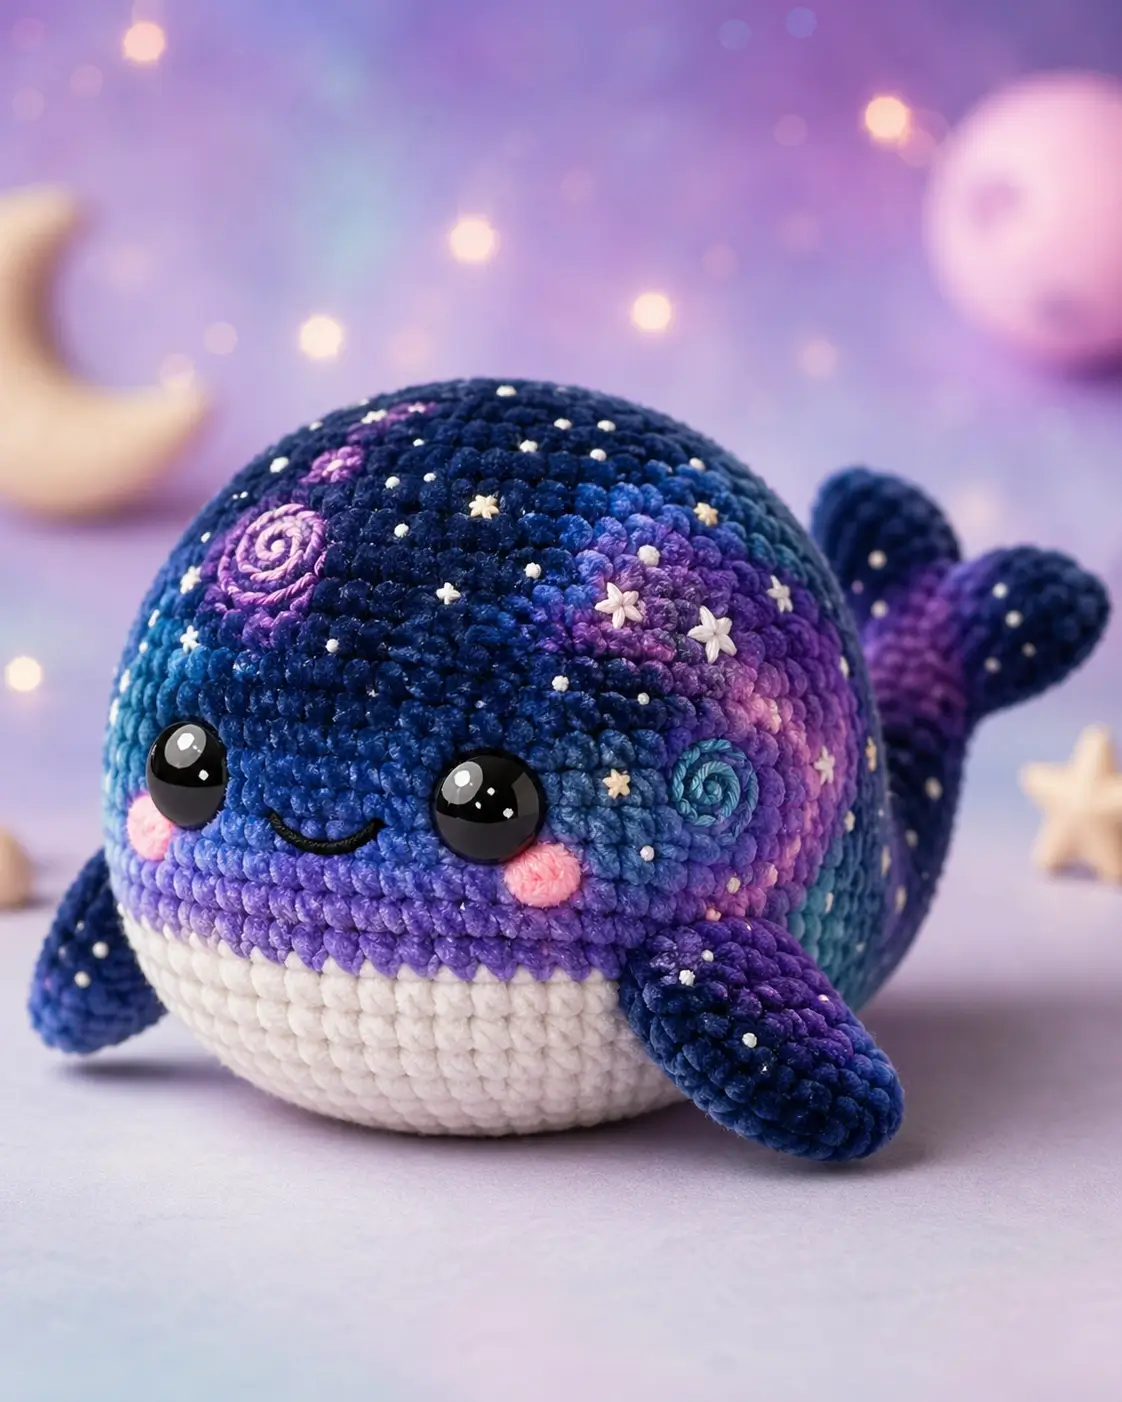
A whale needs a horizontal tail fluke, not a fish tail; that is the balance problem in this whale amigurumi crochet pattern. You will make a velvet galaxy whale with a white belly, side fins, pink cheeks, star embroidery, and a 22.8 cm reference length. Use chunky chenille, a 3.5 mm hook, and intermediate shaping. The finished toy works as a shelf sitter because the belly stays broad.
The Design: What Makes This Galaxy Whale Different
Build the whale as a two-mass toy: a round head dome and a shorter rear barrel. You get the face scale of the photo without making the tail carry too much stuffing. The belly is sewn on as a white patch, not worked as a full colorwork band, because velvet yarn hides seams better than it hides jagged color changes.
A horizontal fluke is the key whale decision. Fish tails read vertical; this one needs two side lobes joined across a short stem so the toy looks like a whale from the rear. The maker should also keep the spiral galaxies flat. Raised appliqués can roll if they sit over a decrease zone. Most crochet whale plush designs lose shape when the eyes are placed too low, which makes the mouth line crowd the belly patch.
Project Info at a Glance
| Skill Level | Time | Finished Size | Hook | Best For |
|---|---|---|---|---|
| Intermediate | 5–6 hours | Approx. 22.8 cm long | 3.5 mm | Shelf sitter, nursery display, market plush |
Materials and Tools
Yarn
- Deep navy velvet yarn — chunky chenille — 45 g — Himalaya Dolphin Baby, Premier Parfait Chunky, or similar
- Blue-purple variegated velvet yarn — chunky chenille — 10 g — for galaxy transitions
- White velvet yarn — chunky chenille — 18 g — for belly patch
- Pink velvet yarn — chunky chenille — 3 g — for cheek patches
- Teal and lavender DK cotton — accent yarn — 5 g total — for spiral galaxies
- Cream embroidery yarn — cotton or acrylic — 2 g — for stars
- Black embroidery thread — small length — for smile
Tools
- Hook 3.5 mm
- 14 mm black safety eyes
- Polyester stuffing
- Yarn needle
- Embroidery needle
- Stitch markers
- Pins
- Scissors
For toys intended for children under 3, embroider the eyes instead of fitting plastic safety eyes.
Abbreviations
MR = magic ring; sc = single crochet; inc = increase; dec = decrease; sl st = slip stitch; ch = chain; BLO = back loop only; FLO = front loop only; surface sl st = slip stitch worked on top of finished fabric.
Use an invisible decrease by catching the front loops of the next two stitches before one yarn-over pull-through; it removes the ridge that normal sc2tog leaves on a velvet dome.
Pattern — Step by Step
Work in a continuous spiral unless noted. The main size uses a large 42-stitch plateau, which matches the round photo shape while staying below the larger 48-stitch body used in some chunky whale patterns.
Head Dome
Make 1. Yarn: deep navy and blue-purple velvet.
R1: 6 sc in MR (6)
R2: inc ×6 (12)
R3: (sc, inc) ×6 (18)
R4: (2 sc, inc) ×6 (24)
R5: (3 sc, inc) ×6 (30)
R6: (4 sc, inc) ×6 (36)
R7: (5 sc, inc) ×6 (42)
R8–R14: sc around (42)
Insert 14 mm eyes between R10 and R11, 12 stitches apart. Keep the eye line slightly above center so the smile has room.
R15: (5 sc, dec) ×6 (36)
R16: (4 sc, dec) ×6 (30)
R17: (3 sc, dec) ×6 (24)
Stuff the dome firmly, adding smaller pieces behind the eye backs.
R18: (2 sc, dec) ×6 (18)
R19: (sc, dec) ×6 (12)
R20: dec ×6 (6)
Fasten off. Leave 25 cm tail.
Body Barrel
Make 1. Yarn: deep navy velvet with blue-purple color changes on any plateau rounds.
R1: 6 sc in MR (6)
R2: inc ×6 (12)
R3: (sc, inc) ×6 (18)
R4: (2 sc, inc) ×6 (24)
R5: (3 sc, inc) ×6 (30)
R6: (4 sc, inc) ×6 (36)
R7: (5 sc, inc) ×6 (42)
R8–R16: sc around (42)
Change color randomly across R10–R16 for galaxy patches; carry ends inside and knot only after testing fabric tension.
R17: (5 sc, dec) ×6 (36)
R18: sc around (36)
R19: (4 sc, dec) ×6 (30)
R20: (3 sc, dec) ×6 (24)
Stuff the barrel so the underside stays flat enough to sit.
R21: (2 sc, dec) ×6 (18)
R22: (sc, dec) ×6 (12)
R23: dec ×6 (6)
Fasten off. Leave 35 cm tail.
White Belly Patch
Make 1. Yarn: white velvet.
R1: 6 sc in MR (6)
R2: inc ×6 (12)
R3: (sc, inc) ×6 (18)
R4: (2 sc, inc) ×6 (24)
R5: (3 sc, inc) ×6 (30)
R6: (4 sc, inc) ×6 (36)
R7: (5 sc, inc) ×6 (42)
R8: sc around (42)
Pin the circle into a shallow oval before sewing. It should cover the lower front of the head and continue under the body.
Fasten off. Leave 40 cm tail.
Pectoral Fins / Front Flippers
Make 2. Yarn: deep navy velvet.
R1: 6 sc in MR (6)
R2: inc ×6 (12)
R3: (sc, inc) ×6 (18)
R4–R8: sc around (18)
R9: (sc, dec) ×6 (12)
R10: dec ×6 (6)
Stuff only the base. Flatten the tip so the fin slopes downward like the photo.
Fasten off. Leave 20 cm tail.
Tail Stem
Make 1. Yarn: deep navy velvet.
R1: 6 sc in MR (6)
R2: inc ×6 (12)
R3–R7: sc around (12)
R8: dec ×6 (6)
Stuff lightly. The stem must bend upward without forcing the body to tip forward.
Fasten off. Leave 25 cm tail.
Tail Fluke Lobes
Make 2. Yarn: deep navy velvet with optional purple at R4–R5.
R1: 6 sc in MR (6)
R2: inc ×6 (12)
R3: (sc, inc) ×6 (18)
R4–R5: sc around (18)
R6: (sc, dec) ×6 (12)
R7: dec ×6 (6)
Flatten each lobe. Place the two lobes side by side, not stacked vertically.
Fasten off. Leave 25 cm tail on each lobe.
Cheek Patches
Make 2. Yarn: pink velvet.
R1: 6 sc in MR (6)
R2: inc ×6 (12)
Sl st to close (12)
Do not stuff. Pull the center tail tight so the cheek stays round.
Fasten off. Leave 15 cm tail.
Spiral Galaxy Patches
Make 2. Yarn: teal DK cotton for one patch; lavender DK cotton for one patch.
R1: 6 sc in MR (6)
R2: inc ×6 (12)
R3: (sc, inc) ×6 (18)
R4: (2 sc, inc) ×6 (24)
With a contrasting strand, work surface sl st from the outer edge toward the center to form a spiral. Keep stitches loose enough that the patch stays flat.
Fasten off. Leave 25 cm tail.
Star Dots and Small Stars
Yarn: cream embroidery yarn.
Make 18–24 small French knots across the navy areas. Add five larger stars by crossing three straight stitches over one center point. Place at least 1 cm between large stars so the surface does not look crowded. Secure each thread tail inside the whale body.
Smile Embroidery
Yarn: black embroidery thread.
Cut 20 cm of black thread. Enter below the left eye, make a shallow curved smile over 5–6 stitches, and exit below the right eye. Couch the curve with one tiny vertical stitch at the center. Knot inside the head.
Assembly
- Pin the head dome to the front third of the body barrel, matching the lower rounds so the whale sits level.
- Sew the head to the body with the 25 cm head tail, then pass the yarn through the neck seam twice for strength.
- Pin the white belly patch from the lower face across the underside, then sew around its edge with white yarn.
- Add the smile after the belly patch is fixed, because the mouth curve must sit just above the white edge.
- Sew one cheek patch one stitch behind each eye, keeping both patches on the same round.
- Pin the pectoral fins low on each side, then sew the bases only so the tips angle forward.
- Sew the tail stem to the rear center of the body, pointing upward at about 35 degrees.
- Join the two tail fluke lobes to the tail stem in a horizontal line.
- Sew the spiral galaxy patches to the top-left and side-right areas, away from decrease ridges.
- Add star knots last, weave every tail for at least 8 cm, and trim only after the toy passes a light tug test.
The galaxy whale is complete when it sits level on the white belly patch.
7 Technical Tips
- Stitch marker drift: If the marker shifts more than 2 stitches by R14, the face line will slant. Add 1–2 plain sc at the underside before starting a decrease round to reset the marker.
- Stuffing firmness: A soft forehead collapses around 14 mm eyes and makes them tilt inward. Pack small pea-sized stuffing pieces behind each eye back before closing R18.
- Invisible decrease ridges: Chenille yarn shows a ridge when normal dec stitches stack across the front. Work every decrease through front loops only, then turn the decrease line toward the underside.
- Eye placement timing: Late eye placement can force you to reopen R15 or R16. Fit the eyes after R14, when the 42-stitch plateau is still open and the curve can be measured.
- Velvet tension holes: Holes larger than 3 mm will show stuffing under bright light. Change from a 3.5 mm hook to 3.0 mm if the plateau rounds look gapped.
- Pinning failure: An unpinned fluke often twists into a fish-tail angle. Run one long pin through both fluke lobes and the tail stem before sewing the first seam.
- Tail weaving: Short chenille tails can slip after handling. Weave each yarn tail through at least 8 cm of fabric, reverse direction once, then trim flush.
Conclusion
Record your final eye spacing, hook size, and yarn brand before making the second whale, because velvet tension changes scale fast. Block the belly patch with pins, then compare the horizontal fluke against the body centerline before the last seam is tightened. For a cleaner blog sample, photograph the toy from a low front angle so the white belly, side fins, and spiral galaxies read as one design. Save the whale amigurumi crochet pattern to Pinterest, then post the finished galaxy whale on Instagram with #GalaxyWhaleAmigurumi. Next, test one variation: teal stars on the navy side or white stars only? Which spiral position keeps this whale from looking lopsided?









