Introduction
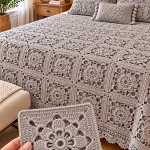
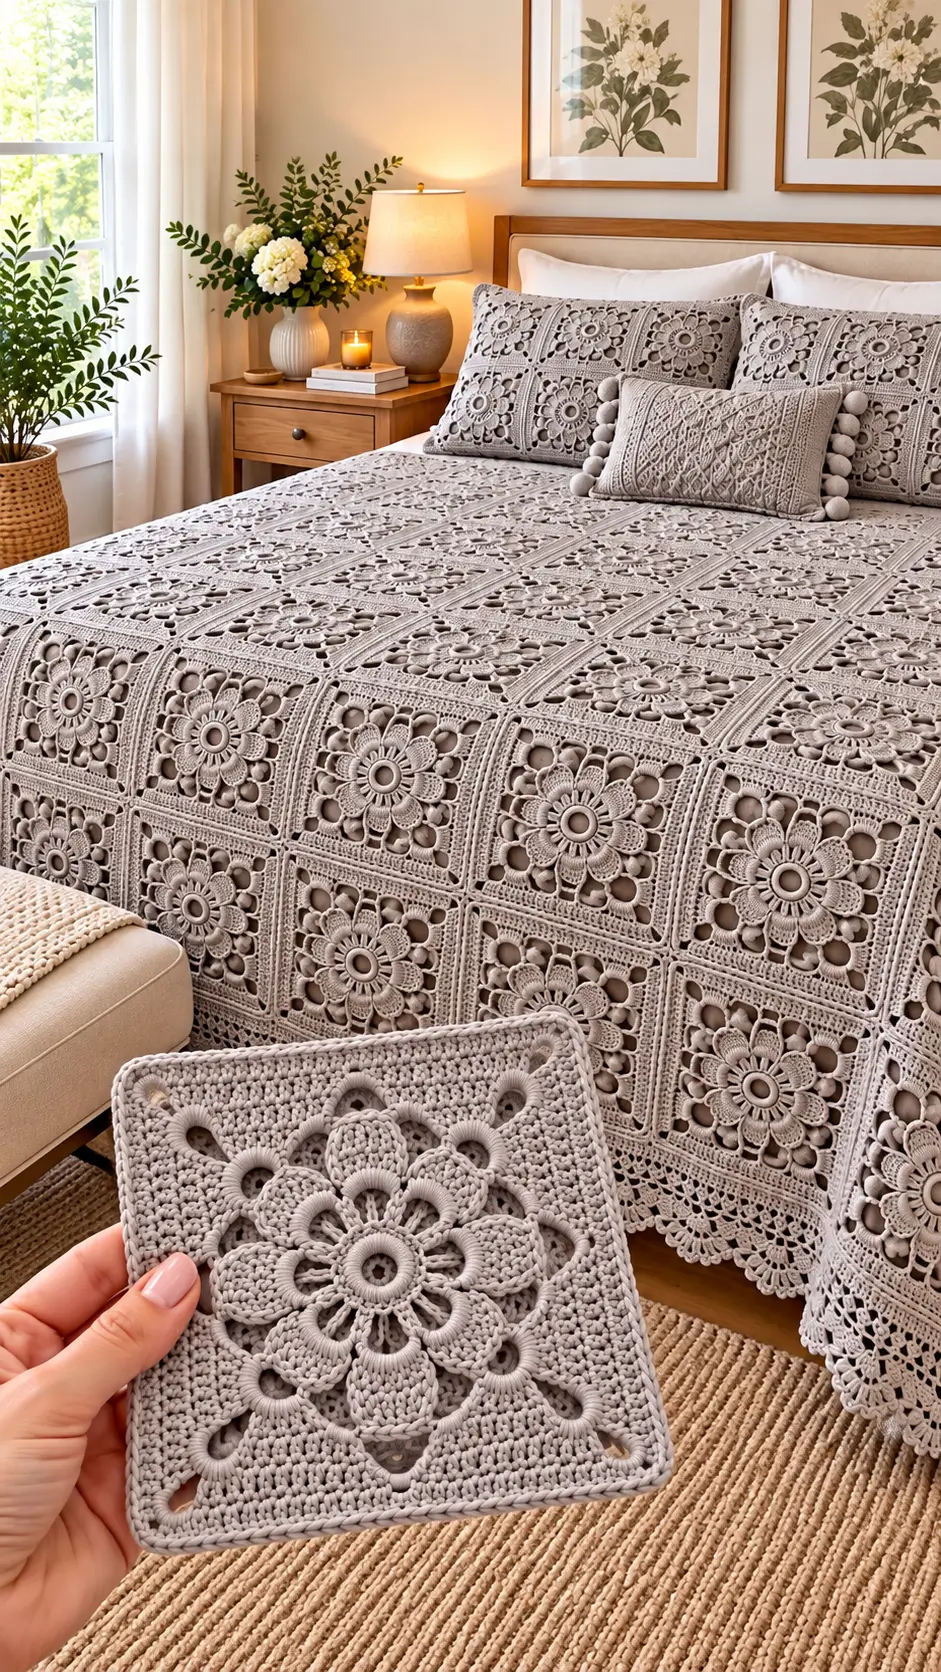
A ringed flower sits inside every taupe square on the photographed bedspread, while a separate scalloped edge hangs below the grid. This floral granny square bedspread pattern translates that construction into an original, photo-inspired crochet project using DK cotton, a 4 mm hook, and repeated eight-petal motifs. The planned 12-by-14 layout measures approximately 185 × 215 cm after blocking and edging if each square reaches 15 cm. Intermediate stitch control is required.
The Design: What Makes This Bedspread Different
The reference image has three distinct layers: a prominent floral center, open spaces around the petals, and a compact square perimeter. Rather than treating the flower as a flat printed shape, this design anchors a raised flower granny square above a second round of chain arches. That separation gives the petals relief without adding stuffing or a sewn appliqué. The square is then built around four alternating arches, placing corners at quarter turns so adjacent motifs have matching edges.
A crochet bedspread with squares also needs predictable seam geometry. Here, every completed block has exactly 27 single crochet stitches between adjacent corner spaces. Match those stitches during assembly to prevent diagonal pulling. The common error is to tighten the joining slip stitches until the fabric puckers; that distortion becomes more visible across a monochrome crochet blanket.
Pattern status: This is an original adaptation based on visible design features, not a recovered pattern from the photograph. Dimensions and project-wide yarn quantities are planning targets, not measurements of the pictured object.
Project Info at a Glance
| Detail | Specification |
|---|---|
| Skill level | Intermediate; chains, treble-height shaping, working behind petals, and joining |
| Time | Plan as a multiweek project; measure your own time per motif |
| Finished size | Target: about 185 × 215 cm, assuming 15 cm motifs and roughly 2.5 cm border depth |
| Hook | 4.0 mm, a published recommendation for Paintbox Cotton DK |
| Yarn | DK/light-worsted cotton, single taupe or warm gray shade |
| Motif layout | 12 across × 14 down = 168 squares |
| Gauge | One blocked, completed R10 motif = target 15 × 15 cm; adjust hook if needed |
| Best for | Decorative bedspread, top cover, coordinated pillow fronts |
A 15 cm motif is a project target, not a verified gauge for these instructions. Published flower-square patterns range considerably: Ravelry’s Flower Field square offers a 15.2 cm version, while an Underground Crafter floral block measures 30.5 cm. Crochet a test block before selecting the bedspread dimensions.
Materials and Tools
Yarn
- Warm taupe or mushroom gray — DK cotton — illustrative 4,000 g yarn budget, subject to swatching: Paintbox Yarns Cotton DK is a practical reference yarn, with 125 m per 50 g ball. The photographed textile is one consistent gray-beige; changing colors between petals and background is optional, not required.
- Accent yarn — 0 g for the photographed monochrome effect: If using an off-white flower center, begin with one 50 g ball and recalculate after a sample; the picture itself does not confirm a second yarn shade.
- Joining and border yarn — included in the provisional main-color allocation: Reserve approximately 15–20% of your calculated yarn quantity for seams, the outer border, sampling, and repairs.
Do not buy 4,000 g solely from this illustration. Weigh a completed, blocked motif and calculate: (grams per square × 168) × 1.20. For example, a 19 g motif would imply about 3,830 g including a 20% allowance. Actual consumption depends on gauge, fiber, and border length.
Tools
- 4.0 mm crochet hook; try 3.5 or 4.5 mm only after measuring a swatch.
- Tapestry needle, small sharp scissors, locking stitch markers, measuring tape, digital kitchen scale, and rustproof blocking pins.
- Blocking mats wide enough for several 15 cm squares and a clean, flat area for joining.
- For matching pillow fronts: two fabric backs and two 45 × 30 cm pillow inserts, if you decide to make rectangular shams.
The yarn weight, yardage, and manufacturer’s suggested 4 mm hook are documented by LoveCrafts. A published flower blanket by Jo to the World illustrates why the exact yarn amount changes with square size, joining, and edging.
Abbreviations
US terminology: ch = chain; MR = magic ring; sc = single crochet; hdc = half double crochet; dc = double crochet; sl st = slip stitch; st/sts = stitch/stitches; sp = space; RS = right side; WS = wrong side; rep = repeat; BLO = back loop only; sk = skip.
These motifs use joined rounds, not a continuous spiral. An invisible decrease is not used; it means working through the front loops of two stitches together before completing one single crochet.
Pattern — Step by Step
Flower Center and Raised Petals (Make 168)
Yarn: warm taupe. Stitch sequence: original construction based on standard round crochet math.
R1: Ch 6 and join into a ring. Ch 1, work 8 sc into the ring, join with sl st to the first sc. (8 sc)
R2: Ch 1, work 2 sc in each sc, join. (16 sc)
R3: [Sc in next sc, ch 4, sk next sc] eight times; join to first sc. (8 sc; 8 ch-4 arches)
R4: In each ch-4 arch work (sc, hdc, 3 dc, hdc, sc); repeat around and join. Fasten off the flower layer, leaving a 12 cm tail. (56 stitches: 8 groups of 7)
Each group forms one petal. The lower arches are still available behind the petals; keep the front-facing petals free from the next round so the flower remains raised rather than pressed into the square.
Backing Arches and Square Frame (Continue on Each Motif)
Yarn: the same taupe. These rounds are attached behind R4 and form the structural block.
R5: From the WS, make a standing sc in one exposed R3 anchor sc behind a petal, then ch 6. [Sc in the next R3 anchor sc, ch 6] seven times, working once into each remaining anchor; sl st to the first new sc. (8 sc; 8 ch-6 arches)
R6: Move into the first ch-6 arch. [(3 dc, ch 2, 3 dc) in the next arch, ch 1, 5 dc in the following arch, ch 1] four times; join to the first dc. (44 dc; 8 ch-1 spaces; 4 ch-2 corners)
R7: Sl st across to a corner ch-2 space. [(2 dc, ch 2, 2 dc) in corner, dc in next 3 dc, dc in next ch-1 space, dc in next 5 dc, dc in next ch-1 space, dc in next 3 dc] four times; join. (68 dc; 4 ch-2 corners)
R8: Move to a corner space. [(Sc, ch 2, sc) in corner, sc in each of next 17 dc] four times; join. (76 sc; 4 ch-2 corners)
R9: Move to a corner space. [(2 dc, ch 2, 2 dc) in corner, dc in each of next 19 sc] four times; join. (92 dc; 4 ch-2 corners)
R10: Move to a corner space. [(2 sc, ch 2, 2 sc) in corner, sc in each of next 23 dc] four times; join. Fasten off with a 20 cm tail if sewing, or a 12 cm tail if using flat slip-stitch joining. (108 sc; 4 ch-2 corners)
Edge check: Count 27 sc along each side between consecutive corner ch-2 spaces after R10. This number includes the two sc immediately after one corner and the two sc immediately before the next corner.
Gauge check: Block the first square to 15 × 15 cm without excessive stretching. If your natural blocked size differs, calculate finished width as (number of columns × actual motif width) + twice the border depth; apply the same formula to length. Do not force a smaller square to 15 cm by pinning it beyond its normal stitch spacing.
Join the Square Grid
Yarn: taupe; method adapted in principle from established flat slip-stitch joining practice.
Lay out 12 columns and 14 rows with petals facing up. Pin corresponding corners and use a slightly relaxed flat slip stitch through the outer loops of matched stitches. Start at one paired corner space, work the 27 corresponding edge stitches, and finish at the next paired corner space, keeping corner connections uniform. Join all vertical runs, then the horizontal runs. A detailed flat slip-stitch demonstration shows the hand position used for a level seam.
Work a four-square test before sewing or joining the entire grid. If the four corners form a raised knot, spread the corner connections across one chain space rather than stacking multiple tight stitches in one point. The joined rectangle should lie flat under its own weight with no pulled diagonal lines.
Outer Border and Scalloped Edge
Yarn: taupe. Counts below apply only to the stated 12 × 14 grid, assuming one border stitch per 27-stitch motif edge and one stitch at each seam junction.
Border R1: Work 1 sc in each of 27 stitches along every exterior motif edge; at each seam junction place 1 sc into the paired corner-space junction. In each of the four bedspread corners, work (sc, ch 2, sc). Join. (1,460 sc; 4 ch-2 corners)
Border R2: Work 1 sc in every sc from the previous round, placing (2 sc, ch 2, 2 sc) in each corner ch-2 space. Join. (1,476 sc; 4 ch-2 corners)
Border R3: In each corner work (sc, ch 2, sc). On each short side of 341 stitches, sc in the first stitch, then [sk 1, 3 dc in next stitch, sk 1, sc in next stitch] 85 times. For each long side of 397 stitches, use the same repeat 99 times. Join and fasten off. (1,484 worked stitches; 4 ch-2 corners; 368 three-dc fans)
Count the border independently if you altered the square count or joined corners differently. To reproduce the photograph’s deeper lace overhang, use a separately tested lace edging; this compact scallop is a practical visual interpretation, not a stitch-for-stitch copy of the photographed trim.
Optional Matching Pillow Shams (Make 2)
Yarn: taupe; both shams repeat the same R1–R10 motif.
Make six additional motifs per pillow, laid out three across and two down; with 15 cm blocked squares, this creates a 45 × 30 cm crochet front before a small seam allowance. Join with the same flat slip stitch, then sew each front to a measured fabric back with an envelope opening or zipper. Select an insert after checking the sewn dimensions; a 45 × 30 cm insert is a starting point rather than a guarantee of fit. The photographed room includes rectangular floral shams and a separate cabled accent pillow; the cable texture is outside this floral pattern.
Assembly
- Make the first complete flower-square sample through R10 and record its unblocked size.
- Block the sample, determine its natural finished dimensions, and weigh it on a digital scale.
- Calculate the required motif count and yarn from your measurements; the featured layout calls for 168.
- Crochet the remaining motifs, checking every tenth square against the sample gauge.
- Weave in flower-layer ends through several WS stitch paths without flattening the petals.
- Block all squares to a common template, keeping the four corner spaces aligned.
- Arrange 12 squares across and 14 down on a clean surface, all RS facing upward.
- Join columns first and rows second, matching 27 edge stitches at every paired seam.
- Work Border R1–R3, then block the outer border until its scallops sit evenly.
- Make the optional matching shams and weave the final yarn tails into the back of the fabric.
The completed design consists of a 168-motif joined rectangle with a three-round border.
7 Technical Tips
- Stitch marker drift: Place a marker in the first corner ch-2 space of R6 and return to it at every subsequent round. Losing that location can rotate the square shaping by one arch.
- Uneven flower relief: If one petal curls higher than the other seven, compare its seven R4 stitches with the reference sequence. Adding an eighth stitch in only one arch creates a visibly larger petal.
- Incorrect side count: Count exactly 27 sc between R10 corner spaces before joining. A 26-stitch side makes the flat seam pull and twists the adjacent flower.
- Excessively tight join: If the seam measures shorter than the blocked side by more than about 3 mm, use a larger hook for joining. Excess tension gathers the squares even when every stitch has a partner.
- Overstretched blocking: Do not pin a 13 cm motif all the way to a 15 cm target without checking stitch distortion. Gauge must be adjusted at the hook-and-yarn stage, not forced during drying.
- Yarn-dye variation: Keep one dye lot for the main-colored field, especially when planning 168 motifs. Alternating noticeably different taupe batches can create unintended stripes in the bedspread.
- Unsecured tails: Weave each finishing tail at least 8 cm through the WS, change direction once, then trim. Tails cut beside a knot can migrate to the front after laundering.
Sizing, Yarn Calculation, and Care
For the proposed grid, 12 × 15 cm = 180 cm of motif width and 14 × 15 cm = 210 cm of length. An outer trim that adds approximately 2.5 cm on each side brings the planned dimensions to 185 × 215 cm. These figures describe this proposed layout, not a measured finished sample and not the size of the bedspread in the photo.
The motif count and yarn requirement should change together. For a smaller throw with 8 columns and 10 rows, crochet 80 motifs; for a wider bedspread, add one full column at a time. Weigh three squares, average their grams, multiply by the final square count, and add a reserve for seams and edging. The sample-first method is more reliable than assuming all raised flower motifs consume the same yardage.
Cotton’s weight matters in a full-sized bed covering. Support the fabric when wet; do not hang a soaked bedspread over one narrow line where it may elongate. Follow the care label on the yarn, test washing a sample motif, and dry the completed textile spread flat where practical.
Frequently Asked Questions
Can I make this with acrylic instead of cotton?
Yes, if you first work a gauge sample and use the care instructions for that yarn. The drape, blocking response, and finished measurements may differ from cotton, even when both yarns are marked DK.
Is this the exact pattern in the picture?
No. The photographed object does not reveal hidden anchoring points, complete stitch sequences, or yarn specifications. This tutorial recreates the visible raised flower, open background, framed squares, and scalloped hem with a new written construction.
How can I avoid a heavy seam across the pillow covers?
Use the same outer-loop flat slip stitch as the bedspread and measure the sewn pillow front before attaching fabric backing. When stitches are matched one for one, the raised floral centers remain distinct from the joining grid.
Related Patterns
- Flower Granny Square Blanket — Jo to the World: A free flower motif, joining tutorial, and full border instructions. See the flower blanket tutorial. [INTERNAL LINK NEEDED: flower granny square blanket]
- Emilia Floral Granny Square — Underground Crafter: A separate eight-petal block design with published gauge and supplies. View the floral square pattern. [INTERNAL LINK NEEDED: floral crochet square]
- Flower Granny Square — Annie Design Crochet: An example of dimensional flower texture worked into a square. Read the free square tutorial. [INTERNAL LINK NEEDED: 3D crochet flower square]
- Simple Flower Granny Square — Hope Corner Farm: A smaller companion motif suitable for experimenting with color. Browse the motif. [INTERNAL LINK NEEDED: easy flower granny square]
Conclusion
The principal control point is the square, not the finished bedspread: each R10 edge has 27 stitches between its two corner spaces. Check that count, measure one blocked motif, and weigh it before committing to 168 repeats. The sample establishes usable dimensions and a yarn budget; the photograph alone does not. For the next step, crochet and block a four-square panel to evaluate petal height, seam tension, and the taupe color in natural light. Share a panel on Pinterest and Instagram with #FloralGrannySquareBedspread, including your measured gauge. Does the raised eight-petal center look closer to the reference when all flowers face outward or when alternate squares are rotated? Use this floral granny square bedspread pattern as a documented starting point.