Introduction
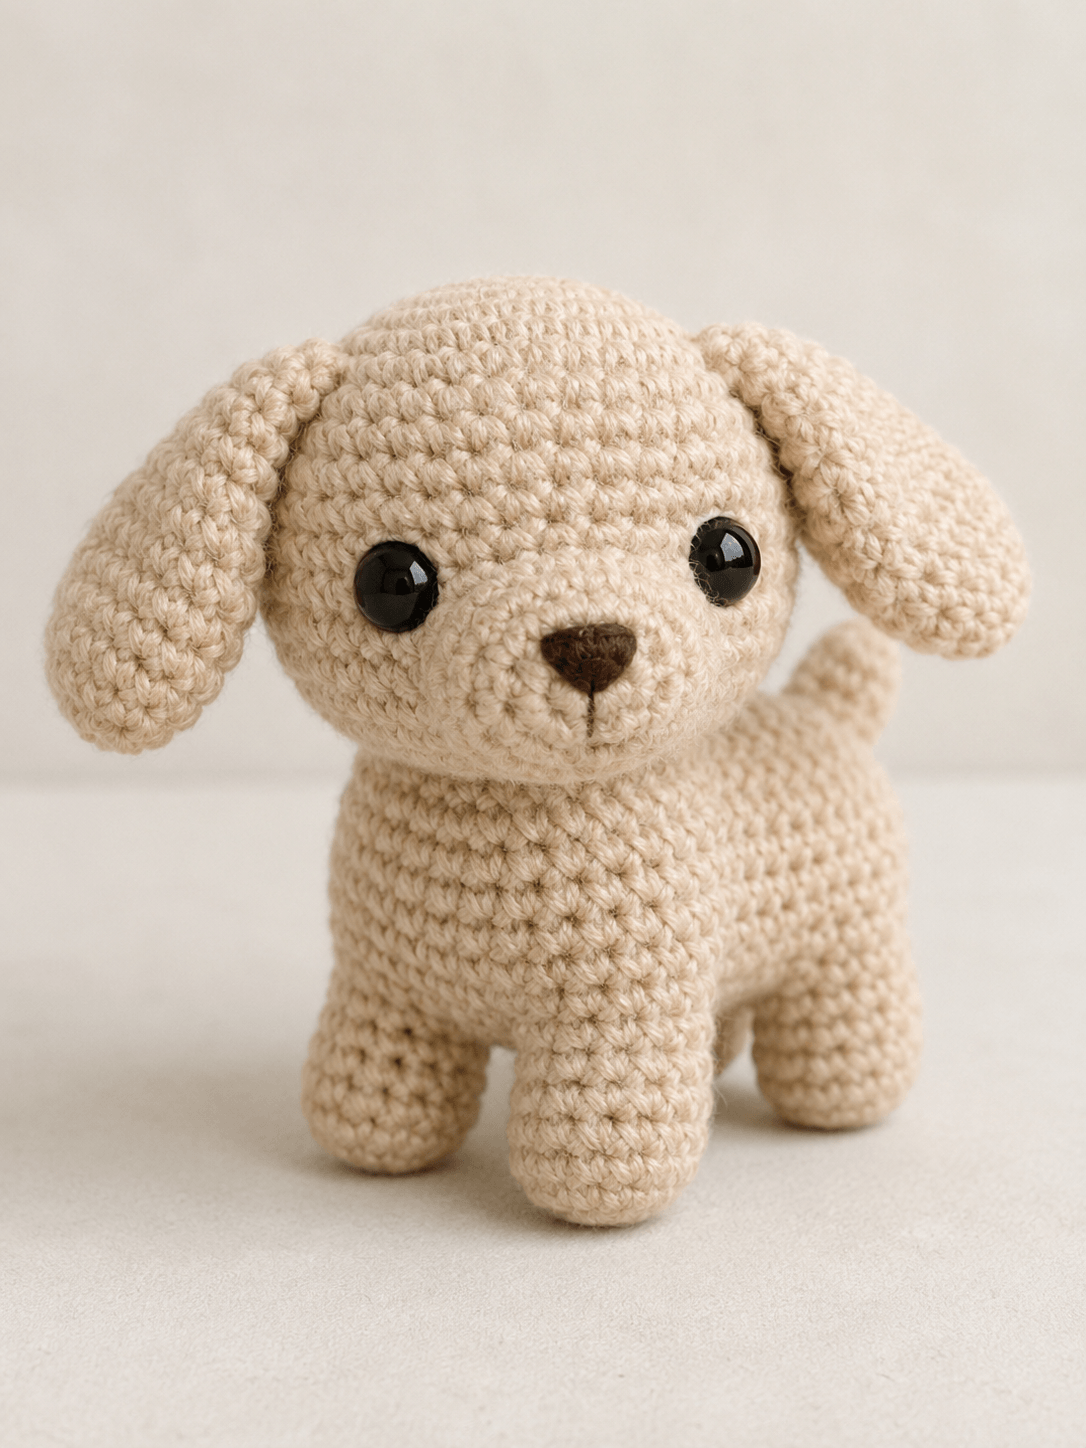
A floppy-eared puppy needs ear bases above the eyes, but the tips must fall below the jaw. This dog amigurumi crochet pattern controls that drop with long unstuffed ear pieces, worsted yarn and a 3.5 mm hook. The finished dog measures approximately 21 cm and requires intermediate assembly skills. Four short legs create a stable stance for shelf display and product photography.
The Design: What Makes This Puppy Different
The head reaches a 36-stitch plateau and remains there for seven rounds, producing a wide forehead without extending the face into a long snout. A separate muzzle supplies the required forward projection and gives the embroidered nose a stable surface. The body is worked as an elongated capsule rather than a vertical pear shape, which places the back legs behind the shoulder line and makes the figure read as a standing crochet dog. Long flattened ears create the main breed signal. They are left unstuffed so gravity can pull the tips beside the cheeks. A common mistake in a floppy-eared dog amigurumi is attaching both ears too far back. That placement exposes the entire side of the head and makes the ears resemble a ponytail. Pin each base above and slightly behind its nearest eye.
Project Info at a Glance
| Skill Level | Time | Finished Size | Hook | Best For |
|---|---|---|---|---|
| Intermediate | 7–9 hours | Approximately 21 cm | 3.5 mm | Display, nursery shelves and photography |
A current worsted-weight puppy pattern reports a finished height of approximately 20.5 cm. Jess Huff’s larger dog pattern confirms the established pairing of worsted yarn and a 3.5 mm hook.
Materials and Tools
Yarn
- Light beige — worsted/category 4 — approximately 80 g — Paintbox Yarns Simply Aran, Stylecraft Special Aran or Red Heart Super Saver
- Dark brown — DK or worsted — less than 3 g — tightly twisted cotton or acrylic for the nose and mouth
Use a smooth yarn with visible stitch definition. Long fibers can blur the eye openings and hide the edge stitches needed for accurate ear attachment. Published smooth-dog specifications place main-color consumption around 70–90 g, while larger dogs require more yarn.
Tools
- 3.5 mm crochet hook
- Two 12 mm black safety eyes
- Polyester fiberfill
- Blunt yarn needle
- Locking stitch markers
- Dressmaking pins
- Scissors
Verified dog patterns use eye diameters from 6 mm on small cotton figures to 15 or 16 mm on larger dogs. Twelve-millimeter eyes reproduce the large eye-to-head ratio visible in the reference image. Substitute embroidered eyes when the finished object is intended for a child under three.
Abbreviations
- MR — magic ring
- sc — single crochet
- inc — work two single crochet stitches in one stitch
- dec — single crochet two stitches together
- sl st — slip stitch
- ch — chain
- BLO — back loop only
- FO — fasten off
For an invisible decrease, insert the hook through the front loops of the next two stitches, yarn over, pull through both loops and complete one single crochet.
Pattern — Step by Step
Work in a continuous spiral unless a section states otherwise. Move the stitch marker after every completed round. This medium-size construction uses a 36-stitch plateau, six-stitch increase rounds and six-stitch decrease rounds.
Head
Yarn: light beige — Source: standard six-increase amigurumi math, adapted to the photographed puppy.
R1: 6 sc in MR (6)
R2: inc ×6 (12)
R3: (sc, inc) ×6 (18)
R4: (2 sc, inc) ×6 (24)
R5: (3 sc, inc) ×6 (30)
R6: (4 sc, inc) ×6 (36)
R7–R13: sc around (36)
R14: (4 sc, dec) ×6 (30)
R15: sc around (30)
Insert the 12 mm eyes between R10 and R11. Leave eight visible stitches between their inner edges, then pin the muzzle below them before fitting the washers.
R16: (3 sc, dec) ×6 (24)
R17: (2 sc, dec) ×6 (18)
Stuff the crown firmly. Add small pieces around the eye posts to prevent depressions.
R18: (sc, dec) ×6 (12)
R19: dec ×6 (6)
Fasten off. Leave a 20 cm tail, thread it through the front loops of the remaining six stitches and close the opening.
Body
Yarn: light beige — Source: original elongated capsule using standard amigurumi math.
R1: 6 sc in MR (6)
R2: inc ×6 (12)
R3: (sc, inc) ×6 (18)
R4: (2 sc, inc) ×6 (24)
R5: (3 sc, inc) ×6 (30)
R6: (4 sc, inc) ×6 (36)
R7–R16: sc around (36)
R17: (4 sc, dec) ×6 (30)
R18–R20: sc around (30)
R21: (3 sc, dec) ×6 (24)
R22: (2 sc, dec) ×6 (18)
Stuff the rear half firmly and shape the torso into a horizontal oval. Keep the neck end moderately filled.
R23: (sc, dec) ×6 (12)
R24: dec ×6 (6)
Fasten off. Leave a 30 cm tail for joining the body to the head.
Front Legs — Make 2
Yarn: light beige — Source: original straight-leg construction.
R1: 6 sc in MR (6)
R2: inc ×6 (12)
R3: (sc, inc) ×6 (18)
R4: BLO sc around (18)
R5–R8: sc around (18)
R9: (sc, dec) ×6 (12)
R10–R13: sc around (12)
Stuff the foot and lower leg firmly. Use less filling in the final two rounds so the upper edge follows the chest curve.
Flatten the opening and work 6 sc through both layers (6). Fasten off. Leave a 25 cm sewing tail.
Back Legs — Make 2
Yarn: light beige — Source: original rear-leg construction with a slightly longer upper section.
R1: 6 sc in MR (6)
R2: inc ×6 (12)
R3: (sc, inc) ×6 (18)
R4: BLO sc around (18)
R5–R9: sc around (18)
R10: (sc, dec) ×6 (12)
R11–R14: sc around (12)
Shape the base into a shallow oval. Compare both legs on a flat surface before closing the openings.
Flatten the opening and work 6 sc through both layers (6). Fasten off. Leave a 30 cm sewing tail.
Floppy Ears — Make 2
Yarn: light beige — Separate pinned ears are documented in established dog constructions.
R1: 6 sc in MR (6)
R2: inc ×6 (12)
R3: (sc, inc) ×6 (18)
R4–R7: sc around (18)
R8: (sc, dec) ×6 (12)
R9–R11: sc around (12)
Do not stuff. Flatten each ear and rotate the closing edge so the broad side faces forward when attached.
Work 6 sc through both layers (6). Fasten off. Leave a 35 cm sewing tail.
Muzzle
Yarn: light beige — Source: original shallow oval construction.
R1: 6 sc in MR (6)
R2: inc ×6 (12)
R3: (sc, inc) ×6 (18)
R4: (2 sc, inc) ×6 (24)
R5–R6: sc around (24)
R7: (2 sc, dec) ×6 (18)
Add a shallow layer of stuffing. Keep the outer edge flat and limit the central projection to approximately 16 mm.
Fasten off. Leave a 35 cm tail for sewing.
Cheek Patches — Make 2
Yarn: light beige — Source: standard flat-circle construction. These matching patches are optional.
R1: 6 sc in MR (6)
R2: inc ×6 (12)
Join with a sl st. Fasten off and leave a 15 cm tail. Press each circle flat before positioning it beside the muzzle.
Tail
Yarn: light beige — Source: original tapered, upward-curving tail.
R1: 6 sc in MR (6)
R2: inc ×6 (12)
R3–R5: sc around (12)
R6: (2 sc, dec) ×3 (9)
R7–R12: sc around (9)
Stuff the tip lightly. Leave the final four rounds nearly unstuffed so the tail can curve upward during attachment.
Flatten the opening and work 4 sc through both layers (4). Fasten off. Leave a 30 cm sewing tail.
Assembly
- Pin the head to the narrow end of the body with the muzzle area centered above the front legs. Sew one complete circuit through corresponding head and body stitches.
- Add a second neck circuit approximately 3 mm outside the first seam. Match the tension on both sides so the head remains level.
- Center the muzzle beneath the eyes, placing its upper edge one round below the eye line. Pin the top, bottom and both sides before sewing.
- Sew three-quarters of the muzzle perimeter, add the final stuffing and close the remaining section with small horizontal stitches.
- Embroider a dark brown triangle approximately 12 mm wide. Add one vertical stitch beneath it and divide the lower end into two short mouth lines.
- Attach the optional cheek patches beside the muzzle. Catch only their outer loops so the matching circles merge into the head.
- Sew the front legs beneath the chest with approximately 14 mm between their inner edges. Test both feet against a flat surface before tightening the seams.
- Attach the back legs behind the body midpoint. Align their bottom rounds with the front feet so the torso remains horizontal.
- Position each ear base above and slightly behind its nearest eye, leaving approximately seven stitches between the upper inner corners. Sew across the flattened edge twice.
- Attach the tail to the rear body between R11 and R15, angle it upward and bury every remaining yarn tail through at least 4 cm of stuffed fabric.
The completed puppy should stand approximately 21 cm high with all four feet touching the work surface.
7 Technical Tips
- Head-center drift: Move the stitch marker after completing the first stitch of every round. A one-stitch error can displace the muzzle center by approximately 8 mm.
- Collapsed torso: Pack the middle eight body rounds until they resist moderate thumb pressure. Loose filling allows the horizontal back to sag between the legs.
- Visible decrease bars: Work decreases through front loops only. Standard decreases create horizontal ridges across the lower head and rear body.
- Late eye installation: Fit the 12 mm safety-eye washers before reducing the head below 30 stitches. The smaller opening restricts finger pressure and can leave a washer partially attached.
- Open stitch gaps: Keep stretched openings below 1 mm when working worsted yarn. Wider gaps expose filling around the muzzle and rounded feet.
- Unequal ear drop: Pin both ears and measure from each tip to the table before sewing. A difference greater than 5 mm remains visible from the front.
- Loose tail seam: Sew the flattened tail base through two adjacent body rounds. A single-round attachment can rotate under the weight of the stuffed tip.
Conclusion
Measure the final head width, ear-tip height and distance between the front feet before changing yarn brands. Those figures separate gauge changes from assembly errors. For a second puppy, modify one feature only: shorten the ears by two rounds, curve the tail farther forward or replace the plastic eyes with embroidery. Pin this dog amigurumi crochet pattern with a front-facing image, then share a side view on Instagram using #FloppyEarPuppyAmigurumi. The side photograph should show the horizontal body and raised tail clearly. Should your puppy’s ear tips stop at the jaw, or extend below the neck seam?
Sources
- Storyland Amis: puppy size, yarn weight, hook and eye reference
- Jess Huff: worsted-weight dog and 3.5 mm hook reference
- Projectarian: measured ear, limb, head and tail placement
- Ravelry: small cotton dog size and hook reference
- Supergurumi: sport-weight dog materials and eye-size reference









