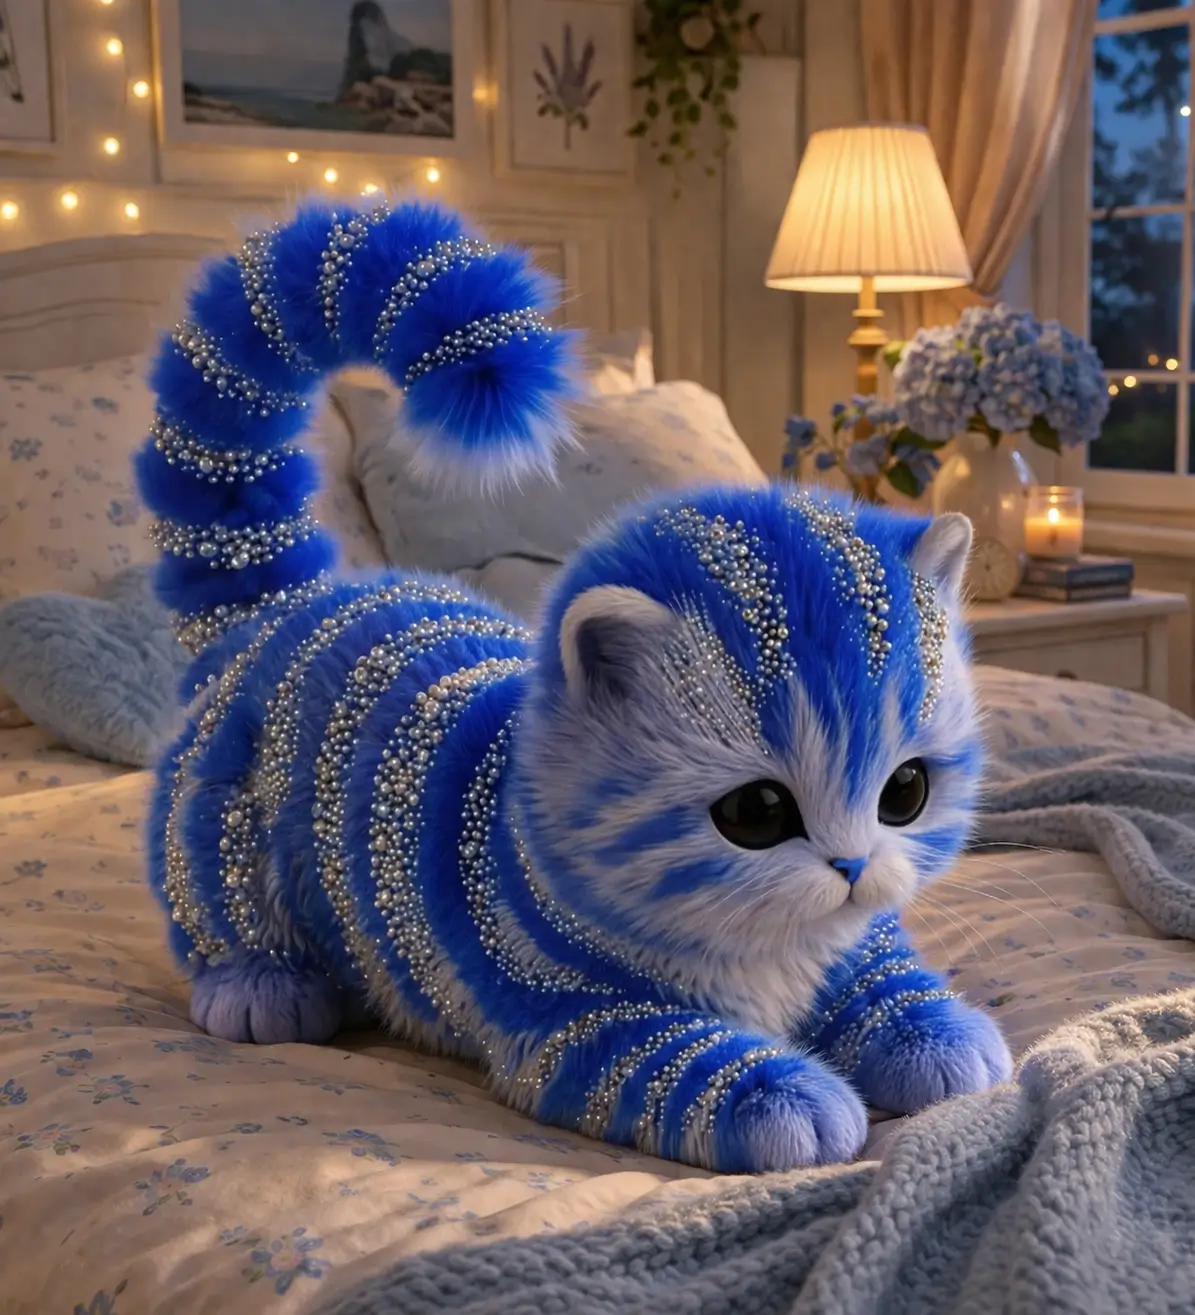
A tabby face fails fast when the forehead stripes ignore the muzzle line. This cat amigurumi crochet pattern builds a low plush kitten with chenille yarn, a 3.5 mm hook, and a finished size near 15 cm. You shape the body in a crouch instead of a sit. The piece works well as shelf decor because the tail stands high and the paws hold the silhouette forward.
The Design: What Makes This Cat Different
This kitten relies on three structural choices. First, the head is slightly wider than the body, because young cats read as forehead first and torso second. Second, the front legs are longer than the back paws, which keeps the chest lifted while the body stays low. Third, the tail starts narrow and then curves upward, since a straight tail would flatten the profile. You need that vertical line at the back.
The striped cat amigurumi effect comes from surface slip-stitch lines worked after assembly, not from color changes every round. That matters with plush yarn. Frequent color swaps in chenille tend to bulk up the seam line and blur the tabby path. One common mistake is placing the eyes too high. The result looks owl-like. On a kitten amigurumi pattern, the eyes should sit low enough that the muzzle still has room to project.
Project Info at a Glance
| Skill Level | Time | Finished Size | Hook | Best For |
|---|---|---|---|---|
| Easy–Intermediate | 4–6 hours | 15 cm | 3.5 mm | Plush shelf toy, gift topper, desk decor |
Materials and Tools
Yarn
- Electric blue chenille yarn — plush / chenille — 100 g — Himalaya Dolphin Baby or similar
- White chenille yarn — plush / chenille — 20 g — same base yarn line
- Silver or pale grey chenille yarn — plush / chenille — 10 g — same base yarn line
- Blue embroidery thread — small amount — for nose detail
Tools
- Hook 3.5 mm
- Safety eyes 16 mm
- Polyfill stuffing
- Tapestry needle
- Stitch markers
- Pins
- Small slicker brush for very light surface fluffing, optional
Abbreviations
- MR = magic ring
- sc = single crochet
- inc = increase
- dec = invisible decrease
- sl st = slip stitch
- ch = chain
- BLO = back loop only
- FLO = front loop only
Invisible decrease keeps the face and body smoother than a standard decrease, which matters in plush yarn where open decrease gaps show stuffing sooner.
Pattern — Step by Step
Continuous spiral unless noted.
Head (Make 1)
Yarn: white
- R1: 6 sc in MR (6)
- R2: inc x6 (12)
- R3: (1 sc, inc) x6 (18)
- R4: (2 sc, inc) x6 (24)
- R5: (3 sc, inc) x6 (30)
- R6: (4 sc, inc) x6 (36)
- R7–R11: sc around (36)
- R12: (4 sc, dec) x6 (30)
- Insert safety eyes between R8 and R9, 7 sts apart. Add stuffing to the lower face first, then the crown.
- R13: (3 sc, dec) x6 (24)
- R14: (2 sc, dec) x6 (18)
- R15: (1 sc, dec) x6 (12)
- R16: dec x6 (6)
Fasten off. Leave a 15 cm tail.
Body (Make 1)
Yarn: electric blue
- R1: 6 sc in MR (6)
- R2: inc x6 (12)
- R3: (1 sc, inc) x6 (18)
- R4: (2 sc, inc) x6 (24)
- R5: (3 sc, inc) x6 (30)
- R6: (4 sc, inc) x6 (36)
- R7–R10: sc around (36)
- R11: (4 sc, dec) x6 (30)
- R12: (3 sc, dec) x6 (24)
- R13: sc around (24)
- R14: (2 sc, dec) x6 (18)
- Stuff firmly through the back and belly. Keep the chest rounded and the top line flatter.
- R15: sc around (18)
Fasten off. Leave a 20 cm tail.
Front Legs (Make 2)
Yarn: electric blue
- R1: 6 sc in MR (6)
- R2: inc x6 (12)
- R3–R4: sc around (12)
- R5: (4 sc, dec) x2 (10)
- R6–R8: sc around (10)
Lightly stuff paw only. Fasten off. Leave a 15 cm tail.
Back Paws (Make 2)
Yarn: electric blue
- R1: 6 sc in MR (6)
- R2: inc x6 (12)
- R3: sc around (12)
- R4: (4 sc, dec) x2 (10)
- R5: sc around (10)
Stuff lightly. Flatten the top edge. Fasten off. Leave a 12 cm tail.
Ears (Make 2)
Yarn: outer electric blue, inner white
- R1: 4 sc in MR (4)
- R2: (1 sc, inc) x2 (6)
- R3: (2 sc, inc) x2 (8)
- R4: sc around (8)
Do not stuff. Flatten lightly. Fasten off. Leave a 12 cm tail.
Tail (Make 1)
Yarn: electric blue
- R1: 6 sc in MR (6)
- R2–R15: sc around (6)
- R16: (1 sc, inc) x3 (9)
- R17–R20: sc around (9)
Stuff only the base 4 cm. Leave the upper tail soft so it curves. Fasten off. Leave a 20 cm tail.
Muzzle (Make 1)
Yarn: white
- R1: 6 sc in MR (6)
- R2: inc x6 (12)
- R3: sc around (12)
Fasten off. Leave a 15 cm tail.
Cheek Patches (Make 2)
Yarn: white
- R1: 6 sc in MR (6)
- R2: inc x6 (12)
Fasten off. Leave a 10 cm tail.
Stripe Surface Details
Yarn: silver or pale grey
Work surface sl st stripes after assembly. Add:
- 3 forehead stripes from crown toward muzzle
- 2 side-face stripes per side
- 4 body stripes per side, curving downward
- 2 stripes on each front leg
- 2 stripes on the tail before the widened tip
Keep the stitches loose. Plush yarn compresses if surface slip stitches are pulled tight.
Assembly
- Sew the head to the front third of the body, not centered over the torso.
- Attach the muzzle low on the face, spanning roughly R9–R12.
- Sew the cheek patches beside the muzzle, slightly under eye level.
- Embroider the nose as a small blue triangle at the top center of the muzzle.
- Attach the ears between R4 and R8 of the head, angled outward rather than straight up.
- Sew the front legs under the chest so the paws extend forward.
- Attach the back paws to the lower sides of the body, keeping them partly hidden in the crouch.
- Sew the tail to the rear top of the body and bend it upward before securing the last stitch.
- Add the silver surface stripes, starting with the face so both sides match before moving to the body.
- Weave in all tails through the body interior and close any visible chenille gaps by teasing the fibers with a needle.
The completed cat should rest on four contact points: two front paws, two back paws, and the lower belly line.
7 Technical Tips
- Mark the start of every round on the head. Lose one stitch in plush yarn and the eye line drifts by several millimeters before you notice it.
- Stuff the muzzle separately from the crown. A single hard wad pushes the eyes upward and erases the kitten profile.
- Use invisible decreases only on visible shaping rounds. Standard decreases leave small ladders that catch light on velvet yarn.
- Install the eyes before the head drops below 24 stitches. Past that point, the washer fit gets awkward and the fabric can twist.
- Keep front leg stuffing to the paw section only. A fully stuffed tube sticks out like a cylinder instead of tucking under the chest.
- Pin the tail in a high arc before sewing. On this pattern, a low tail changes the silhouette from alert kitten to resting loaf.
- Weave yarn tails at least 4 cm through stuffed sections. Short chenille tails pull free faster than cotton, especially at the ear base.
Conclusion
This blue kitten build turns a stylized plush reference into a workable cat amigurumi crochet pattern with a controlled head-to-body ratio, low-set paws, and stripe placement that supports the face instead of crowding it. Keep the yarn fluffy, the eye line low, and the tail soft enough to curve. The next step is to crochet the head first and test your eye spacing before making the body. Share the finished piece on Pinterest and Instagram with one overhead photo and one side profile so the tabby lines read clearly. #BlueStripedCatPattern What stripe direction looked best on your kitten’s forehead: vertical center lines or slightly angled tabby bands?









