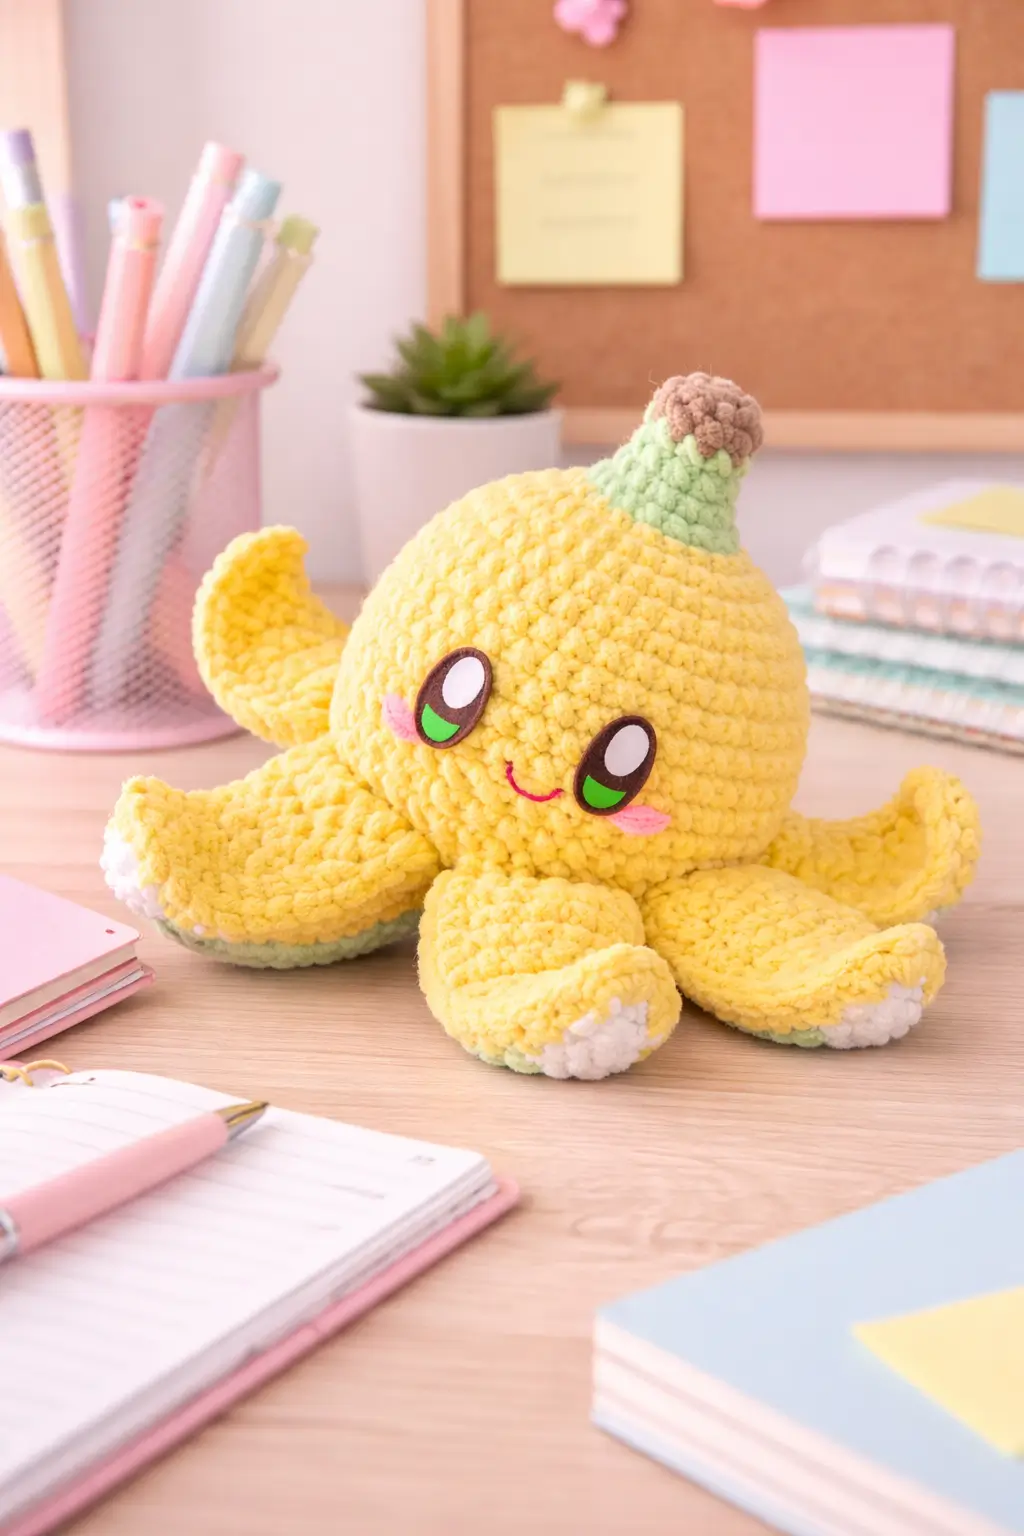
A lemon octopus fails the moment the top reads like a plain round octopus head instead of citrus. This lemon octopus crochet pattern gives you materials, plush-yarn guidance, skill level, and a full part-by-part build for the fruit-styled octopus in the photo. You get head, body, eight tentacles, curled edge shaping, stem, cheek patches, and appliqué-eye placement. The practical reason is resale flexibility. One octopus base can become lemon, lime, peach, or orange with only surface changes.
The Design: What Makes banana Octopus Different
This build depends on silhouette first. The body is not merely spherical. It has to feel like a lemon with tentacles attached, which means the upper mass stays smooth while the tentacles curl outward like peel segments. That choice matters. A standard octopus with short rounded legs would not read as fruit, even in yellow yarn. The second decision is the stem cap. It is small, centered, and conical, so it suggests citrus without turning the plush into a pumpkin variant. Then there is the face. The photo uses large appliqué eyes rather than plain safety eyes, which shifts the result toward kawaii desk decor instead of nursery toy minimalism. Common mistake: crocheters flatten the tentacles too much. Then the plush looks like a round octopus with a hat.
Project Information at a Glance
| Skill Level | Time | Finished Size | Hook | Best For |
|---|---|---|---|---|
| Advanced beginner | 2–4 hours | Source: Standard amigurumi math | 5 mm | Desk decor, gifts, fruit-animal market plush |
Materials and Tools
Yarn
- Pastel yellow — plush polyester / super bulky style — 85g — Himalaya Dolphin Baby or equivalent
- Light green — plush polyester / super bulky style — 12g — for stem base
- Beige-brown — plush polyester / super bulky style — 6g — for stem tip
- White — plush polyester / super bulky style — 10g — for tentacle undersides
- Pink — DK or felt scrap — 2g — for cheeks and smile accents
- Dark brown — DK or felt scrap — 2g — for eye appliqué backing
- Lime green — DK or felt scrap — 1g — for eye highlight details
Tools
- 5 mm crochet hook
- 8.5 mm safety eyes — only if you are replacing the appliqué eye style
- Fiberfill stuffing
- Yarn needle
- Stitch markers
- Sharp scissors
- Felt or crocheted eye pieces
Crochet Abbreviations
MR / sc / inc / dec / sl st / ch / BLO / hdc
Use invisible decrease only on the closing rounds. Plush polyester yarn spreads at the join line, and a standard decrease leaves dents that are easy to see under a smooth lemon face.
Step-by-Step Lemon Octopus Crochet Pattern
Work in continuous spiral rounds unless noted.
Head / Lemon Body (Make 1)
Yarn: pastel yellow
Source: Standard amigurumi math
R1: 6 sc in MR (6)
R2: inc x6 (12)
R3: (sc, inc) x6 (18)
R4: (2 sc, inc) x6 (24)
R5: (3 sc, inc) x6 (30)
R6: (4 sc, inc) x6 (36)
R7: sc around (36)
R8: sc around (36)
R9: sc around (36)
R10: sc around (36)
R11: sc around (36)
R12: (4 sc, dec) x6 (30)
R13: (3 sc, dec) x6 (24)
R14: (2 sc, dec) x6 (18)
Stuff firmly. Keep the lower front slightly flatter so the face does not bulge forward.
R15: (sc, dec) x6 (12)
R16: dec x6 (6)
Fasten off. Leave 30 cm tail.
Tentacles (Make 8)
Yarn: pastel yellow
Source: Standard amigurumi math
R1: 6 sc in MR (6)
R2: inc x6 (12)
R3: sc around (12)
R4: sc around (12)
R5: (4 sc, dec) x2 (10)
R6: sc around (10)
Stuff the front half lightly only. The base should remain soft for assembly.
Fasten off. Leave 18 cm tail.
Curled Tentacle Edge Panels (Make 8)
Yarn: pastel yellow
Source: Standard amigurumi math
R1: ch 12
Row 1: starting in 2nd ch from hook, 2 sc in each chain across (22)
Row 2: ch 1, turn, sc across (22)
This creates the petal-like ruffle visible along the tentacle tops.
Fasten off. Leave 14 cm tail.
Underside Panels (Make 4)
Yarn: white
Source: Standard amigurumi math
R1: ch 10
Row 1: starting in 2nd ch from hook, sc across (9)
Row 2: ch 1, turn, sc across (9)
Fasten off. Leave 12 cm tail.
Sew these to the lower visible tentacles only, as in the photo.
Stem Base (Make 1)
Yarn: light green
Source: Standard amigurumi math
R1: 6 sc in MR (6)
R2: sc around (6)
R3: sc around (6)
R4: (sc, inc) x3 (9)
R5: sc around (9)
Stuff lightly. The stem base should stand but not become rigid.
Fasten off. Leave 16 cm tail.
Stem Tip (Make 1)
Yarn: beige-brown
Source: Standard amigurumi math
R1: 6 sc in MR (6)
R2: sc around (6)
R3: sc around (6)
Fasten off. Leave 12 cm tail.
Eye Appliqué Base (Make 2)
Yarn: dark brown or felt backing
Source: Standard amigurumi math
R1: ch 6
Row 1: starting in 2nd ch from hook, sc 4, 3 sc in last ch, rotate, sc 3, inc in final stitch (11)
Row 2: sc around (11)
Fasten off. Leave 10 cm tail.
Eye Highlights (Make 2)
Yarn: lime green and white scrap
Source: Standard amigurumi math
Lime detail: ch 3, sl st back across (3)
White detail: ch 2, sl st back across (2)
Fasten off. Leave short tails.
Cheek Patches (Make 2)
Yarn: pink
Source: Standard amigurumi math
R1: 6 sc in MR (6)
Fasten off. Leave 8 cm tail.
Smile Detail (Make 1)
Yarn: pink embroidery thread or yarn scrap
Source: Standard amigurumi math
Embroider one shallow curved smile centered below the eyes.
Keep the smile under 1.5 cm wide. A larger curve distorts the face.
Assembly Instructions
- Sew the eight tentacles evenly around the underside of the lemon body.
- Attach the curled tentacle edge panels to the upper outer side of each tentacle so they flare outward.
- Sew the four white underside panels onto the most visible front and side tentacles.
- Attach the light green stem base to the top center of the head.
- Sew the beige-brown stem tip onto the top of the stem base.
- Place both eye appliqué pieces low on the front face, angled slightly upward at the outer corners.
- Add the lime and white eye highlight details after the brown eye bases are fixed.
- Sew the cheek patches below and slightly outside the eyes.
- Embroider the pink smile after the cheeks are attached so the spacing stays balanced.
- Weave every yarn tail at least 4 cm into the stuffing path before trimming.
The lemon octopus is complete.
7 Technical Tips for Cleaner Amigurumi
- Mark every increase round. Missing one increase before the 36-stitch plateau leaves the lemon body oval instead of citrus-round.
- Stuff the head-body firmly but not hard. If it is overpacked, the tentacles tilt downward from a rigid ball and lose their peel-like spread.
- Pin all eight tentacles before sewing the first one permanently. A single tentacle even 1 cm higher than the others is obvious from the front.
- Keep tension slightly tighter on plush yarn. Loose polyester stitches can expose stuffing around the face and stem base.
- Attach the eye appliqués before the smile. If the smile goes in first, the face can shift off-center by several millimeters once the eyes are placed.
- Use invisible decrease on the closing rounds only. Standard decreases leave notches that catch light under a smooth yellow face.
- Weave tails at least 4 cm deep. Shorter tails loosen first at the tentacle seam line because that area gets handled most.
Conclusion
This lemon octopus crochet pattern works because the octopus structure stays simple while the citrus styling carries the identity. Use the published plush-octopus baseline of polyester yarn and a 5 mm hook as the starting point, then refine the look through tentacle curl, stem size, and eye placement rather than random stitch changes. Photograph the finished plush from a front three-quarter angle so the stem, appliqué eyes, and curled tentacle edges all remain visible in one frame. Share it on Pinterest and Instagram with #LemonOctopusAmigurumi. One final question: will the next version stay lemon, or are you turning the same pattern into a lime with darker leaf-green accents?









