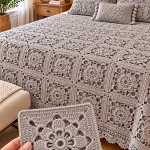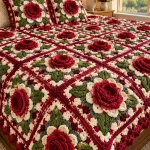
Introduction
A rose this deep needs several independent petal levels before the surrounding square can carry its weight. This 3D rose granny square crochet bedspread pattern combines layered red roses, cream outer petals, olive leaves, ivory backgrounds and burgundy frames. Work the photo-inspired blocks with medium/worsted yarn and a 5.0 mm hook for an intermediate modular bedspread that can also be repeated across matching pillow fronts.
The Design: What Makes This Rose Bedspread Different
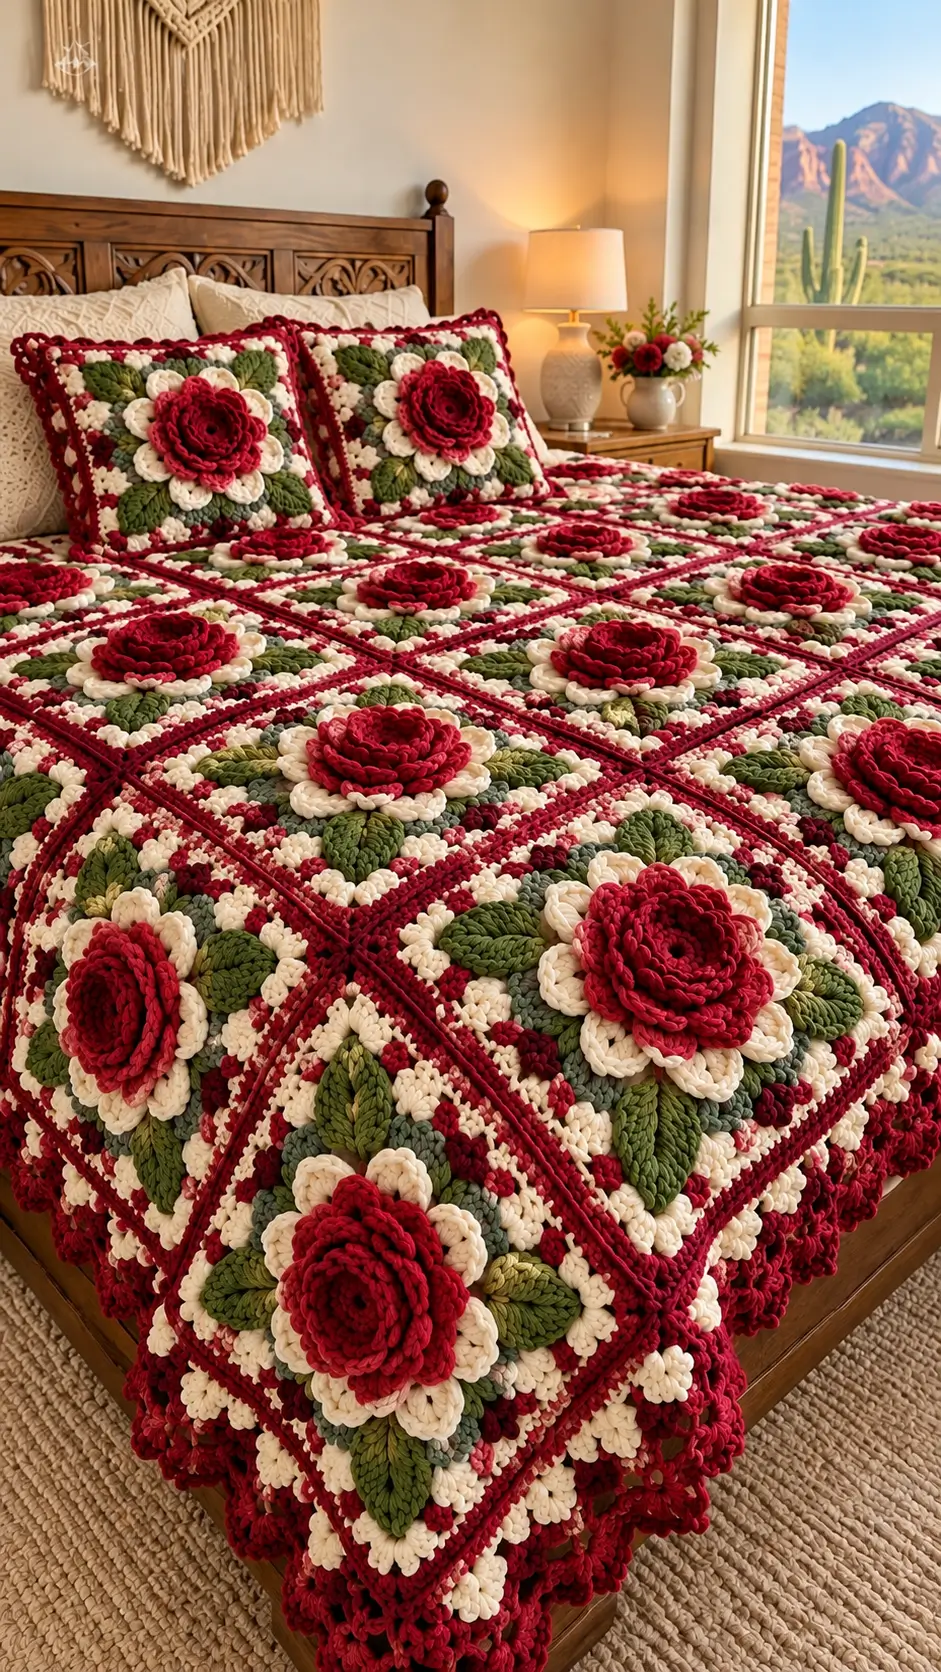
The flower is deliberately separated from the load-bearing square. A compact red center supports progressively larger petal layers, while eight cream petals create a transition between the rose and the background. Four olive leaves then point toward the corners. This arrangement distributes the visual mass of the flower instead of leaving one bulky red circle in the middle of each block.
The reference also uses burgundy as architecture: narrow dark frames separate the cream squares and repeat again around the perimeter. Current 3D rose granny-square patterns commonly use Aran yarn with a 5.0 mm hook, while comparable rose appliqués in medium/worsted yarn can finish around 9 cm across before leaves are included. 0 For this larger bedspread block, target a finished square of approximately 20–22 cm.
Project Info at a Glance
| Skill Level | Construction | Target Square | Hook | Best For |
|---|---|---|---|---|
| Intermediate | Layered rose appliqué on modular square | 20–22 cm | 5.0 mm | Bedspreads, throws and pillow fronts |
Aran-weight 3D rose granny-square patterns using a 5.0 mm hook are documented, and dimensional floral squares are commonly used for blankets and cushions. 1 The 20–22 cm block measurement in this project is a photo-inspired target rather than a measurement of the pictured bedspread.
Materials and Tools
Yarn
- Deep red — medium/worsted or Aran weight — layered roses
- Warm cream — same yarn weight — outer flower petals and background
- Olive green — same yarn weight — leaves
- Sage green — optional — small foliage accents
- Burgundy — same yarn weight — square frames, joins and outer border
Medium/worsted yarn is also used for commercially published crochet rose appliqués, while a current 3D Rose Granny Square listing specifies Aran yarn and a 5.0 mm hook. 2 Use one yarn family across the project so the leaves, flowers and frames behave consistently after washing.
Tools
- 5.0 mm crochet hook
- Yarn needle
- Scissors
- Locking stitch markers
- Tape measure
- Blocking mats
- Rust-resistant pins
- Digital kitchen scale for yarn calculations
Abbreviations
- MR — magic ring
- ch — chain
- sl st — slip stitch
- sc — single crochet
- hdc — half double crochet
- dc — double crochet
- tr — treble crochet
- inc — increase
- sp — space
- st/sts — stitch/stitches
- FLO — front loop only
- BLO — back loop only
- FO — fasten off
Pattern — 3D Red Rose
The instructions below are an original photo-inspired construction. Published 3D flower patterns confirm the general layered approach of placing progressively larger petals behind earlier rounds, but the stitch sequence here is constructed specifically for this project rather than copied from those patterns. 3
Rose Center
With deep red, make a MR.
Round 1: Work 8 sc in MR. Join with sl st. (8)
Round 2: Working in FLO, work 2 sc in each stitch around. Join. (16)
Keep the unused back loops accessible. They will support the next petal foundation.
Inner Rose Petals
Working across the front-loop structure, form four compact petals.
For each petal work:
sl st, ch 2, 2 hdc, 2 dc, 2 hdc, ch 2, sl st.
Distribute four petals evenly around the center.
Push the petals slightly inward as you work. The center should resemble a partially closed rosebud rather than a flat flower.
Second Petal Foundation
Join red yarn behind the inner petals.
Work ch 4.
Anchor with sl st behind the next inner petal.
Repeat around to form 6 chain spaces.
Check that the chain loops sit behind the first petal layer.
Middle Rose Petals
Into each ch-4 space work:
(sc, hdc, 3 dc, hdc, sc)
Repeat in all six spaces.
You now have six medium petals behind the compact center.
Do not press these petals flat.
Third Petal Foundation
Working behind the middle petals, create 8 ch-5 spaces distributed evenly around the flower.
Each loop should sit behind a valley between the existing petals.
Large Red Petals
Into each ch-5 space work:
(sc, hdc, dc, 3 tr, dc, hdc, sc)
Repeat around. (8 large petals)
Push the medium layer toward the center as the outer petals develop.
Fourth Petal Foundation
Create another foundation behind the large petals.
Work 8 ch-6 loops around the flower.
Keep these loops loose. A tight foundation will pull the rose into a cup and can distort the square after assembly.
Outer Red Petals
Into each ch-6 loop work:
(sc, hdc, 2 dc, 3 tr, 2 dc, hdc, sc)
Repeat around.
FO with a 35–40 cm tail.
The completed red section should now show four clearly separated levels: the curled center, six medium petals, eight large petals and eight broad outer petals.
Cream Petal Halo
The photograph uses a cream floral layer beneath each red rose. This creates separation between the dark flower and green leaves.
Join cream behind the outer red layer.
Create 8 ch-7 spaces around the rose.
Anchor each loop securely behind the red petals.
Cream Petals
Into each ch-7 space work:
sc, hdc, 2 dc, 3 tr, 2 dc, hdc, sc.
Repeat eight times.
FO.
Pull the cream petals outward so approximately half of each petal remains visible behind the red rose.
Olive Leaf — Make 4 per Square
With olive green, ch 12.
Starting in the second chain from hook:
Sl st in next chain.
Sc in next chain.
Hdc in next chain.
Dc in next 2 chains.
Tr in next 3 chains.
Dc in next 2 chains.
Hdc in final chain.
Ch 2.
Rotate the foundation and work down the opposite side:
Hdc, dc in next 2, tr in next 3, dc in next 2, hdc, sc, sl st.
Join at the leaf base.
FO with a 25 cm tail.
Leaf Center Vein
Join olive yarn at the base of the leaf.
Work surface sl st along the center foundation chain.
Stop approximately 5 mm before the point.
FO.
If the leaf curls after adding the vein, the surface stitches are too tight.
Optional Sage Leaves
The reference includes subtle green variation between the cream background and olive foliage.
Make selected leaves in sage rather than olive.
Use no more than approximately one sage leaf for every three olive leaves if you want the darker foliage to remain dominant.
Positioning the Flower and Leaves
Arrange four leaves beneath the flower before sewing anything permanently.
Point one leaf toward each corner of the future square.
Allow the cream petals to overlap the leaf bases.
Place the red rose on top.
The foliage should remain visible between the cream petals.
Structural Cream Granny Square
The square should remain comparatively flat because the dimensional flower will be attached after blocking.
With warm cream, ch 4 and join to form a ring.
Round 1
Ch 3.
Work:
2 dc, ch 2, 3 dc, ch 2, 3 dc, ch 2, 3 dc, ch 2.
Join to beginning ch-3.
You have four 3-dc groups and four corners.
Round 2
Sl st to the first corner.
In each corner work:
(3 dc, ch 2, 3 dc)
Ch 1 between corner groups.
Join.
Round 3
Sl st to corner.
Work:
(3 dc, ch 2, 3 dc) in corner.
Ch 1.
Work 3 dc in next ch-1 space.
Ch 1.
Repeat around.
Round 4
Continue the established granny-square pattern.
Work (3 dc, ch 2, 3 dc) in each corner.
Work 3 dc into each side ch-1 space with ch 1 between groups.
Rounds 5–7
Repeat the same expansion.
Each new round adds one additional 3-dc group to every side.
Measure after Round 7.
The square should be approaching the required size without rippling.
Cream Stabilizing Round
Ch 1.
Sc in every dc and ch-1 space around.
At each corner work:
(sc, ch 2, sc)
Join.
FO.
Block the cream square before attaching the dimensional flower.
Burgundy Frame
Join burgundy in a corner.
Round 1: Ch 1, sc around. At each corner work (sc, ch 2, sc).
Round 2: Ch 3, dc in each stitch around. At each corner work (2 dc, ch 2, 2 dc).
Round 3: Ch 1, sc around. At each corner work (sc, ch 2, sc).
FO.
Block the completed square to approximately 20–22 cm.
Adding the Small Cream Texture
The photographed blocks contain small cream clusters around the foliage rather than a completely plain background.
These can be added selectively after blocking.
Join cream in an exposed granny space.
Work a compact popcorn:
5 dc in the same space.
Remove the hook from the loop.
Insert it into the first dc.
Pick up the working loop and pull it through.
Ch 1 to close.
FO or move to another nearby space.
Do not fill every opening. The cream texture should frame the leaves without hiding the square construction.
Attaching the Leaves
Place the four leaves diagonally toward the corners.
Pin each leaf at its base and point.
Sew along the center vein for approximately 3–4 cm.
Add one hidden stitch near each side edge.
Leave the outer leaf edges slightly free.
This gives the foliage dimensional relief without allowing the tips to fold during use.
Attaching the Cream Petal Layer
Center the cream petal halo over the leaves.
Pin all eight petals.
Sew around the hidden central area.
Add one small anchoring stitch approximately halfway along each petal.
Do not stitch around the entire perimeter.
Attaching the Red Rose
Place the rose in the exact center.
Sew its underside to the cream flower layer using the long red tail.
Attach the broad outer petals at several concealed points.
Leave the middle and inner petal layers free.
The rose should remain dimensional while the base stays secure enough for washing and handling.
Target Flower Size
A current medium/worsted rose appliqué specifies approximately 3.5 inches / 9 cm across for the flower alone and approximately 4.5 inches / 11.4 cm including leaves. 4
The rose in this bedspread is visually larger relative to its block. Target approximately:
- Red rose: 9–11 cm across
- Rose + cream petals: 13–15 cm
- Flower + foliage: 16–18 cm
- Finished square: 20–22 cm
These larger measurements are project targets derived from the photographed proportions.
Planning the Bedspread Grid
Measure the blocked square before choosing the grid.
If one finished square measures 21 cm, the approximate dimensions before the outside border are:
| Grid | Squares | Approx. Size |
|---|---|---|
| 5 × 6 | 30 | 105 × 126 cm |
| 6 × 8 | 48 | 126 × 168 cm |
| 8 × 10 | 80 | 168 × 210 cm |
| 9 × 11 | 99 | 189 × 231 cm |
The border increases both dimensions. For a bedspread with substantial side and foot drop, measure the mattress and desired drop before deciding on the number of blocks.
Estimating Yarn
Large dimensional floral blocks consume considerably more yarn than flat granny squares, so calculate from a finished sample.
Weigh one completely assembled square.
Suppose the sample weighs 90 g.
For 80 squares:
90 g × 80 = 7,200 g
This example demonstrates the calculation only; it is not a fixed requirement.
Separate the calculation by color for better accuracy. Weigh each yarn ball before and after making one complete sample square, then multiply the difference by the number of blocks.
Joining the Squares
The burgundy frames make the joining grid a visible design feature.
Place two blocked squares right sides together.
Using burgundy, work a loose slip-stitch seam through corresponding loops.
Alternatively, place the squares side by side and work a flat slip-stitch join from the front.
Keep the seam flexible.
A tight burgundy join will create channels between the raised floral blocks.
Joining in Rows
Join all squares into horizontal rows first.
Lay each completed row flat.
Confirm that every rose faces the same direction and that the corners align.
Join the rows using the same burgundy seam.
Check the blanket after every second row.
If the joined section contracts, remake the seam more loosely before continuing.
Matching Rose Pillow Fronts
The reference repeats the same floral blocks on two large pillow shams.
For a square cushion, use four floral blocks in a 2 × 2 arrangement.
For a rectangular pillow, use a row of two or three blocks depending on their finished measurement.
Join the blocks with burgundy.
Add additional burgundy and cream rounds around the complete pillow front until it matches the pillow insert.
Crochet Pillow Back
For a dense back, chain to the required width using cream.
Row 1: Hdc in third chain from hook and across.
Row 2: Ch 2, turn, hdc across.
Repeat until the panel matches the floral front.
Block both pieces.
Join three sides with burgundy sc.
Add buttons or another removable closure along the fourth side if required.
First Bedspread Border Round
Join burgundy at one outer corner.
Work sc evenly around the entire blanket.
At each corner work:
(2 sc, ch 2, 2 sc)
Join.
Count the stitches along opposite sides. Matching counts simplify the decorative rounds.
Second Border Round
Ch 3.
Dc in each stitch around.
At each corner work:
(2 dc, ch 3, 2 dc)
Join.
Cream Openwork Border
Change to cream.
Work:
ch 4, skip 2 sts, sc in next st.
Repeat around.
At corners use a larger ch-6 or ch-7 loop if needed to keep the edge flat.
Burgundy Scalloped Border
Join burgundy in a cream chain space.
Into each selected space work:
(sc, hdc, 5 dc, hdc, sc)
Sl st or sc into the next space.
Repeat around.
For a deeper border similar to the photograph, add a second layer of larger shells behind the first.
Second Scallop Layer
Create ch-5 loops behind the first burgundy shells.
Into each loop work:
(sc, hdc, 7 dc, hdc, sc)
At corners, increase the chain-loop length rather than forcing extra shells into a small area.
The finished border should hang freely over the bed without turning upward.
Preventing an Overly Heavy Bedspread
A full field of dimensional roses contains much more yarn than a flat blanket.
Cotton gives excellent stitch definition but can become heavy at bedspread scale.
A medium acrylic or cotton-acrylic blend can reduce weight.
Another option is to make the cream background in a slightly lighter yarn while retaining medium yarn for the roses and leaves. Test the combination in one complete square before committing to the blanket.
Making a Lighter Version
Remove the fourth red petal layer.
Keep the inner, middle and first large layers.
Make only four cream petals rather than eight if the rose still has enough visual separation.
Reduce the number of popcorn accents around the foliage.
This lowers yarn consumption and makes the bedspread easier to wash while preserving the red-rose character.
Making a More Dimensional Rose
Do not increase the number of stitches in every petal indiscriminately.
Instead, shorten the inner petals and leave the outer petals at their existing size.
The greater difference between the center and outer layers makes the flower appear deeper.
After blocking, lift the inner petals toward the center rather than pressing the entire flower flat.
Assembly
- Crochet one complete cream square with its burgundy frame, block it to the 20–22 cm target and record the exact dimensions.
- Make one four-layer red rose, cream petal halo and four olive leaves, then arrange them on the blocked master square.
- Sew the four leaves toward the corners, attaching their center sections while leaving the outer edges slightly raised.
- Attach the cream petal halo over the leaf bases, then center the red rose and secure its underside without flattening the inner petals.
- Make the remaining floral blocks, comparing every fifth square with the master for size, flower position and border tension.
- Arrange all finished blocks into the required bedspread grid and check that the burgundy frames form continuous straight lines.
- Join squares into horizontal rows with burgundy yarn, then join the completed rows using the same flexible seam.
- Work the structural burgundy border and cream openwork round around the assembled bedspread.
- Add the burgundy scalloped perimeter and matching floral blocks to the pillow fronts if making the complete bedroom set.
- Weave all remaining tails, then lightly block the joined grid and border while leaving the dimensional roses uncompressed.
The completed bedspread should show a regular burgundy grid, centered raised red roses, visible cream petals and four consistently angled green leaves on each block.
7 Technical Tips
- Keep every blocked square within 5 mm of the master measurement. A 5 mm difference repeated across ten blocks creates a potential 5 cm alignment error across a bedspread row.
- Attach only the underside and broad outer areas of each rose. Sewing through the inner petal layers collapses the flower and removes the deep center visible in the reference.
- Stop each leaf vein approximately 5 mm before the point. Tight surface stitches extending into the tip cause the leaf to curl upward.
- Keep the floral unit within roughly 16–18 cm on a 20–22 cm square. A larger flower covers the burgundy frame and leaves too little negative space between neighboring roses.
- Use two or three hidden attachment points on every cream petal. One center-only attachment allows large petals to fold over after washing, while sewing the complete edge removes their relief.
- Check the burgundy joining seam every two squares. If the seam measures even 5–10 mm shorter than the blocked edge, the finished blanket can develop channels along the grid.
- Weave rose and leaf tails through at least 5 cm of dense stitches. Avoid hiding structural tails inside open granny spaces because repeated handling gives them too little friction.
Color Balance
The deep red rose should remain the dominant element. Cream occupies the largest total area but functions as negative space, while olive green separates the flower from the square.
Burgundy should remain narrow. Its purpose is to outline the blocks and create the strong geometric grid visible across the bedspread.
If using sage as a second foliage color, distribute it irregularly. Avoid making one complete row of sage leaves because the color shift would create an unintended stripe across the blanket.
Care and Final Blocking
Follow the care directions for the selected yarn.
Support the blanket fully when wet rather than lifting it from one corner.
Lay it flat and align the burgundy grid first.
Shape the outer border next.
Do not pin every rose petal flat. Arrange only the broad outer red and cream petals, then lift the inner rose layers after the blanket has dried.
Reshape the olive leaves by pulling gently from base to point. Confirm that the scalloped border lies below the blanket surface rather than curling upward.
Conclusion
The layered flower is the measurement that controls this 3D rose granny square crochet bedspread pattern. Start with one 20–22 cm block, build a 9–11 cm red rose over its cream petal halo and keep the complete floral unit within roughly 16–18 cm. Block that sample before producing dozens of repeats, then weigh it to calculate the actual yarn requirement for your chosen bed size. Keep burgundy seams flexible and attach only selected areas of the dimensional petals. Save the finished bedspread to Pinterest or share it on Instagram with #RedRoseGrannyBedspread. For the central block, would you keep the rose deep red or make one contrasting cream rose surrounded by burgundy petals?