Introduction
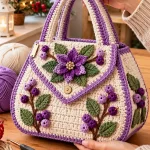
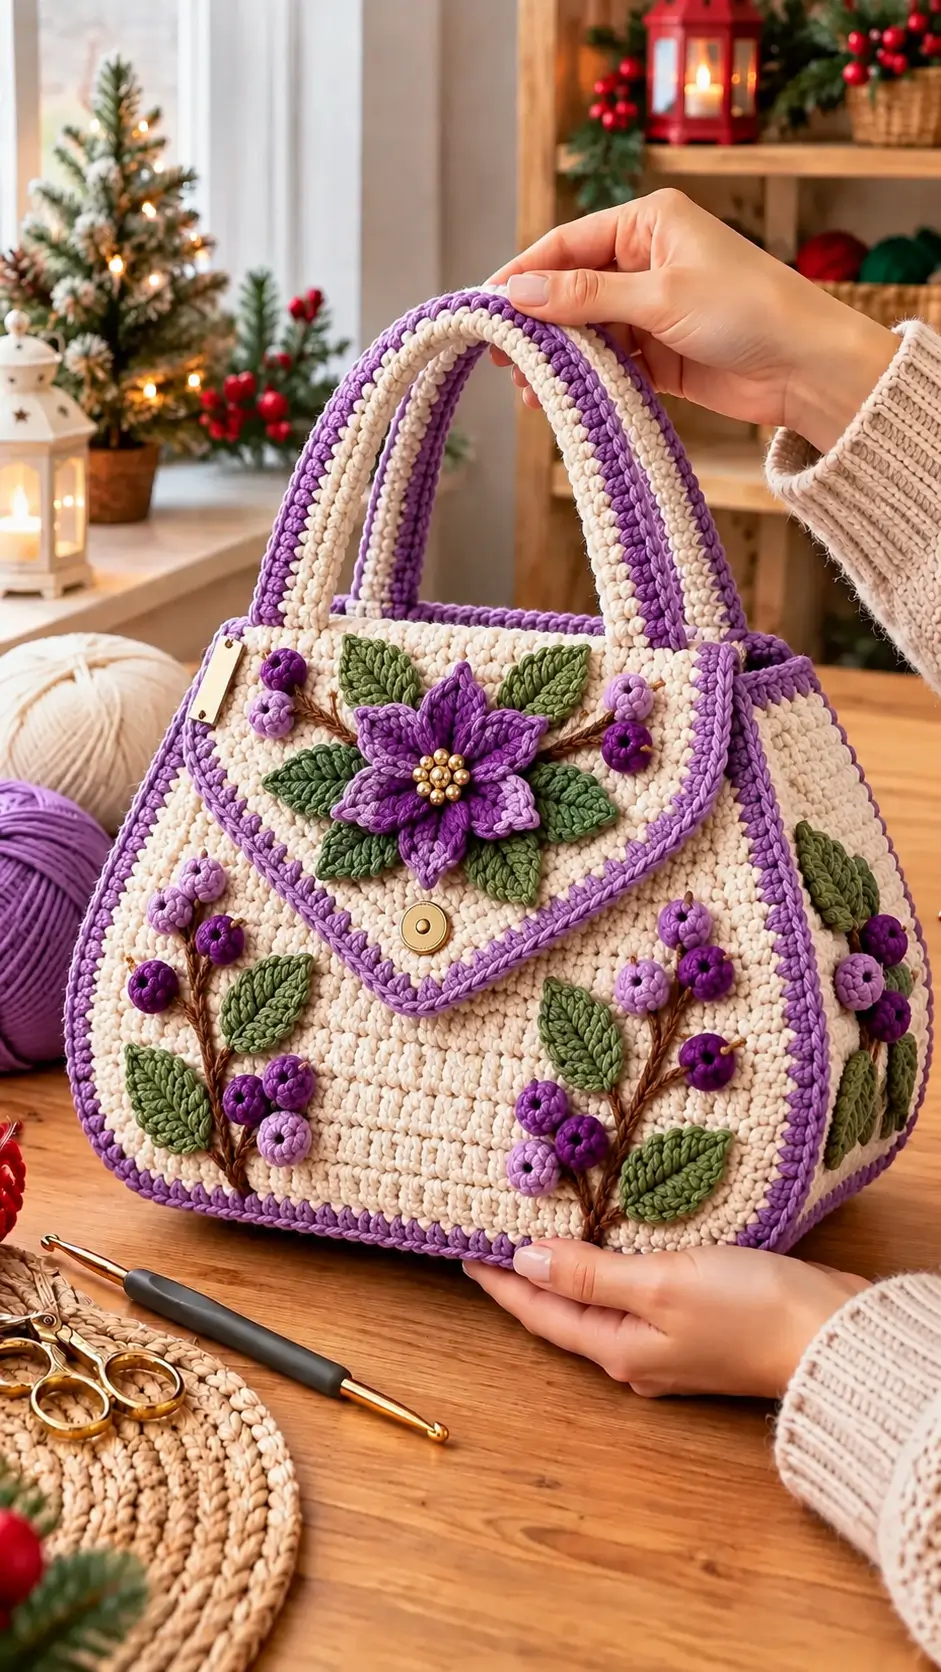
A six-petal violet flower spans the pointed cream flap of this handbag, while raised berry vines extend down its front and side. This floral crochet handbag pattern interprets those details with worsted cotton, a 4 mm hook, two reinforced handles, and a lined magnetic closure. The planned body measures 30 × 24 × 10 cm at the stated gauge. Intermediate skills are useful because the flap tapers and the gusset requires accurate seaming.
The Design: What Makes Purple Bloom Different
The photographed purse combines a rectangular body with a tapered envelope flap. Separate front and back panels keep the surface smooth for a raised floral appliqué; a three-sided gusset gives depth without bunching corners. Double handles are crocheted as dense strips rather than chains because straps carry the load when lifted.
Decoration follows a structural hierarchy. One layered purple blossom anchors the flap, while smaller berry clusters and olive leaves follow embroidered branches across the front and one side. Purple edging covers seams and outlines the silhouette. You can alter vine placement without changing the bag measurements; the maker should not sew heavy beads onto unsupported crochet. A common error in a crochet flap handbag is attaching the snap before checking where the finished flap actually lands.
Project Info at a Glance
| Skill Level | Time | Finished Size | Hook | Best For |
|---|---|---|---|---|
| Intermediate (design assessment) | Not independently verified; allow 12–18 hours | Target 30 × 24 × 10 cm at design gauge; not a measured sample | 4 mm | Wallet, phone, keys and other light everyday items |
Construction gauge: Aim for 14 sc and 15 sc rows over 10 × 10 cm in firm, flat crochet. This is a design target, not a gauge measured from the photo or guaranteed by a commercial yarn. Swatch first: 42 stitches ÷ 14 × 10 = 30 cm; 36 rows ÷ 15 × 10 = 24 cm. The gusset is 14 stitches wide, giving approximately 10 cm of depth. Actual dimensions may differ after assembly. Lion Brand’s 24/7 Cotton specifications identify the yarn as worsted and list a 4 mm hook, but its published stitch gauge is not the design target above.
Materials and Tools
Yarn
Quantities below are planning allowances for this original version, not gram weights documented for the photographed bag.
- Natural cream — worsted #4 cotton — 300 g — Lion Brand 24/7 Cotton or a similarly firm cotton.
- Rich purple — worsted #4 cotton — 85 g — matching 24/7 Cotton or similar; for flap flower, borders and handle trim.
- Pale lavender — worsted #4 cotton — 30 g — matching cotton for alternating berries.
- Olive green — worsted #4 cotton — 45 g — matching cotton for leaf appliqués.
- Brown — worsted #4 cotton or embroidery cotton — 10 g — for stitched stems.
Purchase extra cream if your swatch is heavier than expected. Separate yarn colors give the flower edges more definition than carrying unused colors across a cream panel.
Tools
- 4 mm crochet hook for panels and straps; optional 3.5 mm hook for compact leaf details.
- 18 mm magnetic snap, preferably sew-on or attached through reinforced lining.
- Seven to nine gold-colored beads for the large flower, secured individually.
- Yarn needle, fine sewing needle, matching strong thread, scissors, tape measure, and four stitch markers.
- Cotton lining fabric, interfacing or a thin base stiffener, sewing clips and removable marking pencil.
- Optional decorative tag matching the small label visible beside the handle.
Small beads and magnets are unsuitable for objects intended for young children. This is a functional handbag, not a stuffed toy; no safety eyes or polyester stuffing are required.
Abbreviations
MR = magic ring; sc = single crochet; inc = two sc in one stitch; dec = single-crochet decrease; sl st = slip stitch; ch = chain; BLO = back loops only; hdc = half double crochet; dc = double crochet; tr = treble crochet; st(s) = stitch(es); RS = right side; WS = wrong side; FO = fasten off.
An invisible decrease works through the front loops of the next two stitches, reducing the count by one with less surface bulk.
Pattern — Step by Step
US crochet terms are used. Bag panels and straps are worked flat in turned rows, not in a continuous spiral; only the spherical berry ornaments use spiral rounds. Beginning turning chains do not count as stitches. Check each count before working the next row.
Front Panel (Make 1)
Yarn: natural cream — original flat-panel stitch math.
Foundation: Ch 43.
Row 1: Sc in the second ch from hook and in every ch across. (42)
Rows 2–36: Ch 1, turn; sc in every stitch. (42 in each row)
FO; leave a 25 cm sewing tail. The bottom edge is the original chain, and the top edge is Row 36. Mark the two top corners before setting the panel aside. Avoid pulling the foundation chain tighter than the final row because a shortened lower edge will curve the front inward.
Back Panel (Make 1)
Yarn: natural cream — original flat-panel stitch math.
Foundation: Ch 43.
Row 1: Sc in second ch from hook and each remaining ch. (42)
Rows 2–36: Ch 1, turn; sc across. (42 in each row)
FO with a 25 cm tail. Lay the back against the front, matching the foundation edges and all four corners. Their row counts and finished width must agree. If one panel is larger by more than 5 mm, recheck tension before stitching the gusset.
Side-and-Bottom Gusset (Make 1)
Yarn: natural cream — original flat-panel stitch math.
Foundation: Ch 15.
Row 1: Sc in second ch from hook and each ch across. (14)
Rows 2–114: Ch 1, turn; sc across. (14 in each row)
FO, leaving 35 cm for attachment. Number the row-end positions mentally or with markers: rows 1–36 correspond to the first side; rows 37–78, to the bottom; and rows 79–114, to the opposite side. The total is 36 + 42 + 36 = 114 matched attachment positions per panel. Ease the fabric slightly while seaming, because rows and stitches may have different physical heights. Keep the gusset’s two short ends level with the bag opening.
Pointed Envelope Flap (Make 1)
Yarn: natural cream — original decrease math.
Join cream at the first top stitch of the back panel and work across its 42 top stitches.
Row 1: Sc across the back’s top edge. (42)
Row 2: Ch 1, turn; dec, sc 38, dec. (40)
Row 3: Dec, sc 36, dec. (38)
Row 4: Dec, sc 34, dec. (36)
Row 5: Dec, sc 32, dec. (34)
Row 6: Dec, sc 30, dec. (32)
Row 7: Dec, sc 28, dec. (30)
Row 8: Dec, sc 26, dec. (28)
Row 9: Dec, sc 24, dec. (26)
Row 10: Dec, sc 22, dec. (24)
Row 11: Dec, sc 20, dec. (22)
Row 12: Dec, sc 18, dec. (20)
Row 13: Dec, sc 16, dec. (18)
Row 14: Dec, sc 14, dec. (16)
Row 15: Dec, sc 12, dec. (14)
Row 16: Dec, sc 10, dec. (12)
Row 17: Dec, sc 8, dec. (10)
Row 18: Dec, sc 6, dec. (8)
Row 19: Dec, sc 4, dec. (6)
Row 20: Dec, sc 2, dec. (4)
Row 21: Dec twice. (2)
Row 22: Dec once. (1)
For Rows 3–22, ch 1 and turn before working each row. FO with 20 cm remaining. Each shaping row removes two stitches until the last row removes one, making a centered point. Check that the flap rests across the assembled front before deciding where the fastener will go.
Purple Flap Border (Make 1)
Yarn: rich purple — edging count based on 22 flap rows.
Border Round 1: Join purple at one top corner. Work 1 sc in each of 22 row ends down the first diagonal, 3 sc around the pointed tip, then 1 sc in each of 22 row ends up the other diagonal. (47)
Border Round 2: Work 1 sl st into each of those 47 stitches. (47)
FO and weave the tail into the wrong side. The top edge stays attached to the back panel and is not included in the 47-stitch count. If the border pulls the flap upward, work a longer stitch into selected row ends rather than adding uncontrolled increases.
Reinforced Handles (Make 2)
Yarn: natural cream with rich purple edging — original flat-strip math.
Foundation: Ch 7.
Row 1: Sc in second ch from hook and each ch across. (6)
Rows 2–60: Ch 1, turn; sc across. (6 in each row)
FO, leaving a 30 cm attachment tail at each end. For each handle, join purple to a corner and sc around the entire rectangle: 60 stitches along each long edge and 6 across each short edge. (132 around) Sl st to join, then FO. The expected length is approximately 40 cm at the project gauge. Sew narrow cotton tape inside each handle if the bag will hold more than a phone and wallet; this limits long-term strap growth. Make sure both handles have the same finished length before sewing.
Layered Violet Flower (Make 2 Layers)
Yarn: rich purple — original six-petal motif using standard circular increases.
Round 1: 6 sc in MR. (6)
Round 2: Inc × 6. (12)
Round 3: (Sc, inc) × 6. (18)
Round 4: Repeat six times: sl st in the next base stitch; ch 7; working back along the chain, sc in second ch, hdc in next ch, dc in next two ch, hdc in next ch and sc in final ch; sl st in each of the next two base stitches. (6 petals; 18 base stitches used)
FO with a 25 cm sewing tail on each layer. Stack the two flowers with petals staggered. Sew only the two center disks together so the raised petals remain free; the layered profile resembles the purple bloom seen on the flap. Attach seven to nine small gold beads through the central disk with sewing thread, tying each bead securely on the reverse.
Olive Leaves (Make 12)
Yarn: olive green — original oval leaf stitch math.
Foundation: Ch 8.
Round 1: Beginning in second ch from hook, sc, hdc, dc in each of next three chains, hdc, then 3 sc in the final chain. Continue on the underside of the foundation: hdc, dc in each of next three chains, hdc, sc. (15)
Round 2: Sl st in each of the 15 edge stitches. (15)
FO with a 20 cm tail. Use brown yarn to surface-stitch one center vein from the rounded base to the point. Six leaves can frame the large flower, four can accompany the front berries, and two can decorate the visible side gusset. Shape each leaf between your fingers rather than adding stuffing, which would make the appliqué sit awkwardly away from the bag.
Raised Berry Balls (Make 16)
Yarn: rich purple for 8; pale lavender for 8 — standard six-stitch amigurumi math.
Round 1: 6 sc in MR. (6)
Round 2: Inc × 6. (12)
Round 3: Sc around. (12)
Round 4: Dec × 6. (6)
Insert a small amount of yarn scrap or stuffing before closing. FO with 20 cm of yarn, thread through the six remaining front loops, pull closed and secure. The stitch counts progress 6 → 12 → 12 → 6, without skipped or extra stitches. Mix both shades in clusters of three or four, allowing space between clusters for the embroidered branching stems.
Brown Branches and Flower Arrangement
Yarn: brown — surface embroidery, with no crochet row count.
Mark curved branch lines on the front panel, keeping them away from the 1 cm seam allowance. Use a doubled length of brown thread to make backstitches 4–6 mm long along each marked path. Position berry balls at branch tips and leaf appliqués at alternating angles. Add a shorter vine and two leaves to the visible side gusset. Secure each element from inside the fabric with several small stitches; do not run one exposed thread through the entire group.
Closure, Optional Tag and Lining
Materials: gold-colored 18 mm magnetic snap, fabric reinforcement and optional label.
Lay the flap over the front after seaming and mark the matching halves of the closure. Fit the snap through small reinforced fabric tabs or to an interfaced lining piece rather than anchoring its prongs directly into unsupported crochet. A rigid decorative circle may be sewn over the exterior flap position to imitate the photographed hardware. Stitch the small optional label beside a handle attachment, avoiding any strap seam. Finally, sew a lightweight cotton lining to the interior opening; keep the magnetic backing hidden between the lining and outer fabric.
Assembly
- Inspect the flap attachment. Fold the completed flap across the back panel and check that its triangle is centered over the front opening.
- Shape the body. Match the front and back corners, then align the cream gusset around each panel’s left side, bottom and right side.
- Seam the panels. Use purple yarn and a whipstitch or mattress stitch through the matched 114 attachment positions on each panel; keep the seam tension even.
- Finish the opening. Work a line of purple slip stitches along the visible front rim and the two exposed gusset tops, without closing the bag.
- Install the closure. Fold the flap into its final position, then fasten the reinforced snap pieces where both halves meet naturally.
- Attach the handles. On the front and back top edges, place strap ends roughly 5 cm from each upper corner; sew through a 2 cm overlap on each end.
- Position the face of the design. Center the double-layer purple flower on the flap, leaving the tip and closure clear, then secure its center.
- Add the botanical pieces. Pin six leaves around the central flower, followed by the remaining leaves and the sixteen mixed-color berries along the stems.
- Finish the accessories. Sew on the gold beads, optional tag and lining, hiding hardware backs and embroidery knots inside the bag.
- Complete the finishing. Weave yarn tails at least 5 cm in two directions, reinforce handle roots, and check that the snap opens without pulling the flap fabric.
The assembled bag has a cream box body, purple pointed flap trim, paired handles, raised flower and berry-vine decoration.
7 Technical Tips
- Stitch markers: Place markers at all four panel corners and at gusset rows 36 and 78. A misplaced bottom transition can twist a side seam even when the total 114 rows are correct.
- Bag firmness: Make a 10 cm swatch and hold it upright before beginning the panels. Fabric that collapses under its own weight may need a smaller hook or a sewn-in stabilizer.
- Invisible decreases: On the berry balls, reduce 12 stitches to 6 using six front-loop decreases. Regular bulky decreases leave holes that allow the filling to appear.
- Closure timing: Mark the magnetic snap only after the flap is bordered and the gusset assembled. Installing it earlier may put the halves several centimeters apart when the bag is closed.
- Velvet tension: If substituting velvet or chenille for cotton, test a 10 cm square and recalculate panel dimensions. Plush yarn often obscures the stitch loops and changes the bag’s rigidity.
- Pinning: Pin the six central leaves before sewing the flower, leaving an open area for the gold center and flap snap. Placing every leaf after the petals are fixed can force the arrangement into an uneven fan.
- Tail weaving: Hide each tail for at least 5 cm, reverse direction, and trim only after testing the handles under a light load. A short unsecured end at a handle root can unravel under repeated lifting.
Conclusion
The finished Purple Bloom purse depends on matching flat-panel dimensions, placing the gusset without puckers, and supporting the hardware before attaching its raised ornaments. This floral crochet handbag pattern uses a 42-stitch panel width, a 14-stitch gusset and a flap that narrows to one final stitch. Measure your completed body, test the closure, then carry a light load for several minutes to check the handle roots. Photograph the front and side to show both the central layered blossom and the berry branches. Share the finished project on Pinterest and Instagram with #PurpleBloomCrochetHandbag. Would you place the darkest purple berries near the lower corners, as in the reference, or group them closer to the flap?