Introduction
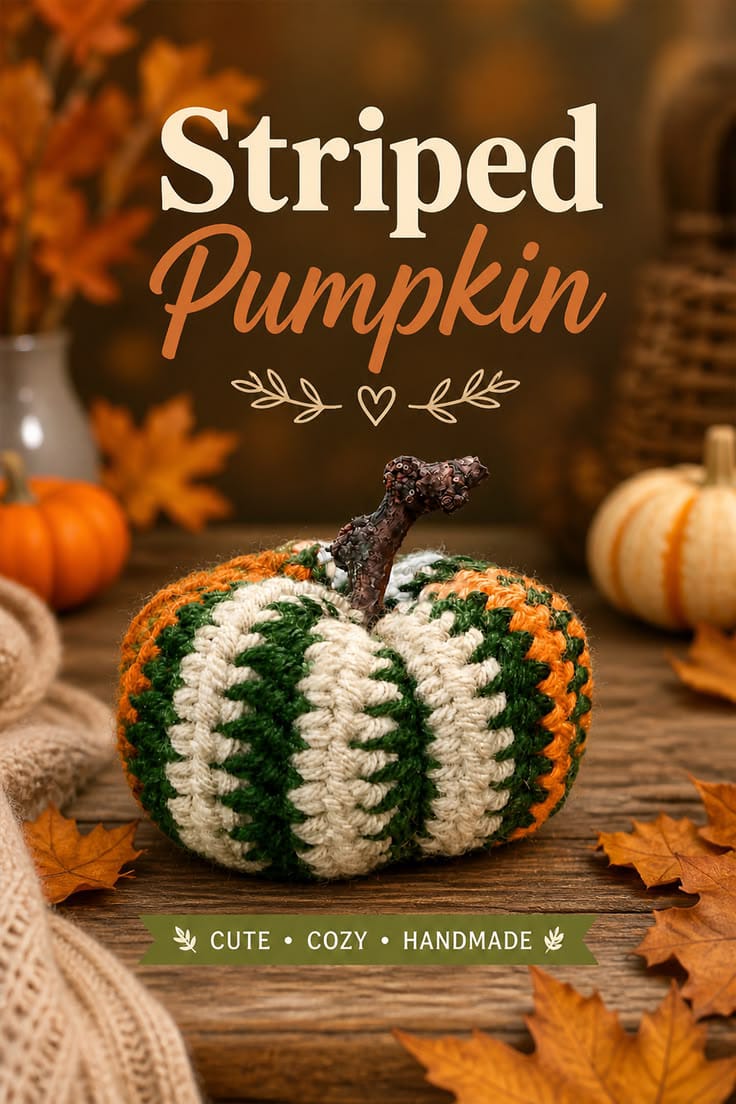
One narrow orange rib sitting between two green stripes changes the whole balance of this pumpkin. This striped crochet pumpkin pattern uses worsted-weight yarn and a 4 mm hook to make an approximately 15–18 cm decoration with cream, forest-green and burnt-orange vertical bands. The intermediate construction is worked flat, seamed, stuffed and gathered, making the color repeat easy to inspect before the pumpkin is closed.
The Design: What Makes This Striped Pumpkin Different
The dominant cream sections are deliberately wider than the green and orange bands, so the pumpkin reads as cream first and multicolor second. Narrow forest-green stripes frame each orange section and sharpen the contrast between neighboring ribs. Back-loop-only half double crochet creates the raised texture visible in the reference; once the rectangle is turned into a tube, those horizontal ridges become vertical pumpkin ribs. The body is also proportioned for a squat silhouette rather than a tall cylinder. A short dark-brown stem finishes the crown without adding leaves or vines that are not present in the image. A common mistake in a ribbed crochet pumpkin is treating every color band as the same width. Equal bands reduce the cream dominance and make the finished pumpkin look more like an ordinary striped ball.
Project Info at a Glance
| Skill Level | Time | Finished Size | Hook | Best For |
|---|---|---|---|---|
| Intermediate | 3–5 hours | Approx. 15–18 cm diameter × 17–20 cm including stem | 4.0 mm | Autumn shelves, table décor and seasonal displays |
Materials and Tools
Yarn
- Warm cream — worsted / Aran — approximately 35–45 g — broad pumpkin ribs.
- Forest green — worsted / Aran — approximately 25–35 g — narrow separator ribs.
- Burnt orange — worsted / Aran — approximately 20–25 g — accent ribs.
- Dark brown — worsted or DK held firmly — approximately 5–8 g — stem.
Keep the three body yarns close in thickness. If the orange strand is noticeably heavier than the cream or green, the narrow accent sections can become taller than the neighboring ribs and distort the seam.
Tools
- 4.0 mm crochet hook
- Polyester fiberfill — approximately 120–160 g
- Long tapestry needle
- Standard yarn needle
- Stitch markers
- Scissors
- Measuring tape
- Dressmaking pins
Abbreviations
- MR — magic ring
- ch — chain
- sc — single crochet
- hdc — half double crochet
- sl st — slip stitch
- BLO — back loop only
- inc — increase
- dec — decrease
An invisible decrease is worked through the front loops of the next two stitches before one single crochet is completed through both loops.
Pattern — Step by Step
The pumpkin body is worked flat. The foundation chain controls the body height, while the total row count controls its circumference.
Body Foundation
Yarn: warm cream — original reconstruction using standard ribbed-pumpkin geometry.
Foundation: ch 23.
Row 1: Beginning in the second chain from hook, hdc across. (22)
Ch 1 and turn. The turning chain does not count as a stitch.
Cream Rib 1
Row 2: hdc BLO across. (22)
Row 3: hdc BLO across. (22)
Row 4: hdc BLO across. (22)
Row 5: hdc BLO across. (22)
You now have five cream rows including Row 1.
Green Separator 1
Change to forest green.
Row 6: hdc BLO across. (22)
Row 7: hdc BLO across. (22)
Row 8: hdc BLO across. (22)
Orange Accent 1
Change to burnt orange.
Row 9: hdc BLO across. (22)
Row 10: hdc BLO across. (22)
Row 11: hdc BLO across. (22)
Green Separator 2
Row 12: hdc BLO across. (22)
Row 13: hdc BLO across. (22)
Row 14: hdc BLO across. (22)
Cream Rib 2
Row 15: hdc BLO across. (22)
Row 16: hdc BLO across. (22)
Row 17: hdc BLO across. (22)
Row 18: hdc BLO across. (22)
Row 19: hdc BLO across. (22)
Green Separator 3
Row 20: hdc BLO across. (22)
Row 21: hdc BLO across. (22)
Row 22: hdc BLO across. (22)
Orange Accent 2
Row 23: hdc BLO across. (22)
Row 24: hdc BLO across. (22)
Row 25: hdc BLO across. (22)
Green Separator 4
Row 26: hdc BLO across. (22)
Row 27: hdc BLO across. (22)
Row 28: hdc BLO across. (22)
Cream Rib 3
Row 29: hdc BLO across. (22)
Row 30: hdc BLO across. (22)
Row 31: hdc BLO across. (22)
Row 32: hdc BLO across. (22)
Row 33: hdc BLO across. (22)
Green Separator 5
Row 34: hdc BLO across. (22)
Row 35: hdc BLO across. (22)
Row 36: hdc BLO across. (22)
Orange Accent 3
Row 37: hdc BLO across. (22)
Row 38: hdc BLO across. (22)
Row 39: hdc BLO across. (22)
Green Separator 6
Row 40: hdc BLO across. (22)
Row 41: hdc BLO across. (22)
Row 42: hdc BLO across. (22)
Cream Rib 4
Row 43: hdc BLO across. (22)
Row 44: hdc BLO across. (22)
Row 45: hdc BLO across. (22)
Row 46: hdc BLO across. (22)
Row 47: hdc BLO across. (22)
Final Green and Orange Balance
Row 48: green, hdc BLO across. (22)
Row 49: green, hdc BLO across. (22)
Row 50: green, hdc BLO across. (22)
Row 51: orange, hdc BLO across. (22)
Row 52: orange, hdc BLO across. (22)
Row 53: orange, hdc BLO across. (22)
Row 54: green, hdc BLO across. (22)
Fasten off with approximately 80 cm of yarn for joining.
Target relaxed panel dimensions: approximately 16–18 cm high × 46–52 cm long.
Check the Stripe Sequence
Lay the panel flat with the ribbed side facing upward.
The cream sections should be the widest visual bands. Forest green should frame the orange sections rather than competing with the cream for width.
Count all 22 stitches in every row before seaming. One missing stitch shortens that row and produces a tapered edge that becomes visible only after the pumpkin is stuffed.
The first and final edges should meet without creating one unusually wide color section. Pin the short edges together and inspect the stripe rhythm before stitching.
Joining the Body
Bring the short ends together with the ribbing aligned.
Use mattress stitch or a loose whipstitch through all 22 positions.
Match the first stitch to the first stitch, the midpoint to the midpoint and the final stitch to the final stitch before sewing the spaces between them.
Do not pull the seam tighter than the adjacent rows.
The finished piece should form a straight tube with vertical crochet ribs.
Closing the Bottom
Thread approximately 80–100 cm of strong matching yarn through a long needle.
Work a running stitch through the row ends around one opening.
Pull in several stages until the hole becomes approximately 10 mm wide.
Pass the yarn across the opening two or three times.
Secure the center from the inside.
The gathered edge contains many layers of worsted yarn, so forcing it closed in one pull can snap the working strand.
Stuffing the Pumpkin
Place stuffing around the outer wall first.
Build a consistent ring behind the cream, green and orange ribs.
Add smaller amounts toward the center.
The body should remain compressible enough for its top and bottom to move approximately 15–20 mm toward each other during shaping.
Do not pack the crown firmly. A softer upper center makes the final gather flatter and creates a more natural stem recess.
Closing the Top
Work a running stitch through all row ends around the remaining opening.
Pull until the opening narrows to approximately 20 mm.
Add the final small amount of stuffing.
Tighten to about 8–10 mm and secure the yarn temporarily.
Keep a long tail for compression.
Compressing the Pumpkin
Pass the yarn needle from the upper center through the complete pumpkin and exit at the bottom center.
Return to the crown.
Pull until the body loses approximately 15–20 mm of vertical height.
Check the silhouette from the side.
The upper and lower centers should recess while the middle circumference expands outward.
Secure the strand beneath the pumpkin.
Refining the Rib Shape
The BLO rows already create strong vertical texture, so additional sculpting should be light.
If the stuffed pumpkin remains too round, add four to six external shaping strands.
Place each strand in one of the deeper green valleys or directly beside a color transition.
Run the strand from bottom center to top center, over the exterior and back through both centers.
Pull until the groove sits approximately 6–10 mm beneath its neighboring cream rib.
Stop before the narrow orange sections disappear into the valleys.
Brown Stem
Yarn: dark brown.
R1: 6 sc in MR. (6)
R2: sc around. (6)
R3: sc around. (6)
R4: sc around. (6)
R5: sc around. (6)
R6: sc around. (6)
R7: sc around. (6)
R8: sc around. (6)
R9: sc around. (6)
R10: sc around. (6)
Stuff only the lower half very lightly.
Fasten off with a 25 cm sewing tail.
Target stem length: approximately 4–5 cm.
Stem Base
Yarn: dark brown.
R1: 6 sc in MR. (6)
R2: inc ×6. (12)
Fasten off with a 20 cm tail.
The small base disc hides the gathered opening and distributes the stem attachment across a wider area.
Shaping the Stem
The image shows an irregular, slightly angled stem rather than a perfectly straight cylinder.
Pinch the upper two or three rounds slightly to one side.
If needed, make one hidden brown stitch along the inside of the bend.
Keep the lower 20 mm upright so the stem appears rooted in the crown instead of leaning from the attachment point.
Assembly
- Complete all 54 body rows and verify that every row contains 22 hdc before joining the short edges.
- Pin the beginning and ending edges together and check the cream-green-orange stripe sequence from both sides.
- Join all 22 stitch positions with a relaxed mattress stitch or whipstitch to form the tube.
- Gather one open edge to approximately 10 mm and reinforce the lower center before adding stuffing.
- Fill the outer circumference first, keeping the crown and center approximately 15 percent softer than the ribs.
- Gather the upper edge to an 8–10 mm opening and compress the body by approximately 15–20 mm from top to bottom.
- Add four to six light shaping strands only if the existing BLO texture needs deeper valleys.
- Sew the 12-stitch brown base disc over the gathered crown opening.
- Position the six-stitch stem at the center and sew through its lower 15 mm into both the disc and pumpkin body.
- Set the pumpkin on a level surface, adjust any narrow ribs by hand and weave every remaining tail into the interior.
The finished pumpkin should show broad raised cream ribs, narrow green valleys, burnt-orange accents and one short dark-brown stem.
7 Technical Tips
- Stripe sequence breaks at the seam: The first and last bands were joined without checking the full repeat. Pin the edges first and reject any seam that creates a color section more than about 50 percent wider than its matching bands.
- Rows taper toward one end: One or more stitches have been dropped during color changes. Count all 22 hdc after each row and correct any short row before adding the next color.
- Pumpkin becomes cylindrical: A panel that is too short cannot spread into a broad stuffed body. Target approximately 46–52 cm of relaxed circumference against 16–18 cm of panel height.
- Orange bands disappear: External shaping strands have been pulled too deeply into the narrow accent areas. Limit secondary groove depth to roughly 6–10 mm and place the strand beside, rather than directly over, the center of an orange band.
- Top forms a pointed cone: Excess stuffing under the crown prevents the gathered edge from recessing. Keep the upper center about 15 percent softer and compress the top and bottom by approximately 15–20 mm after closing.
- Stem tilts from its base: A six-stitch tube sewn through only one point works like a hinge. Attach at least the lower 15 mm through the separate 12-stitch base disc and into several pumpkin rows.
- Bottom rocks on the table: The gathered closure is protruding below the ribs. Push the center inward approximately 5 mm and redistribute the lowest stuffing until three or more ribs share contact with the surface.
Adjusting the Finished Size
The rectangle method is easy to scale because height and circumference are controlled separately. For a smaller pumpkin, begin with ch 18–20 and work approximately 42–46 rows using the same ratio of broad cream sections to narrow green and orange sections.
For a larger version, start with ch 27–29 and continue until the panel circumference is close to three times its height. Do not rely on a fixed row count when switching yarn brands because worsted yarn varies substantially in thickness.
A published striped pumpkin pattern made with worsted yarn reaches approximately 15.2 cm high by 22.9 cm wide, confirming that this construction scales well beyond miniature décor. The photographed reconstruction is intentionally smaller and more compact.
Color Planning
The strongest feature of this striped crochet pumpkin pattern is unequal stripe width. Cream occupies the broadest visual area, green works as the dark divider and burnt orange supplies the smallest but strongest seasonal accent.
For a more muted version, substitute oatmeal for cream, moss for forest green and rust for orange. A high-contrast version can use ivory, deep bottle green and bright pumpkin orange.
Avoid making the brown stem close in value to the forest-green yarn. The crown contains several dark elements already, so a slightly warmer or darker brown keeps the stem readable.
If working from leftover yarn, make all body colors the same fiber type whenever possible. Different stretch levels can change row height and disrupt the rib spacing.
Finishing the Texture
Do not wet-block the stuffed pumpkin aggressively. The raised rib texture depends partly on the elasticity of the back-loop fabric, and heavy blocking can flatten the ridges.
Shape the finished body by hand instead. Press outward beneath each broad cream section and inward along the green valleys.
Rotate the pumpkin after every adjustment.
Opposite ribs should differ by no more than approximately 10–12 mm in visible width.
Check the seam last. If it appears flatter than the rest of the pumpkin, move a small amount of stuffing directly behind it rather than pulling the seam tighter.
Conclusion
Check the stripe sequence before seaming because the final join is the only place where the cream, green and orange rhythm can fail completely. Your next step is to finish all 54 rows, measure the relaxed panel and pin its short ends together before sewing. Gather and stuff the tube only after the color repeat looks balanced from every side. Share the finished striped crochet pumpkin pattern project on Pinterest with a front view, then post an overhead rib-detail image on Instagram using #CreamGreenStripedPumpkin. For this specific pumpkin, would you keep the orange ribs narrow or widen them to match the forest-green sections?









