Introduction
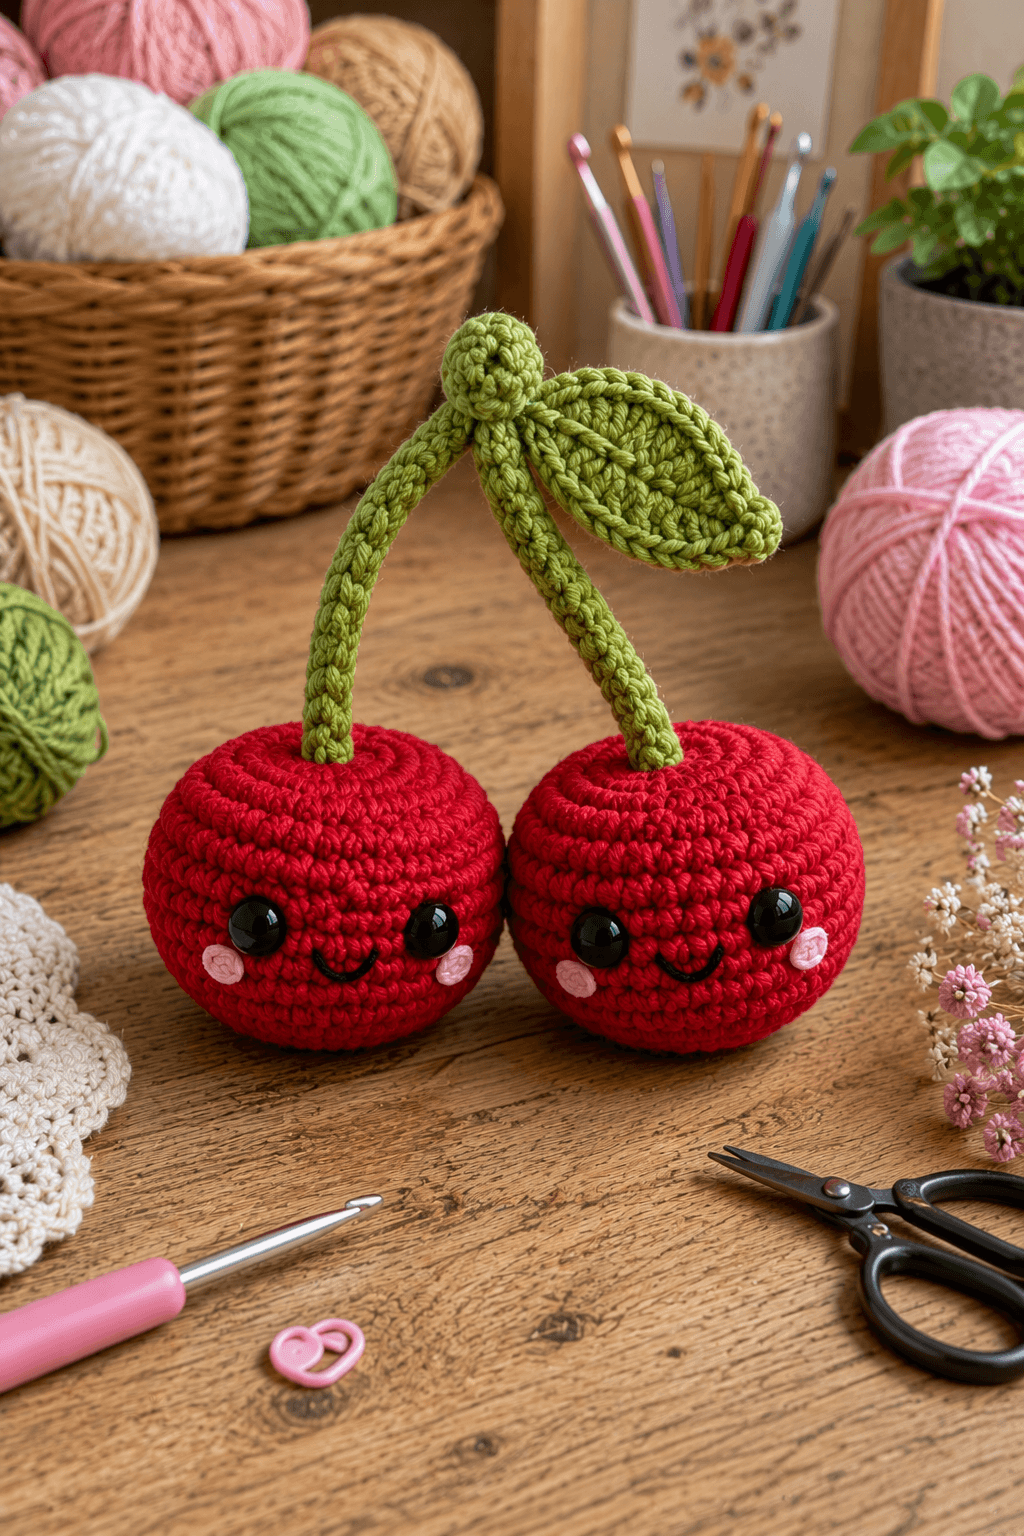
Two cherries only look connected when the stems meet above the fruit instead of simply emerging as separate green cords. This cherry amigurumi crochet pattern uses worsted yarn, a 4 mm hook and 12–14 mm safety eyes to make a paired cherry plush approximately 18–21 cm tall. Rounded red fruit, long curved stems, one large leaf and simple embroidered faces create an intermediate fruit-amigurumi project.
The Design: What Makes These Cherries Different
Each cherry reaches a 36-stitch plateau because the photographed fruit is broad enough to support large facial features without becoming a miniature keychain shape. The body is slightly flattened through straight rounds before decreasing, which gives the fruit a squat cherry profile rather than a perfect ball. Long six-stitch stems rise independently from each fruit, then angle inward toward one shared top connection. A large green leaf is attached close to that junction, while a compact bud hides the stem meeting point. This kawaii cherry amigurumi also uses matching pink cheeks and curved black smiles so the pair reads as one coordinated set. A common maker mistake is attaching both stems vertically. They should lean toward one another gradually, otherwise the leaf and top bud appear disconnected from the fruit.
Project Info at a Glance
| Skill Level | Time | Finished Size | Hook | Best For |
|---|---|---|---|---|
| Intermediate | 7–9 hours | Approx. 18–21 cm including stems | 4.0 mm | Fruit collections, desk decor and kawaii crochet displays |
Materials and Tools
Yarn
- Cherry red — worsted / Aran #4 — approximately 90–110 g total — used for both cherries.
- Leaf green — matching worsted yarn — approximately 35–45 g — used for both stems, leaf and top bud.
- Blush pink — scrap yarn — used for four cheek patches.
- Black embroidery yarn — small amount — used for both smiles.
Tools
- 4.0 mm crochet hook
- 12–14 mm safety eyes, four total
- Polyester stuffing, approximately 100–130 g
- Yarn needle
- Embroidery needle
- Locking stitch marker
- Dressmaking pins
- Scissors
Use embroidered eyes instead of plastic fittings when the finished cherries are intended for a child under three.
Abbreviations
- MR — magic ring
- sc — single crochet
- inc — two single crochet stitches in one stitch
- dec — invisible single crochet decrease
- sl st — slip stitch
- ch — chain
- hdc — half double crochet
- dc — double crochet
- tr — treble crochet
- BLO — back loop only
An invisible decrease is worked through the front loops of the next two stitches before completing one single crochet through both loops.
Pattern — Step by Step
Work the stuffed pieces in continuous spirals unless stated otherwise. Mark the first stitch of every round and count the complete round before moving the marker.
Cherry Body (Make 2)
Yarn: cherry red — Source: standard six-stitch amigurumi math.
R1: 6 sc in MR (6)
R2: inc ×6 (12)
R3: (sc, inc) ×6 (18)
R4: (2 sc, inc) ×6 (24)
R5: (3 sc, inc) ×6 (30)
R6: (4 sc, inc) ×6 (36)
R7–R12: sc around (36)
R13: (4 sc, dec) ×6 (30)
R14: (3 sc, dec) ×6 (24)
R15: (2 sc, dec) ×6 (18)
R16: sc around (18)
R17: (sc, dec) ×6 (12)
R18: dec ×6 (6)
Insert the safety eyes between R9 and R10 with approximately seven visible stitches between the posts. Begin stuffing after R13. Pack the widest middle section firmly but leave the upper center slightly softer for stem attachment.
Fasten off. Leave a 30 cm tail and close the remaining six front loops.
Cheek Patches (Make 4)
Yarn: blush pink.
R1: 6 sc in MR (6)
R2: inc ×6 (12)
Do not stuff. Flatten each circle.
Fasten off. Leave a 12 cm sewing tail.
Left Stem
Yarn: leaf green.
R1: 6 sc in MR (6)
R2–R22: sc around (6)
Do not stuff the full stem. Add only a narrow strand of fiber through the lower 6–8 rounds if extra support is required.
Fasten off. Leave a 35 cm sewing tail.
Right Stem
Yarn: leaf green.
R1: 6 sc in MR (6)
R2–R24: sc around (6)
The second stem can be one or two rounds longer so the joined top appears slightly asymmetrical, as in the reference.
Fasten off. Leave a 35 cm sewing tail.
Large Leaf
Yarn: leaf green.
Row 1: ch 14
Row 2: starting in second ch from hook: sl st, sc, hdc, dc, dc, 2 tr, dc, dc, hdc, sc, sl st; work 3 sc in final chain.
Continue down the opposite side:
sl st, sc, hdc, dc, dc, 2 tr, dc, dc, hdc, sc, sl st.
Pull the foundation chain slightly inward so it becomes a visible center vein.
Fasten off. Leave a 30 cm sewing tail.
Leaf Edge
Yarn: same green.
Join at the leaf base.
Work sl st evenly around the complete outer edge.
Keep the slip stitches relaxed. Tight edging makes the leaf curl into a cup.
Fasten off and bury the tail.
Leaf Surface Veins
Yarn: leaf green.
Thread a yarn needle and make one long surface stitch from the base toward the leaf tip.
Add three short diagonal stitches on each side of the center.
Pull only enough to make the veins visible; heavy tension distorts the leaf.
Top Bud
Yarn: leaf green.
R1: 6 sc in MR (6)
R2: inc ×6 (12)
R3–R4: sc around (12)
R5: dec ×6 (6)
Add a tiny pinch of stuffing.
Fasten off. Leave a 20 cm sewing tail.
Smile (Make 2)
Yarn: black embroidery yarn.
Place the center of each smile approximately one round below the midpoint between the eyes.
Work a shallow curved line approximately 18–20 mm wide.
Keep both smile ends inside the inner edges of the cheek patches.
Secure all embroidery ends inside the cherry.
Optional Stem Reinforcement Cord
Yarn: leaf green.
Ch 24.
Starting in the second chain from hook, sl st across all chains.
This cord can be threaded inside a stem if the yarn is too soft to hold the photographed arc.
Fasten off and hide the cord completely inside the stem.
Assembly
- Complete and stuff both cherry bodies before attaching facial details so the eye spacing can be checked on the final rounded surface.
- Sew two pink cheek patches to each cherry, positioning them below and slightly outside the safety eyes.
- Embroider one curved smile on each fruit and secure all black yarn ends inside the body.
- Attach the left stem to the top center of the left cherry and the right stem to the top center of the right cherry.
- Angle both stems inward so their upper ends meet approximately 7–9 cm above the cherry tops.
- Join the two stem tips together with several green stitches over approximately 15–20 mm of length rather than fixing them at only one point.
- Position the large leaf beside the joined stem area and sew through its base and approximately the first 15 mm of the center vein.
- Attach the small green bud over the exact point where the two stems meet, covering the structural stitches.
- Place the cherries side by side on a level surface and adjust stem tension until neither fruit is pulled upward or tilted inward.
- Weave every structural tail through at least 4 cm of matching crochet, reverse direction once and trim only after the end retracts beneath the stitches.
The completed pair should sit side by side with both stems curving toward one shared top point, the leaf extending to one side and both faces remaining level.
7 Technical Tips
- Cherry bodies becoming spherical: Too much stuffing at the upper and lower poles removes the slightly flattened fruit shape. Concentrate filling around the widest 36-stitch section and use less within approximately 2 cm of each closure.
- Eye spacing looking crossed: Large 12–14 mm eyes placed fewer than about six visible stitches apart crowd the smile area. Test both posts before attaching washers and keep approximately seven visible stitches between them.
- Visible decrease holes: Loose decreases expose pale stuffing through the red body. Work each decrease through the two front loops and match its tension to surrounding single crochet stitches.
- Stem collapse: A fully unstuffed 6-stitch tube can fold sharply where it exits the fruit. Add a narrow amount of fiber or a reinforced slip-stitch cord through only the lower 6–8 stem rounds.
- Stem junction splitting: Joining the two stems with a single stitch allows them to separate under the leaf weight. Sew the stems together over a 15–20 mm overlap before adding the bud.
- Leaf curling: Tight slip stitches around the edge shorten the perimeter and cup the leaf. Work the border with relaxed tension and keep the finished leaf approximately 8–10 cm long.
- One cherry lifting: If the stems are joined too tightly, one fruit may lose contact with the table. Set both cherries down before final knotting and leave enough stem slack that both bases remain fully supported.
Conclusion
Check the stem junction before burying any green tails because the entire twin-cherry silhouette depends on both fruit remaining level beneath one shared top point. Next, place the pair on a flat surface and compare eye height, stem arc and leaf angle from the front. Correct any stem that pulls one cherry upward before fixing the bud permanently. Share the finished cherry amigurumi crochet pattern project on Pinterest with a vertical photograph, then post a close view of the joined stems and leaf on Instagram using #TwinCherryAmigurumi. For this pair specifically, would you keep both cherries the same red or make one deep burgundy for contrast?









