Introduction
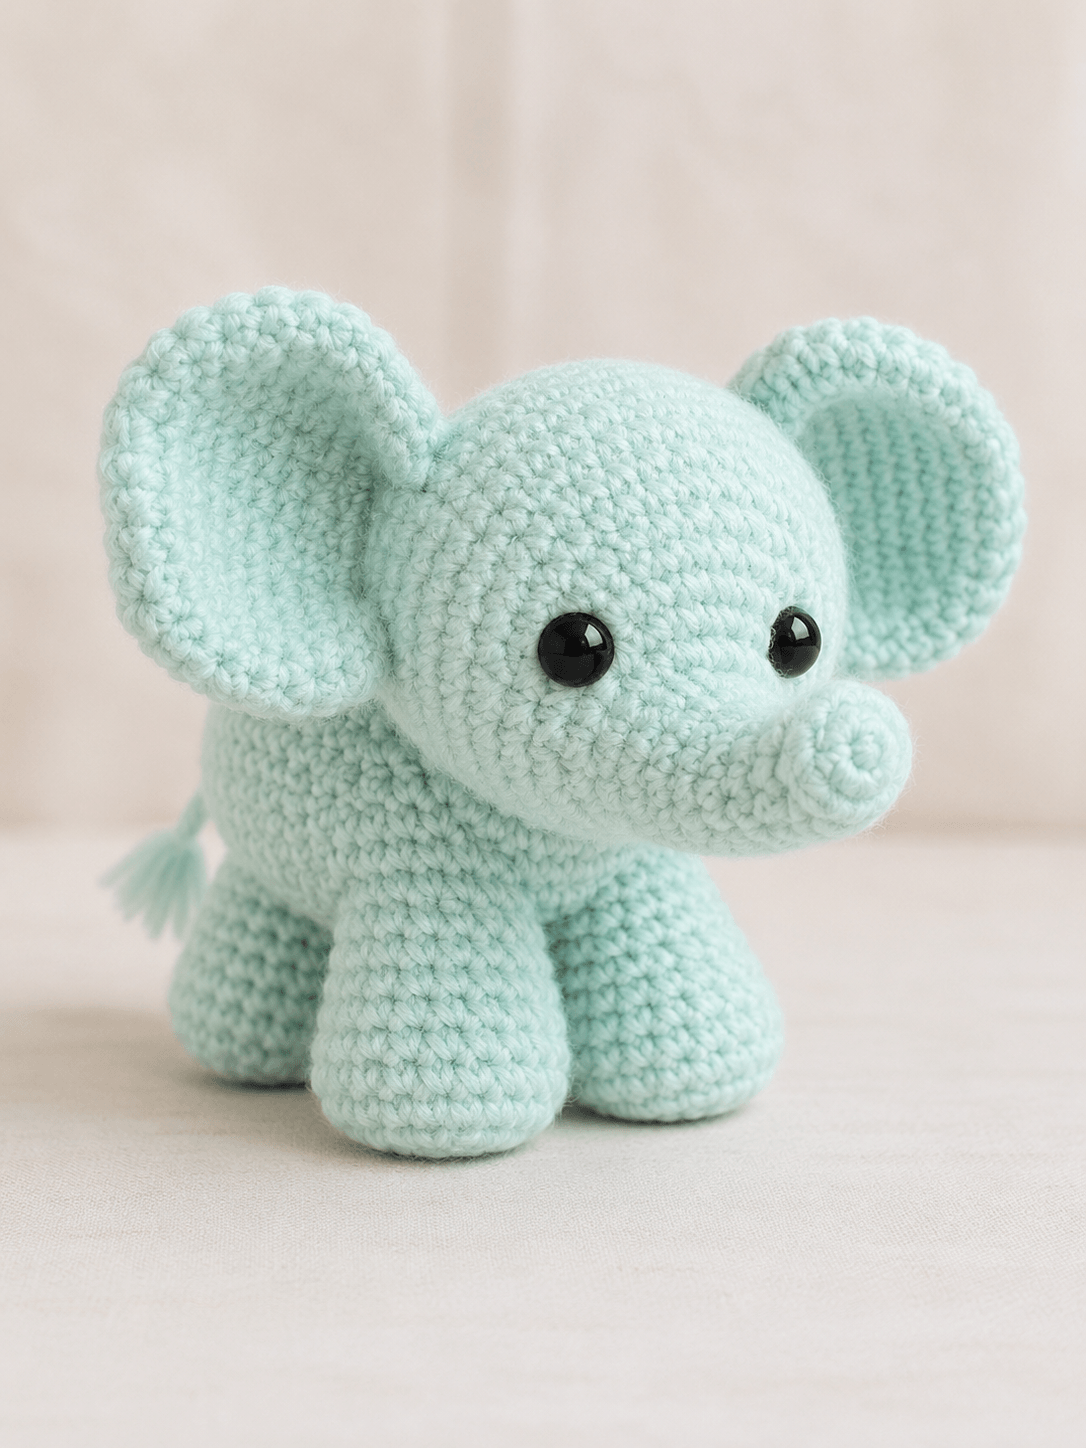
An elephant’s trunk must project beyond the front feet without pulling the head downward. This elephant amigurumi crochet pattern solves that balance problem with a lightly stuffed trunk, a 36-stitch head and four broad-based legs. Worked in DK yarn with a 2.5 mm hook, the finished figure measures about 13–14 cm and suits an intermediate maker. Its stable seated form works well for shelf display or nursery decoration.
The Design: What Makes This Baby Elephant Different
The head uses a medium 36-stitch plateau, giving the ears enough attachment area without making the neck joint excessively wide. A separate trunk starts at the tip and expands toward the face; that direction keeps the visible nose end round and reduces finishing bulk. Four independent legs create the low stance shown in the reference photo, while the rear pair is one round wider at its maximum point to support the body behind its center of gravity. The ears are flat circles with a final non-increase round, which cups each edge slightly. A frequent error in a baby elephant crochet pattern is placing the ears too far forward. That position narrows the face and pushes the eye line toward the trunk. This small elephant crochet pattern instead anchors each ear behind the eye line and leaves the front third of the head unobstructed.
Project Information at a Glance
| Skill Level | Time | Finished Size | Hook | Best For |
|---|---|---|---|---|
| Intermediate | 6–8 hours | 13–14 cm | 2.5 mm | Display, nursery décor and photography props |
Published elephant patterns at this scale measure approximately 13–14 cm, while DK elephant references commonly pair the yarn with a 2.5 mm hook. Finished dimensions still depend on personal tension and stuffing density.
Materials and Tools
Yarn
- Pale mint — DK weight — allow 60 g — Stylecraft Special DK, Paintbox Yarns Cotton DK or a comparable smooth yarn
- Very pale mint or matching mint — DK weight — allow 5 g — for optional cheek patches
- Mint — approximately 1 g — for the tail tassel
A documented 36 cm elephant uses 121 g of its main worsted-weight color. The smaller quantity above is a working allowance for this compact pattern rather than a claim taken from that larger design.
Tools
- 2.5 mm crochet hook
- Two 10 mm black safety eyes
- Polyester stuffing
- Yarn needle
- Locking stitch markers
- Ball-head pins
- Scissors
Safety eyes are not suitable for a toy intended for a child younger than three years. Embroidered eyes are the appropriate substitution for that use.
Abbreviations
- MR — magic ring
- sc — single crochet
- inc — two single crochets in one stitch
- dec — decrease over two stitches
- sl st — slip stitch
- ch — chain
- BLO — back loop only
- st/sts — stitch/stitches
For an invisible decrease, insert the hook under the front loops of the next two stitches, yarn over, draw through both front loops, then complete the single crochet.
Pattern — Step by Step
Work in a continuous spiral unless a section states otherwise. Place a marker in the first stitch of every round.
Head
Yarn: pale mint — original construction based on standard amigurumi sphere math.
R1: 6 sc in MR (6)
R2: inc ×6 (12)
R3: (sc, inc) ×6 (18)
R4: (2 sc, inc) ×6 (24)
R5: (3 sc, inc) ×6 (30)
R6: (4 sc, inc) ×6 (36)
R7–R12: sc around (36)
R13: (4 sc, dec) ×6 (30)
R14: (3 sc, dec) ×6 (24)
Insert the eyes between R9 and R10, 8 stitches apart. Check the position with the trunk pinned below them before fitting the washers.
R15: (2 sc, dec) ×6 (18)
R16: (sc, dec) ×6 (12)
Stuff the crown firmly. Keep the lower front surface slightly softer so the trunk seam can sit flat.
R17: dec ×6 (6)
Fasten off. Leave a 30 cm tail and close the opening through the front loops.
Body
Yarn: pale mint — original construction based on standard amigurumi sphere math.
R1: 6 sc in MR (6)
R2: inc ×6 (12)
R3: (sc, inc) ×6 (18)
R4: (2 sc, inc) ×6 (24)
R5: (3 sc, inc) ×6 (30)
R6: (4 sc, inc) ×6 (36)
R7–R13: sc around (36)
R14: (4 sc, dec) ×6 (30)
R15: sc around (30)
R16: (3 sc, dec) ×6 (24)
R17: sc around (24)
R18: (2 sc, dec) ×6 (18)
Stuff the base firmly and the upper body moderately. A harder base lowers the center of gravity.
R19: (sc, dec) ×6 (12)
R20: dec ×6 (6)
Fasten off. Leave a 35 cm tail for sewing the body to the head.
Front Legs — Make 2
Yarn: pale mint — original cylindrical limb construction.
R1: 6 sc in MR (6)
R2: inc ×6 (12)
R3: (sc, inc) ×6 (18)
R4: BLO sc around (18)
R5–R8: sc around (18)
R9: (sc, dec) ×6 (12)
R10–R12: sc around (12)
Stuff the lower two-thirds firmly. Leave the top 1 cm unstuffed so the seam bends against the body.
Flatten the opening and work 6 sc through both layers (6).
Fasten off. Leave a 25 cm sewing tail.
Back Legs — Make 2
Yarn: pale mint — original broad-base limb construction.
R1: 6 sc in MR (6)
R2: inc ×6 (12)
R3: (sc, inc) ×6 (18)
R4: (2 sc, inc) ×6 (24)
R5: BLO sc around (24)
R6–R7: sc around (24)
R8: (2 sc, dec) ×6 (18)
R9: sc around (18)
R10: (sc, dec) ×6 (12)
R11–R12: sc around (12)
Pack the foot firmly, then reduce the stuffing above R9. The broader rear feet prevent backward tipping.
Flatten the opening and work 6 sc through both layers (6).
Fasten off. Leave a 25 cm sewing tail.
Ears — Make 2
Yarn: pale mint — circular ear geometry follows standard six-increase flat-circle math.
R1: 6 sc in MR (6)
R2: inc ×6 (12)
R3: (sc, inc) ×6 (18)
R4: (2 sc, inc) ×6 (24)
R5: (3 sc, inc) ×6 (30)
R6: sc around (30)
Do not stuff. Fold the lower edge inward by about 8 mm and secure it with two small stitches to create a shallow cup.
Fasten off. Leave a 40 cm tail on each ear.
Trunk
Yarn: pale mint — original tapered tube; published elephant patterns also construct the trunk as a narrow tube expanding toward the head.
R1: 6 sc in MR (6)
R2: inc ×6 (12)
R3–R6: sc around (12)
R7: (sc, inc) ×6 (18)
R8–R13: sc around (18)
Stuff only R1–R8, using small pinches. Leave the final five rounds almost empty so the base flattens against the face. Bend the tip upward by 5–7 mm while sewing, or keep it horizontal to match the photograph.
Fasten off. Leave a 35 cm sewing tail.
Cheek Patches — Make 2
Yarn: very pale mint or matching mint — optional low-contrast facial discs.
R1: 6 sc in MR (6)
R2: inc ×6 (12)
Join with a sl st. Do not stuff.
Fasten off. Leave a 15 cm sewing tail. For the monochrome appearance in the photograph, use the main color and sew each patch almost flush with the surface.
Tail
Yarn: pale mint — six-stitch tail tubes are also used in published elephant constructions.
R1: 6 sc in MR (6)
R2–R8: sc around (6)
Do not stuff.
Flatten the opening and work 3 sc through both layers (3). Fasten off, leaving a 20 cm tail.
Cut four 8 cm yarn strands. Fold them in half, pull the folded centers through the closed tip and draw the loose ends through the loops. Trim the tassel to 2 cm.
Assembly
- Position the body under the head so its upper opening is centered slightly behind the head’s midpoint. Sew around the 12-stitch neck area twice.
- Pin the trunk between the eyes, with its upper edge approximately one round below the eye line. The base should span about nine head stitches.
- Sew the trunk around its open edge. Add two small shaping stitches under the trunk if the base lifts away from the face.
- Place each cheek patch below and slightly outside its corresponding eye. Sew with small surface stitches, or omit the patches for an exact monochrome face.
- Pin each front leg to the lower front half of the body. Leave approximately four body stitches between their inner edges.
- Attach the back legs beside and slightly behind the front pair. Set all four feet on a flat surface before completing the seams.
- Pin the ears behind the eye line, covering approximately R6–R12 of the head. Leave 18–20 visible stitches across the forehead between their upper attachment points.
- Sew only the folded inner section and rear third of each ear edge. The remaining edge must stay free to preserve the wide circular profile.
- Attach the tail at the rear center of the body around R10–R11. Point it downward and slightly toward one back leg.
- Weave every tail through at least three stitch directions, trim the yarn ends and redistribute the stuffing with the blunt end of the needle.
The completed elephant should rest on all four feet without the trunk touching the surface.
7 Technical Tips
- Round drift: A missing stitch marker can move the decreases several stitches off axis. Place the marker in the first stitch, not in the loop currently on the hook.
- Distorted head: Overstuffing the final 12-stitch opening creates a pointed crown. Stop adding fiber when the surface is firm but still compresses by about 5 mm under a fingertip.
- Visible decrease gaps: A conventional decrease can expose stuffing along the closing rounds. Work every head and body decrease through the front loops only.
- Incorrect eye spacing: Eyes placed fewer than seven stitches apart make the trunk appear too wide. Test an eight-stitch gap while the head is still open and the trunk is pinned in position.
- Uneven ear tension: Loose stitches on R5 produce a rippled outer edge. Measure both ears after R5; their diameters should differ by no more than 3 mm.
- Unstable legs: Sewing one leg completely before checking the others can create a rocking base. Pin all four feet and test them on a hard surface before closing any seam.
- Loose woven ends: A tail carried in only one direction may pull out under handling. Pass each end vertically, horizontally and diagonally through the stuffed fabric before trimming.
Conclusion
Check the four-foot stance before treating the elephant as finished. The trunk should clear the surface, both ears should begin behind the eyes, and the head should remain level when the figure is released. Record the yarn brand, hook size and final height in your project notes because a change in fiber or tension will alter every attachment measurement. Pin this elephant amigurumi crochet pattern to a dedicated safari-pattern board, then post the finished mint version on Instagram with #MintBabyElephant. The next practical step is to crochet both ears together so their diameter and tension can be compared round by round. Will your elephant’s trunk remain straight like the photographed model, or curve upward at the final 7 mm?









