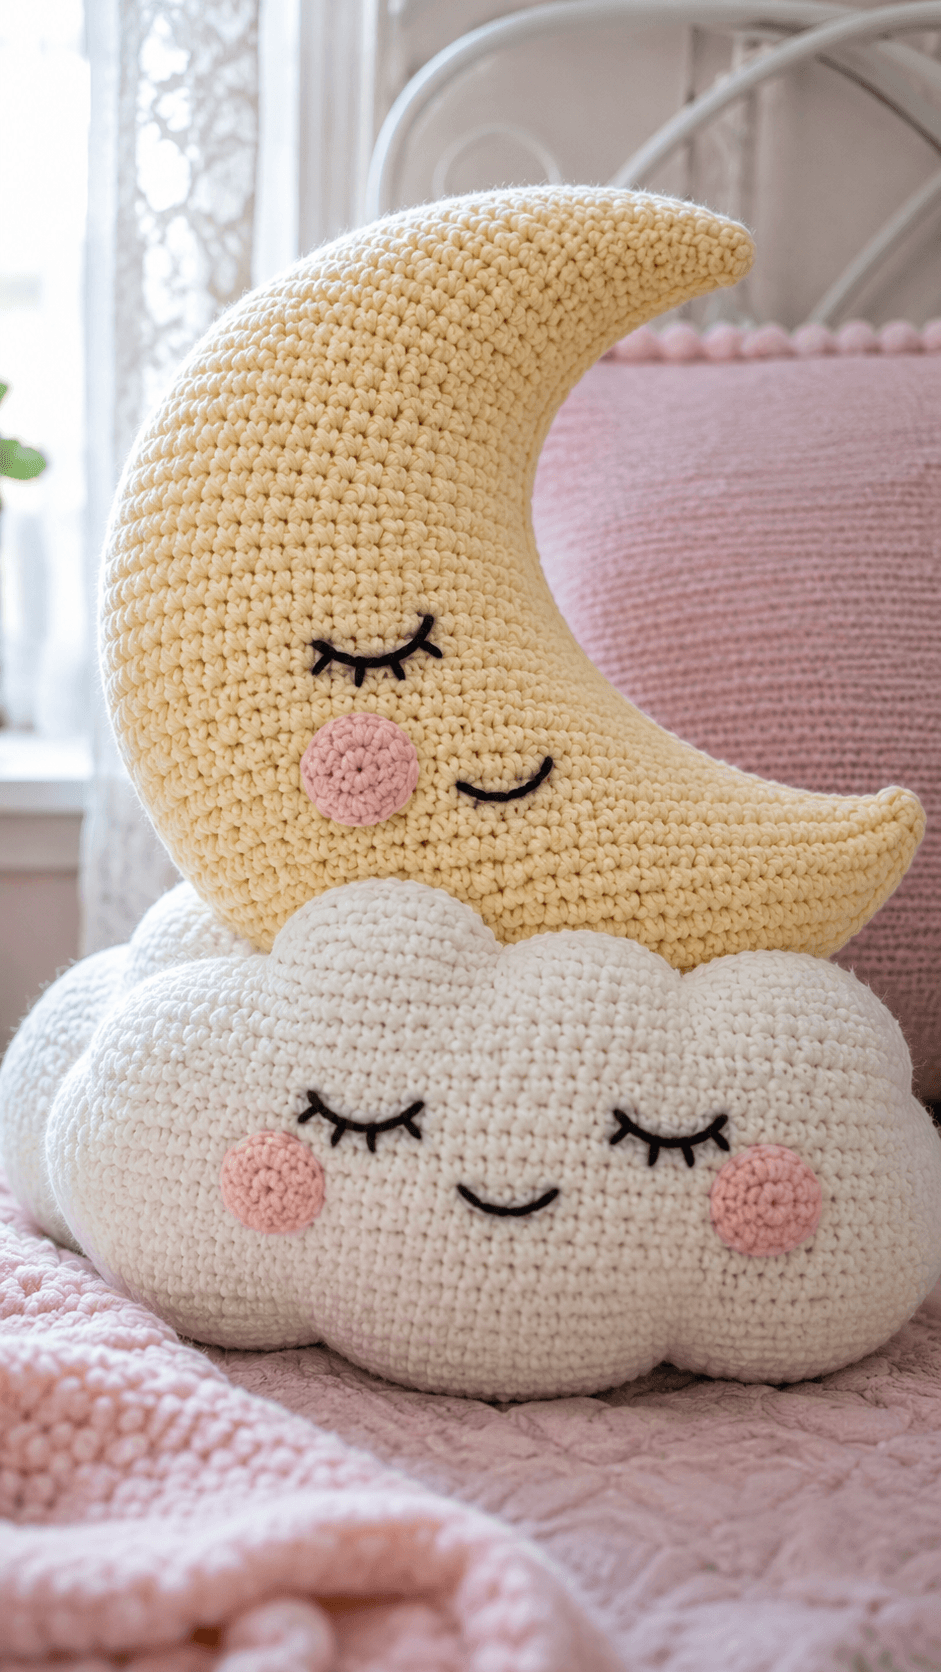
A moon pillow only works when the inner curve stays clean after stuffing and the lower cloud remains wide enough to support the full silhouette. That structural balance defines this moon and cloud crochet pillow pattern. The sample shown here uses a soft cream-yellow crescent moon, a white cloud base, embroidered sleepy faces, and pink cheek appliqués to create a nursery-style decorative cushion. It suits intermediate crocheters who can manage shaped panels, even stuffing, and precise facial placement on soft sculptural forms.
The Design: What Makes This Moon and Cloud Pillow Different
This piece depends on silhouette before stitch detail. The moon has to keep a clear crescent shape, which means the outer arc must stay smooth while the inner cutout curve remains deep and readable. If either side rounds out too much after filling, the moon stops looking distinct.
The second design choice is the stacked layout. The cloud is not just a second pillow placed underneath. It acts as the visual base, which stabilizes the crescent and turns two separate shapes into one nursery composition. In a crochet moon pillow, that support matters because the crescent alone can look narrow and top-heavy.
The third choice is the face style. Closed eyes, short lashes, small smiles, and pink cheeks keep the design soft and simple. One common mistake with a moon crochet cushion is placing the face too close to the inner curve. That crowds the expression and weakens the shape of the crescent immediately.
Project Info at a Glance
| Skill Level | Time | Finished Size | Hook | Best For |
|---|---|---|---|---|
| Intermediate | 7–12 hours | Approx. 35–45 cm tall | 4.5–6 mm | Nursery decor, bed cushions, baby room styling, gift projects |
Materials and Tools
Yarn
- Soft pale yellow yarn — worsted or bulky — approx. 180–260 g
- White yarn — worsted or bulky — approx. 220–320 g
- Pink yarn — small amount for cheeks
- Black yarn — small amount for face embroidery
Tools
- Crochet hook 4.5 mm to 6 mm
- Tapestry needle
- Stitch markers
- Scissors
- Polyfill stuffing
- Optional fabric backing for extra shape control
Abbreviations
- MR = magic ring
- ch = chain
- sl st = slip stitch
- sc = single crochet
- hdc = half double crochet
- dc = double crochet
- inc = increase
- dec = decrease
- rep = repeat
- BLO = back loop only
For shaped pillows, even stuffing matters more than speed. A tightly packed tip beside a soft middle section changes the outline immediately.
Construction Overview
This design is made as two separate stuffed forms. The crescent moon is crocheted as two matching shaped panels joined and stuffed. The cloud is built the same way, using rounded bump sections across the top to create the cloud contour. After both pieces are complete, the moon is sewn securely onto the top of the cloud. The embroidered faces and pink cheek details are added last so placement can be adjusted once the final shape is visible.
Crescent Moon Shape
The moon should have a broad outer curve and a deep inner curve. The lower point and upper point both need enough stuffing to stay firm, but not so much that they become blunt. A crescent works best when both panels are identical and the seam stays smooth around the full edge.
- Work one moon panel in pale yellow using shaped rows or rounds to form a crescent.
- Make a second identical moon panel.
- Place both panels together with right sides facing outward.
- Join around the edge with sc or a flat seam, leaving an opening for stuffing.
- Stuff gradually, shaping the top and lower tips by hand as you fill.
- Close the opening neatly.
The inner curve is the critical section. Keep the stuffing firm enough to support it, but not so heavy that the hollow curve rounds outward.
Cloud Base
The cloud should be wider than the lower width of the moon. That gives the design a stable base and creates the layered sleepy-sky look shown in the sample. The top edge should have several rounded bumps, while the bottom remains broad and soft.
- Work one cloud panel in white using rounded bump shaping across the top edge.
- Make a second matching cloud panel.
- Join the panels together with sc or a flat seam, leaving an opening.
- Stuff evenly across each bump and the full bottom section.
- Close the opening and smooth the lower edge by hand.
The sample uses a plush, rounded cloud rather than a flat appliqué shape. That extra depth is what lets it function as both pillow and visual base.
Moon Face Details
The moon face should sit on the outer lower half of the crescent, leaving the pointed ends clear. The eye is a short curved embroidered line with lashes, while the smile is placed slightly below and inward from the cheek.
- Mark the eye, cheek, and mouth positions before stitching.
- Embroider one closed eye with short lash stitches in black.
- Embroider a small curved smile below it.
- Add one pink circular cheek using crochet, felt, or embroidery.
Cloud Face Details
The cloud face should sit centered on the front of the widest bump section. The two eyes need to be level, with the smile placed midway between them and slightly below.
- Mark two eye positions evenly across the cloud front.
- Embroider both closed eyes with short lashes.
- Embroider a small centered smile below them.
- Add one pink cheek beneath each eye.
Keep the cloud face low enough that the moon attachment does not crowd the upper bumps.
Assembly
- Complete and stuff the moon first.
- Complete and stuff the cloud second.
- Test the moon placement on top of the cloud before sewing.
- Attach the lower outer edge of the moon securely to the upper cloud surface.
- Check that the crescent stands centered and does not lean heavily to one side.
- Add the face embroidery only after the final placement is confirmed, if preferred.
- Weave in all ends inside the seams.
Optional Reinforcement
If the crescent tends to lean backward, add slightly firmer stuffing to the cloud top center or place a hidden fabric support layer inside the moon before closing. For a display pillow, moderate firmness is enough. For frequent handling in a nursery, stronger shaping usually works better.
Color Placement Notes
Keep the moon soft yellow, the cloud bright white, the face embroidery black, and the cheeks pale pink. That arrangement matches the sample and keeps the contrast clear without making the pillow look too graphic. A warmer cream moon can also work, but it should still stand apart from the white cloud base.
Common Failure Points
- Moon losing its crescent shape: The inner curve is overstuffed or the seam is too tight. Reduce stuffing and smooth the curve before closing.
- Cloud looking flat: The top bumps were not filled evenly. Stuff each section separately before finishing the seam.
- Moon leaning sideways: The attachment point on the cloud is off-center. Pin the placement before sewing permanently.
- Faces looking crowded: The embroidery was placed before the final assembly position was checked. Mark everything after shaping the stuffed forms.
- Tips becoming blunt: The moon points are under-shaped or overfilled. Add filling gradually and pinch the ends into form as you work.
Where This Pillow Works Best
This style works best on nursery beds, reading corners, rocking chairs, and shelves where the full silhouette remains visible. It functions as an accent cushion first rather than a standard sleep pillow. Because the shapes are sculptural, it also works well for baby shower gifts, themed room styling, and soft celestial decor.
Conclusion
A moon and cloud crochet pillow succeeds when the crescent stays sharp, the cloud stays full, and the facial details remain simple enough to support the overall silhouette. Focus on shaped panel accuracy, even stuffing, and centered assembly between the two forms. For the closest match to the sample, use a pale yellow crescent, a bright white cloud base, and embroidered sleepy faces with pink cheeks. Once finished, the piece works as both a cushion and a clear celestial nursery accent.









