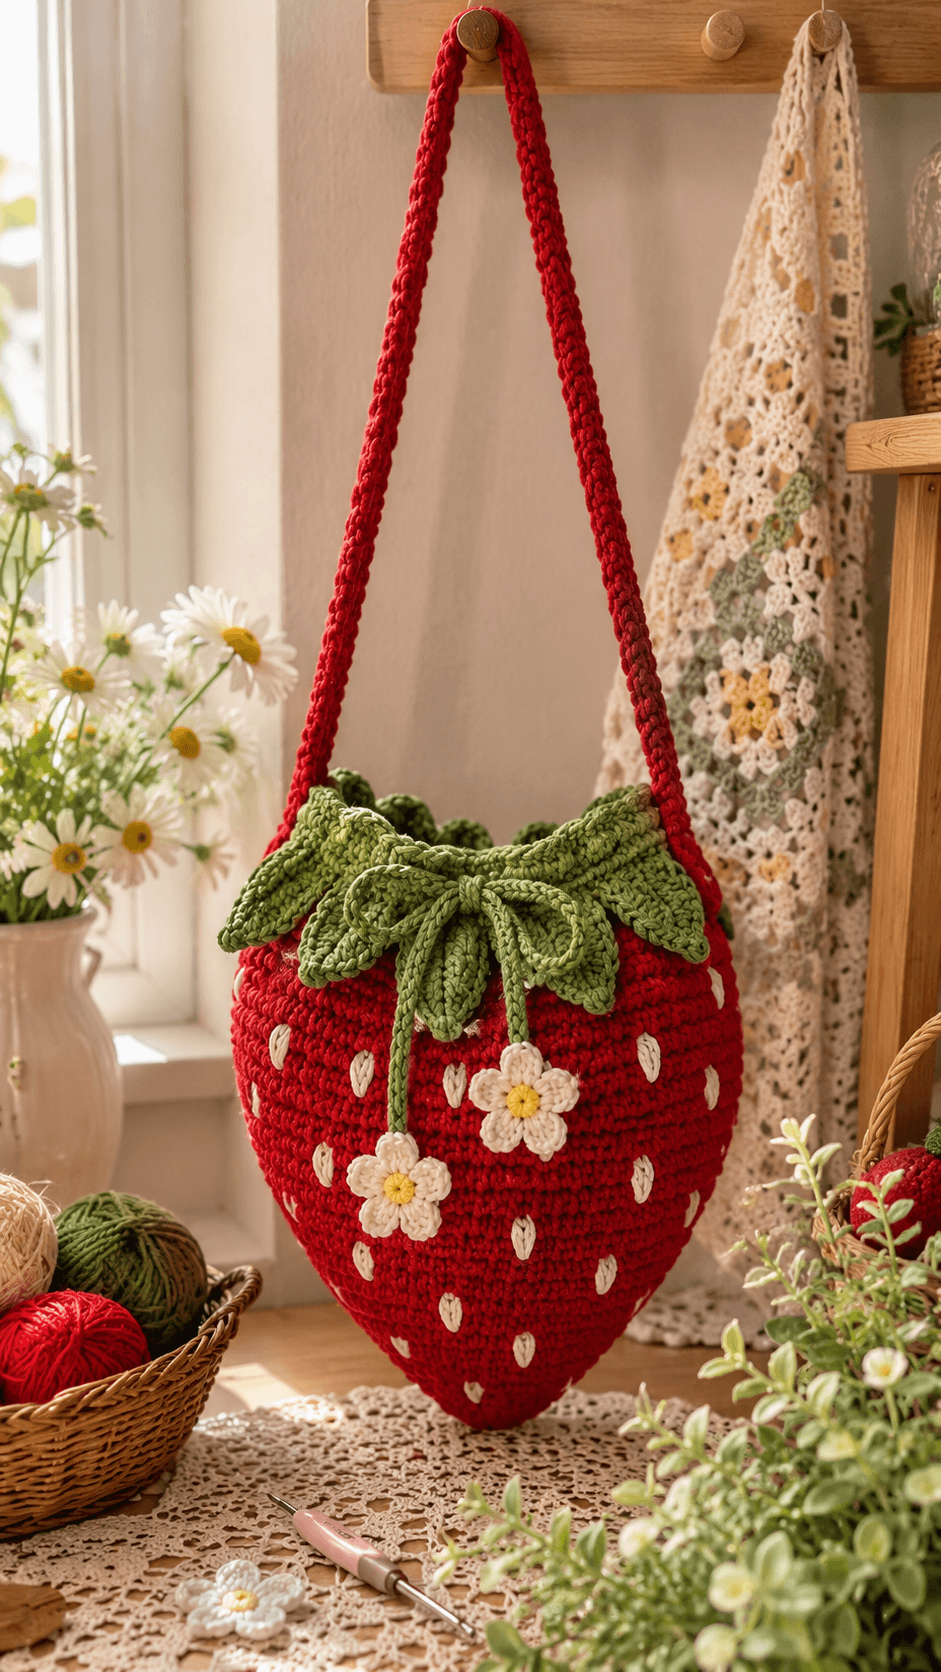
A strawberry bag only works if the body stays tapered while the top remains soft enough to gather under the leaf cap. That balance defines this strawberry crochet bag pattern. The sample shown here uses a bright red body, embroidered white seed details, green leaves at the opening, a drawstring tie with small daisy accents, and a long shoulder strap. It suits intermediate crocheters who can manage shaped rounds, firm fabric tension, and decorative finishing on a structured accessory.
The Design: What Makes This Strawberry Bag Different
This bag depends on silhouette first. The body is not a plain pouch with color changes added later. It narrows toward the base to create the pointed fruit shape, then widens through the middle so it can hold small daily items without losing the strawberry outline.
The second design choice is the top finish. Instead of a standard straight opening, the upper edge is covered with layered green leaves that act as both trim and visual closure. That keeps the theme readable from a distance and softens the transition between the body and strap.
The third choice is surface detail. White embroidered seeds break up the red field and give the bag a finished fruit texture without adding bulky appliqués. One common mistake with a crochet strawberry purse is making the body too loose. That causes the bag to sag and turns the pointed shape into a round sack once anything is placed inside.
Project Info at a Glance
| Skill Level | Time | Finished Size | Hook | Best For |
|---|---|---|---|---|
| Intermediate | 8–14 hours | Approx. 24–32 cm tall excluding strap | 3.5–4.5 mm | Small essentials, summer outfits, gift projects, novelty accessories |
Materials and Tools
Yarn
- Red cotton yarn — worsted weight — approx. 180–250 g
- Green cotton yarn — worsted weight — approx. 60–100 g
- White cotton yarn — small amount for seeds and flowers
- Yellow cotton yarn — small amount for flower centers
Tools
- Crochet hook 3.5 mm to 4.5 mm
- Tapestry needle
- Stitch markers
- Scissors
- Measuring tape
- Optional fabric lining and sewing needle
Abbreviations
- MR = magic ring
- ch = chain
- sl st = slip stitch
- sc = single crochet
- hdc = half double crochet
- dc = double crochet
- inc = increase
- dec = decrease
- rep = repeat
- BLO = back loop only
For a shaped bag like this, tight and even stitches matter more than speed. Loose rounds make the fruit form collapse once the bag is filled.
Construction Overview
This bag is worked in sections. The red body is crocheted from the bottom upward in continuous or joined rounds, starting at the pointed tip and expanding into the widest section before narrowing slightly near the opening. White seed stitches are added after the body is complete. Separate green leaves are worked and attached around the top edge, then a cord or tie is threaded through the upper section. The strap is made separately and sewn firmly to both sides. Small flowers can be added as optional embellishments at the tie ends.
Body Structure
The main body needs to hold a strawberry outline while remaining usable as a bag. That means controlled increases through the lower half, a short section at full width, then either straight rounds or a slight decrease near the top. A dense single crochet fabric works best because it supports the shape and keeps gaps between stitches small.
- Begin with an MR and work the first round of sc into the ring.
- Increase gradually over the next rounds to build the tapered fruit shape.
- Continue in even rounds once the bag reaches its widest point.
- Add a few rounds near the top that prepare the opening for the leaf trim or drawstring section.
- Fasten off once the desired height is reached.
The sample shows a pointed base rather than a flat one. That is visually accurate for the fruit shape, but it also means the bag is best used as a hanging or carried accessory rather than a freestanding basket.
Seed Details
The white seed marks are not separate appliqués. They are best added with small embroidered satin stitches or short vertical surface stitches after the main body is finished. Space them evenly across the red fabric, but avoid strict grid placement. Slight irregularity looks more natural and keeps the surface from appearing mechanical.
- Thread white yarn onto a tapestry needle.
- Add short angled seed stitches across the body.
- Keep the seeds consistent in size.
- Leave more space near the base tip so the shaping remains visible.
Leaf Top
The green leaf section is what makes the opening look like the cap of a strawberry. Each leaf should be long enough to fold slightly over the upper edge without hiding the full opening. The photographed sample uses several overlapping leaves arranged all around the rim.
- Chain a short foundation for one leaf.
- Work along both sides of the chain, increasing toward the center and tapering to a point.
- Make enough leaves to fit all the way around the opening.
- Sew the leaves in overlapping order so the joins are hidden.
Drawstring and Ties
The front tie softens the top edge and helps gather the opening. A crocheted cord works well here because it matches the leaf section and stays flexible. Thread it through eyelets or spaces near the top, then tie it at the front. This sample also adds small white flowers to the hanging ends, which reinforces the strawberry blossom theme.
- Make a long green cord with chain stitches and a return row of sl st if more firmness is needed.
- Thread the cord through the top opening below the leaves.
- Add optional flower motifs to each cord end.
Flower Embellishments
The small flowers are simple but effective. They connect the finished fruit back to the strawberry plant and help the tie ends look intentional rather than leftover cord tails.
- Work a small center circle in yellow.
- Add white petals around the center.
- Make two flowers and attach one to each hanging tie end.
Strap
The strap in the sample is long, narrow, and firm. A standard chain alone is not enough for this kind of bag. It needs a reinforced strap made with dense stitches so it does not stretch too quickly under weight.
- Chain to the desired strap length.
- Work back in sc or hdc for several rows until the strap reaches the required width.
- Keep tension tight so the strap remains stable.
- Sew both ends securely to the upper sides of the bag beneath the leaf section.
Assembly
- Complete the red body and weave in the base tail.
- Add the white embroidered seed details.
- Sew the green leaves around the opening.
- Thread the drawstring through the upper edge.
- Attach the small flower embellishments to the tie ends.
- Make and attach the strap securely on both sides.
- Check symmetry before reinforcing the strap joins.
- Optionally add a fabric lining for extra structure.
Color Placement Notes
Keep the body bright red, the seeds white, and the leaves and ties green. That arrangement matches the photographed bag and keeps the fruit theme immediate. Small white flowers with yellow centers add contrast without crowding the design. Darker green can be used for a more botanical look, but the top should still stand apart clearly from the red body.
Common Failure Points
- Bag losing its strawberry shape: The body was crocheted too loosely. Use a smaller hook or tighter tension.
- Opening collapsing inward: The leaf section is too heavy or the drawstring row is too loose. Stabilize the upper edge before attaching leaves.
- Strap stretching: The strap is too narrow or too open in stitch structure. Use dense rows and reinforce the join points.
- Seeds looking uneven: Surface stitches vary in size and direction. Mark placement lightly before embroidering.
- Bag twisting when worn: The strap was attached off-center. Measure both side placements before sewing.
Where This Bag Works Best
This style works well as a novelty shoulder bag, market accessory for light items, handmade gift, or seasonal statement piece. It performs best when carried with compact essentials such as a phone, wallet, keys, or small craft items. Because the shape is decorative first, it is more effective as a lightweight personal bag than an everyday heavy tote.
Conclusion
A strawberry crochet bag succeeds when the fruit shape stays clear and the upper leaf section feels integrated rather than added on. Focus on dense body stitches, measured shaping, and firm strap construction. For the closest match to the sample, keep the body tapered, use embroidered white seeds instead of bulky appliqués, and finish the opening with layered green leaves and small blossom ties. Once assembled, the bag reads immediately as a strawberry while still functioning as a practical crochet accessory.









