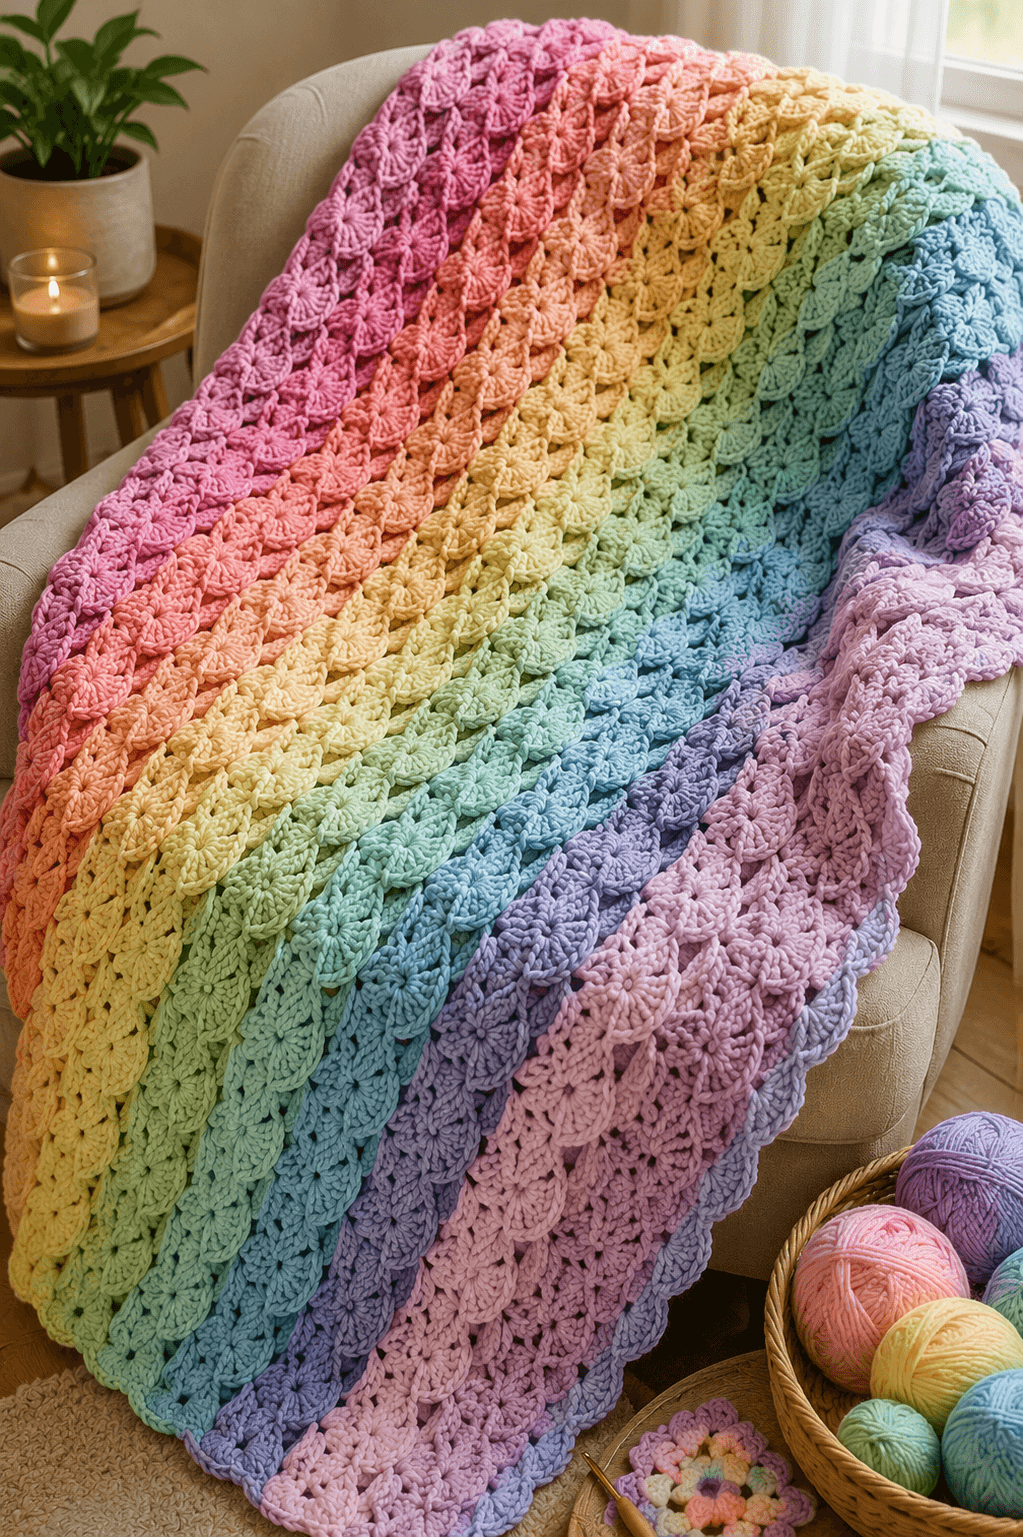
Shell repeats change a striped blanket from flat rows into layered texture with visible depth. That structure defines this rainbow shell crochet blanket pattern. The sample shown here uses bulky pastel yarn in graduated rainbow shades, a large hook, and stacked shell motifs that create a soft, dimensional surface across the full throw. It suits intermediate crocheters who can keep row alignment consistent while managing color flow and the extra bulk created by raised stitch groups.
The Design: What Makes This Rainbow Blanket Different
This blanket relies on two things: color transition and stitch relief. The rainbow effect is not printed by the stitch itself. It comes from controlled shade changes that move from pink through peach, yellow, green, blue, and lavender without abrupt breaks. That smooth sequence keeps the blanket looking intentional rather than random.
The second design choice is the shell texture. Each row sits visibly above the one below it, which gives the throw a plush, almost tiled surface. In a crochet shell blanket, that depth matters because it helps broad color bands stand out even when the blanket is folded or draped over furniture.
The third choice is scale. Thick yarn and oversized shell repeats make the texture readable from a distance. One common mistake with a rainbow crochet throw is changing colors too often in a dense stitch pattern. That breaks the gradient and makes the texture look visually crowded instead of structured.
Project Info at a Glance
| Skill Level | Time | Finished Size | Hook | Best For |
|---|---|---|---|---|
| Intermediate | 16–26 hours | Approx. 100 x 140 cm to 120 x 160 cm | 6.5–8 mm | Sofa throws, reading chairs, bed layering, nursery decor |
Materials and Tools
Yarn
- Pastel pink yarn — bulky weight — approx. 150–220 g
- Peach yarn — bulky weight — approx. 150–220 g
- Soft yellow yarn — bulky weight — approx. 150–220 g
- Light green yarn — bulky weight — approx. 150–220 g
- Mint yarn — bulky weight — approx. 150–220 g
- Sky blue yarn — bulky weight — approx. 150–220 g
- Lavender yarn — bulky weight — approx. 150–220 g
- Light lilac yarn — bulky weight — approx. 150–220 g
Tools
- Crochet hook 6.5 mm to 8 mm
- Tapestry needle
- Stitch markers
- Scissors
- Measuring tape
Abbreviations
- ch = chain
- sl st = slip stitch
- sc = single crochet
- hdc = half double crochet
- dc = double crochet
- rep = repeat
- sp = space
- sk = skip
In a thick shell blanket, tension must stay consistent from row to row. A loose shell row beside a tight shell row changes both width and drape.
Construction Overview
This blanket is worked in rows from the bottom edge upward. The body is built from repeated shell groups that stack in offset formation, creating a textured surface with visible ridges. Colors are changed in broad horizontal bands to form a soft rainbow gradient. The edges can be left clean and simple, or finished with a narrow border that stabilizes the sides without competing with the shell texture.
Foundation and Stitch Pattern
A shell blanket works best with a chain count that matches the stitch repeat exactly. Most versions use a multiple based on the shell width plus edge stitches. The shell itself can be formed with grouped double crochet stitches worked into a single space or anchor stitch, then separated by skipped stitches or small chain gaps depending on the density you want.
- Chain to the desired blanket width using the stitch multiple required by your shell repeat.
- Work a foundation row in sc or dc to stabilize the base.
- Begin the first shell row by placing grouped dc stitches at regular intervals across the row.
- Work the next row into the spaces between shell groups so the texture stacks in an offset pattern.
- Repeat the shell sequence until the blanket reaches the target length.
Color Flow
The photographed blanket uses a smooth pastel spectrum rather than sharp color blocks. That means each shade should cover several rows before changing to the next. Wide bands preserve the shell texture and keep the rainbow progression readable. A practical order is pink, coral, peach, yellow, soft green, mint, sky blue, lavender, then pale lilac.
For a cleaner gradient, join the next color at the end of the final stitch in the previous row. Keep all joins on the same side if you plan to add a border later. That makes the edge easier to neaten.
How to Build the Shell Rows
Row 1: Foundation Row
- Chain to width.
- Work 1 dc or hdc into each required chain across.
- Turn.
Row 2: First Shell Row
- Ch to starting height.
- Work shell groups across the row, for example multiple dc into one stitch or space.
- Separate shells with skipped stitches or a small gap based on the chosen repeat.
- End with an edge stitch that keeps the side straight.
Row 3: Offset Shell Row
- Turn and chain to height.
- Place the next shell groups between the shells from the previous row.
- Keep each shell centered so the textured columns remain aligned.
- Repeat to the end of the row.
Body Rows
- Continue alternating shell placement row after row.
- Change color after several rows to maintain the rainbow effect.
- Measure width regularly. Bulky shell patterns can widen slightly if tension loosens over time.
Border Options
The sample appears to rely mainly on the shell body for visual interest, so a minimal border works best. A single round of sc around the full blanket is enough to tidy the edge. If more structure is needed, add one second round in hdc or a shallow shell repeat that does not overpower the body.
- Join a matching pastel shade in any corner.
- Work sc evenly down the first side, across the top, up the opposite side, and across the bottom.
- Place extra stitches in each corner to keep the edges flat.
- Add a second round only if the sides need more stability.
Color Placement Notes
Use one pastel shade per band and keep each band broad enough to read clearly across the chair or bed. That matches the photographed blanket and prevents the shell texture from breaking up the gradient. Closely related shades work better than high-contrast rainbow brights for this design because the stitch relief is already strong.
Common Failure Points
- Side edges drifting: The first or last shell in each row is inconsistent. Mark the edge stitches and keep the turn identical every row.
- Blanket widening: Extra stitches are being added inside shell groups. Count each repeat section at the end of the row.
- Gradient looking patchy: Color changes are too frequent. Work broader bands before switching shades.
- Fabric feeling stiff: The hook is too small for the yarn weight. Increase hook size to improve drape.
- Texture collapsing: Shell groups are too shallow for bulky yarn. Use full-height stitches so the pattern remains defined.
Where This Blanket Works Best
This style works well as a lounge throw, reading chair blanket, nursery accent, or decorative layer at the foot of a bed. The pastel rainbow palette fits soft interior color schemes, while the raised shell texture adds visible structure even when the blanket is folded. It performs best in spaces where both color and texture can be seen clearly from a distance.
Conclusion
A rainbow shell crochet blanket depends on two forms of control: stable shell repeats and measured color transition. Focus on straight edges, evenly stacked shells, and broad pastel bands. Those choices produce the layered look shown in the sample. For the closest match, use bulky yarn in soft rainbow shades, keep the shell texture pronounced, and avoid adding a heavy border. Once finished, the blanket reads as both functional crochet and strong color-based decor.









