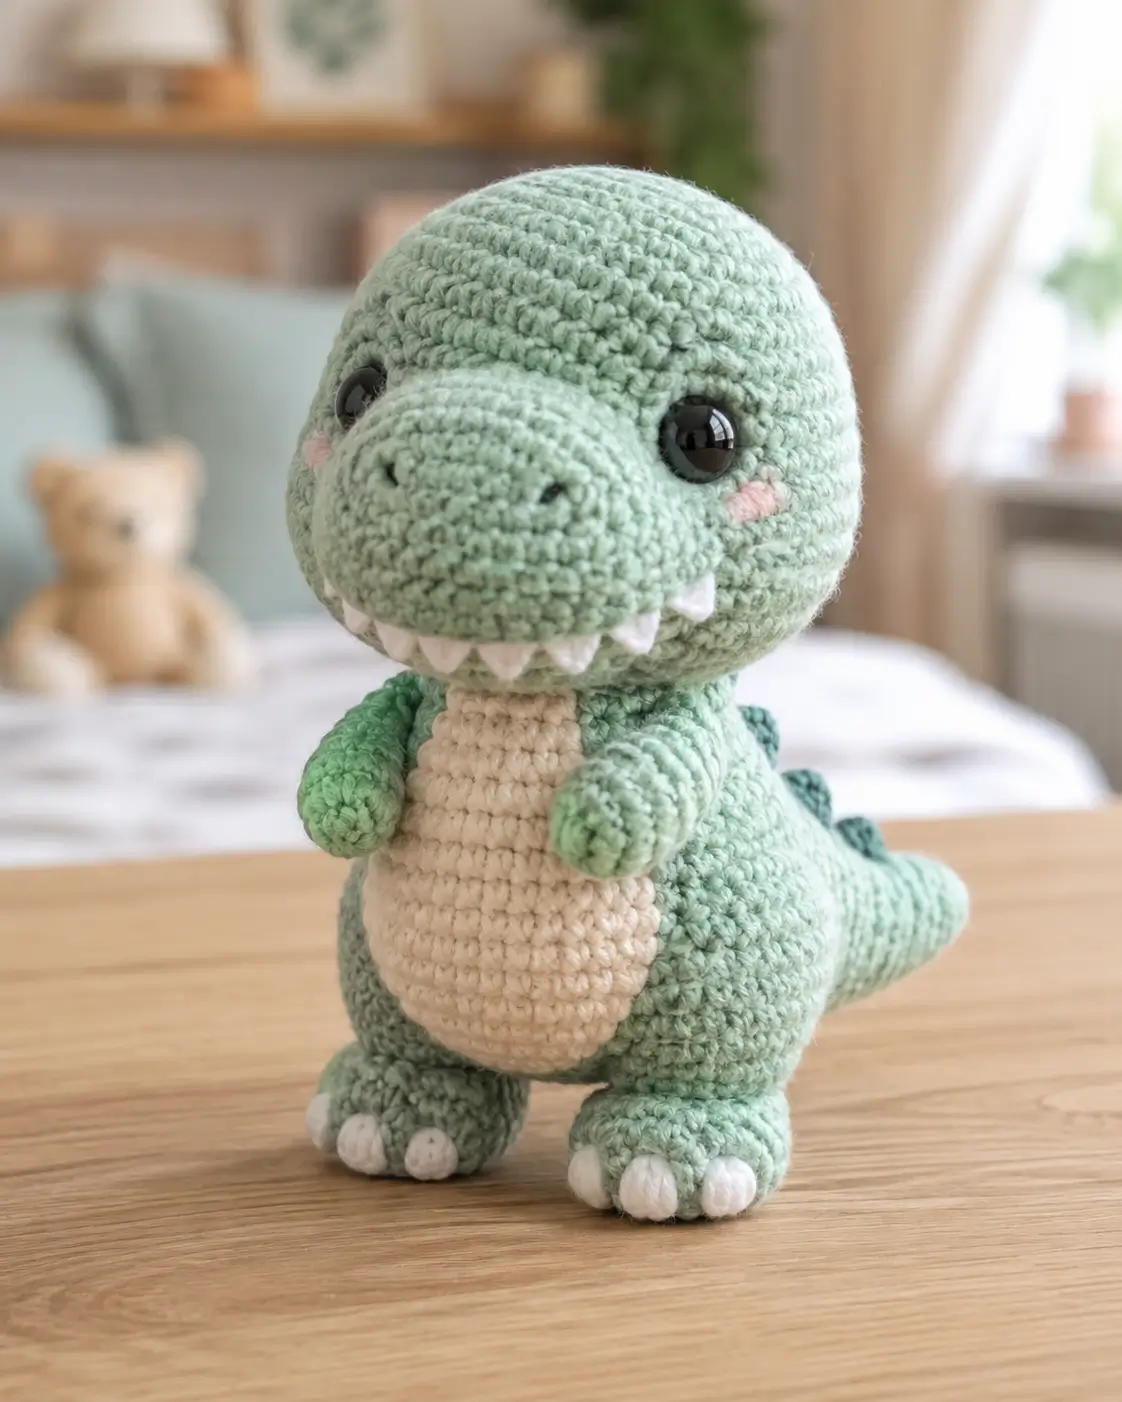
T-Rex arms are absurdly short. That proportion is the first engineering problem in a T-Rex amigurumi crochet pattern. This image-inspired version uses mint and cream yarn, white felt-free tooth shaping, a medium body scale, and a standing finish at roughly 15 cm in the verified reference range. It suits an intermediate maker who wants a compact desk toy with a stable tail-balanced silhouette.
The Design: What Makes T-Rex Different
A T-Rex is not just a generic dinosaur plush. The head has to project forward, the snout must sit wider than the neck, and the arms need to read as tiny without disappearing into the torso. That changes the shaping sequence immediately. In this build, the head uses a medium 36-stitch plateau for a clean sphere, while the snout is added as a separate oval to create depth rather than embroidery-only definition. The body stays shorter and pear-shaped so the toy stands without a support base. That matters in a baby T-Rex crochet pattern because overlong torsos push the center of gravity backward. A common mistake in a crochet dinosaur toy is placing the legs too low and the tail too narrow. The result leans, even when the stitch work is fine.
Project Info at a Glance
| Skill Level | Time | Finished Size | Hook | Best For |
|---|---|---|---|---|
| Intermediate | 5–7 hrs | 15 cm verified reference size | 2.0–2.5 mm verified reference | shelf toy, nursery decor, gift make |
Materials and Tools
Yarn
- Mint green — fine/sport to light DK look — use main color; verified reference category is fine yarn
- Cream — belly panel and lower jaw accent
- White — teeth and claws
- Soft pink — cheek patches
- Darker green — back spikes
A verified commercial T-Rex sample uses about 49 g main color, 11 g natural, and 16 g contrast in a larger version. This image-based build will use less if worked at the 15 cm scale.
Tools
- Hook 2.5 mm — aligned with the verified 2.0–2.5 mm range
- 8 mm safety eyes — verified reference size
- Polyester stuffing
- Tapestry needle
- Stitch markers
- Pins
- Sharp scissors
Abbreviations
MR / sc / inc / dec / sl st / ch / BLO / FLO
Use invisible decrease through the front loops only. It reduces bulk on rounded shaping lines and keeps the snout and head cleaner than a standard two-loop decrease.
Pattern — Step by Step
Continuous spiral unless noted.
Head (Make 1)
Yarn: mint green — image-inspired math
R1: 6 sc in MR (6)
R2: inc x6 (12)
R3: (sc, inc) x6 (18)
R4: (2 sc, inc) x6 (24)
R5: (3 sc, inc) x6 (30)
R6: (4 sc, inc) x6 (36)
R7–12: sc around (36)
R13: (4 sc, dec) x6 (30)
R14: (3 sc, dec) x6 (24)
Insert eyes between R9 and R10, about 8 sts apart. Add stuffing.
R15: (2 sc, dec) x6 (18)
R16: (sc, dec) x6 (12)
R17: dec x6 (6)
Fasten off. Leave 20 cm tail.
Snout (Make 1)
Yarn: mint green — image-inspired oval
Ch 7.
R1: inc in 2nd ch, 4 sc, 3 sc in last ch, 4 sc on opposite side, inc (14)
R2: inc, sc 5, inc x3, sc 5, inc x2 (20)
R3: (sc, inc), sc 5, (sc, inc) x3, sc 5, (sc, inc) x2 (26)
R4–6: sc around (26)
Lightly stuff before sewing. Embroider nostrils on the front third.
Fasten off. Leave 25 cm tail.
Body (Make 1)
Yarn: mint green with cream belly overlay — image-inspired math
R1: 6 sc in MR (6)
R2: inc x6 (12)
R3: (sc, inc) x6 (18)
R4: (2 sc, inc) x6 (24)
R5: (3 sc, inc) x6 (30)
R6–9: sc around (30)
R10: (3 sc, dec) x6 (24)
R11–13: sc around (24)
R14: (2 sc, dec) x6 (18)
R15–16: sc around (18)
Stuff firmly through the lower body, lighter through the neck area.
Fasten off. Leave 25 cm tail.
Belly Patch (Make 1)
Yarn: cream — image-inspired panel
Ch 8.
Row 1: sc in 2nd ch and across (7)
Row 2: ch 1, turn, inc, 5 sc, inc (9)
Row 3: ch 1, turn, sc across (9)
Row 4: ch 1, turn, inc, 7 sc, inc (11)
Row 5–8: ch 1, turn, sc across (11)
Row 9: ch 1, turn, dec, 7 sc, dec (9)
Row 10: ch 1, turn, sc across (9)
Fasten off. Leave 20 cm tail.
Arms / Front Legs (Make 2)
Yarn: mint green
R1: 6 sc in MR (6)
R2: inc x6 (12)
R3–5: sc around (12)
R6: (2 sc, dec) x3 (9)
R7–8: sc around (9)
Light stuffing only in the hand section.
Fasten off. Leave 18 cm tail.
Back Legs (Make 2)
Yarn: mint green
R1: 6 sc in MR (6)
R2: inc x6 (12)
R3: (sc, inc) x6 (18)
R4–5: sc around (18)
R6: (sc, dec) x6 (12)
R7–9: sc around (12)
Stuff firmly. Shape the foot flat at the base.
Fasten off. Leave 22 cm tail.
Tail (Make 1)
Yarn: mint green
R1: 6 sc in MR (6)
R2: sc around (6)
R3: (2 sc, inc) x2 (8)
R4: sc around (8)
R5: (3 sc, inc) x2 (10)
R6: sc around (10)
R7: (4 sc, inc) x2 (12)
R8–13: sc around (12)
Stuff lightly. Keep the tip slimmer than the body base.
Fasten off. Leave 25 cm tail.
Back Spikes (Make 4)
Yarn: darker green
R1: 6 sc in MR (6)
R2: (sc, inc) x3 (9)
R3: sc around (9)
R4: (sc, dec) x3 (6)
Do not stuff. Flatten. Fasten off. Leave 15 cm tail.
Teeth Strip (Make 1)
Yarn: white — image-inspired
Ch 13.
Row 1: sl st in 2nd ch, (ch 2, sl st in next ch) x6.
Fasten off. Leave 18 cm tail.
Cheek Patches (Make 2)
Yarn: pink
R1: 6 sc in MR (6)
Sl st to first sc.
Fasten off. Leave 10 cm tail.
Claws (Make 6)
Yarn: white
For each claw: ch 2, 2 sc in 2nd ch from hook (2).
Fasten off.
Assembly
- Sew the snout centered on the lower half of the head.
- Attach the tooth strip under the snout seam so the points show along the lower mouth line.
- Add cheek patches slightly below and outside the eyes.
- Sew the head to the body with the chin angled slightly forward.
- Attach the belly patch to the front body center.
- Sew the arms high on the torso, just below the neck seam, angled inward.
- Sew the legs low on the body sides so the toy stands flat on both feet.
- Attach the tail at the back base of the body as a third balance point.
- Sew the spikes from crown to back in a straight center line.
- Attach the white claws to the feet and finish all tail weaving.
The completed toy should stand upright with the tail lightly bracing the back line.
7 Technical Tips
- Use two stitch markers on the head. One marks round start; the second marks eye spacing before insertion. Losing that spacing by even 1 stitch makes the snout look off-center.
- Stuff the body base harder than the neck. A soft lower body collapses under the head weight, while an overstuffed neck forces the head upward at the wrong angle.
- Work invisible decreases only on visible shaping rounds. Standard decreases on R13–17 of the head can create ridges that show beside the cheeks.
- Insert eyes before the final two decrease rounds. Waiting too long makes the washers difficult to lock in the narrower head opening.
- Pin the snout before sewing. A snout tilted even 3–4 mm upward changes the expression and exposes the tooth strip unevenly.
- Flatten the feet before attaching the legs. If the base seam twists, the dinosaur will rock from side to side instead of standing square.
- Weave spike tails downward into the body line. Sideways weaving leaves visible bumps along the back ridge and distorts the silhouette.
Conclusion
The useful part of a T-Rex amigurumi crochet pattern is not the dinosaur theme alone. It is proportion control: oversized head, short arms, stable feet, and a tail that supports rather than drags. Build those four elements in that order and the character reads immediately. Start with the head and snout first, test eye placement before closing, then keep the leg placement level during assembly. For publishing, this version is also Pinterest-friendly because the silhouette is clear at thumbnail size. Share the finished toy on Pinterest and Instagram with #MintTRexPattern. One question matters here: did you keep the snout broad enough to read as T-Rex instead of crocodile?









