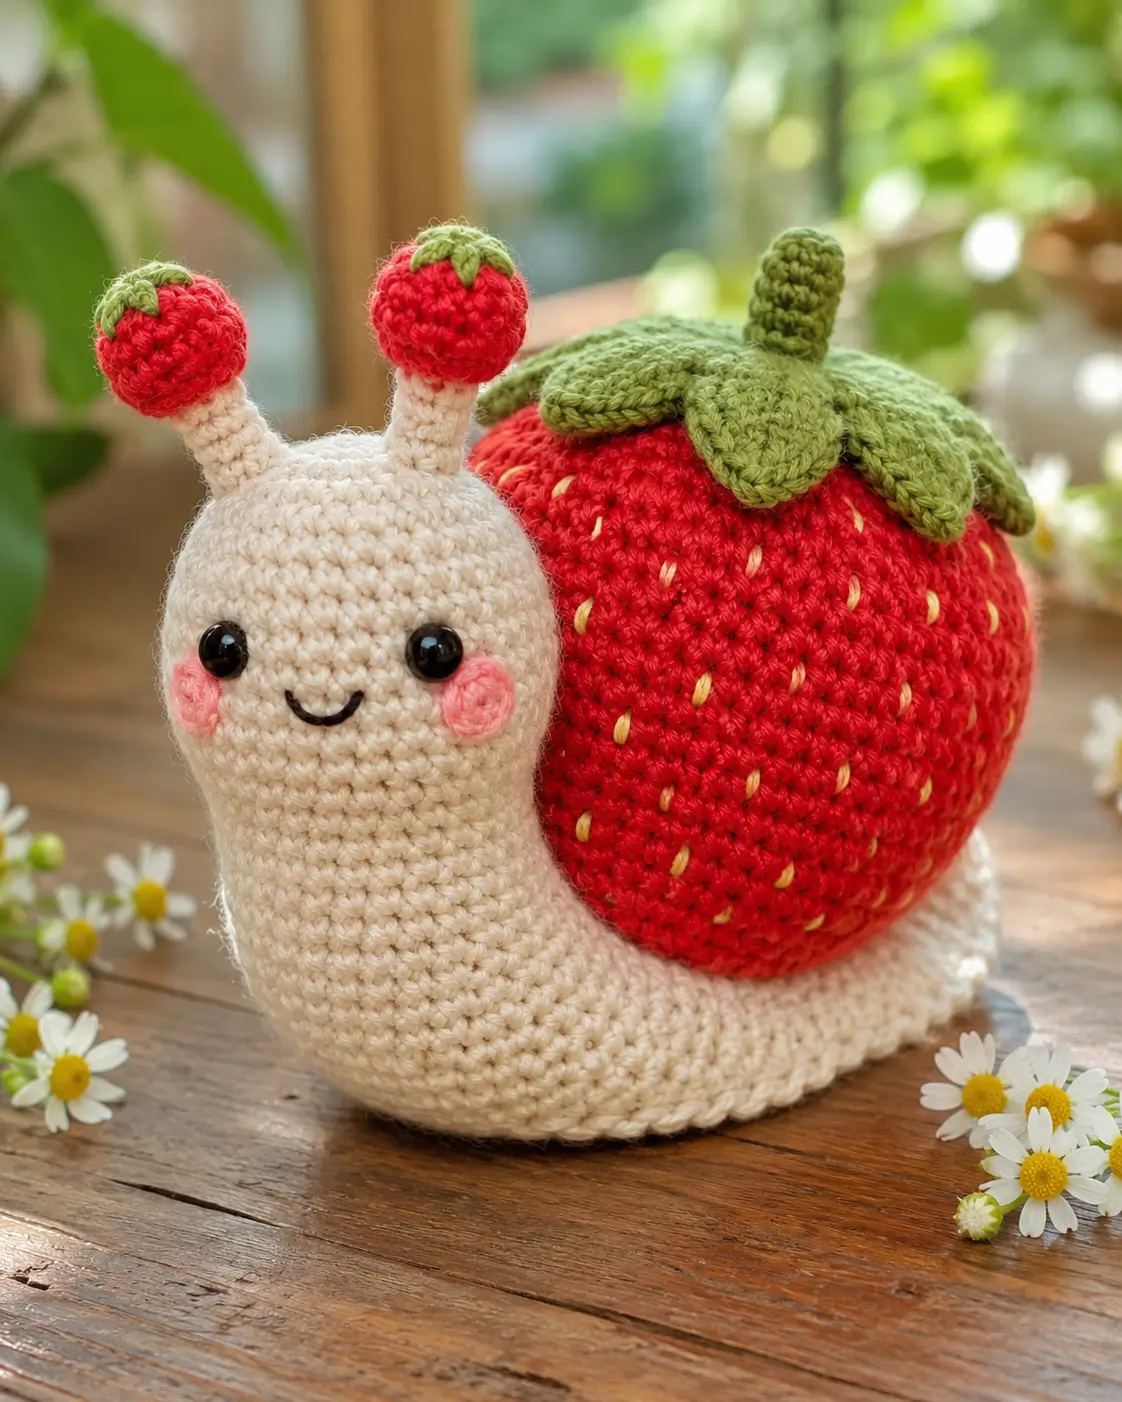
A strawberry shell changes the whole engineering of a snail. This strawberry snail amigurumi crochet pattern uses worsted cotton, a 3.25 mm hook, and an original medium-format shape to build a compact plush at roughly 11 cm long and 10 cm high, aimed at advanced beginners. The project works well as a desk plush because the flat foot and broad shell base keep it upright.
The Design: What Makes Strawberry Snail Different
The photo pushes two structural choices first. One is shell mass. A strawberry sits higher and farther back than a spiral shell, so the body needs a flatter foot and a fuller rear curve to stop backward tipping. Another is the eyestalk treatment. Standard snail stalks can be narrow and plain; this version ends in two tiny berries, which adds weight at the very front and calls for firmer anchoring at the crown. Proportion matters more here than on a generic crochet snail pattern.
Seed placement also changes how the shell reads. A plain red oval can look like an apple or tomato. Embroidered seeds, a five-point leaf cap, and a short center stem lock the silhouette into fruit snail amigurumi territory. The common failure is oversizing the shell. Once the strawberry exceeds the body width too aggressively, the piece stops looking like a creeping snail and starts looking like a carrier base with a ball attached.
Project Info at a Glance
| Skill Level | Time | Finished Size | Hook | Best For |
|---|---|---|---|---|
| Advanced beginner | 4–6 hours | ~11 cm long × 10 cm high | 3.25 mm | Desk plush, market stock, strawberry-themed decor |
Materials and Tools
Yarn
- Cream/light beige — worsted cotton — about 35–40 g — YarnArt Jeans, Schachenmayr Catania held firm, or similar
- Red — worsted cotton — about 18–22 g — same base yarn family
- Leaf green — worsted cotton — about 8–10 g — same base yarn family
- Soft pink — worsted cotton — about 3 g — for cheek patches
- Pale yellow or cream — small amount — for strawberry seeds
- Black embroidery floss or yarn — small amount — for smile
Tools
- Hook 3.25 mm
- 8 mm safety eyes
- Polyester stuffing
- Tapestry needle
- Stitch markers
- Sewing pins
- Small scissors
Abbreviations
MR / sc / inc / dec / sl st / ch / BLO / FLO / hdc / dc
Use invisible decrease on all visible shaping rounds so the head and shell keep a cleaner surface line.
Pattern — Step by Step
Continuous spiral unless noted.
Head (Make 1)
Yarn: cream — original draft using standard amigurumi math
R1: 6 sc in MR (6)
R2: inc x6 (12)
R3: (sc, inc) x6 (18)
R4: (2 sc, inc) x6 (24)
R5: (3 sc, inc) x6 (30)
R6: (4 sc, inc) x6 (36)
R7-R11: sc around (36) 5 rounds total
R12: (4 sc, dec) x6 (30)
Insert safety eyes between R8 and R9, 8 stitches apart. Start stuffing.
R13: (3 sc, dec) x6 (24)
R14: (2 sc, dec) x6 (18)
Stuff firmly but keep the lower opening flexible for sewing.
Fasten off. Leave a 25 cm tail.
Body and Foot (Make 1)
Yarn: cream — original draft calibrated to the photo
R1: 6 sc in MR (6)
R2: inc x6 (12)
R3: (sc, inc) x6 (18)
R4: (2 sc, inc) x6 (24)
R5: (3 sc, inc) x6 (30)
R6: (4 sc, inc) x6 (36)
R7-R10: sc around (36) 4 rounds total
R11: 8 sc, dec, 16 sc, dec, 8 sc (34)
R12: 7 sc, dec, 15 sc, dec, 8 sc (32)
R13: 6 sc, dec, 14 sc, dec, 8 sc (30)
R14-R18: sc around (30) 5 rounds total
R19: 10 sc, dec, 3 sc, dec, 13 sc (28)
R20: sc around (28)
R21: 9 sc, dec, 3 sc, dec, 12 sc (26)
R22: sc around (26)
R23: 8 sc, dec, 3 sc, dec, 11 sc (24)
Stuff the rear body firmly. Keep the front lower half softer so the curve stays natural.
R24: sc around (24)
Fasten off. Leave a 25 cm tail.
Eyestalks (Make 2)
Yarn: cream — original draft
R1: 6 sc in MR (6)
R2-R5: sc around (6) 4 rounds total
Do not overstuff; a toothpick-firm tube looks stiff and unnatural.
Fasten off. Leave a 20 cm tail.
Strawberry Tips for Eyestalks (Make 2)
Yarn: red — original draft
R1: 6 sc in MR (6)
R2: inc x6 (12)
R3: sc around (12)
R4: (sc, dec) x4 (8)
Add a pinch of stuffing.
Fasten off. Leave a 15 cm tail.
Leaf Caps for Eyestalk Berries (Make 2)
Yarn: green — original draft
R1: 5 sc in MR (5)
R2: (ch 2, sl st in 2nd ch from hook, sl st in next st on ring) x5
Fasten off. Leave a 10 cm tail.
Arms / Front Lobes (Make 2)
Yarn: cream — original draft
R1: 6 sc in MR (6)
R2: (sc, inc) x3 (9)
R3-R4: sc around (9) 2 rounds total
Flatten lightly.
Fasten off. Leave a 15 cm tail.
Back Body Support Nubs (Make 2)
Yarn: cream — original draft
R1: 6 sc in MR (6)
R2: sc around (6)
Fasten off. Leave a 12 cm tail.
Strawberry Shell (Make 1)
Yarn: red — original draft shaped to the photo
R1: 6 sc in MR (6)
R2: inc x6 (12)
R3: (sc, inc) x6 (18)
R4: (2 sc, inc) x6 (24)
R5: (3 sc, inc) x6 (30)
R6: (4 sc, inc) x6 (36)
R7-R10: sc around (36) 4 rounds total
R11: (4 sc, dec) x6 (30)
R12: sc around (30)
R13: (3 sc, dec) x6 (24)
Stuff to a rounded but not rock-hard shape.
R14: (2 sc, dec) x6 (18)
R15: (sc, dec) x6 (12)
R16: dec x6 (6)
Fasten off. Close opening. Leave a 30 cm tail.
Leaf Cap for Shell (Make 1)
Yarn: green — inspired by the common five-leaf strawberry-top structure seen in public guides, but rewritten for this pattern
R1: 10 sc in MR (10)
R2: (ch 4, sl st in 2nd ch from hook, sc in next ch, hdc in next ch, sl st in next st on ring) x5
Fasten off. Leave a 25 cm tail.
Stem (Make 1)
Yarn: green — original draft
R1: 4 sc in MR (4)
R2-R4: sc around (4) 3 rounds total
Fasten off. Leave a 10 cm tail.
Cheek Patches (Make 2)
Yarn: soft pink — original draft
R1: 6 sc in MR (6)
R2: inc x6 (12)
Fasten off. Leave a 12 cm tail.
Smile Embroidery
Yarn: black — original draft
Embroider a shallow curved smile centered one round below the eyes.
Strawberry Seeds
Yarn: pale yellow or cream — original draft
Add short vertical seed stitches across the shell, spaced irregularly but kept off the very center front top where the leaf cap will sit.
Assembly
- Sew the head to the narrow front opening of the body, tilting the face slightly upward.
- Attach the two eyestalks to the crown, about 6 stitches apart.
- Sew one red berry tip to the top of each eyestalk.
- Add one tiny green leaf cap under each berry tip.
- Place the safety eyes if not already installed, then embroider the smile.
- Sew the pink cheek patches below and slightly outside the eyes.
- Attach the two front lobes low on the body front, one on each side, to widen the creeping silhouette.
- Sew the two back support nubs low on the rear underside to stabilize the shell side.
- Fix the strawberry shell onto the back body, centered but shifted 2–3 mm toward the rear.
- Sew the large green leaf cap onto the shell top, add the stem at center, then embroider the shell seeds if any gaps remain.
The piece is complete once it stands with the shell balanced and the eyestalk berries facing forward.
7 Technical Tips
- Mark the first stitch of every round. On a snail body, one missed marker shifts the underside line and makes the shell sit crooked by several millimeters.
- Do not overstuff the front body. The face needs firmness, but the lower front curve should compress slightly so the plush reads as creeping rather than sitting upright.
- Use invisible decreases on the head and shell. Standard decreases leave ridges that show clearly on cream yarn and break the smooth face contour.
- Install eyes before the final narrowing rounds. Waiting too long forces the washer through dense stuffing and often distorts the cheek line around R8–R10.
- Pin the shell before sewing. A strawberry shell that sits even 5 mm too high makes the toy tip backward and throws off the photo-matched proportions.
- Keep eyestalk stuffing light. Packed tubes stand too straight and stop reading as soft snail anatomy; a lightly filled stalk bends more naturally under the berry tip.
- Weave tails sideways, not straight inward. Pulling every tail to the center creates dents on small parts like berries and cheek circles.
Conclusion
This build works because the shell, face, and footing solve one problem at a time. The shell stays recognizable through seed spacing and the five-point cap. The body keeps the plush stable by spreading width low instead of adding height. That balance is what makes a strawberry snail amigurumi crochet pattern read cleanly from a single photo. The next step is simple: crochet the head and shell first, then test the tilt with pins before final sewing. Share the finished piece on Pinterest and Instagram with one front view and one side view. #StrawberrySnailPattern Which detail matters more on your version: smaller berry tips on the stalks, or a broader leaf cap on the shell?









