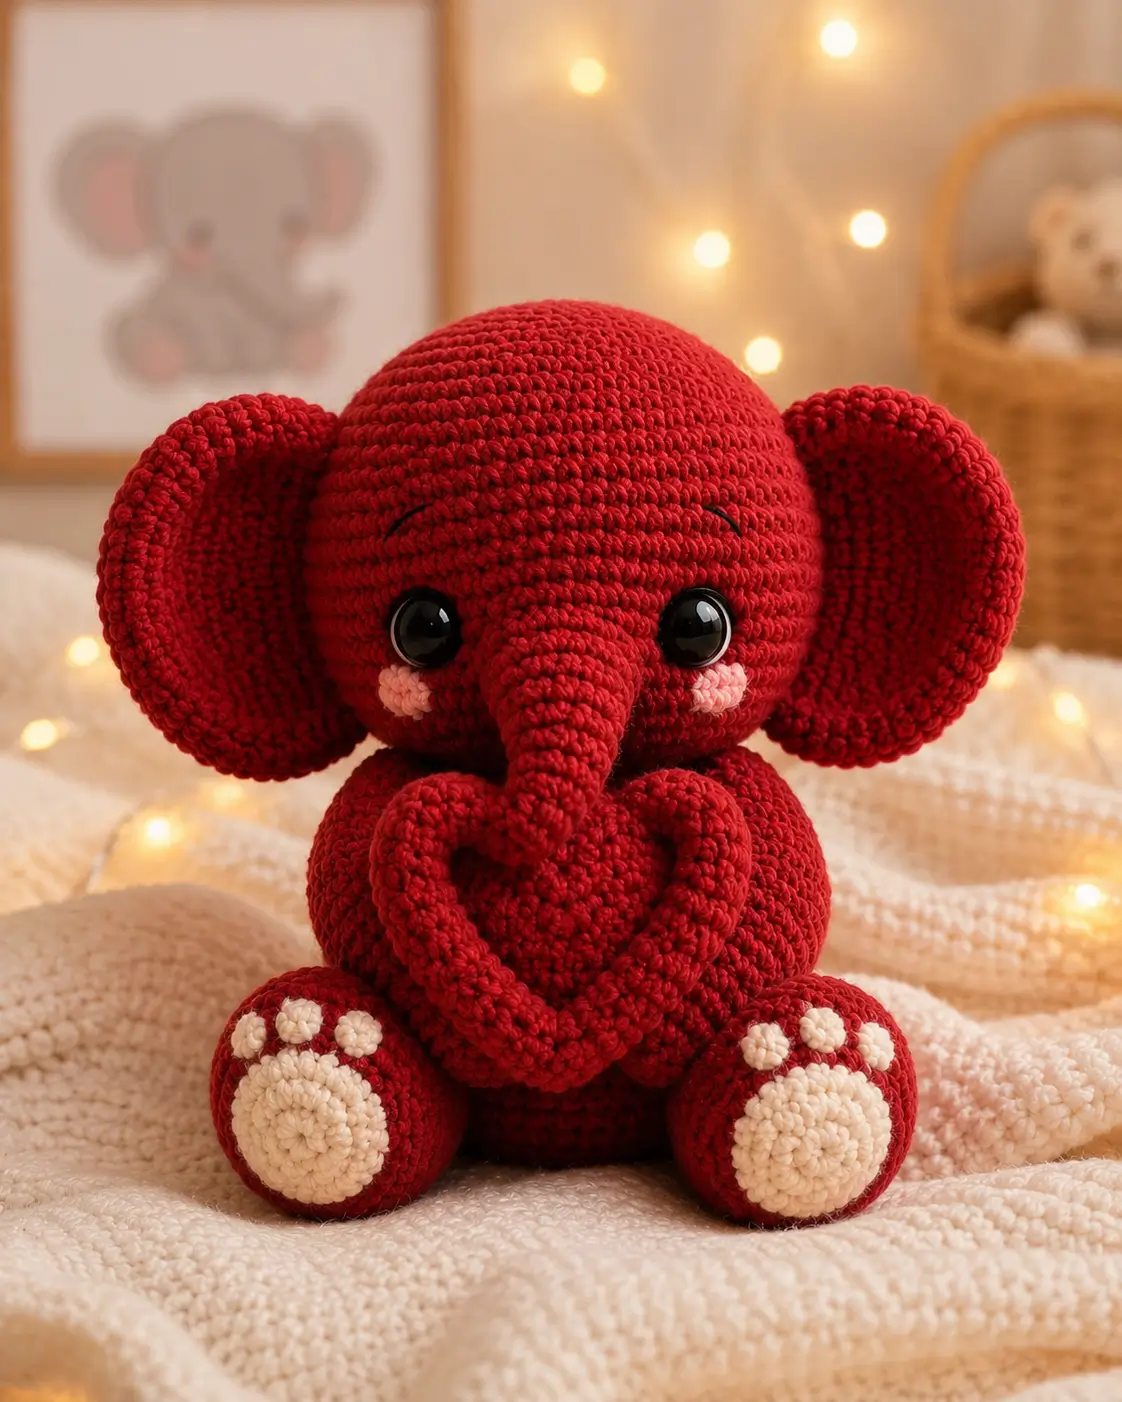
An elephant’s trunk must read as weight, not a tube. This elephant amigurumi crochet pattern builds a red sitting toy with big ears, black safety eyes, pink cheek patches, and cream foot pads. Use DK cotton, a 2.5 mm hook, and intermediate amigurumi skills for a finished height near 20 cm. The compact body makes it useful for nursery shelves, market tables, or photo props.
The Design: What Makes Red Elephant Different
The image calls for a top-heavy silhouette: a wide red head, lower sitting body, and two oversized ears that start slightly behind the eye line. The head uses a 42-stitch plateau so the trunk can sit under the eyes without squeezing the cheeks. The body drops to 36 stitches because a larger torso would hide the heart-shaped front legs. Ears stay single-layered with a firm edging; doubled ears would pull the head sideways in DK cotton. The common mistake in a crochet elephant plush pattern is building a long trunk first and then forcing the face around it. Here the face is set first, then the trunk is sewn into the lower center. That keeps the red elephant amigurumi stable, front-facing, and readable from one photo angle.
Project Info at a Glance
| Skill Level | Time | Finished Size | Hook | Best For |
|---|---|---|---|---|
| Intermediate | 5–7 hours | Approx. 20 cm | 2.5 mm | Sitting elephant toy, market display, nursery shelf |
Materials and Tools
Yarn
- Red — DK cotton — 110–120 g planning amount — Paintbox Cotton DK, Hobbii Rainbow Cotton 8/8, or similar.
- Cream — DK cotton — 12–15 g — for foot pads and toe dots.
- Pink — DK cotton — 3–5 g — for cheek patches.
- Black embroidery thread — small amount — for eyelid arcs.
Tools
- Hook 2.5 mm
- Safety eyes 12–15 mm; embroider eyes instead for toys intended for children under 3.
- Polyester stuffing
- Yarn needle
- Stitch markers
- Pins
- Scissors
Abbreviations
MR = magic ring. sc = single crochet. inc = 2 sc in one stitch. dec = single crochet decrease. sl st = slip stitch. ch = chain. BLO = back loop only. FLO = front loop only.
An invisible decrease works through front loops only so the red head closes without raised knots.
Pattern — Step by Step
Continuous spiral unless noted. This is an original stitch plan using standard 6-stitch amigurumi math.
Head
Yarn: red.
R1: 6 sc in MR (6)
R2: inc ×6 (12)
R3: (sc, inc) ×6 (18)
R4: (2 sc, inc) ×6 (24)
R5: (3 sc, inc) ×6 (30)
R6: (4 sc, inc) ×6 (36)
R7: (5 sc, inc) ×6 (42)
R8: sc around (42)
R9: sc around (42)
R10: sc around (42)
R11: sc around (42)
R12: sc around (42)
R13: sc around (42)
R14: sc around (42)
R15: sc around (42)
Place safety eyes between R11 and R12, 9 stitches apart. Add pink cheeks later, not now.
R16: (5 sc, dec) ×6 (36)
R17: (4 sc, dec) ×6 (30)
R18: (3 sc, dec) ×6 (24)
R19: (2 sc, dec) ×6 (18)
Stuff firmly across the crown and lightly around the lower front so the trunk does not bulge.
R20: (sc, dec) ×6 (12)
R21: dec ×6 (6)
Fasten off. Leave 20 cm tail and close the hole.
Body
Yarn: red.
R1: 6 sc in MR (6)
R2: inc ×6 (12)
R3: (sc, inc) ×6 (18)
R4: (2 sc, inc) ×6 (24)
R5: (3 sc, inc) ×6 (30)
R6: (4 sc, inc) ×6 (36)
R7: sc around (36)
R8: sc around (36)
R9: sc around (36)
R10: sc around (36)
R11: sc around (36)
R12: sc around (36)
R13: sc around (36)
R14: (4 sc, dec) ×6 (30)
R15: (3 sc, dec) ×6 (24)
R16: sc around (24)
R17: (2 sc, dec) ×6 (18)
R18: (sc, dec) ×6 (12)
Stuff the base harder than the neck opening. A firm base keeps the elephant seated.
R19: dec ×6 (6)
Fasten off. Leave 25 cm tail for sewing to the head.
Front Legs / Arms
Make 2. Yarn: red.
R1: 6 sc in MR (6)
R2: inc ×6 (12)
R3: sc around (12)
R4: sc around (12)
R5: sc around (12)
R6: sc around (12)
R7: sc around (12)
R8: sc around (12)
R9: sc around (12)
R10: sc around (12)
R11: sc around (12)
R12: sc around (12)
R13: sc around (12)
R14: sc around (12)
R15: sc around (12)
R16: sc around (12)
Stuff only the first 4 rounds. Leave the long section soft so it bends into the heart shape.
Flatten opening and sc through both layers across 6 stitches (6).
Fasten off. Leave 35 cm tail on each arm.
Back Legs
Make 2. Yarn: red.
R1: 6 sc in MR (6)
R2: inc ×6 (12)
R3: (sc, inc) ×6 (18)
R4: (2 sc, inc) ×6 (24)
R5: sc around (24)
R6: sc around (24)
R7: sc around (24)
R8: sc around (24)
R9: (2 sc, dec) ×6 (18)
R10: (sc, dec) ×6 (12)
Stuff into an oval, not a ball. The foot should sit forward.
R11: dec ×6 (6)
Fasten off. Leave 25 cm tail.
Ears
Make 2. Yarn: red.
R1: 6 sc in MR (6)
R2: inc ×6 (12)
R3: (sc, inc) ×6 (18)
R4: (2 sc, inc) ×6 (24)
R5: (3 sc, inc) ×6 (30)
R6: (4 sc, inc) ×6 (36)
R7: (5 sc, inc) ×6 (42)
R8: sc around (42)
R9: sc around (42)
Do not stuff. The final two plain rounds make a shallow cup and stop the ears from curling forward.
Fasten off. Leave 35 cm tail.
Trunk
Yarn: red.
R1: 6 sc in MR (6)
R2: sc around (6)
R3: sc around (6)
R4: sc around (6)
R5: sc around (6)
R6: inc ×6 (12)
R7: sc around (12)
R8: sc around (12)
R9: sc around (12)
R10: sc around (12)
R11: sc around (12)
R12: sc around (12)
Stuff the base only. Leave the tip unstuffed so it bends downward.
Fasten off. Leave 30 cm tail.
Cheek Patches
Make 2. Yarn: pink.
R1: 6 sc in MR (6)
R2: inc ×6 (12)
Sl st to first stitch (12).
Fasten off. Leave 18 cm tail.
Foot Pads
Make 2. Yarn: cream.
R1: 6 sc in MR (6)
R2: inc ×6 (12)
R3: (sc, inc) ×6 (18)
Sl st to first stitch (18).
Fasten off. Leave 22 cm tail.
Toe Dots
Make 6. Yarn: cream.
R1: 6 sc in MR (6)
Sl st to first stitch (6).
Fasten off. Leave 12 cm tail on each dot.
Eyelid Stitches
Make 2 embroidered arcs. Yarn: black embroidery thread.
Thread a needle with black thread. Make one shallow arc above each eye, spanning about 5 mm. Anchor inside the head and hide the thread end under nearby red stitches.
Heart-Shaping Tack
Yarn: red.
Ch 7 (7)
Row 1: sl st in second ch from hook and across (6)
Fasten off. Leave both tails. This small strip is hidden between the front legs to hold the lower heart point.
Assembly
- Sew the body to the lower center of the head, keeping the body opening hidden against the head closure.
- Pin the trunk under the eyes with the tip pointing down; sew the base across R9–R12 of the trunk.
- Sew the cheek patches under the eyes and beside the trunk, with one stitch of red space from each safety eye.
- Place each ear behind the eye line, starting around head R8 and ending near R15; sew around two-thirds of the edge.
- Attach the back legs to the lower front body, 6 stitches apart, with the rounded ends angled outward.
- Sew one cream foot pad to each back leg, centered on the forward-facing oval.
- Sew three toe dots above each foot pad, with about 3 mm between dots.
- Curve the front legs into a heart shape and pin them to the body from shoulder to lower center.
- Use the arm tails and hidden heart-shaping tack to hold the lower point of the heart closed.
- Add eyelid embroidery above the eyes and weave all yarn tails through dense red areas.
The completed elephant sits with the trunk centered, ears balanced, and front legs forming one visible heart.
7 Technical Tips
- Stitch marker drift: A marker one stitch late twists the trunk centerline. Move it after the first stitch of every round and check the head front before R16.
- Stuffing firmness: A soft 42-stitch head will collapse above the eyes. Pack the crown firmly, then reduce stuffing pressure below R17 so the trunk can sit flat.
- Invisible decrease holes: Standard decreases can leave pale stuffing visible on red yarn. Work every head and body decrease through FLO and tighten the next sc.
- Eye placement timing: Add safety eyes before closing past R17. After that point, the opening is too small for accurate washer pressure.
- Velvet tension swap: Chenille or velvet yarn can make the ears heavy and loose at the 42-stitch edge. Drop the hook by 0.5 mm and remove R9 from each ear.
- Pinning symmetry: One ear set 1 round lower makes the whole elephant look tilted. Pin both ears first, measure from the eye center to the ear base, then sew.
- Yarn-tail weaving: Short tails work loose inside tight cotton toys. Leave at least 20 cm on head, legs, and ears, then weave through three separate stitch paths.
Conclusion
This red elephant is built around three checks: a 42-stitch head, a 36-stitch body, and ears that sit behind the eye line instead of flat on the face. Before publishing the piece or gifting it, photograph the front view and confirm the trunk covers the center seam without tilting. Next, make a second ear swatch with one fewer edging round if the head leans. Save this elephant amigurumi crochet pattern to Pinterest, post the finished red version on Instagram, and tag it with #RedElephantAmigurumi. Which detail changes the elephant most in your sample: the trunk length, the ear angle, or the cream toe pad spacing?









