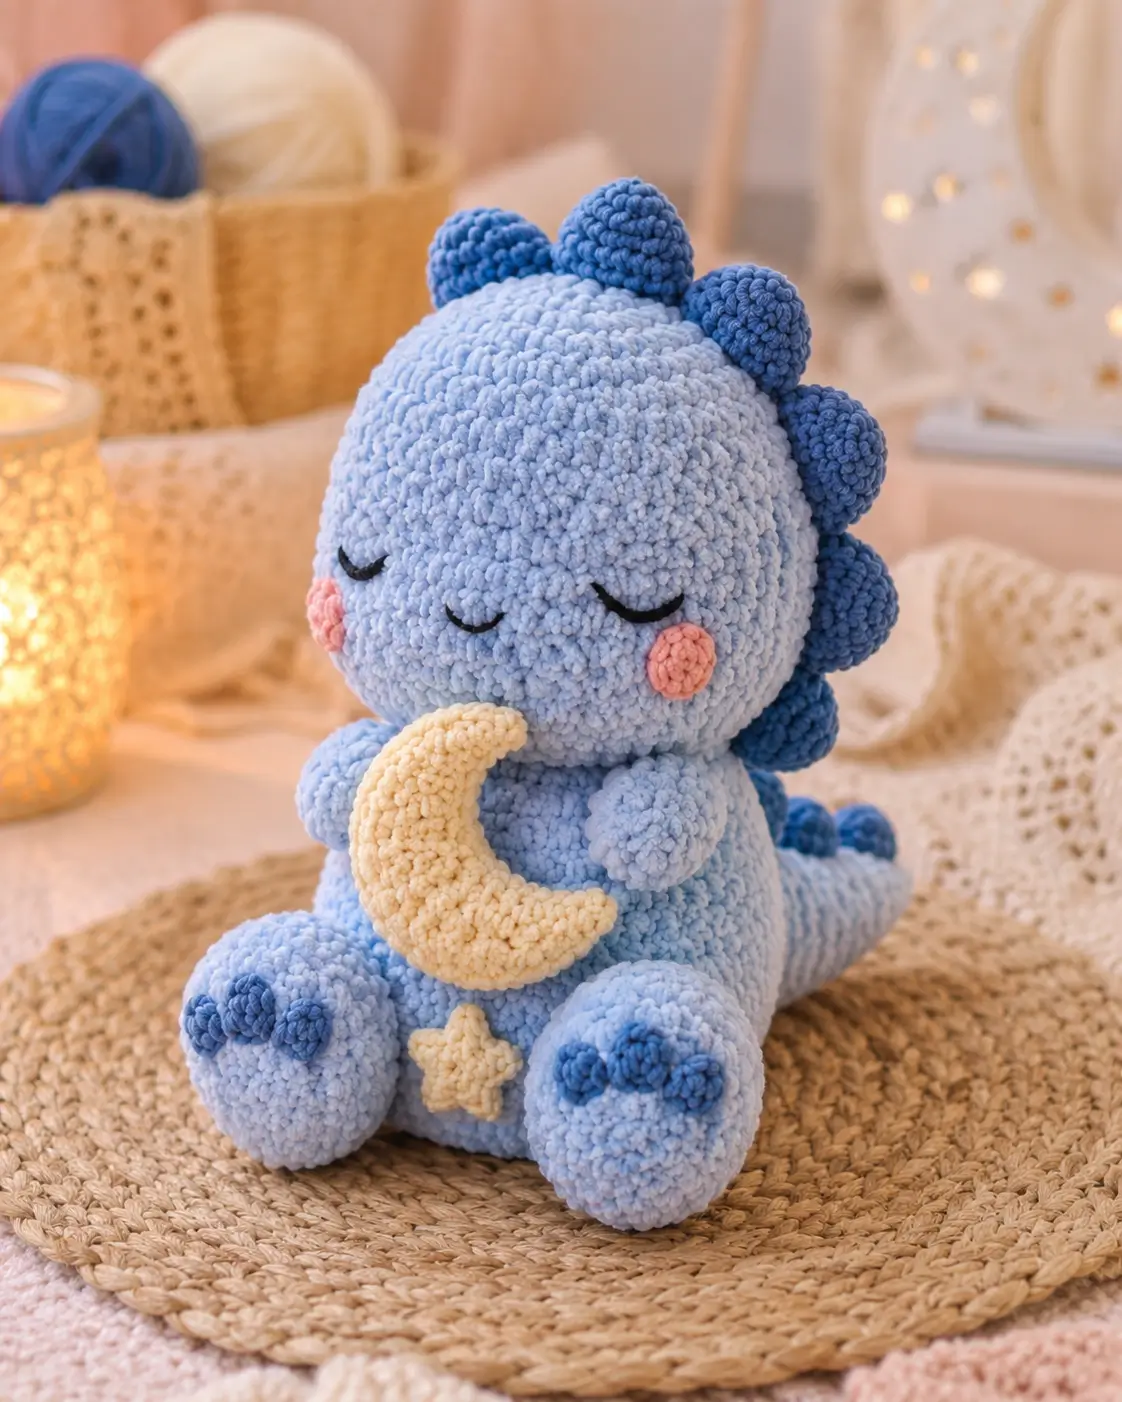
A blue sleepy dinosaur holding a crescent moon needs its tail, feet, and moon to share the same center of gravity. This dinosaur amigurumi crochet pattern uses chunky chenille, embroidered closed eyes, blue back plates, pink cheek patches, a cream crescent, and a small star to finish at about 22 cm. The skill level is intermediate. Make it when a nursery shelf needs a seated plush that will not tip forward.
The Design: What Makes This Sleepy Dinosaur Different
This sleepy dino crochet pattern uses a large 42-stitch head because the face carries the character: closed embroidered eyes, low blush, and a rounded forehead. The body stays smaller at 36 stitches so the dinosaur reads as a baby dinosaur crochet pattern, not a long-neck reptile. Dark-blue dorsal bumps replace sharp plates; plush yarn turns small triangles into lumps, so rounded bobbles give the back a clearer silhouette.
The crescent moon is made as a stuffed curved tube, then stitched to the chest after the arms are pinned. That order prevents the moon from twisting the face off center. A common maker mistake with a chenille dinosaur amigurumi is attaching the tail too high. The toy then rocks backward, and the moon pulls the front forward.
Project Info at a Glance
| Skill Level | Time | Finished Size | Hook | Best For |
|---|---|---|---|---|
| Intermediate | Test sample required | About 22 cm | 5.0 mm | Seated plush display, nursery shelf, moon-themed set |
Finished size and hook are based on a comparable chenille dinosaur benchmark from DIY Fluffies. Published dinosaur examples vary from 13 cm to 22 cm depending on hook and yarn.
Materials and Tools
Yarn
- Pale blue — chunky chenille — about 80–100 g — plush chenille in matching gauge
- Dark blue — chunky chenille — about 20 g — for dorsal bumps and toes
- Cream — chunky chenille — about 20 g — for crescent moon and star
- Pink — chunky chenille or velvet — about 5 g — for cheek patches
- Black — cotton or acrylic strand — less than 1 g — for embroidered sleepy eyes
Tools
- Hook 5.0 mm
- Safety eyes: not used for the photo version; optional 10 mm only for a display variation
- Polyester stuffing
- Tapestry needle
- Stitch markers
- Pins
- Scissors
Abbreviations
- MR = magic ring
- sc = single crochet
- inc = 2 sc in same stitch
- dec = invisible decrease
- sl st = slip stitch
- ch = chain
- BLO = back loop only
Use an invisible decrease by working through the front loops of the next two stitches before completing one sc; this keeps plush decrease rounds from forming ridges.
Pattern — Step by Step
Continuous spiral unless noted. Stitch counts are shown in brackets.
Head Make 1
Yarn: pale blue
R1: 6 sc in MR (6)
R2: inc ×6 (12)
R3: (sc, inc) ×6 (18)
R4: (2 sc, inc) ×6 (24)
R5: (3 sc, inc) ×6 (30)
R6: (4 sc, inc) ×6 (36)
R7: (5 sc, inc) ×6 (42)
R8–R14: sc around (42)
R15: (5 sc, dec) ×6 (36)
R16: (4 sc, dec) ×6 (30)
R17: (3 sc, dec) ×6 (24)
Embroider closed eyes across R10–R11. Each eye should span 5 stitches, with about 12 stitches between the inner ends. Add cheeks later, after the face is checked from the front.
R18: (2 sc, dec) ×6 (18)
R19: (sc, dec) ×6 (12)
Stuff firmly, especially the forehead and lower cheeks.
R20: dec ×6 (6)
Fasten off. Close the opening and leave a 20 cm tail.
Body Make 1
Yarn: pale blue
R1: 6 sc in MR (6)
R2: inc ×6 (12)
R3: (sc, inc) ×6 (18)
R4: (2 sc, inc) ×6 (24)
R5: (3 sc, inc) ×6 (30)
R6: (4 sc, inc) ×6 (36)
R7–R11: sc around (36)
R12: (4 sc, dec) ×6 (30)
R13: (3 sc, dec) ×6 (24)
R14: sc around (24)
R15: (2 sc, dec) ×6 (18)
R16: (sc, dec) ×6 (12)
Stuff the lower body more firmly than the upper body. A flat seated base helps the moon stay forward without pulling the toy down.
R17: dec ×6 (6)
Fasten off. Leave a 25 cm tail for sewing to the head.
Arms / Front Legs Make 2
Yarn: pale blue
R1: 6 sc in MR (6)
R2: inc ×6 (12)
R3–R5: sc around (12)
R6: dec ×6 (6)
Stuff only the hand end. Leave the shoulder end soft so the arms can curve around the moon.
Fasten off. Leave a 20 cm tail on each arm.
Back Legs / Feet Make 2
Yarn: pale blue
R1: 6 sc in MR (6)
R2: inc ×6 (12)
R3: (sc, inc) ×6 (18)
R4: (2 sc, inc) ×6 (24)
R5–R7: sc around (24)
R8: (2 sc, dec) ×6 (18)
R9: (sc, dec) ×6 (12)
Stuff firmly at the front and lightly at the heel. Flatten the underside with your fingers before sewing.
R10: dec ×6 (6)
Fasten off. Leave a 25 cm tail on each foot.
Toe Bobbles Make 6
Yarn: dark blue
R1: 6 sc in MR (6)
R2: sc around (6)
Fasten off. Leave a 12 cm tail on each toe. Sew three toe bobbles to the front of each back foot.
Dorsal Bumps Make 8
Yarn: dark blue
R1: 6 sc in MR (6)
R2: inc ×6 (12)
R3–R4: sc around (12)
Add a very small amount of stuffing. Overstuffing turns the bump into a ball that will not sit flat on the head.
R5: dec ×6 (6)
Fasten off. Leave a 20 cm tail on each bump.
Tail Make 1
Yarn: pale blue
R1: 6 sc in MR (6)
R2: sc around (6)
R3: inc ×6 (12)
R4–R5: sc around (12)
R6: (sc, inc) ×6 (18)
R7–R8: sc around (18)
R9: (2 sc, inc) ×6 (24)
R10–R13: sc around (24)
Stuff the tip lightly and the base firmly. Curve the tail toward the back-right side before sewing if the moon makes the toy lean forward.
Fasten off. Leave a 35 cm tail.
Cheek Patches Make 2
Yarn: pink
R1: 6 sc in MR (6)
R2: inc ×6 (12)
Sl st into first sc.
Fasten off. Leave a 15 cm tail on each cheek. Do not stuff.
Crescent Moon Make 1
Yarn: cream
R1: 6 sc in MR (6)
R2: sc around (6)
R3: inc ×6 (12)
R4: sc around (12)
R5: (sc, inc) ×6 (18)
R6–R13: sc around (18)
R14: (sc, dec) ×6 (12)
R15: sc around (12)
R16: dec ×6 (6)
Stuff lightly. Bend the tube into a crescent, then use cream yarn to take three hidden stitches along the inner curve. Do not add wire to a toy version.
Fasten off. Close both tips and leave a 30 cm sewing tail at one end.
Star Make 1
Yarn: cream
R1: 6 sc in MR (6)
R2: [sl st in next st, ch 2, sc in second ch from hook] ×6 (6 points)
Sl st to the base of the first point.
Fasten off. Leave a 15 cm tail. Block flat by pinning each point for 20 minutes before sewing.
Assembly
- Sew the head to the body with the body opening centered under the head, using small ladder stitches around the full neck seam.
- Pin the body upright on a flat surface and check that the head does not roll left or right.
- Sew the pink cheek patches beside the embroidered eyes, centered around R12 of the head.
- Attach the arms to the front of the body at R8–R10, angled inward so they can touch the crescent.
- Pin both back feet to the lower front body and test the seated position before sewing.
- Sew three dark-blue toe bobbles to each foot, keeping the middle toe 1 stitch higher than the side toes.
- Attach the tail to the lower back of the body, with the base crossing R7–R10 of the body.
- Sew the dorsal bumps from the top of the head down the back, spacing each bump about 1.5 cm apart.
- Stitch the crescent moon to the arms and chest, then sew the star below it on the belly.
- Weave every tail through at least 8 cm of fabric, trim, and brush the chenille surface with your fingers.
The finished dinosaur is a seated plush with embroidered sleepy eyes, raised back bumps, a curved moon, and a small belly star.
7 Technical Tips
- Stitch marker drift: If the marker moves more than 2 stitches from the back center by R14 of the head, rotate the face placement instead of moving the seam. The embroidered eyes should sit across R10–R11, not on the decrease slope.
- Stuffing dents: A 42-stitch head collapses beside the cheeks if R17 is under-filled. Add stuffing in 1 cm pinches before R18 so the lower face stays round.
- Invisible decrease ridges: A standard sc2tog leaves six visible bars on plush yarn during each decrease round. Use front-loop invisible decrease from R15 on the head and R12 on the body.
- Eye timing: Embroider the closed eyes before the head drops below 24 stitches. After R18, the needle angle pulls the arcs downward and makes the dinosaur look like it is frowning.
- Velvet tension: Chenille loops taller than 6 mm can show stuffing at the increase rounds. Pull the working yarn back after each sc, then let the stitch relax before starting the next one.
- Pinning balance: Use four pins per back foot and let the toy sit for 30 seconds before sewing. If the moon tips the body forward, shift the tail base 1 cm lower.
- Tail weaving: Short yarn tails can slip out between velvet loops. Bury each tail through at least 8 cm of stuffed fabric before trimming close to the surface.
Conclusion
This pattern works because the dinosaur is engineered around balance, not only shape. The oversized head gives the sleepy face room, the smaller seated body keeps the plush compact, and the low tail counters the crescent moon at the front. Work the head first, then place the eyes before closing so the expression stays level. Your next step is to make one test head in the exact chenille you plan to use and confirm that the 42-stitch plateau gives the size you want. Share the finished dinosaur on Pinterest and Instagram with #SleepyBlueDino. Which detail changes the character more: the dark-blue back bumps or the cream crescent in this dinosaur amigurumi crochet pattern?









