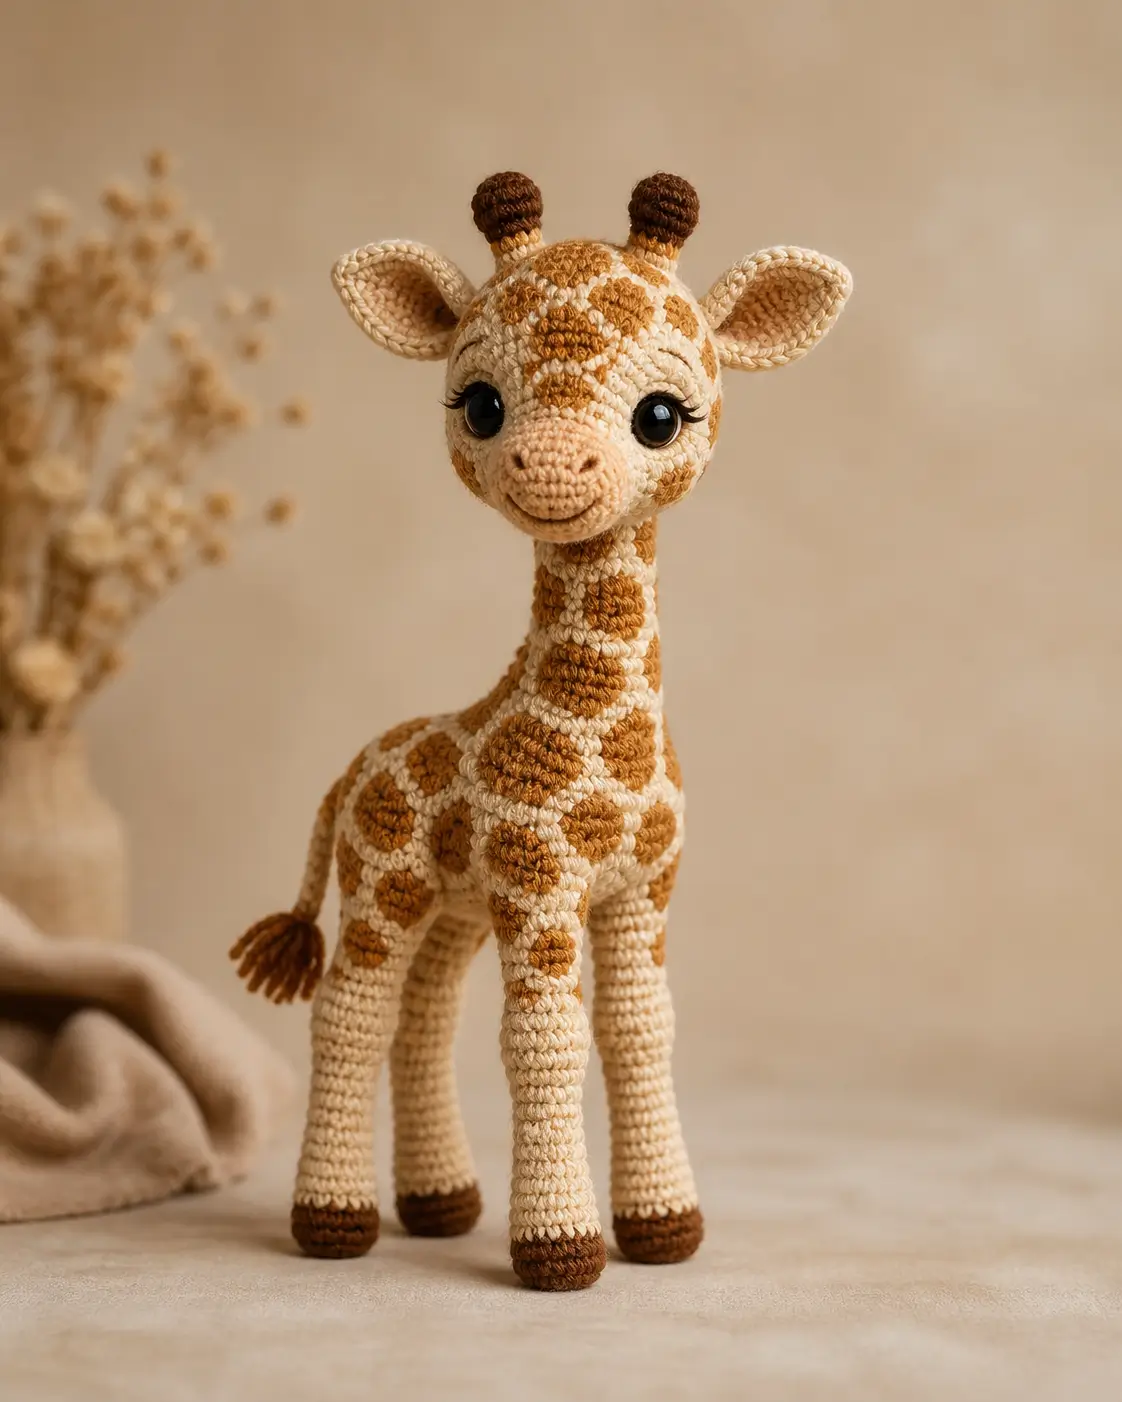
A giraffe’s ossicones are not horns, and on this toy they must stand between the ears without tipping the head forward. This giraffe amigurumi crochet pattern uses DK cotton, a 2.5mm hook, and 8mm safety eyes for a 26cm standing figure at beginner-plus level. Make it when a nursery shelf needs height without wire.
The Design: What Makes This Giraffe Different
The neck is the engineering point. It is worked as part of the body, then narrowed to an 18-stitch column so the head can sit above the shoulders instead of sliding forward. The legs stay slim because a standing giraffe amigurumi looks wrong when the hooves become teddy-bear feet. Spots are added as separate flat circles, not color-work, because sewn patches keep the cream base clean and let the maker place markings after assembly. That matters on a crochet giraffe amigurumi with a long neck; one badly centered spot can make the face look twisted. A common mistake is placing the ossicones too far apart. Real giraffe ossicones sit near the crown, and amigurumi versions need the same close spacing for balance.
Project Info at a Glance
| Skill Level | Time | Finished Size | Hook | Best For |
|---|---|---|---|---|
| Beginner-plus | 7–9 hours | 26 cm standing | 2.5 mm | Safari nursery decor, shelf display, photo prop |
Materials and Tools
Yarn
- Warm cream — DK cotton — 80 g — Paintbox Cotton DK, YarnArt Jeans, or Schachenmayr Catania
- Caramel brown — DK cotton — 25 g — for spots and cheek patches
- Dark brown — DK cotton — 10 g — for hooves, ossicone tips, tail tuft
- Peach beige — DK cotton — 10 g — for muzzle and inner-ear detail
- Black embroidery yarn — small length — for nostrils, lashes, and mouth
Tools
- Hook 2.5 mm
- Safety eyes 8 mm, or embroidered eyes for children under 3
- Polyester stuffing
- Yarn needle
- Stitch markers
- Straight pins
- Scissors
Abbreviations
MR = magic ring; sc = single crochet; inc = 2 sc in same stitch; dec = invisible decrease; sl st = slip stitch; ch = chain; BLO = back loop only; FO = fasten off.
Invisible decrease joins the front loops of the next two stitches so the decrease sits flatter on the surface.
Pattern — Step by Step
Continuous spiral unless noted. This pattern is drafted from standard amigurumi math for the giraffe shown in the photo, with medium 36-stitch plateaus for the head and body and narrow 18-stitch cylinders for the standing legs.
Head
Yarn: warm cream
R1: 6 sc in MR (6)
R2: inc ×6 (12)
R3: (sc, inc) ×6 (18)
R4: (2 sc, inc) ×6 (24)
R5: (3 sc, inc) ×6 (30)
R6: (4 sc, inc) ×6 (36)
R7–R12: sc around (36)
R13: (4 sc, dec) ×6 (30)
R14: sc around (30)
R15: (3 sc, dec) ×6 (24)
R16: sc around (24)
R17: (2 sc, dec) ×6 (18)
R18: (sc, dec) ×6 (12)
R19: dec ×6 (6)
Insert safety eyes between R10 and R11 with 8–9 stitches between the posts before closing. Stuff firmly through the back half of the head.
Fasten off. Leave 15cm tail.
Muzzle
Yarn: peach beige
R1: 6 sc in MR (6)
R2: inc ×6 (12)
R3: (sc, inc) ×6 (18)
R4–R6: sc around (18)
R7: (sc, dec) ×6 (12)
Stuff lightly. Embroider two nostrils across R3–R4, two stitches wide each, before sewing to the head.
Fasten off. Leave 25cm tail.
Body and Neck
Yarn: warm cream
R1: 6 sc in MR (6)
R2: inc ×6 (12)
R3: (sc, inc) ×6 (18)
R4: (2 sc, inc) ×6 (24)
R5: (3 sc, inc) ×6 (30)
R6: (4 sc, inc) ×6 (36)
R7–R14: sc around (36)
R15: (4 sc, dec) ×6 (30)
R16–R18: sc around (30)
R19: (3 sc, dec) ×6 (24)
R20–R21: sc around (24)
R22: (2 sc, dec) ×6 (18)
R23–R35: sc around (18)
R36: (sc, dec) ×6 (12)
R37: dec ×6 (6)
Stuff the belly medium-firm. Pack the neck in 2cm layers so it stands upright but does not bulge.
Fasten off. Leave 25cm tail.
Front Legs — Make 2
Yarn: dark brown hoof, then warm cream leg
R1: 6 sc in MR with dark brown (6)
R2: inc ×6 (12)
R3: (sc, inc) ×6 (18)
R4: BLO sc around (18)
R5–R6: sc around (18)
R7: change to warm cream, sc around (18)
R8–R24: sc around (18)
R25: (sc, dec) ×6 (12)
R26: sc around (12)
R27: dec ×6 (6)
Stuff the hoof firmly and the upper leg lightly. Keep both front legs equal in length before assembly.
Fasten off. Leave 30cm tail.
Back Legs — Make 2
Yarn: dark brown hoof, then warm cream leg
R1: 6 sc in MR with dark brown (6)
R2: inc ×6 (12)
R3: (sc, inc) ×6 (18)
R4: BLO sc around (18)
R5–R6: sc around (18)
R7: change to warm cream, sc around (18)
R8–R20: sc around (18)
R21: (sc, dec) ×6 (12)
R22: sc around (12)
R23: dec ×6 (6)
Stuff the lower half firmly. Leave the top slightly softer so the back legs can angle under the body.
Fasten off. Leave 30cm tail.
Ears — Make 2
Yarn: warm cream; optional peach surface stitching
R1: 6 sc in MR (6)
R2: inc ×6 (12)
R3: (sc, inc) ×6 (18)
R4–R7: sc around (18)
R8: (sc, dec) ×6 (12)
R9: sc around (12)
Do not stuff. Flatten each ear, then add three peach straight stitches inside the oval.
Fasten off. Leave 25cm tail.
Ossicones — Make 2
Yarn: dark brown tip, then caramel brown stem
R1: 6 sc in MR with dark brown (6)
R2: inc ×6 (12)
R3–R4: sc around (12)
R5: dec ×6 (6)
R6: change to caramel brown, sc around (6)
R7–R10: sc around (6)
Stuff only the dark brown tip. Leave the stem flexible enough to sew flat to the crown.
Fasten off. Leave 20cm tail.
Cheek Patches — Make 2
Yarn: caramel brown
R1: 6 sc in MR (6)
R2: inc ×6 (12)
Sl st to close (12)
Make the patches flat. Sew them low on the face, outside the muzzle line and below the eyes.
Fasten off. Leave 18cm tail.
Body and Neck Spots
Yarn: caramel brown
Small spots — make 6:
R1: 6 sc in MR (6)
R2: inc ×6 (12)
Sl st to close (12)
Fasten off. Leave 15cm tail.
Large spots — make 5:
R1: 6 sc in MR (6)
R2: inc ×6 (12)
R3: (sc, inc) ×6 (18)
Sl st to close (18)
Fasten off. Leave 15cm tail.
Place three small spots down the front neck, two large spots on each body side, and the remaining spots unevenly across the shoulders.
Tail
Yarn: warm cream tail, dark brown tuft
R1: 6 sc in MR with warm cream (6)
R2–R14: sc around (6)
Do not overstuff. Tie six 10cm dark brown strands through the closed tip and trim them to 3cm.
Fasten off. Leave 20cm tail.
Accessory From Photo
No separate accessory is visible in the reference photo. Do not add a bow, scarf, bell, or saddle if the goal is to match the pictured giraffe.
Assembly
- Pin the head upright and mark the center bottom of R19.
- Place the closed neck top directly under the head, not behind it.
- Sew the body and neck to the head with two full passes around the join.
- Sew the muzzle to the front of the head across R8–R14 and add the mouth line under the muzzle.
- Attach the cheek patches one round below the eyes, then embroider black lashes at the outer eye edges.
- Sew the ears to the sides of the head across R9–R12.
- Sew the ossicones between the ears, spaced 4 stitches apart at the base.
- Attach the front legs under the shoulder line, parallel and 2cm apart.
- Attach the back legs under the rear body, then sew the tail to the center back at the rump.
- Sew the spots last, weave all tails inside the body, and trim visible yarn ends.
The completed giraffe stands as a 26cm DK amigurumi with four sewn legs, separate spots, cheek patches, tail, ears, and ossicones.
7 Technical Tips
- Stitch marker drift: If the marker moves more than 3 stitches off center on the neck, the head will twist after sewing. Move the marker up every round and re-center the front neck spot before assembly.
- Stuffing firmness: A soft neck collapses under the head within a day of display. Pack stuffing into the neck every 2cm and test it by holding the body sideways for 5 seconds.
- Invisible decrease holes: Loose decreases on cream yarn show dark shadow gaps beside the muzzle. Pull the working loop tight after each dec on R17–R19 of the head.
- Eye placement timing: Safety eyes cannot be moved cleanly after the backs snap into place. Pin both eye locations first, check the 8–9 stitch gap, then press the backs on.
- Leg length mismatch: A 1-round difference between front legs makes the giraffe lean. Count R7–R24 on both front legs before stuffing closes the tube.
- Pinning failure: Spots sewn without pins often climb into a straight column. Pin every spot first, then rotate the giraffe 360 degrees to check spacing from front, side, and back.
- Tail weaving: A tail joined with only one stitch can tear away during handling. Sew through at least 6 body stitches at the rump and bury the yarn tail 4cm inside the body.
Conclusion
This build depends on vertical control: firm neck stuffing, matched leg rounds, and crown parts placed close enough to keep the head balanced. The giraffe amigurumi crochet pattern works best when the maker finishes all flat spots before assembly, then pins every marking before sewing. Next step: cut the spot tails to equal lengths and lay out the full marking map beside the stuffed body. Share the finished giraffe on Pinterest and Instagram with #StandingGiraffeAmi. For the next version, would you place the cheek patches directly under the eyes or farther back toward the ears?









