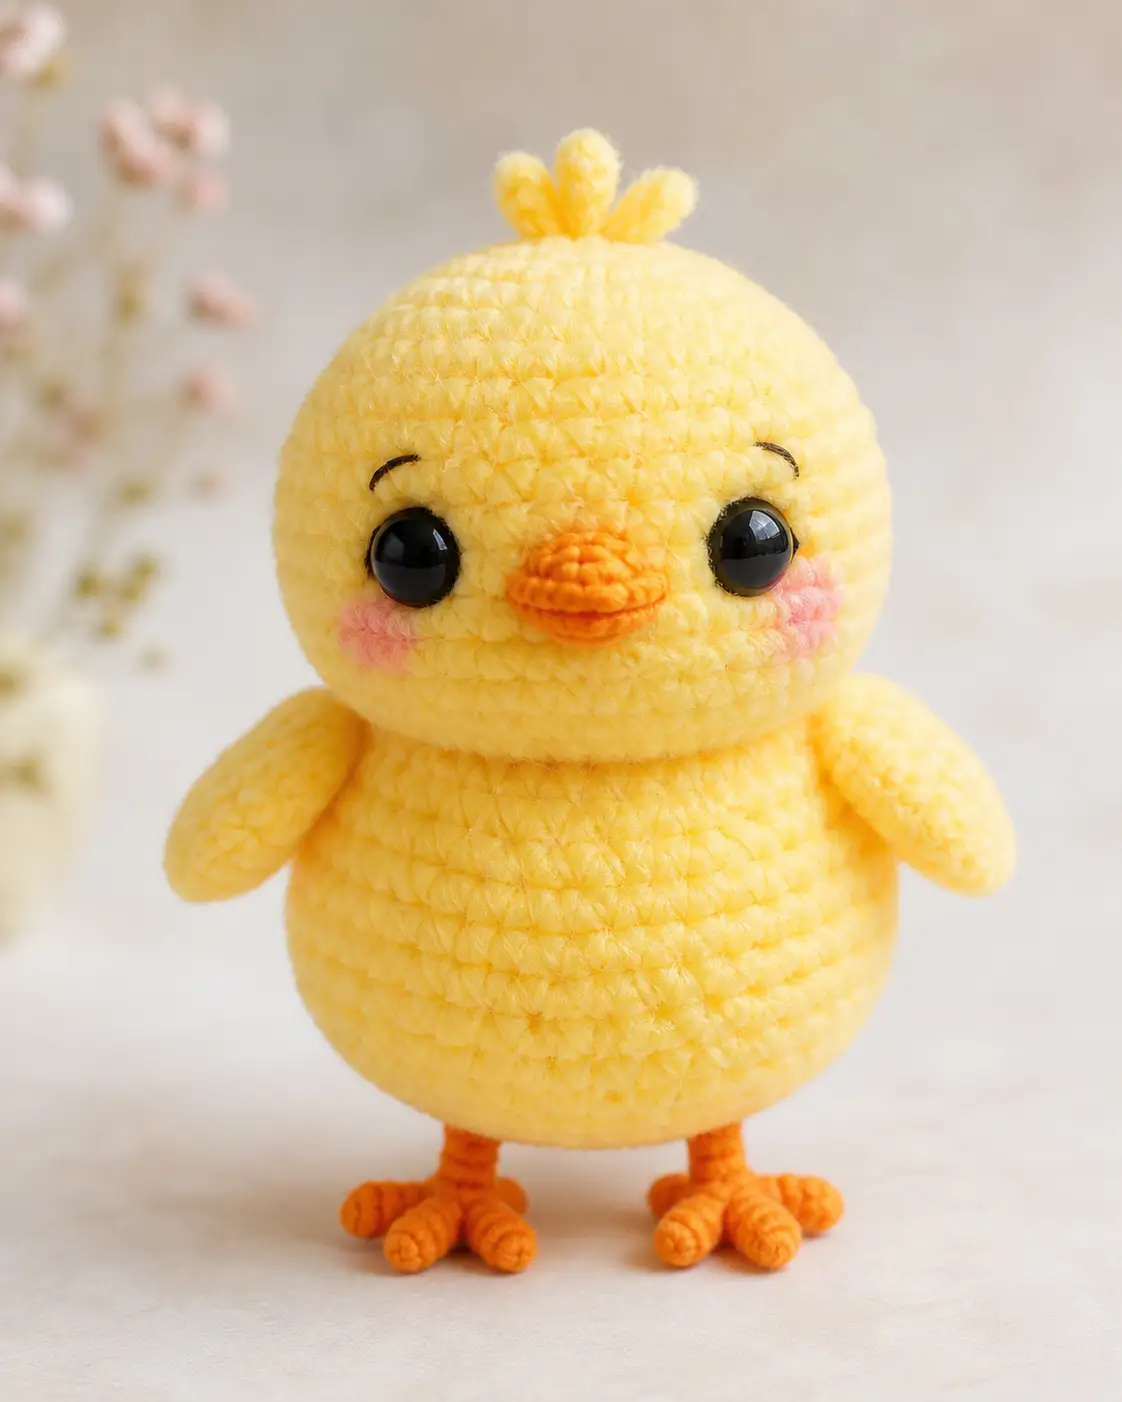
A chick’s first readable detail is not the beak; it is the three orange toes under a round yellow belly. This chick amigurumi crochet pattern builds a 15 cm plush bird with worsted yarn, a 3.5–4.0 mm hook, safety eyes, stuffing, and upper-beginner shaping. Make it when you need a compact spring figure that stands upright instead of rolling forward.
The Design: What Makes This Chick Different
The head is a clean sphere, while the body is a lower oval. That split matters because a chick needs a heavy belly under a short neck, not one continuous egg with eyes placed too low. The wings stay small and flattened so the side profile remains round; oversized wings make a baby chick read as a duckling. The feet carry most of the character work. Three separate toes per foot add width at the base and stop the finished yellow chick amigurumi from tipping. Another choice is the raised beak. A flat embroidered beak works on micro pieces, but this crochet chick pattern needs a short cone so the face projects between the large eyes. The common mistake is placing the eyes after the head is stuffed. At that point, the face loses symmetry.
Project Info at a Glance
| Skill Level | Time | Finished Size | Hook | Best For |
|---|---|---|---|---|
| Upper beginner | A few hours | 15 cm | 3.5–4.0 mm | Easter chick crochet display, nursery shelf, market table sample |
Materials and Tools
Yarn
- Butter yellow — #4 worsted or soft velvet-style worsted — 25–35 g — brand suggestion: Paintbox Simply Aran or similar smooth acrylic
- Orange — DK or #4 worsted — 2–5 g — brand suggestion: Ricorumi or similar firm cotton blend
- Pink — DK scrap yarn — less than 1 g — brand suggestion: any smooth cotton/acrylic scrap
- Black embroidery floss — scrap length — for brow arcs only
Tools
- Hook 3.5 mm for firm worsted stitches, or 4.0 mm if your yarn is dense
- Safety eyes 9 mm for the verified 15 cm scale; size up to 10 mm for the photo look
- Polyester stuffing
- Tapestry needle
- Stitch markers
- Pins
- Scissors
Abbreviations
- MR = magic ring
- sc = single crochet
- inc = increase, 2 sc in one stitch
- dec = decrease, sc 2 stitches together
- sl st = slip stitch
- ch = chain
- BLO = back loop only
- FO = fasten off
For an invisible decrease, work through the front loops of the next two stitches before completing one single crochet; this keeps neck and belly decreases recessed.
Pattern — Step by Step
Continuous spiral unless noted. Use a stitch marker at the first stitch of each round.
Head
Yarn: butter yellow — Source: Standard amigurumi math, scaled to the verified 15 cm chick profile.
R1: 6 sc in MR (6)
R2: inc ×6 (12)
R3: (sc, inc) ×6 (18)
R4: (2 sc, inc) ×6 (24)
R5: (3 sc, inc) ×6 (30)
R6: (4 sc, inc) ×6 (36)
R7: sc around (36)
R8: sc around (36)
R9: sc around (36)
R10: sc around (36)
R11: sc around (36)
R12: sc around (36)
R13: sc around (36)
R14: (4 sc, dec) ×6 (30)
R15: (3 sc, dec) ×6 (24)
R16: (2 sc, dec) ×6 (18)
Place eyes between R9 and R10, 8 stitches apart. Add the beak marker centered between them, one round lower.
R17: (sc, dec) ×6 (12)
R18: dec ×6 (6)
Fasten off. Leave a 20 cm tail. Weave through the front loops of the last 6 stitches and pull closed.
Body
Yarn: butter yellow — Source: Standard amigurumi math, with a medium 36-stitch plateau.
R1: 6 sc in MR (6)
R2: inc ×6 (12)
R3: (sc, inc) ×6 (18)
R4: (2 sc, inc) ×6 (24)
R5: (3 sc, inc) ×6 (30)
R6: (4 sc, inc) ×6 (36)
R7: sc around (36)
R8: sc around (36)
R9: sc around (36)
R10: sc around (36)
R11: sc around (36)
R12: sc around (36)
R13: sc around (36)
Stuff the lower half firmly, then continue stuffing after each decrease round.
R14: (4 sc, dec) ×6 (30)
R15: (3 sc, dec) ×6 (24)
R16: (2 sc, dec) ×6 (18)
R17: (sc, dec) ×6 (12)
R18: dec ×6 (6)
Fasten off. Leave a 25 cm tail for sewing the body to the head.
Wings
Yarn: butter yellow — Source: Standard amigurumi math; flattened oval wing matched to the photo.
Make 2.
R1: 6 sc in MR (6)
R2: inc ×6 (12)
R3: (sc, inc) ×6 (18)
R4: sc around (18)
R5: sc around (18)
R6: sc around (18)
R7: (sc, dec) ×6 (12)
Do not stuff. Flatten the opening and sc through both layers for 6 stitches. Fasten off. Leave a 20 cm sewing tail on each wing.
Legs
Yarn: orange — Source: Standard narrow tube construction for visible bird legs.
Make 2.
R1: 6 sc in MR (6)
R2: sc around (6)
R3: sc around (6)
R4: sc around (6)
R5: sc around (6)
Stuff only if your yarn is thin. Fasten off. Leave a 15 cm tail.
Toes
Yarn: orange — Source: Standard amigurumi math; three visible toes per foot based on the photo.
Make 6.
R1: 6 sc in MR (6)
R2: sc around (6)
R3: sc around (6)
Fasten off each toe. Leave a 10 cm tail. Sew three toes to the base of each leg, with the center toe pointing forward and the outer toes angled about 30 degrees.
Beak
Yarn: orange — Source: Standard amigurumi math for a small raised oval cone.
R1: 6 sc in MR (6)
R2: inc ×6 (12)
R3: sc around (12)
R4: sc around (12)
Flatten slightly. Do not stuff heavily; one pinch of stuffing is enough. Fasten off with a 20 cm tail.
Cheek Patches
Yarn: pink — Source: Standard flat circle math.
Make 2.
R1: 6 sc in MR (6)
R2: inc ×6 (12)
sl st to first stitch (12)
Fasten off. Leave a 15 cm sewing tail. Press flat before pinning.
Top Tuft
Yarn: butter yellow — Source: Standard chain-loop tuft construction used for small bird amigurumi details.
Insert hook into the top center of the head between R1 and R2. Pull up a loop and ch 6, sl st into the same entry point. Repeat twice more for 3 loops total. Fasten off inside the head if still open; otherwise thread both tails through the same hole and knot inside the stitches.
Brow Arcs
Yarn: black embroidery floss — Source: Photo-matched embroidery placement.
Make 2.
Thread the needle with one strand. On each side, enter one stitch above the eye and exit two stitches toward the outside edge. Lay a shallow curved stitch over the eye, then anchor it one round higher at the outer end. Repeat once over the same path only if the line looks too thin.
Optional Lower Lip Stitch
Yarn: orange — Source: Photo-matched beak shaping.
Add one horizontal stitch under the beak after sewing it on. Keep the stitch 2 stitches wide. It should sit on R12 of the head, directly below the center of the beak.
Assembly
- Pin the head to the body first, with the head centered over the body’s R1–R6 top curve.
- Sew the head to the body using the body tail, catching one head stitch and one body stitch at a time.
- Attach the beak between the eyes, covering the space from R10 to R12 of the head.
- Sew the cheek patches one round below each eye, with the inner edge nearly touching the beak.
- Embroider the brow arcs above the eyes after the face pieces are fixed.
- Pin the wings to the body sides with their top edge at body R6 and their lower point angled toward R11.
- Sew each wing through the flattened edge only, leaving the outer curve loose.
- Attach the legs under the body between body R15 and R16, spaced 5 stitches apart.
- Sew three toes to each leg, then tack the outer toes lightly to the body base for balance.
- Add the top tuft last, trim tails inside the stitches, and smooth the stuffing by rolling the plush between both hands.
The finished chick is a 15 cm yellow amigurumi bird with raised beak, side wings, cheek patches, top tuft, and two orange three-toe feet.
7 Technical Tips
- Stitch marker drift: Move the marker at the first stitch of every round. A marker left one stitch behind on R6–R13 will rotate the face and make the beak sit off-center.
- Stuffing firmness: Under-filled body stuffing makes the chick lean forward. Pack the body base more firmly than the neck, especially before closing R16–R18.
- Invisible decrease bumps: Visible decrease ridges will show across the cheeks and belly. Work invisible decreases on head R14–R18 and body R14–R18 for a cleaner curve.
- Eye placement timing: Add the washers before closing the head past R16. If the eyes are placed after stuffing, the correct spacing of 8 stitches is harder to hold.
- Velvet tension: Velvet yarn hides stitch tops and can turn R2 into 11 or 13 stitches by mistake. Count every increase round aloud, then count again at 12, 18, 24, 30, and 36.
- Pinning failure: Wings sewn too low make the body look like a pear with flaps. Keep the top wing edge at body R6 and the lower point no lower than body R12.
- Tail weaving: Loose leg tails make the feet twist outward after handling. Weave each 15 cm leg tail through the body base twice before trimming.
Conclusion
This chick amigurumi crochet pattern works because the structure stays specific: round head, lower oval body, raised beak, small wings, three-toe feet, pink cheek patches, and a top tuft. The next useful step is making one test chick in plain worsted yarn before switching to velvet, because stitch visibility will help confirm the 36-stitch plateau and the eye spacing. Save the finished project photo for Pinterest with a vertical crop, then post the side view on Instagram so the wing and toe placement are visible. Use hashtag #RoundBabyChick. Which detail makes this chick read faster in your version: the orange beak or the three front toes?









