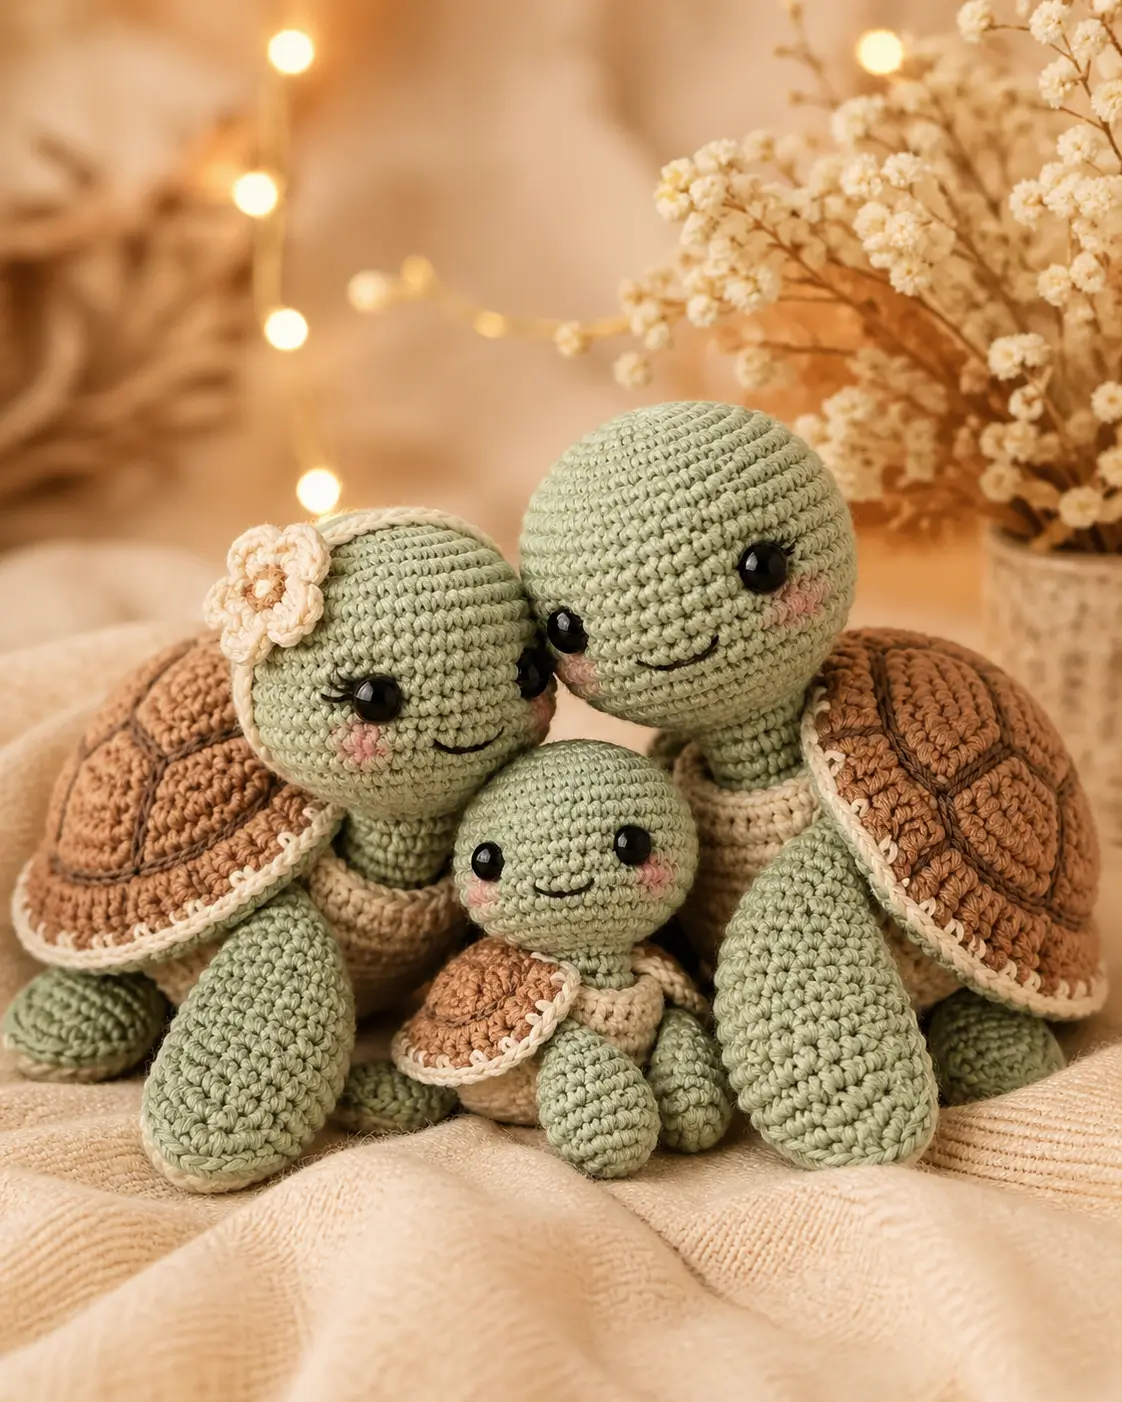
A turtle shell is not a backpack; it is the whole silhouette problem. This turtle amigurumi crochet pattern builds the head, body, shell, legs, cheeks, trim, and flower in worsted cotton with a 3.75 mm hook. The finished adult turtle sits about 15 cm tall. Use it for a matched family set where every shell still reads clean from the front.
The Design: What Makes This Turtle Different
The head is larger than a realistic turtle head because the photo style depends on a rounded face and wide eye spacing. A 36-stitch head plateau gives enough surface for 12 mm safety eyes, embroidered smile curves, and separate cheek patches without crowding. The shell is worked as a shallow dome, not a flat disc, so the caramel top sits above the cream belly and does not disappear behind the front legs.
The cream edging is structural as well as decorative. It hides the join line between shell and body, then frames the segmented shell look. In a crochet turtle pattern, the common maker mistake is placing the head too low under the shell rim. That makes the turtle amigurumi free pattern look like a snail from the front. Raise the head seam by one round and pin before sewing.
Project Info at a Glance
| Skill Level | Time | Finished Size | Hook | Best For |
|---|---|---|---|---|
| Advanced beginner | 4–5 hours | about 15 cm tall | 3.75 mm | family turtle display, nursery shelf, market table sample |
Materials and Tools
Yarn
- Sage green — worsted cotton or cotton-blend — 35–45 g — Paintbox Cotton Aran, Ricorumi XL, or similar
- Caramel brown — worsted cotton or cotton-blend — 18–25 g — shell top
- Cream — worsted cotton or cotton-blend — 15–20 g — belly, shell edging, flower
- Pale pink — worsted cotton or cotton-blend — less than 5 g — cheek patches
- Black embroidery thread — small length — smile
Tools
- Hook 3.75 mm
- 12 mm safety eyes
- Polyester stuffing
- Yarn needle
- Locking stitch markers
- Straight pins
- Scissors
Abbreviations
- MR = magic ring
- sc = single crochet
- inc = 2 sc in next stitch
- dec = invisible decrease over next 2 stitches
- sl st = slip stitch
- ch = chain
- BLO = back loop only
Use the invisible decrease on all closing rounds because a standard sc2tog leaves a visible bar across stuffed turtle curves.
Pattern — Step by Step
Continuous spiral unless noted. Counts are written at the end of every round.
Head
Yarn: sage green
R1: 6 sc in MR (6)
R2: inc ×6 (12)
R3: (sc, inc) ×6 (18)
R4: (2 sc, inc) ×6 (24)
R5: (3 sc, inc) ×6 (30)
R6: (4 sc, inc) ×6 (36)
R7–R13: sc around (36)
R14: (4 sc, dec) ×6 (30)
R15: (3 sc, dec) ×6 (24)
Insert safety eyes between R9 and R10, about 8 stitches apart. Stuff firmly at the cheek line, then add more stuffing before closing.
R16: (2 sc, dec) ×6 (18)
R17: (sc, dec) ×6 (12)
R18: dec ×6 (6)
Fasten off. Leave 25 cm tail for sewing.
Body / Belly
Yarn: cream
R1: 6 sc in MR (6)
R2: inc ×6 (12)
R3: (sc, inc) ×6 (18)
R4: (2 sc, inc) ×6 (24)
R5: (3 sc, inc) ×6 (30)
R6: (4 sc, inc) ×6 (36)
R7–R9: sc around (36)
R10: (4 sc, dec) ×6 (30)
R11: sc around (30)
R12: (3 sc, dec) ×6 (24)
R13: sc around (24)
R14: (2 sc, dec) ×6 (18)
Stuff into a flattened oval, not a ball. The underside should support the shell without rolling.
R15: (sc, dec) ×6 (12)
R16: dec ×6 (6)
Fasten off. Weave the closing tail through the front loops and pull tight.
Front Legs / Flippers
Yarn: sage green
Make 2.
R1: 6 sc in MR (6)
R2: inc ×6 (12)
R3: (sc, inc) ×6 (18)
R4–R6: sc around (18)
R7: (sc, dec) ×6 (12)
R8–R10: sc around (12)
Stuff the front half only. Leave the top flat for sewing.
Fasten off. Leave 18 cm tail.
Back Legs
Yarn: sage green
Make 2.
R1: 6 sc in MR (6)
R2: inc ×6 (12)
R3: (sc, inc) ×6 (18)
R4–R5: sc around (18)
R6: (sc, dec) ×6 (12)
R7–R8: sc around (12)
Stuff lightly. Back legs must sit lower than front legs so the body tilts forward like the photo.
Fasten off. Leave 18 cm tail.
Shell Dome
Yarn: caramel brown
R1: 6 sc in MR (6)
R2: inc ×6 (12)
R3: (sc, inc) ×6 (18)
R4: (2 sc, inc) ×6 (24)
R5: (3 sc, inc) ×6 (30)
R6: (4 sc, inc) ×6 (36)
R7–R9: sc around (36)
R10: BLO sc around (36)
R11: (4 sc, dec) ×6 (30)
Do not overstuff. The shell should be domed, with the last round cupping toward the belly.
Fasten off. Leave 30 cm tail for sewing.
Cream Shell Edging
Yarn: cream
Join cream yarn in any front loop left from Shell R10.
R1: ch 1, sc in each exposed front loop around, sl st to first sc (36)
R2: (sl st, ch 1) in each stitch around (36 textured edge)
Fasten off. Weave tail under the edging.
Shell Segment Lines
Yarn: cream
Cut three 35 cm strands of cream yarn.
Line 1: embroider from shell center to front edge.
Line 2: embroider from shell center to left back edge.
Line 3: embroider from shell center to right back edge.
Keep all lines shallow. Long floats snag, so pass through the shell fabric every 2–3 stitches.
Fasten off each strand inside the shell.
Tail
Yarn: sage green
R1: 6 sc in MR (6)
R2: sc around (6)
R3: (sc, inc) ×3 (9)
R4: sc around (9)
Do not stuff unless the yarn is very soft.
Fasten off. Leave 15 cm tail.
Cheek Patches
Yarn: pale pink
Make 2.
R1: 6 sc in MR (6)
R2: inc ×6 (12)
Sl st to next stitch (12)
Fasten off. Leave 12 cm tail. Flatten the circle before sewing.
Flower Accessory
Yarn: cream
R1: 6 sc in MR, sl st to first sc (6)
R2: [ch 3, 2 dc in same stitch, ch 3, sl st in same stitch, sl st in next stitch] ×5
Fasten off. Leave 20 cm tail.
Flower Center
Yarn: caramel brown
R1: 6 sc in MR (6)
Sl st to first sc (6)
Fasten off. Sew the center to the flower.
Optional Baby Turtle Scaling
Use the same pattern with DK yarn, a 2.5 mm hook, and 8 mm eyes for a smaller turtle. Stop the head at 30 stitches by omitting R6 and working only R6–R11 as the plateau. The shell and body should also stop at 30 stitches. Keep the cheek patches at 6 stitches only, with no second round.
Assembly
- Pin the head to the front of the cream body between body R8 and R13, with the eye line facing forward.
- Sew the head to the body using small stitches through one body stitch and one head stitch at a time.
- Pin the caramel shell over the back of the body, leaving the head seam visible from the front.
- Sew the shell to the body under the cream edging so the attachment stitches stay hidden.
- Place the front legs at the lower front corners, angled outward, and sew each across 6 body stitches.
- Place the back legs behind the front legs, lower by one round, and sew each across 5 body stitches.
- Attach the tail at the back center under the shell rim.
- Sew the cheek patches below the eyes, one round lower than the eye posts.
- Embroider a shallow smile with black thread across 5–6 stitches.
- Sew the flower above one eye, slightly off-center, and tack down one petal to stop rotation.
The turtle is complete when the shell sits level and all four legs touch the surface.
7 Technical Tips
- Use a stitch marker on every round start. A one-stitch drift on the shell moves the segment lines off center and makes the cream trim look twisted.
- Stuff the head to firm resistance, about the feel of a tight tennis ball. Understuffing leaves dents beside 12 mm eyes.
- Work every decrease as an invisible decrease through front loops only. A standard decrease forms a horizontal scar across the cheeks and shell closing rounds.
- Place the safety eyes before Head R16. After the opening drops to 18 stitches, the washer is difficult to seat flat inside the head.
- Keep the shell stuffing thinner than the head stuffing. A shell packed to the same firmness becomes a dome ball and lifts the legs off the table.
- Pin the head, shell, and all four legs before sewing anything. A 5 mm shift in head height changes the turtle from front-facing to downward-looking.
- Weave tails through stuffed sections in three direction changes. A single straight tail path can slide out when the toy is handled.
Conclusion
This turtle amigurumi crochet pattern uses a large head, shallow shell dome, cream edging, four stable legs, and small cheek patches to match the sage turtle family shown in the reference photo. Make the adult first, then scale down with DK yarn for the baby so the proportions stay related. For the next step, pin the full turtle together before sewing and check the shell line from the front, not the top. Share the finished turtle on Pinterest and Instagram with #SageShellTurtle. Which shell detail will you keep for your version: cream edging only, or cream edging plus embroidered segment lines?









