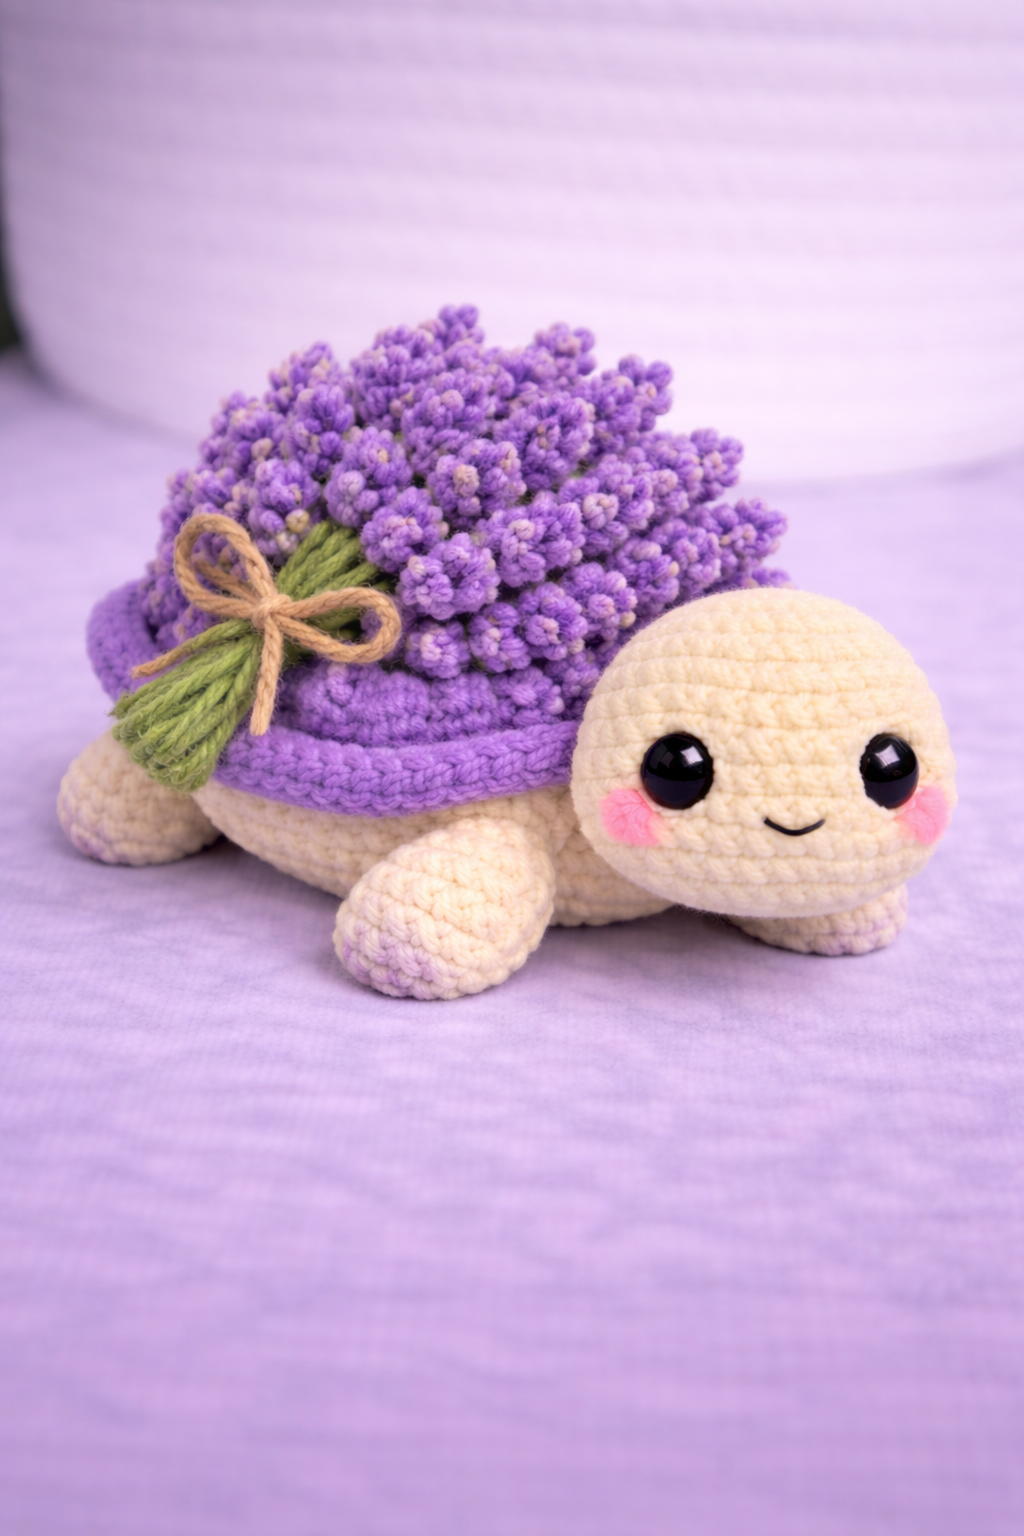
A turtle carrying lavender has a weight-distribution problem before it has a shell problem. This lavender turtle amigurumi solves that with super bulky plush yarn, a 4 mm hook, a compact 15–16 cm finish, and beginner-to-advanced-beginner shaping that stays low to the table. It works as spring décor, market stock, or a scented-gift lookalike without adding real dried stems.
The Design: What Makes This Lavender Turtle Different
The photo reads as a turtle first, bouquet second. That matters. The head is oversized and set low, so the plush keeps a forward, resting posture instead of tipping backward under the floral shell. The shell itself needs two layers of control: a stable base ring and a raised rim that contains the lavender mass. Without that rim, clustered stitches slide visually into a mound rather than a shell.
You also need restraint on leg size. Large flippers work on sea turtles, but a bouquet turtle looks more convincing with short, rounded feet that keep the body close to the surface. A common mistake in a flower turtle crochet pattern is overstuffing the body before the shell is attached. The result is a barrel shape. In this version, the maker places structure in the shell and bouquet, not in body bulk. That is why crochet lavender turtle designs read cleaner when the torso stays shallow and wide.
Project Info at a Glance
| Skill Level | Time | Finished Size | Hook | Best For |
|---|---|---|---|---|
| Advanced beginner | 4–6 hours | 15–16 cm | 4.0 mm | décor plush, spring markets, themed gifts |
Size and hook are based on comparable flower-turtle sources using super bulky plush yarn.
Materials and Tools
Yarn
- Cream — super bulky plush/chenille — about 40 g — Premier Parfait Chunky or similar benchmark yarn
- Lavender purple — super bulky plush/chenille — about 20 g — same yarn family for shell rim/base
- Lilac boucle or textured yarn scraps — small amount — for clustered lavender buds
- Sage green — small amount — for stems
- Pink — very small amount — for cheek patches
- Natural jute or beige cotton — short length — for the bow
Tools
- Hook 4.0 mm
- Safety eyes 10 mm
- Polyester stuffing
- Yarn needle
- Stitch markers
- Small scissors
- Black embroidery thread for the smile
Abbreviations
MR = magic ring, sc = single crochet, inc = increase, dec = decrease, sl st = slip stitch, ch = chain, BLO = back loop only, bob = bobble stitch.
Use an invisible decrease on all shaping rounds where the head or body closes; it keeps the plush surface flatter than a standard two-loop decrease.
Pattern — Step by Step
Continuous spiral unless noted.
Head (Make 1)
Yarn: cream
R1: 6 sc in MR (6)
R2: inc x6 (12)
R3: (sc, inc) x6 (18)
R4: (2 sc, inc) x6 (24)
R5: (3 sc, inc) x6 (30)
R6: (4 sc, inc) x6 (36)
R7–11: sc around (36)
R12: (4 sc, dec) x6 (30)
R13: (3 sc, dec) x6 (24)
Insert 10 mm safety eyes between R9 and R10, about 9 sts apart. Add embroidered smile one round below.
R14: (2 sc, dec) x6 (18)
Stuff firmly, but keep the lower half slightly flatter than the top.
R15: (sc, dec) x6 (12)
R16: dec x6 (6)
Fasten off. Leave a 20 cm tail.
Body (Make 1)
Yarn: cream
R1: 6 sc in MR (6)
R2: inc x6 (12)
R3: (sc, inc) x6 (18)
R4: (2 sc, inc) x6 (24)
R5: (3 sc, inc) x6 (30)
R6: (4 sc, inc) x6 (36)
R7–9: sc around (36)
R10: (4 sc, dec) x6 (30)
R11: (3 sc, dec) x6 (24)
Stuff lightly. This body should stay low, not spherical.
R12: (2 sc, dec) x6 (18)
R13: (sc, dec) x6 (12)
R14: dec x6 (6)
Fasten off. Leave a 20 cm tail.
Front Legs (Make 2)
Yarn: cream
R1: 6 sc in MR (6)
R2: inc x6 (12)
R3–4: sc around (12)
R5: (4 sc, dec) x2 (10)
R6: sc around (10)
Stuff the front half only.
Fasten off. Leave a 15 cm tail.
Back Legs (Make 2)
Yarn: cream
R1: 6 sc in MR (6)
R2: inc x6 (12)
R3: sc around (12)
R4: (4 sc, dec) x2 (10)
R5: sc around (10)
Back legs sit lower; use less stuffing than the front legs.
Fasten off. Leave a 15 cm tail.
Shell Base (Make 1)
Yarn: lavender purple
R1: 6 sc in MR (6)
R2: inc x6 (12)
R3: (sc, inc) x6 (18)
R4: (2 sc, inc) x6 (24)
R5: (3 sc, inc) x6 (30)
R6: (4 sc, inc) x6 (36)
R7: BLO sc around (36)
R8: sc around (36)
Fasten off. Leave a 25 cm tail.
Shell Rim (Make 1)
Yarn: lavender purple
Ch 26.
Row 1: Starting in 2nd ch from hook, 25 sc, ch 1, turn (25)
Row 2–4: 25 sc, ch 1, turn (25)
Fasten off. Leave a 30 cm tail.
Sew the short ends together to form a ring, then attach around Shell Base R7/R8 to create the raised basket edge.
Tail (Make 1)
Yarn: cream
R1: 4 sc in MR (4)
R2: sc around (4)
R3: (sc, dec) once, 1 sc (3)
Fasten off. Leave a 10 cm tail.
Cheek Patches (Make 2)
Yarn: pink
R1: 6 sc in MR (6)
Sl st to first sc.
Fasten off. Leave a short tail.
Flatten before sewing or gluing in place.
Lavender Sprigs (Make 18–22)
Yarn: lilac textured yarn + sage green stem yarn
With sage green, ch 8.
Working back down the chain: sl st in next ch, then in each remaining ch to base.
Join lilac at the top third of the stem.
Make 3 tiny bobbles or popcorn-style buds spaced over the upper 4 chain positions.
Fasten off. Leave a 10 cm tail.
Make more sprigs for denser coverage. Vary lengths slightly so the bouquet looks bundled, not flat.
Lavender Bouquet Pad (Make 1)
Yarn: lavender purple
R1: 6 sc in MR (6)
R2: inc x6 (12)
R3: (sc, inc) x6 (18)
R4: (2 sc, inc) x6 (24)
R5: sc around (24)
Fasten off. Leave a 25 cm tail.
Sew this pad inside the shell rim and use it as the anchor surface for the sprigs.
Bow (Make 1)
Yarn: jute or beige cotton
Cut one 18 cm strand and one 8 cm strand.
Form two loops with the long strand.
Wrap the short strand around the center three times and knot at back.
Trim ends.
Tie around a small bundle of 4–5 sprigs before attaching to shell.
Assembly
- Sew the head to the front third of the body, slightly angled upward.
- Sew the front legs beside the head seam, one on each side.
- Sew the back legs near the rear third of the body so the turtle sits level.
- Attach the tail centered at the back.
- Sew the cheek patches below and slightly outside each eye.
- Stitch the shell base to the upper body, keeping the edge even all the way around.
- Form the shell rim into a ring and sew it around the shell base perimeter.
- Sew the lavender bouquet pad inside the rim.
- Attach the lavender sprigs densely to the pad, starting at the center and working outward; tie a small cluster together first for the front-left bundle detail.
- Add the bow over that bundled section and trim tails neatly.
The completed plush should rest flat, with the shell bouquet centered behind the head.
7 Technical Tips
- Mark every increase round. Miss one increase on the head and the eye line shifts off-center by the time you reach 36 stitches.
- Keep body stuffing lighter than head stuffing. A firm torso under a floral shell creates a barrel shape and lifts the turtle too high off the surface.
- Use invisible decreases on R12–R16 of the head. Standard decreases leave a visible ridge that shows strongly in cream chenille.
- Insert eyes before the final two decrease rounds. Waiting until the head closes below 18 stitches makes washer placement awkward and can distort the face.
- Control textured lavender yarn tension. Pulling bobbles too tight makes the sprigs collapse inward instead of reading as clustered buds.
- Pin the shell rim in four quadrants first. Without quarter-point pinning, the rim drifts and looks oval from above.
- Weave bouquet tails downward into the pad, not sideways into the rim. Sideways weaving adds bulk to one edge and makes the shell tilt visually.
Conclusion
This lavender turtle amigurumi works because the shell reads as a contained bouquet, not a pile of random texture. The verified benchmark puts the project in the 15–16 cm range with super bulky plush yarn, a 4 mm hook, and small safety eyes, which keeps the shape compact and stable. Start with the head and body first, test the posture on a table, then build the shell rim before adding any lavender sprigs. When it is finished, share one overhead photo for Pinterest and one side view for Instagram with #LavenderTurtlePattern. For this character, the useful question is simple: did you keep the bouquet low and rounded, or let it rise into a tall dome?









