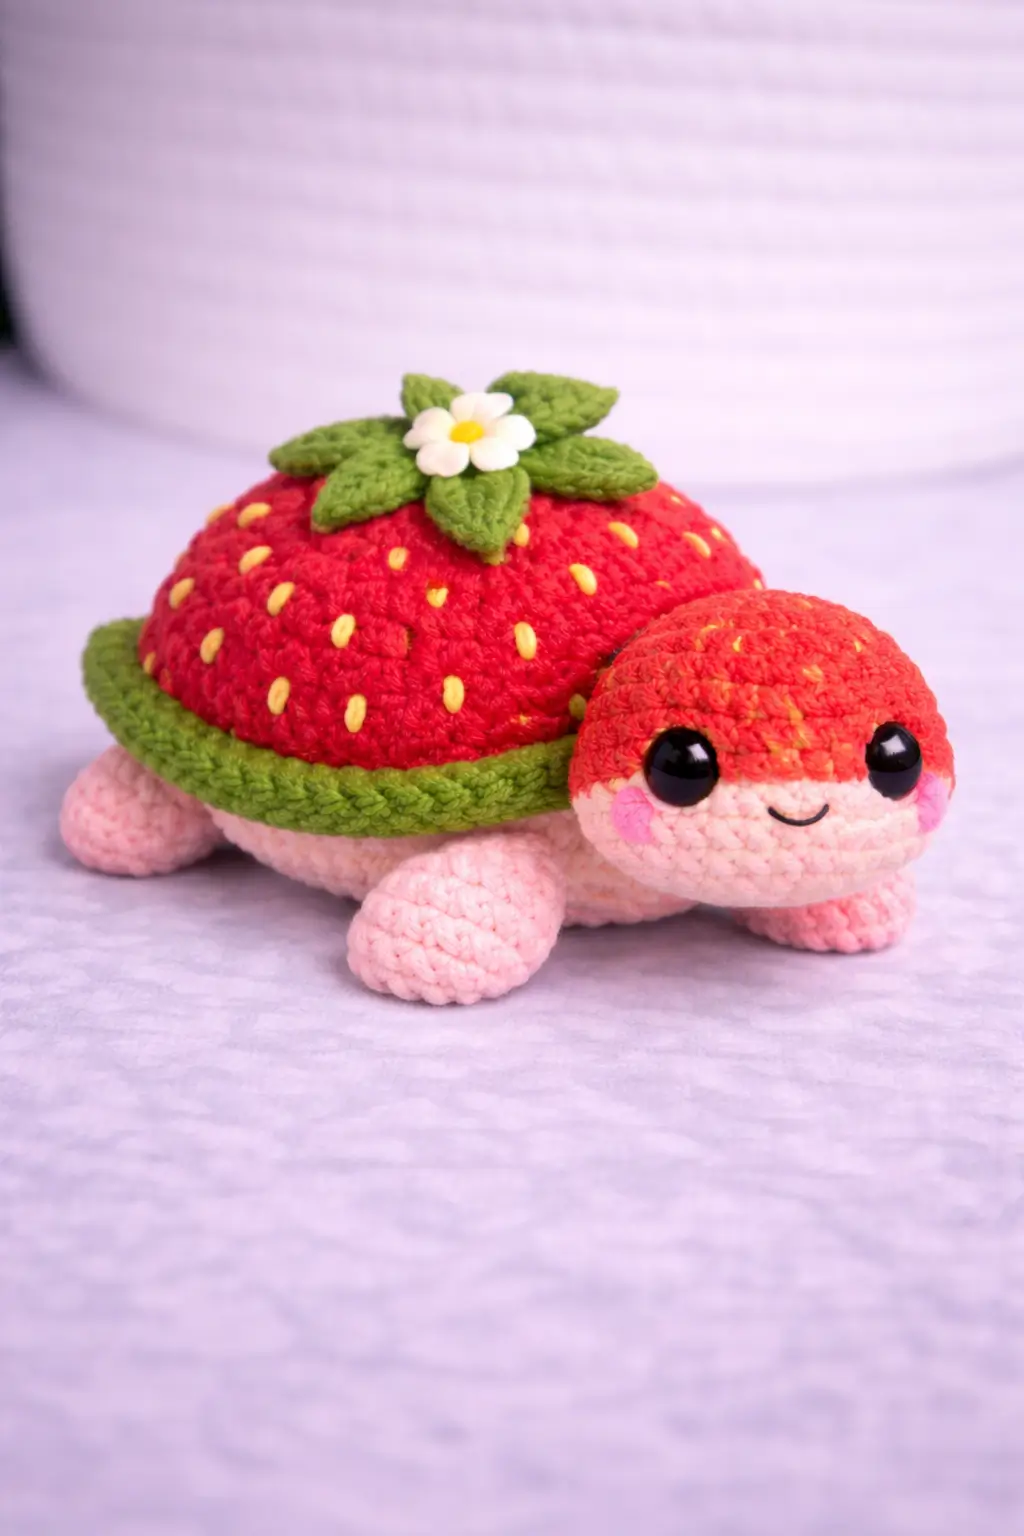
Turtles do not grow strawberries on their backs, so the shell has to read as fruit before it reads as armor. This strawberry turtle amigurumi crochet pattern uses worsted yarn, a 3.5 mm hook, and medium shaping to build a 10–12 cm plush with separate parts, moderate stitch control, and a stable base. It works well for spring market tables because the silhouette is legible from a distance.
The Design: What Makes Strawberry Turtle Different
A standard turtle shell is a low dome with even segmentation. A strawberry version needs a higher crown, a clear green transition band, and top foliage that sits flat instead of collapsing backward. Those three choices change the whole build. The red cap has to project beyond the body line. The leaf ring has to interrupt the shell edge. The flower must sit above the visual center, not at the exact center, or the shell reads like a pin cushion.
The common mistake is making the face too long. When the snout extends past the shell line, the fruit illusion weakens. In most strawberry turtle crochet pattern results, the strongest versions keep the head shallow and wide. Several published patterns also lean on compact sizes and simple fin shapes, which supports this proportion choice.
Project Info at a Glance
| Skill Level | Time | Finished Size | Hook | Best For |
|---|---|---|---|---|
| Easy–Intermediate | 4–6 hours | 10–12 cm | 3.5 mm | gifts, desk decor, spring markets |
Finished size and hook range align with published strawberry turtle references using sport cotton or similar compact construction.
Materials and Tools
Yarn
- Strawberry red — light worsted / sport-heavy blend — about 20 g — cotton or cotton-acrylic blend
- Blush pink — light worsted — about 20 g — for body and limbs
- Leaf green — light worsted — about 10 g — for crown and shell border
- Cream or pale pink — scraps — for muzzle underside
- White — scraps — for flower petals
- Yellow — scraps — for flower center and seed embroidery
Tools
- Hook 3.5 mm
- Safety eyes 8–10 mm
- Stuffing
- Tapestry needle
- Stitch markers
- Black embroidery thread
Published strawberry turtle patterns commonly use 3.0–3.5 mm with sport cotton, 4 mm with bulky yarn, and 8 mm or larger eyes depending on scale.
Abbreviations
MR / sc / inc / dec / sl st / ch / BLO / FLO
Invisible decrease joins two front loops before completing the stitch, which reduces bulk at the closing rounds.
Pattern — Step by Step
Continuous spiral unless noted.
Head (Make 1)
Yarn: blush pink — Standard amigurumi math based on photo
R1: 6 sc in MR (6)
R2: inc x6 (12)
R3: (sc, inc) x6 (18)
R4: (2 sc, inc) x6 (24)
R5: (3 sc, inc) x6 (30)
R6: (4 sc, inc) x6 (36)
R7: sc around (36)
R8: sc around (36)
R9: sc around (36)
R10: sc around (36)
R11: sc around (36)
Insert safety eyes between R8 and R9, 8 sts apart.
R12: (4 sc, dec) x6 (30)
R13: (3 sc, dec) x6 (24)
R14: (2 sc, dec) x6 (18)
Stuff firmly, keeping the front broad rather than tall.
R15: (sc, dec) x6 (12)
R16: dec x6 (6)
Fasten off. Leave a 25 cm tail.
Muzzle Underside (Make 1)
Yarn: cream — Standard amigurumi math based on photo
Ch 7.
R1: Starting in 2nd ch from hook, 5 sc, 3 sc in last ch, 4 sc on opposite side, inc in last (14)
R2: inc, 4 sc, inc x3, 4 sc, inc x2 (20)
R3: sc around (20)
Fasten off. Leave a 20 cm tail.
Body (Make 1)
Yarn: blush pink — Standard amigurumi math based on photo
R1: 6 sc in MR (6)
R2: inc x6 (12)
R3: (sc, inc) x6 (18)
R4: (2 sc, inc) x6 (24)
R5: (3 sc, inc) x6 (30)
R6: (4 sc, inc) x6 (36)
R7: sc around (36)
R8: sc around (36)
R9: BLO sc around (36)
R10: sc around (36)
R11: sc around (36)
R12: (4 sc, dec) x6 (30)
R13: (3 sc, dec) x6 (24)
R14: (2 sc, dec) x6 (18)
Stuff the center firmly and keep the lower edge level.
R15: (sc, dec) x6 (12)
R16: dec x6 (6)
Fasten off. Leave a 25 cm tail.
Front Legs (Make 2)
Yarn: blush pink — Standard amigurumi math based on photo
R1: 6 sc in MR (6)
R2: inc x6 (12)
R3: sc around (12)
R4: sc around (12)
R5: (4 sc, dec) x2 (10)
Light stuffing only in the first half.
Flatten piece.
R6: 5 sc through both layers (5)
Fasten off. Leave a 20 cm tail.
Back Legs (Make 2)
Yarn: blush pink — Standard amigurumi math based on photo
R1: 6 sc in MR (6)
R2: inc x6 (12)
R3: sc around (12)
R4: (4 sc, dec) x2 (10)
Back legs sit slightly flatter than the front pair.
Flatten piece.
R5: 5 sc through both layers (5)
Fasten off. Leave a 20 cm tail.
Strawberry Shell Cap (Make 1)
Yarn: strawberry red — Shape informed by published strawberry turtle shell proportions and photo reference.
R1: 6 sc in MR (6)
R2: inc x6 (12)
R3: (sc, inc) x6 (18)
R4: (2 sc, inc) x6 (24)
R5: (3 sc, inc) x6 (30)
R6: (4 sc, inc) x6 (36)
R7: sc around (36)
R8: sc around (36)
R9: sc around (36)
R10: FLO sc around (36)
R11: sc around (36)
R12: sc around (36)
Fasten off. Leave a 30 cm tail.
Do not overstuff this piece; it sits as a cap over the body.
Leaf Border / Shell Skirt (Make 1)
Yarn: leaf green — Standard edging to match photo
Join green yarn into FLO of Shell Cap R10.
R1: (5 sc, inc) x6 (42)
R2: (sl st, ch 5, working back: sc in 2nd ch, hdc, hdc, sc, skip next 2 sts on base, sl st in next st) repeat 6 times
Fasten off. Weave tail in.
Top Leaves (Make 5)
Yarn: leaf green — Inspired by the five-point leaf format documented in mini strawberry turtle patterns.
R1: 5 sc in MR (5)
R2: In each stitch work: sl st, ch 5, sc in 2nd ch, hdc, dc, hdc; sl st into next base st across all 5 points
Fasten off. Leave a 12 cm tail.
Tail (Make 1)
Yarn: blush pink — Standard amigurumi math based on photo
R1: 4 sc in MR (4)
R2: sc around (4)
R3: (sc, inc) x2 (6)
Fasten off. Leave a 12 cm tail.
Cheek Patches (Make 2)
Yarn: pale pink — Standard flat circle
R1: 6 sc in MR (6)
R2: inc x6 (12)
Fasten off. Leave a 10 cm tail.
Flower Center (Make 1)
Yarn: yellow — Standard flat circle
R1: 6 sc in MR (6)
Fasten off. Leave a 10 cm tail.
Flower Petals (Make 1)
Yarn: white — Standard embellishment based on photo
R1: 5 sc in MR (5)
R2: In each stitch work (sl st, ch 3, 2 dc in next ch space effect, sl st in same base stitch) x5 petals
Fasten off. Leave a 12 cm tail.
Seed Embroidery
Yarn: yellow — Photo detail
Embroider small vertical satin stitches across the shell cap. Place them in staggered rows rather than straight columns.
Face Embroidery
Yarn: black embroidery thread — Photo detail
Sew a shallow curved smile centered under the eyes. Keep the mouth width under one eye spacing.
Assembly
- Sew the muzzle underside to the lower front of the head.
- Add cheek patches below and slightly outside the eyes.
- Embroider the smile between the cheek patches.
- Sew the head to the front third of the body.
- Attach the front legs beside the neck seam.
- Attach the back legs near the rear curve, keeping all four feet level.
- Sew the tail centered at the back.
- Place the shell cap on top of the body so the red dome overhangs slightly at both sides.
- Stitch the five top leaves into a star, then add the flower slightly off-center above them.
- Embroider the shell seeds and adjust the leaf border so it sits evenly around the shell base.
The piece is complete when the shell reads as a strawberry from above and a turtle from profile view.
7 Technical Tips
- Mark the first stitch of every round. Losing one increase round on the shell shifts the dome and the leaf border will ripple on one side.
- Stuff the head firmer than the body. A soft head collapses under the shell line and the face stops reading cleanly from the front.
- Use invisible decreases on the closing rounds of the head and body. Regular decreases leave raised corners that show through light yarn.
- Insert the eyes before the final decrease section. Waiting until the opening is under 18 stitches makes washer placement awkward and can distort the face.
- Keep shell stuffing lighter than body stuffing. Overfilled shell caps bulge upward and the top leaves tip backward.
- Pin all four legs before sewing. A difference of even 3–4 mm in leg height changes the resting angle of the finished turtle.
- Weave tails back through at least two direction changes. A single straight pass in smooth cotton can work loose around the shell seam after handling.
Conclusion
A good strawberry turtle amigurumi crochet pattern depends on silhouette discipline more than novelty. The shell has to stay broad, the face has to stay short, and the green details need clear placement breaks so the fruit idea reads at first glance. Next, swatch your chosen yarn with the head rounds before making the full set of parts. Then pin the shell cap in place and check the side profile before sewing. Share the finished piece on Pinterest and Instagram with #StrawberryTurtlePattern. One useful comparison remains: did your top flower sit better centered, or slightly forward between the first two leaves?









