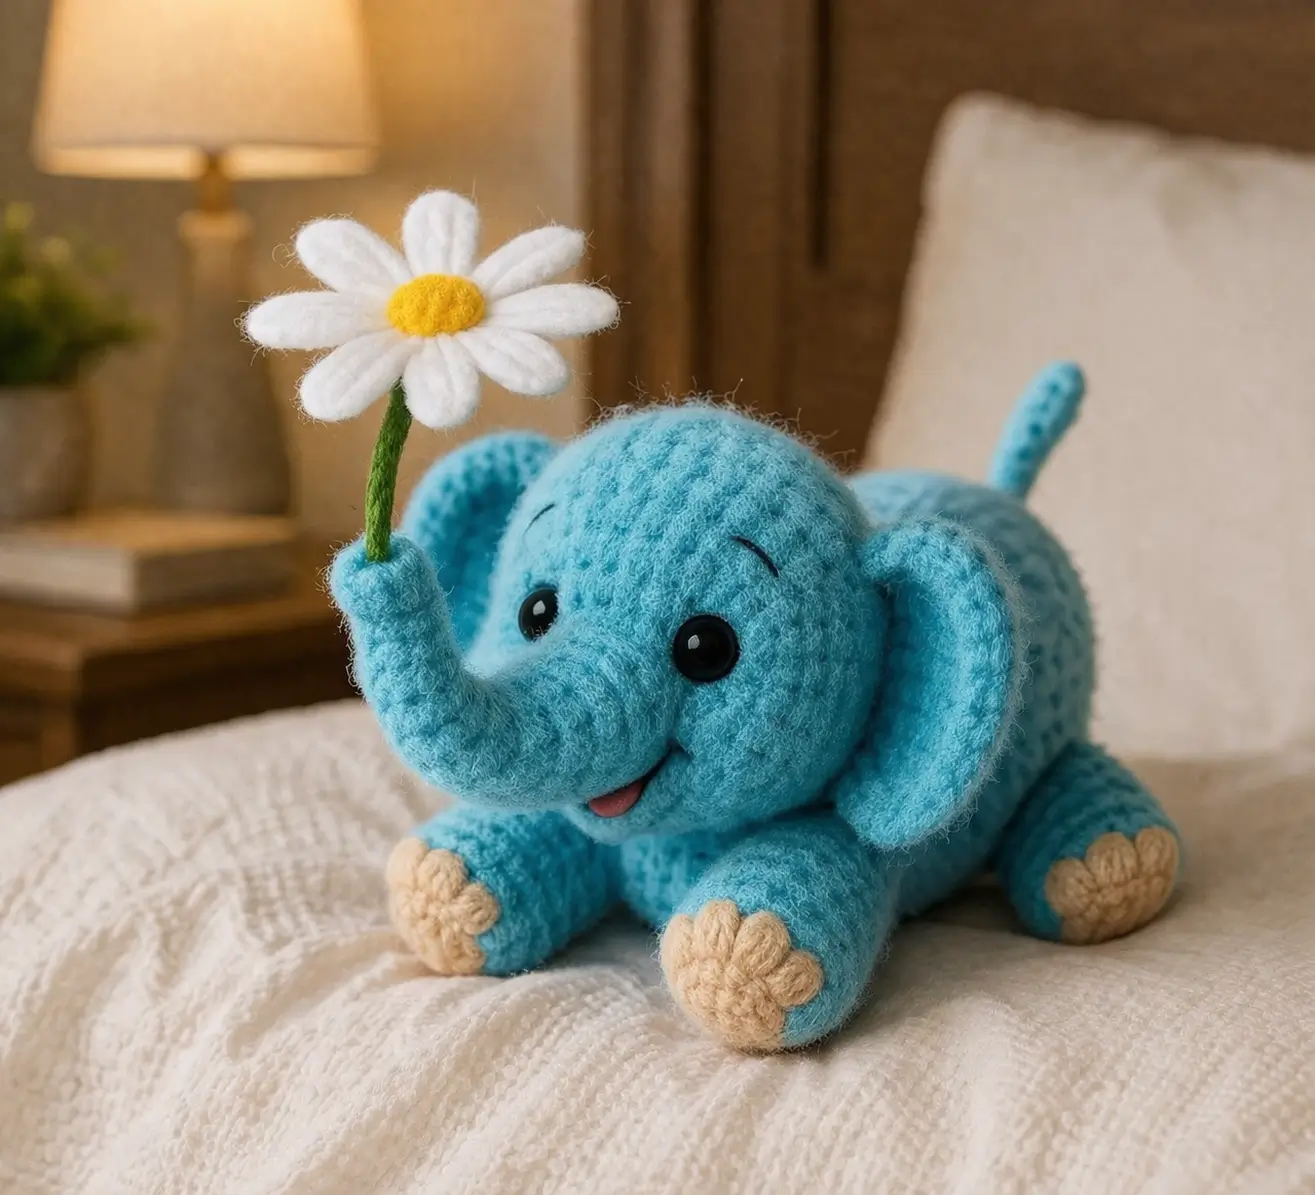
An elephant trunk throws the center of gravity forward. This elephant amigurumi crochet pattern corrects that with a low body, short legs, fuzzy worsted yarn, a 2.75 mm hook, and a finished palm-size profile. Skill level sits at confident beginner to intermediate. The daisy prop gives the piece a practical role for nursery decor, flat-lay content, or spring market tables.
The Design: What Makes This Elephant Different
This elephant uses a separate trunk rather than extending the head cone too far forward. That choice keeps the forehead round and leaves room for large eyes placed low on the face. Compact elephants also need ear spread without side collapse. A half-moon ear with a worked edge solves that better than a full flat circle. Another structural decision is the low rectangle body. It shifts bulk backward so the raised flower trunk does not pull the toy onto its face.
A common mistake with a mini elephant amigurumi is overstuffing the muzzle side of the head. The result is a blunt snout, narrow eye spacing, and ears that angle backward. In a crochet elephant plush, shape control matters more than raw stitch count.
Project Info at a Glance
| Skill Level | Time | Finished Size | Hook | Best For |
|---|---|---|---|---|
| Confident beginner / intermediate | 4–6 hours | approx. 16 cm long, 8 cm high | 2.75 mm | Nursery shelf, gift topper, spring display |
Materials and Tools
Yarn
- Light aqua blue — fuzzy worsted — approx. 85 g — brushed acrylic or halo cotton blend
- Cream/beige — fuzzy worsted — approx. 8 g — for toe pads
- White — smooth DK/worsted — approx. 4 g — for daisy petals
- Yellow — smooth DK/worsted — approx. 2 g — for flower center
- Green — smooth DK/worsted — approx. 3 g — for stem
- Pink — small scrap — for tongue
Tools
- Hook 2.75 mm
- 12 mm safety eyes
- Polyester stuffing
- Tapestry needle
- Stitch markers
- Black embroidery thread
- Pins
Abbreviations
MR / sc / inc / dec / sl st / ch / BLO / FLO
Invisible decrease: work through the front loops of the next two stitches before completing one single crochet so the decrease line stays flatter on the outside.
Pattern — Step by Step
Continuous spiral unless noted.
Head (Make 1)
Yarn: aqua blue
R1: 6 sc in MR (6)
R2: inc x6 (12)
R3: (1 sc, inc) x6 (18)
R4: (2 sc, inc) x6 (24)
R5: (3 sc, inc) x6 (30)
R6: (4 sc, inc) x6 (36)
R7-R11: sc around (36)
R12: (4 sc, dec) x6 (30)
R13: sc around (30)
R14: (3 sc, dec) x6 (24)
Insert safety eyes between R10 and R11, spaced 8 stitches apart. Stuff firmly at the forehead, lighter at the lower face.
R15: (2 sc, dec) x6 (18)
R16: (1 sc, dec) x6 (12)
R17: dec x6 (6)
Fasten off. Close opening. Leave 15 cm tail.
Trunk (Make 1)
Yarn: aqua blue
R1: 6 sc in MR (6)
R2-R5: sc around (6)
R6: (2 sc, inc) x2 (8)
R7: sc around (8)
R8: (3 sc, inc) x2 (10)
R9-R10: sc around (10)
R11: (4 sc, inc) x2 (12)
R12-R13: sc around (12)
Fasten off. Leave 20 cm tail. Light stuffing only in the lower half.
Body (Make 1)
Yarn: aqua blue
R1: 6 sc in MR (6)
R2: inc x6 (12)
R3: (1 sc, inc) x6 (18)
R4: (2 sc, inc) x6 (24)
R5: (3 sc, inc) x6 (30)
R6: (4 sc, inc) x6 (36)
R7-R12: sc around (36)
R13: (4 sc, dec) x6 (30)
R14: sc around (30)
R15: (3 sc, dec) x6 (24)
Stuff the rear more firmly than the chest. The body should stay broad, not spherical.
R16: (2 sc, dec) x6 (18)
R17: (1 sc, dec) x6 (12)
R18: dec x6 (6)
Fasten off. Close opening. Leave 18 cm tail.
Front Legs (Make 2)
Yarn: aqua blue with cream toe pads
R1: 6 sc in MR (6)
R2: inc x6 (12)
R3-R6: sc around (12)
R7: (4 sc, dec) x2 (10)
R8-R9: sc around (10)
Flatten top and crochet 5 sc through both layers to close (5)
Fasten off. Leave 18 cm tail. Stuff lower 70% only.
Back Legs (Make 2)
Yarn: aqua blue with cream toe pads
R1: 6 sc in MR (6)
R2: inc x6 (12)
R3-R5: sc around (12)
R6: (4 sc, dec) x2 (10)
R7-R8: sc around (10)
Flatten top and crochet 5 sc through both layers to close (5)
Fasten off. Leave 18 cm tail. Stuff lower half only.
Ears (Make 2)
Yarn: aqua blue
R1: 6 sc in MR (6)
R2: inc x6 (12)
R3: (1 sc, inc) x6 (18)
R4: (2 sc, inc) x6 (24)
R5: sc around (24)
Fold slightly off-center and work 10 sc through both sides across the top edge to give a cupped shape (10)
Fasten off. Leave 15 cm tail.
Tail (Make 1)
Yarn: aqua blue
Row 1: ch 8
Row 2: sl st in 2nd ch from hook and in each ch across (7)
Fasten off. Fringe the end lightly. Leave 10 cm tail.
Toe Pads (Make 4)
Yarn: cream
R1: 6 sc in MR (6)
R2: (2 sc, inc) x2 (8)
Fasten off. Leave 12 cm tail.
Cheek Patches (Make 2)
Yarn: aqua blue or very pale aqua
R1: 6 sc in MR (6)
R2: inc x6 (12)
Fasten off. Leave 12 cm tail.
Tongue (Make 1)
Yarn: pink
R1: 4 sc in MR (4)
R2: (1 sc, inc) x2 (6)
Fasten off. Leave 10 cm tail.
Daisy Petals Unit (Make 1)
Yarn: white
R1: 6 sc in MR (6)
R2: (1 sc, inc) x6 (18)
R3: (ch 5, sl st in 2nd ch from hook, 3 sl st back down, sl st in next base stitch) x9 petals total
Fasten off. Leave 12 cm tail.
Daisy Center (Make 1)
Yarn: yellow
R1: 6 sc in MR (6)
R2: inc x6 (12)
Fasten off. Leave 12 cm tail.
Stem (Make 1)
Yarn: green
Row 1: ch 16
Row 2: sl st in 2nd ch from hook and each ch across (15)
Fasten off. Leave 15 cm tails at both ends.
Assembly
- Sew the trunk to the lower half of the head, centered, with the top of the trunk opening landing between rounds 8 and 12.
- Stitch the tongue just under the trunk seam so only the curved tip remains visible.
- Embroider the mouth corners from the trunk base outward for a shallow smile.
- Place the safety eyes if not already installed, then embroider short curved brows two rounds above them.
- Sew the head to the front third of the body. Tip it down by a few degrees so the trunk projects forward, not upward.
- Attach the front legs directly under the head seam. The bottoms should extend slightly ahead of the chest.
- Attach the back legs near the rear body third so the elephant rests in a low crouch.
- Sew the ears to the sides of the head with the cupped edge facing forward. Start the top of each ear around head round 7 and end near round 13.
- Add cheek patches low on the face, then sew one cream toe pad to the front of each leg.
- Join the daisy center to the petal unit, sew the stem behind it, then tack the stem into the raised trunk and add the tail at the back seam.
The finished toy should rest on four contact points with the trunk lifted clear of the surface.
7 Technical Tips
- Mark the first stitch of every round on the head and body. Losing one stitch at the 36-stitch plateau shifts the face center by up to 10 degrees.
- Stuff the forehead firmly, then reduce fill under the eye line. Too much fill below the eyes rounds the muzzle and shortens the visual trunk length.
- Use invisible decreases on rounds 12, 14, 15, 16, and 17 of the head. Standard decreases leave a stepped line that shows through halo yarn when side-lit.
- Install 12 mm eyes before the head closes past 24 stitches. Waiting until 18 stitches makes washer placement awkward and can roughen the halo fibers around the socket.
- Brush-texture yarn hides joins but also hides split stitches. Slow down on the ears, because a missed increase there cuts the spread from 24 to 23 and the cup will twist.
- Pin all four legs before sewing. A front-leg spacing error of even 5 mm changes the trunk clearance and can make the flower touch the table.
- Weave tails through at least three direction changes. A single straight pass can creep out of fuzzy yarn after repeated handling, especially on the daisy stem.
Conclusion
This build keeps the focus on proportion. The trunk is narrow first, wider later. The ears sit large and low. The body stays flatter than a standard seated plush, which is why the flower reads clearly in profile. For a blog post built around a photo reference, that structural match matters more than copying any published elephant line for line. Work the sample once in plain acrylic, then repeat it in brushed yarn for the final finish. Share the result on Pinterest and Instagram with one side profile and one overhead photo. Use #ElephantDaisyPattern. Which detail matters more on this elephant: a longer trunk curve or a wider ear cup?









