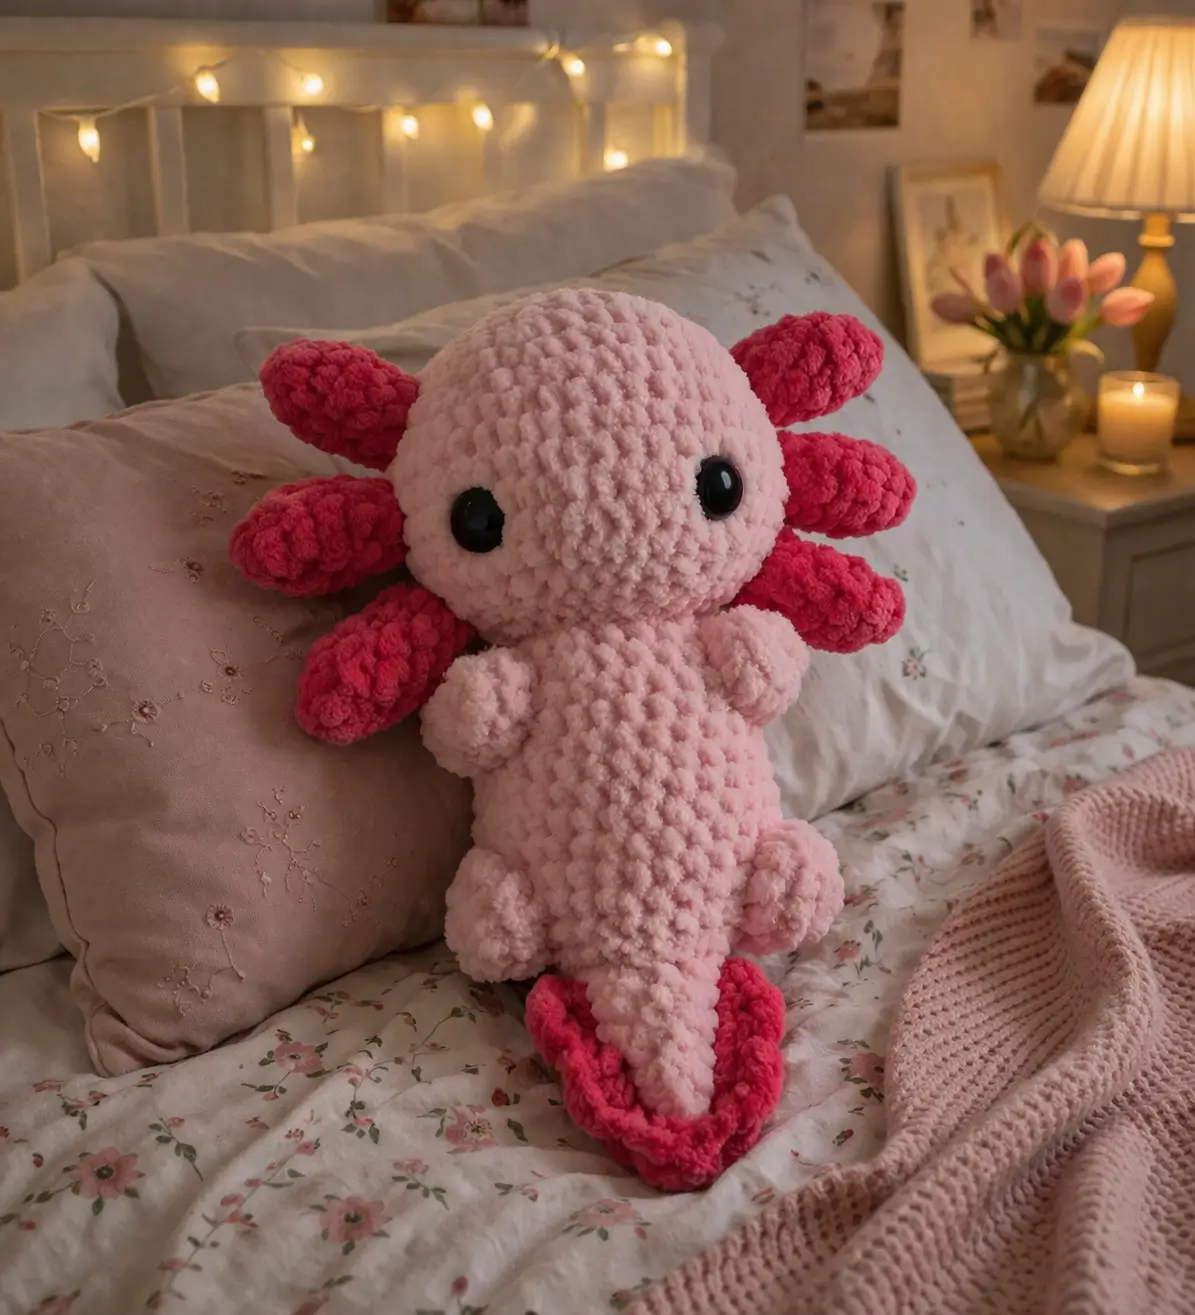
Axolotls carry their feathery external gills for life. That is the first proportion problem this axolotl amigurumi crochet pattern has to solve. This version uses plush chenille yarn, a 5.0 mm hook, and a medium-size body plan that lands close to 23 cm in the common chunky format. It suits an advanced beginner who can track spiral rounds and place symmetrical parts. The result works well as nursery decor or a desk plush.
The Design: What Makes Axolotl Different
The axolotl shape depends on contrast, not complexity. First, the head has to read larger than the body. That oversized ratio matches real axolotl-inspired plush styling and stops the toy from drifting into generic salamander territory. Second, the three gills on each side need more width than length. Long narrow gills flatten visually in chenille; short padded ones hold their silhouette better. Third, the tail has to taper before the fin starts. Without that necked-down section, the back end looks like a fish paddle instead of an amphibian tail. A common mistake in an axolotl crochet plush is attaching the gills too low, which widens the face rather than framing it. In many free axolotl amigurumi pattern posts, size and placement receive less attention than stitch sequence.
Project Info at a Glance
| Skill Level | Time | Finished Size | Hook | Best For |
|---|---|---|---|---|
| Advanced beginner | 4–6 hours | approx. 23–26 cm | 5.0 mm | Plush décor, baby-room shelf, gift plush |
Materials and Tools
Yarn
- Pale pink chenille — super bulky — about 80–100 g — Himalayan Dolphin Baby or similar
- Hot pink chenille — super bulky — about 20–30 g — same base yarn for matching pile
Tools
- Hook 5.0 mm
- Safety eyes 15 mm
- Polyester stuffing
- Yarn needle
- Stitch markers
- Scissors
Abbreviations
MR / sc / inc / dec / sl st / ch / BLO / FO
Invisible decrease joins the front loops only, which keeps the decrease line tighter and less visible than a standard two-loop decrease.
Pattern — Step by Step
Continuous spiral unless noted. Counts are given in brackets each round. This pattern is photo-matched to the supplied plush axolotl and follows standard amigurumi count logic.
Head (Make 1)
Yarn: pale pink
R1: 6 sc in MR (6)
R2: inc x6 (12)
R3: (sc, inc) x6 (18)
R4: (2 sc, inc) x6 (24)
R5: (3 sc, inc) x6 (30)
R6: (4 sc, inc) x6 (36)
R7: (5 sc, inc) x6 (42)
R8-R11: sc around (42)
R12: (5 sc, dec) x6 (36)
R13: (4 sc, dec) x6 (30)
R14: (3 sc, dec) x6 (24)
Insert 15 mm eyes between R8 and R9, about 8 stitches apart. Stuff firmly.
R15: (2 sc, dec) x6 (18)
R16: (sc, dec) x6 (12)
R17: dec x6 (6)
The plush in the photo has a broad round head rather than a flattened oval, so the 42-stitch plateau is the correct target size.
Fasten off. Leave 15 cm tail.
Body (Make 1)
Yarn: pale pink
R1: 6 sc in MR (6)
R2: inc x6 (12)
R3: (sc, inc) x6 (18)
R4: (2 sc, inc) x6 (24)
R5: (3 sc, inc) x6 (30)
R6-R11: sc around (30)
R12: (3 sc, dec) x6 (24)
R13-R15: sc around (24)
R16: (2 sc, dec) x6 (18)
R17-R18: sc around (18)
Stuff the lower body firmly and the neck area lightly, so the head can sit forward without folding the torso flat.
Fasten off. Leave 20 cm tail.
Arms / Front Legs (Make 2)
Yarn: pale pink
R1: 6 sc in MR (6)
R2: sc around (6)
R3: (2 sc, inc) x2 (8)
R4-R6: sc around (8)
Stuff very lightly or not at all. Flatten top before sewing.
Fasten off. Leave 15 cm tail.
Back Legs (Make 2)
Yarn: pale pink
R1: 6 sc in MR (6)
R2: inc x6 (12)
R3: sc around (12)
R4: (4 sc, dec) x2 (10)
R5: sc around (10)
Stuff lightly. The photo shows small side-facing foot nubs rather than long hind legs.
Fasten off. Leave 15 cm tail.
Outer Gills (Make 6)
Yarn: hot pink
R1: 6 sc in MR (6)
R2: sc around (6)
R3: (2 sc, inc) x2 (8)
R4-R5: sc around (8)
R6: (2 sc, dec) x2 (6)
Stuff lightly. Shape each piece into a rounded petal, not a tube.
Fasten off. Leave 18 cm tail.
Tail Core (Make 1)
Yarn: pale pink
R1: 6 sc in MR (6)
R2: sc around (6)
R3: (sc, inc) x3 (9)
R4: sc around (9)
R5: (2 sc, inc) x3 (12)
R6-R7: sc around (12)
R8: (2 sc, dec) x3 (9)
R9-R10: sc around (9)
Stuff lightly. Keep the upper half narrow so the fin reads separately.
Fasten off. Leave 18 cm tail.
Tail Fin (Make 2, then join or sew back-to-back)
Yarn: hot pink
Ch 9.
Row 1: starting in second ch from hook, sc 8, ch 1, turn (8)
Row 2: dec, 4 sc, dec, ch 1, turn (6)
Row 3: sc 6, ch 1, turn (6)
Row 4: dec, 2 sc, dec, ch 1, turn (4)
Row 5: sc 4
Fasten off first piece. Repeat once more. Sew the two pieces together around the edge for a thicker plush fin, leaving the straight edge open for attachment.
Cheek Patches (Make 2)
Yarn: pale pink
R1: 6 sc in MR (6)
R2: inc x6 (12)
Do not stuff.
Fasten off. Leave 12 cm tail.
Optional Mouth Detail (Make 1)
Yarn: black embroidery floss
Embroider a short horizontal mouth centered one round below the eyes. Keep it under 1.5 cm wide.
Assembly
- Sew the head to the top of the body, centering the neck opening.
- Add the cheek patches low on the face, directly under the eyes, if extra roundness is needed.
- Insert and lock the safety eyes before the head is fully closed if you have not already done so.
- Sew the arms to the upper body, roughly one round below the neck seam.
- Sew the back legs at the lower sides of the body so the plush can sit without rolling.
- Pin the six gills first: three on each side of the head.
- Attach the top gills slightly above eye level, the middle pair at eye level, and the bottom pair just below it.
- Sew the tail core to the lower back, centered.
- Sew the tail fin along the back edge of the tail core so the scallop faces outward.
- Embroider the mouth and weave in all tails inside the body cavity.
The completed axolotl should sit with the tail centered and the gills framing the head in a shallow fan.
7 Technical Tips
- Use one marker for round start and a second for eye line. Losing the eye line by even one round shifts the face upward and makes the forehead look too tall.
- Stuff the head firmer than the body. On this shape, a soft head collapses around the eye washers and the gills start to angle downward.
- Make every decrease invisible on the head. Regular decreases form a ridge that shows clearly in chenille because the pile parts along the seam.
- Insert eyes before the final two head decrease rounds. With plush yarn, late insertion compresses stitches and can crack the pile around the eye posts.
- Keep gill stuffing minimal. Overfilled gills twist outward like cones instead of reading as soft fronds.
- Pin all six gills before sewing any of them. A 3–5 mm mismatch between left and right sides is obvious because the head is almost perfectly round.
- Weave tail-fin ends through the tail core, not just the fin edge. A shallow weave makes the fin curl away after handling.
Conclusion
This axolotl amigurumi crochet pattern works because the major landmarks stay controlled: a 42-stitch head plateau, a narrower 30-stitch body, compact side gills, and a separate tail fin. Those choices keep the silhouette close to the plush in the photo instead of drifting into a generic reptile toy. The next step is simple: swatch your chenille with the 5.0 mm hook, then build the head first and check the eye spacing before continuing. Share the finished result on Pinterest and Instagram with #AxolotlAmigurumiPattern. One question remains useful during finishing: did you angle the top gills slightly upward, or leave them horizontal like the sample plush?









