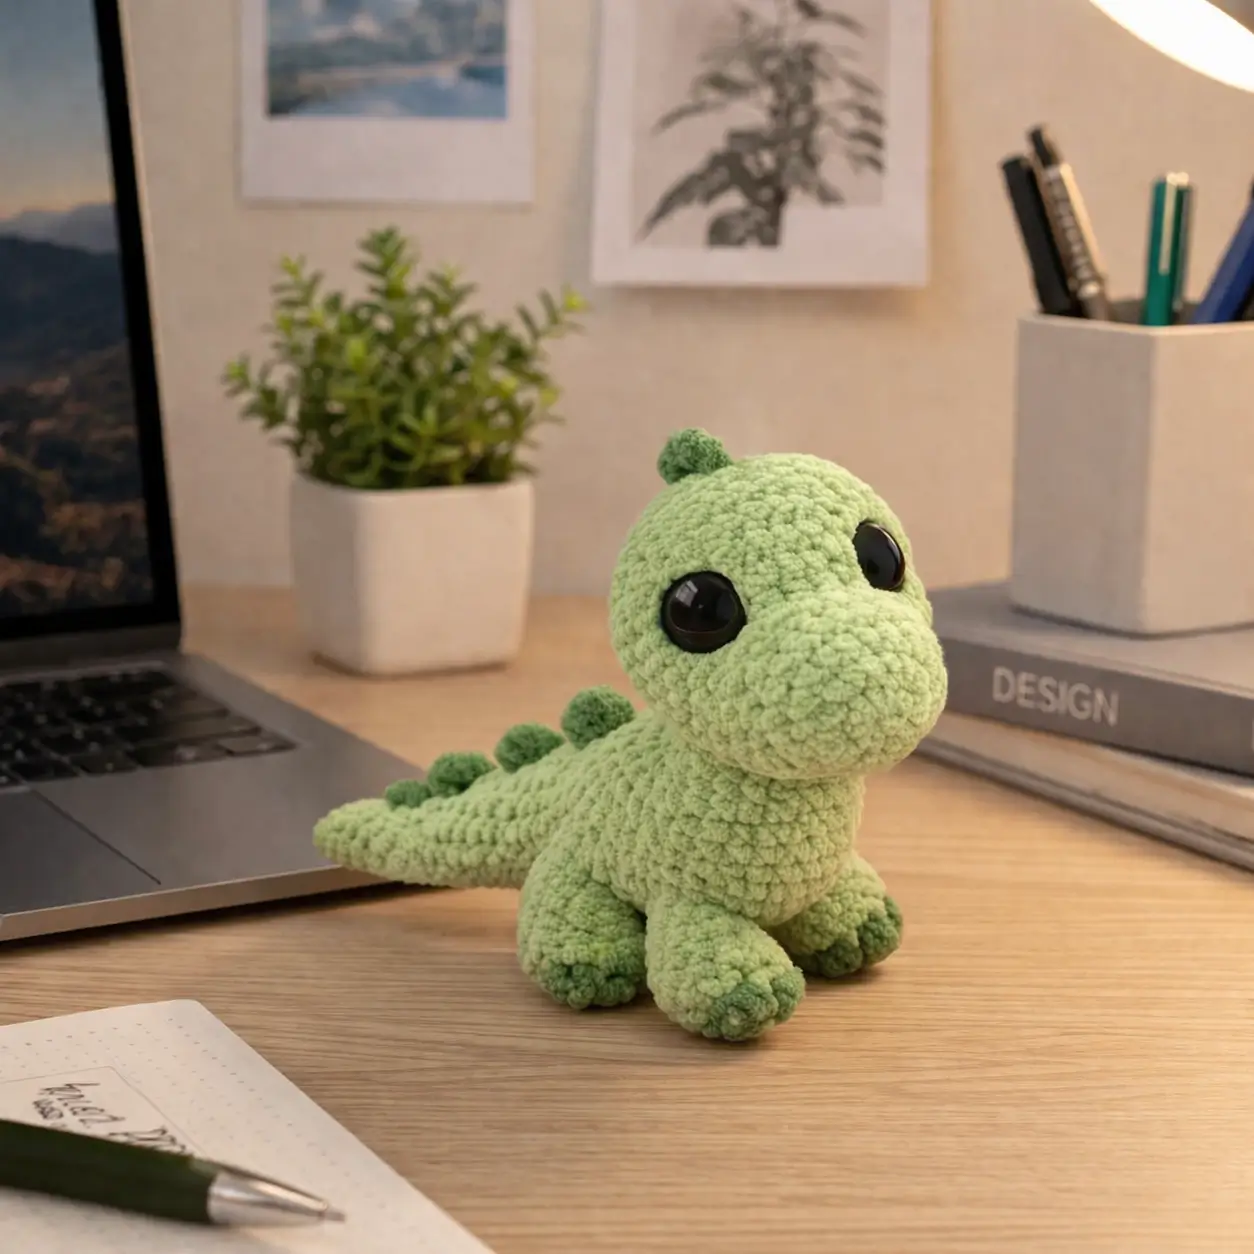
Back spikes decide the silhouette before the tail even matters. This dinosaur amigurumi crochet pattern builds a compact chenille desk dino with a rounded snout, 24 cm target size, bulky materials, and intermediate shaping. It suits makers who want a display plush that stands up to repeated handling better than a long-limbed toy.
The Design: What Makes This Dinosaur Different
This photographed dinosaur reads clearly because the head is oversized, the muzzle projects forward, and the legs stay short enough to keep the body low. Those three choices control the whole build. Push the head too small and the toy starts to look reptilian in a generic way. Lengthen the legs too much and the plush loses desk stability. Flatten the back line and the spikes stop carrying visual weight.
The chenille dinosaur amigurumi approach also changes stitch decisions. Plush yarn hides minor shaping lines, so the structure has to do more work than the surface. A separate snout piece helps the face hold its rounded profile. Split front and back legs keep the chest pitched slightly upward. The common mistake with a plush dinosaur crochet pattern is placing the eyes too high after stuffing. That shrinks the muzzle visually and makes the head look spherical instead of dinosaur-like.
This sample pattern is written from the photographed plush, then checked against current chenille dinosaur references for size, hook, yarn quantity, and eye scale.
Project Info at a Glance
| Skill Level | Time | Finished Size | Hook | Best For |
|---|---|---|---|---|
| Intermediate | 3–5 hours | 24 cm | 6 mm | Desk plush, gift, shelf display |
Materials and Tools
Yarn
- Light pastel green chenille — bulky plush — ~80 g — suggestion: a chenille yarn close to the 5 mm thickness noted in the reference tutorial
- Dark green chenille — bulky plush — ~20 g — for toes and spikes
- Pale cream or lighter green chenille — small amount — optional cheek patches
Tools
- Hook 6 mm
- Safety eyes 18–20 mm
- Polyfill stuffing
- Tapestry needle
- Stitch markers
- Pins
- Sharp scissors
Abbreviations
MR / sc / inc / dec / sl st / ch / BLO
Invisible decrease joins two stitches through the front loops first, which keeps the plush surface cleaner than a standard decrease and matters more with chenille than with smooth cotton.
Pattern — Step by Step
Continuous spiral unless noted. Pattern below is drafted from the photographed plush and standard amigurumi math, not copied from a single source.
Head (Make 1)
Yarn: light pastel green — Source: standard amigurumi math + photo proportions
R1: 6 sc in MR (6)
R2: inc x6 (12)
R3: (1 sc, inc) x6 (18)
R4: (2 sc, inc) x6 (24)
R5: (3 sc, inc) x6 (30)
R6: (4 sc, inc) x6 (36)
R7-11: sc around (36)
R12: (4 sc, dec) x6 (30)
R13: sc around (30)
R14: (3 sc, dec) x6 (24)
Insert eyes between R9 and R10, spaced 10 stitches apart. Do not fasten washers after the snout is tested in place.
R15: (2 sc, dec) x6 (18)
Stuff firmly at the forehead and lightly at the lower face.
R16: (1 sc, dec) x6 (12)
R17: dec x6 (6)
Fasten off. Close the opening. Leave a 20 cm tail.
Snout (Make 1)
Yarn: light pastel green — Source: standard amigurumi math + photo proportions
R1: 6 sc in MR (6)
R2: inc x6 (12)
R3: (1 sc, inc) x6 (18)
R4-5: sc around (18)
Fasten off. Leave a 25 cm tail.
Stuff only the front half before sewing. Keep the back edge flat.
Body (Make 1)
Yarn: light pastel green — Source: standard amigurumi math + photo proportions
R1: 6 sc in MR (6)
R2: inc x6 (12)
R3: (1 sc, inc) x6 (18)
R4: (2 sc, inc) x6 (24)
R5: (3 sc, inc) x6 (30)
R6: (4 sc, inc) x6 (36)
R7-10: sc around (36)
R11: (4 sc, dec) x6 (30)
R12-13: sc around (30)
R14: (3 sc, dec) x6 (24)
R15: sc around (24)
R16: (2 sc, dec) x6 (18)
Stuff the lower body firm enough to resist sagging between the legs.
Fasten off. Leave a 25 cm tail.
Front Legs (Make 2)
Yarn: dark green for R1-2, then light pastel green — Source: standard amigurumi math + photo proportions
R1: 6 sc in MR (6)
R2: inc x6 (12)
Change to light green.
R3: (1 sc, inc) x6 (18)
R4-5: sc around (18)
R6: (1 sc, dec) x6 (12)
R7: sc around (12)
Fasten off. Leave a 20 cm tail.
Stuff the paw firmly and the upper section lightly.
Back Legs (Make 2)
Yarn: dark green for R1-2, then light pastel green — Source: standard amigurumi math + photo proportions
R1: 6 sc in MR (6)
R2: inc x6 (12)
Change to light green.
R3: (1 sc, inc) x6 (18)
R4-6: sc around (18)
R7: (1 sc, dec) x6 (12)
R8: sc around (12)
Fasten off. Leave a 20 cm tail.
Back legs are one round taller than front legs to lift the rear body slightly less than the chest.
Tail (Make 1)
Yarn: light pastel green — Source: standard amigurumi math + photo proportions
R1: 6 sc in MR (6)
R2: inc x6 (12)
R3: sc around (12)
R4: (1 sc, inc) x6 (18)
R5: sc around (18)
R6: (2 sc, inc) x6 (24)
R7-8: sc around (24)
Fasten off. Leave a 25 cm tail.
Stuff the first half only. Keep the body-end flatter so it sits against the back without twisting.
Back Spikes (Make 5)
Yarn: dark green — Source: standard amigurumi math + photo proportions
For each spike:
R1: 6 sc in MR (6)
R2: sc around (6)
R3: (1 sc, inc) x3 (9)
R4: sc around (9)
Fasten off. Leave a 15 cm tail.
Do not stuff. Flatten each spike before sewing so it reads as a nub, not a ball.
Cheek Patches (Make 2)
Yarn: pale cream or lighter green — Source: standard amigurumi math
R1: 6 sc in MR (6)
R2: inc x6 (12)
sl st to finish.
Fasten off. Leave a 12 cm tail.
These are optional if you want a cleaner face closer to the photo.
Assembly
- Sew the head to the body with the muzzle angled slightly downward, not straight out.
- Pin the snout to the lower front of the head so its top edge sits just below the eyes.
- Add stuffing to the snout, then sew it on and lock the eye washers from inside if you delayed them.
- Attach the front legs to the body at the lower chest, spaced about 8 stitches apart.
- Attach the back legs to the widest part of the rear body, also about 8 stitches apart.
- Pin the tail to the back center line and sew it on with the flat edge horizontal.
- Place the smallest spike on top of the head, centered behind the forehead.
- Sew the remaining spikes down the neck and back, reducing the gap between spikes as they approach the tail.
- Add cheek patches under the eyes if using them, then weave all tails through stuffed areas.
- Shape the plush by hand so the body rests low and the head tips forward slightly.
The plush is complete when all four feet touch the surface and the tail stays aligned with the spine.
7 Technical Tips
- Stitch-marker drift: Chenille hides the start of round fast. Move the marker every round, not every other round, or the body seam will spiral into the face line.
- Stuffing firmness: Pack the body to a medium-firm level. If the lower body feels softer than the head, the toy will sink between the front legs after a few days on a shelf.
- Invisible decreases: Use invisible dec on all closing rounds. Standard decreases show as fuzzy notches in plush yarn and break the clean outline.
- Eye placement timing: Test the eyes before sewing the snout shut. On this shape, even a 1-round shift upward makes the muzzle look shorter.
- Velvet tension: Pull the working loop only enough to close gaps. Over-tight chenille compresses the pile and makes the stitches look striped.
- Pinning order: Pin head, tail, then legs before sewing anything. That sequence lets you check the floor contact line and fix a forward or backward lean.
- Tail weaving: Run the tail yarn through at least 5 cm of stuffed body before trimming. Short hidden ends work loose faster in chenille because the pile reduces friction.
Conclusion
This dinosaur amigurumi crochet pattern works because the profile stays disciplined: large head, forward snout, short legs, low body, and a clear spike line. Keep those five elements in proportion and the plush reads immediately from across a desk. Your next step is simple. Crochet the head first, test the eye size against the snout piece, then commit to the full body only after that scale check. Share the finished dino on Pinterest and Instagram with a side-profile photo, because the silhouette carries the design. Hashtag: #DeskDinoPattern. One question remains useful here: did you place the first spike directly on the crown or slightly behind it?









