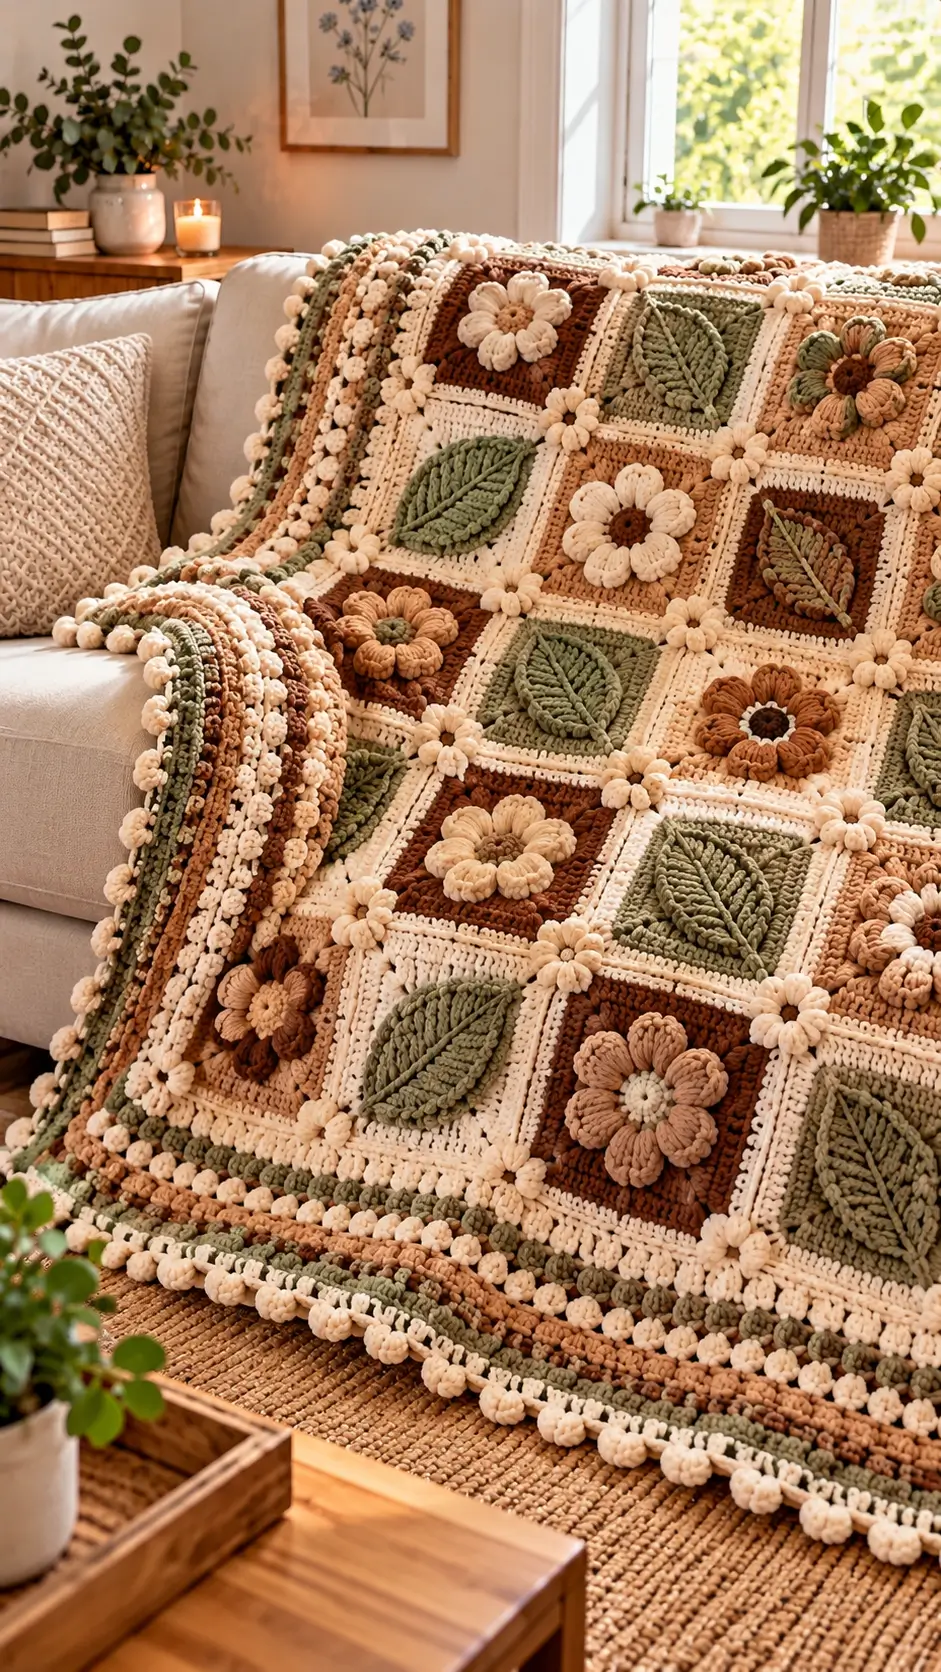
Flat petals cannot reproduce the heavy botanical relief visible across this blanket. This 3D flower granny square blanket crochet pattern instead uses raised flowers, veined leaves, solid backgrounds, and cream joining rounds. Work it in worsted yarn with a 5 mm hook for roughly 15 cm reconstruction squares. The project suits intermediate crocheters and provides a modular way to build a throw without handling the entire blanket at once.
The Design: What Makes This Botanical Blanket Different
Three structural decisions define this botanical crochet blanket. First, the flower petals sit above the square rather than being represented by color changes alone; that extra layer creates the pronounced relief visible in the reference. Second, each crochet leaf granny square needs a central raised vein. A plain oval leaf loses the strongest directional line in the photograph. Third, cream borders isolate the rust, caramel, and sage backgrounds so adjacent blocks remain visually distinct.
The most common construction error is attaching dimensional motifs only at their centers. Petals and leaves can then twist after washing. The reconstructed raised flower crochet square anchors strategic outer points while leaving most of the motif free.
Color distribution matters too. Alternate flower and leaf blocks rather than forming long uninterrupted rows of one motif.
Project Info at a Glance
| Skill Level | Time | Finished Size | Hook | Best For |
|---|---|---|---|---|
| Intermediate | Modular/multi-session | Approx. 15 cm per reconstruction square | 5 mm | Throws, lap blankets, decorative bed runners |
The 15 cm measurement is a reconstruction target. Published flower squares vary considerably in size, so the final measurement depends on yarn, hook, stitch construction, and individual tension.
Materials and Tools
Yarn
For the photo-inspired version, choose worsted/#4 yarn in a firm cotton, acrylic, or blend capable of supporting raised motifs.
- Cream/ivory — worsted/#4 — quantity based on blanket dimensions — square borders, joins, flowers, and edging
- Sage/olive green — worsted/#4 — quantity based on motif count — leaves and backgrounds
- Caramel/tan — worsted/#4 — quantity based on motif count — flower petals and backgrounds
- Rust brown — worsted/#4 — quantity based on motif count — square backgrounds and petals
- Dark brown — worsted/#4 — small quantity — flower centers
Exact blanket yardage should be calculated from a completed and blocked sample square rather than estimated from the photograph.
Tools
- 5 mm crochet hook
- Locking stitch markers
- Tapestry needle
- Scissors
- Blocking pins and mats
- Tape measure
No safety eyes or stuffing are required.
Abbreviations
- MR — magic ring
- sc — single crochet
- hdc — half double crochet
- dc — double crochet
- tr — treble crochet
- inc — 2 stitches in one stitch
- sl st — slip stitch
- ch — chain
- BLO — back loop only
- sp — space
- st/sts — stitch/stitches
- RS — right side
- WS — wrong side
Invisible decrease is an amigurumi shaping method and is not required for this flat modular blanket.
Pattern — Step by Step
Unlike amigurumi, these motifs are not based on the standard 6-stitch sphere progression. Applying spherical stitch math to a granny square would create the wrong structure. The instructions below follow square and floral geometry.
Basic Background Square
Yarn: sage, caramel, rust, or cream.
R1: MR, ch 3, 2 dc, ch 2; *3 dc, ch 2* three times. Join with sl st.
R2: Sl st to corner. Ch 3, 2 dc, ch 2, 3 dc in corner. Ch 1; *(3 dc, ch 2, 3 dc) in next corner, ch 1* three times. Join.
R3: Sl st to corner. Work *(3 dc, ch 2, 3 dc) in corner, ch 1, 3 dc in side ch-1 sp, ch 1* around. Join.
R4: Repeat the same corner construction, placing 3 dc in each side ch-1 space and ch 1 between groups.
R5: Change to cream. Repeat the established granny-square sequence.
R6: Ch 1. Sc in each dc and ch-1 space; work 3 sc in each corner ch-2 space. Join.
Fasten off. Block to approximately 15 cm or to the consistent measurement established by your sample square.
Raised Flower Center
Yarn: dark brown or caramel.
R1: MR, ch 1, work 8 sc into ring. Join. (8)
R2: Work 2 sc in each stitch. Join. (16)
Fasten off, leaving a 20 cm tail if the center will be sewn directly to the background.
Raised Flower Petals
Yarn: cream, caramel, or rust.
Attach yarn to one stitch of the flower center.
R1: *Ch 4, skip 1 center st, sl st in next st* eight times to create the petal foundations.
R2: In each ch-4 loop work sc, hdc, 3 dc, hdc, sc.
For thicker flowers, work a second petal layer from the rear of the flower center. Make the rear loops one chain longer so the back petals extend beyond the first layer.
Fasten off. Leave approximately 25 cm for attachment.
The petals need visible height above the square. Keep the petal tips free when sewing the motif down; anchor the center and lower portions of the petals instead.
Raised Leaf
Yarn: sage green.
Foundation: Ch 16.
Row 1: Starting in the second ch from hook, sc, hdc, dc in next 9 ch, hdc, sc; work 3 sc into final ch. Rotate to work along the opposite side of the foundation chain. Sc, hdc, dc in next 9 foundation loops, hdc, sc.
Row 2: Sl st to the leaf tip. Ch 1. Work sc around the edge, placing 3 sc at the tip and maintaining a flat oval shape.
Fasten off with a 30 cm tail.
Leaf Vein
Yarn: sage one shade darker, or use the same sage yarn.
Surface sl st from the base to the tip along the original foundation chain.
For the branching veins, embroider diagonal straight stitches from the center vein toward the leaf edge at approximately 1–1.5 cm intervals.
Keep these stitches relaxed. Excessive tension will fold the leaf along its center and distort the surrounding square.
Small Joining Flower
Yarn: cream.
R1: MR, work 6 sc. Join. (6)
R2: *Sl st in next st, ch 3, 2 dc in same st, ch 3, sl st in same st* six times.
Fasten off with a 20 cm sewing tail.
Make enough joining flowers to cover selected four-square intersections. They work best as repeated decorative accents rather than being crowded onto every possible intersection.
Cream Joining Border
Attach cream to any square corner.
R1: Ch 1, sc evenly around all four sides, placing 3 sc in each corner.
R2: Ch 3, dc in each stitch around, working dc, ch 2, dc into each corner stitch.
Fasten off.
Every square should finish with the same stitch count on corresponding sides. Equal counts make the joining stage considerably more accurate.
Textured Outer Border
Attach cream after all squares have been joined.
R1: Sc around the entire blanket, placing 3 sc in each blanket corner.
R2: Change to sage. Dc around, maintaining three stitches at each corner.
R3: Change to caramel. Work sc around.
R4: Change to cream. *Sc in next 3 sts, ch 3, work 3 dc together in same base stitch, ch 1*; repeat around, adjusting the spacing by one stitch near corners when required.
R5: Work a final sc round if a firmer outer edge is required.
Sample a short border section before working around the complete blanket. If the edge begins to ripple, reduce the number of stitches or decorative repeats before continuing.
Assembly
- Block every completed background square to the same dimensions before adding the raised motifs.
- Place the flower center over the middle of a rust, caramel, sage, or cream square and pin it at four points.
- Sew through the flower center and lower portions of the petals, leaving the rounded outer petal edges raised.
- Center each leaf diagonally or vertically according to the planned layout, then pin its base, tip, and two side points.
- Sew along the leaf’s center vein and add two or three small anchoring stitches near each outer edge.
- Arrange all blocks on a flat surface, alternating flower and leaf motifs while distributing the background colors across the blanket.
- Join adjacent blocks through their cream borders with mattress stitch, whip stitch, or a flat crochet join.
- Attach the small cream flowers over selected four-square intersections after the main seams are complete.
- Work the multicolor outer border around the joined blanket, checking each side for rippling after every round.
- Weave tails through several stitch directions, wash according to the yarn label, and block the completed blanket square.
The completed blanket should contain a stable cream grid with raised botanical motifs remaining visibly separate from their backgrounds.
7 Technical Tips for Better Results
- Square mismatch: A 5 mm difference between individual blocks compounds across a long blanket row. Block every square to the same target measurement before joining.
- Leaf curling: Surface slip stitches pulled too tightly shorten the central vein. Keep the vein tension slightly looser than the stitches forming the leaf.
- Petal collapse: Sewing through the outer 10–15 mm of every petal removes the dimensional profile. Attach petals close to their bases and leave the rounded outer portions free.
- Crooked motifs: Attaching a leaf without first pinning its tip and base can shift the central axis during sewing. Pin at least four points before making the first permanent attachment stitch.
- Wavy joins: Unequal side counts force one square to absorb additional stitches. Count every cream border and correct discrepancies before assembling the blanket.
- Ruffled edging: Too many perimeter stitches cause the border to flare outward. Lay the work flat after each border round and correct the repeat spacing before adding another round.
- Loose tails: Dimensional flowers place greater mechanical stress on attachment yarn than flat motifs. Weave each structural tail through at least three changes of direction on the reverse side.
Finishing the 3D Flower Granny Square Blanket
Measure and block one complete flower square and one leaf square before calculating the final blanket layout. That test establishes the actual yarn consumption, motif dimensions, border behavior, and gauge for your chosen fiber more reliably than estimates taken from a photograph.
After both samples match, multiply the finished module size by the required number of rows and columns, allowing for your chosen joining method. Save the finished 3D flower granny square blanket crochet pattern to Pinterest and share your completed layout on Instagram with #Botanical3DGrannyBlanket.
For your sample square, compare one detail specifically: do the raised sage leaves hold their shape better when sewn only along the center vein, or when two additional side anchors are added?









