Introduction
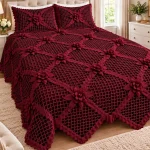
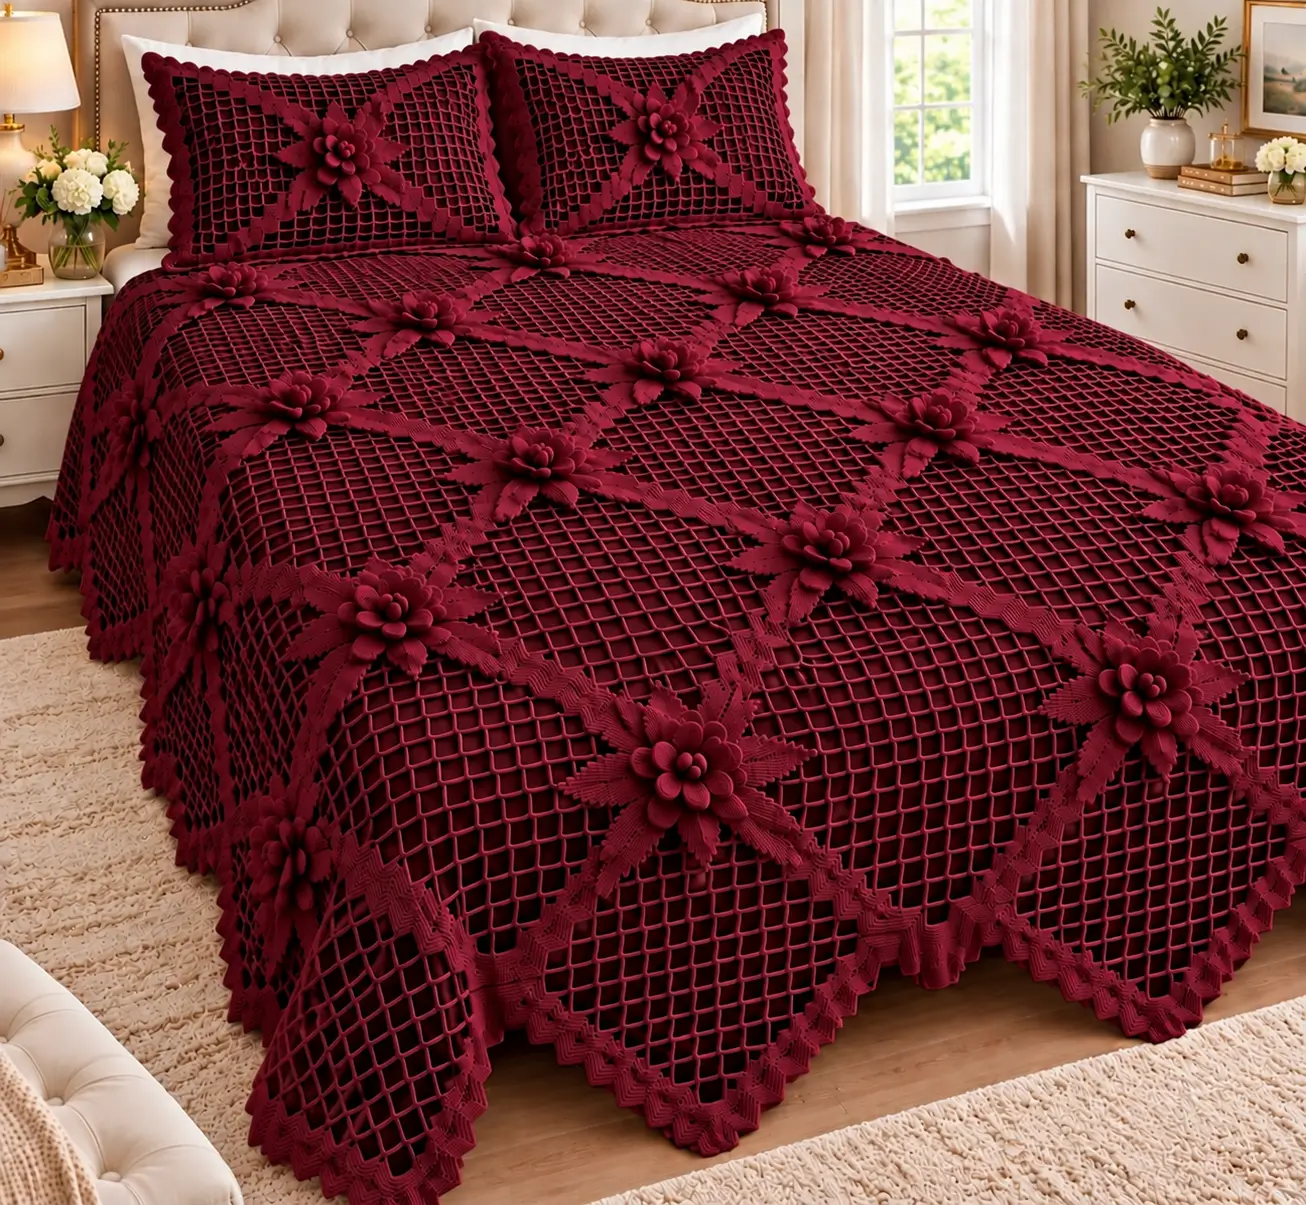
Every flower in this bedspread sits exactly where four open mesh panels would otherwise create an empty intersection. This 3D flower crochet bedspread pattern uses off-white yarn, large filet-style lattice panels, layered flowers, pointed leaves and a geometric scalloped edge. A smooth DK cotton with a 4.0 mm hook gives the mesh enough definition for an intermediate modular bedspread and matching pillow covers.
The Design: What Makes This Flower Bedspread Different
The bedspread is not a conventional granny-square blanket. Its visual weight comes from broad open mesh fields separated by solid diagonal bands. Raised flowers cover selected intersections, while elongated leaves extend from the flower centers and visually connect neighboring panels. That combination turns a basic crochet lattice into a dimensional floral surface.
The second structural decision is scale. Comparable filet crochet squares made with DK cotton and an H-size hook can measure about 6 inches, while other filet motifs reach 7.5 inches or more depending on yarn and hook. For this photo-inspired filet crochet bedspread, a larger 24–28 cm panel better matches the broad mesh sections visible on the bed. The main failure mode is tightening the chain spaces; undersized chains pull the panel diagonally and prevent adjoining squares from forming a level grid.
Project Info at a Glance
| Skill Level | Construction | Panel Target | Hook | Best For |
|---|---|---|---|---|
| Intermediate | Open mesh panels with applied 3D flowers | Approx. 24–28 cm | 4.0 mm | Bedspreads, coverlets and pillow fronts |
The 24–28 cm measurement is a project target based on the proportions in the photograph, not a measurement taken from the pictured bedspread. Published filet squares demonstrate that motif dimensions change substantially with yarn weight, hook size and tension, so complete one blocked master panel before calculating the final grid.
Materials and Tools
Yarn
- Off-white / warm cream — DK weight #3 cotton or cotton blend — main bedspread
- Off-white / warm cream — same yarn — layered flowers and leaves
Use one dye lot for a large bedspread whenever possible. A single-color design exposes even minor differences between cream, ivory and natural shades.
DK cotton is a practical starting point because comparable filet squares have been made successfully with DK cotton and medium crochet hooks. The exact quantity should be calculated from a completed sample rather than inferred from the photograph.
Tools
- 4.0 mm crochet hook
- Off-white DK cotton or cotton-blend yarn
- Yarn needle
- Scissors
- Locking stitch markers
- Tape measure
- Blocking mats
- Rust-resistant blocking pins
Abbreviations
- MR — magic ring
- ch — chain
- sl st — slip stitch
- sc — single crochet
- hdc — half double crochet
- dc — double crochet
- tr — treble crochet
- dtr — double treble crochet
- sp — space
- st/sts — stitch/stitches
- FO — fasten off
Understanding the Mesh
Filet crochet normally combines solid blocks with open mesh cells. A common open cell is formed from a double crochet, chains and skipped stitches. The photographed bedspread exaggerates that principle into a larger decorative lattice.
For this version, each mesh opening is made with a dc, ch 3, skip 3 structure. This creates larger windows than traditional fine-thread filet crochet and keeps the bedspread visually close to the reference.
Before beginning a full panel, make a small mesh swatch. The openings should remain rectangular after blocking rather than collapsing into narrow diamonds.
Pattern — Large Filet Mesh Panel
This is an original photo-inspired construction. It is designed to reproduce the visual structure of the reference rather than copy a published bedspread pattern.
Foundation
Ch 61.
Row 1: Dc in 5th ch from hook. Dc in each chain across. Turn.
This solid foundation stabilizes the lower edge.
Mesh Row 1
Row 2: Ch 3, turn.
Dc in next 3 sts.
Work:
(ch 3, skip 3 sts, dc in next st)
across the central portion of the panel.
Finish with solid dc stitches corresponding to the opposite border.
The solid stitches at each side form the beginning of the structural frame.
Mesh Rows 2–13
Rows 3–14: Ch 3, turn.
Work dc into each solid border stitch.
Across the mesh section work:
ch 3, dc in next dc.
Continue across every opening.
Maintain the same number of mesh cells on every row.
Count the vertical posts rather than relying on visual estimation.
Upper Structural Row
Row 15: Ch 3.
Dc in every dc and work 3 dc into every ch-3 space across.
The result is a solid upper band corresponding to the foundation.
FO only if making the surrounding frame separately.
Solid Frame Around the Mesh Panel
Join yarn at one corner.
Round 1: Ch 1 and sc evenly around all four sides.
At each corner work:
(2 sc, ch 2, 2 sc)
Join with sl st.
Round 2: Ch 3 and dc around.
At each corner:
(2 dc, ch 2, 2 dc)
Round 3: Repeat Round 2.
The three structural rounds give the panel enough substance to support flowers and leaves without distorting the mesh.
Creating the Stepped Decorative Frame
The photographed panels are separated by textured bands with a stepped or zigzag appearance.
Work the following around the framed panel:
Round 4: Ch 1, sc around, working (sc, ch 2, sc) in every corner.
Round 5: *Sc in next 3 sts, ch 2, skip 2 sts.* Repeat around.
Round 6: Work 3 sc into each ch-2 space and sc in each sc between spaces.
At the corners work:
(2 sc, ch 2, 2 sc)
This produces a textured perimeter without making the frame excessively thick.
Blocking the Master Panel
Wet or steam block according to the yarn manufacturer’s care instructions.
Pin the four corners first.
Measure both diagonals.
If one diagonal is longer, reposition the corners before pinning the side edges.
Target approximately 24–28 cm square.
Allow the panel to dry completely.
Record the final width, height and weight. Use this piece as the master for every subsequent panel.
Layered 3D Flower
The raised flowers are the focal points of the bedspread. They should project above the mesh without becoming heavy enough to drag the intersections downward.
Flower Center
Round 1: Make a MR. Work 6 sc into ring. Join. (6)
Round 2: Work 2 sc in each stitch around. Join. (12)
Round 3: Work (sc in next st, 2 sc in next st) ×6. Join. (18)
Inner Petal Layer
Work in the front loops only.
In the first stitch work:
sl st, ch 2, 2 hdc, ch 2, sl st.
Skip one stitch.
Repeat around to create approximately 9 compact inner petals.
Do not cut yarn if the next layer can be reached cleanly from the reverse.
Middle Petal Layer
Working behind the inner petals, join yarn to the unused back-loop structure.
For each petal work:
sl st, ch 3, hdc, 3 dc, hdc, ch 3, sl st.
Repeat around.
The middle petals should extend beyond the inner layer by approximately 8–12 mm.
Outer Petal Layer
Create chain loops behind the middle petals:
ch 5, anchor with sc behind the next petal.
Repeat around.
Into each ch-5 loop work:
sc, hdc, 3 dc, tr, 3 dc, hdc, sc.
Repeat around.
FO leaving a 30 cm sewing tail.
Small Raised Center Bud
For the rounded central detail visible on the flowers:
Make a MR.
Round 1: 6 sc in MR. (6)
Round 2: 2 sc in each stitch. (12)
Round 3: Sc around. (12)
Place a tiny amount of yarn scrap or fiberfill inside only if a strongly raised center is wanted.
Draw the opening inward and sew the bud into the center of the layered flower.
For a completely washable all-yarn bedspread, use tightly rolled yarn scraps instead of loose fiberfill.
Long Pointed Leaf
The reference uses elongated leaves extending diagonally from many flower centers.
Ch 22.
Beginning in second chain from hook:
sl st, sc, hdc, dc in next 4 chains, tr in next 7 chains, dc in next 4 chains, hdc, sc, sl st.
Ch 2 at the end.
Turn to work along the opposite side of the foundation chain.
Mirror the stitch sequence:
sl st, sc, hdc, dc in next 4, tr in next 7, dc in next 4, hdc, sc, sl st.
Join at the base.
Do not fasten off if adding the central rib.
Raised Leaf Rib
Work surface slip stitches along the foundation chain from the leaf base toward the point.
Stop approximately 5 mm before the tip.
FO on the reverse.
The surface line stiffens the center slightly and produces the raised botanical detail visible in the photograph.
Serrated Leaf Edge
For a more detailed version, work around the completed leaf:
sc in next 2 sts, ch 2, sl st in second ch from hook
Repeat along both sides.
Keep the points small. Oversized picots make the leaves compete visually with the layered flowers.
Leaf Cluster for One Flower
Make 4 long leaves for a standard intersection flower.
For larger focal flowers, make 6 leaves.
Arrange the leaves in opposing diagonal pairs.
The leaf tips should extend onto the solid joining bands rather than deep into the open mesh.
This positioning keeps the decorative weight on the structurally stronger areas.
Assembling One Floral Intersection
Lay four blocked panels together.
Position one flower at the intersection.
Place four leaves underneath it, pointing diagonally into the neighboring panels.
Pin the arrangement.
Sew each leaf at its base and along approximately the first 2–3 cm of the center rib.
Leave the outer leaf section unattached.
Sew the flower through its center and lower petal layer.
Do not stitch down every outer petal. The unsewn edges create the dimensional effect.
Joining the Filet Panels
Place two blocked panels with edges aligned.
Use a yarn needle or crochet slip-stitch join.
For a crocheted join, hold the panels with wrong sides together.
Insert the hook through corresponding edge stitches.
Work a loose sl st through both layers.
Continue across.
Do not tighten the slip stitches. A contracted seam will pull the mesh squares into trapezoids.
Alternative Flat Single-Crochet Join
Place panels side by side with right sides facing upward.
Join yarn through corresponding edge stitches.
Work sc through both panels.
Continue across each side.
This creates a more visible structural band and works well when flowers will later cover the intersections.
Planning the Bedspread Grid
Measure one blocked panel before calculating quantity.
If the finished repeat is 26 cm, example layouts are:
| Grid | Panels | Approx. Unbordered Size |
|---|---|---|
| 5 × 7 | 35 | 130 × 182 cm |
| 6 × 8 | 48 | 156 × 208 cm |
| 7 × 9 | 63 | 182 × 234 cm |
| 8 × 10 | 80 | 208 × 260 cm |
The border adds extra width and length. These figures are calculations based on a 26 cm repeat rather than standard mattress dimensions.
Estimating Yarn
Do not buy yarn for a full bedspread based only on motif diameter.
Complete one mesh panel, one flower and its leaf cluster.
Weigh all components.
For example, if one finished decorative repeat consumes 45 g and the project uses 63 repeats:
45 g × 63 = 2,835 g
Add yarn for joining, the outside border, pillow panels, swatching and gauge variation.
Large filet bedspreads can require several kilograms of yarn depending on fiber, thread size and finished dimensions, so weighing the sample is considerably more useful than applying a generic yardage figure.
Positioning the Flowers
A flower does not need to be sewn to every panel corner.
Join the complete panel grid first.
Place flowers at the major intersections.
Step several meters away and inspect the spacing.
The reference creates a regular floral rhythm, but the open mesh still occupies more visual area than the flowers.
If the surface becomes crowded, remove some flower clusters rather than reducing the mesh openings.
Creating Larger Focal Flowers
Selected flowers can be enlarged by adding another petal layer.
Behind the outer layer, create ch-6 loops.
Into each loop work:
sc, hdc, dc, 3 tr, dc, hdc, sc.
Repeat around.
Use the larger flowers sparingly at prominent intersections.
Adding this fourth layer to every flower substantially increases both yarn weight and drying time.
Matching Pillow Covers
The photograph repeats the bedspread structure on two pillow fronts.
For a rectangular pillow, crochet a mesh panel to match the insert dimensions.
Add a solid frame.
Place one large flower at the center.
Arrange four elongated leaves diagonally from the flower.
Finish with the same geometric edge used on the bedspread.
Attach the crochet front to a fabric back or a dense crocheted back panel.
A fabric backing is especially practical because the pillow insert otherwise shows clearly through the large mesh.
Making a Crochet Pillow Back
For an all-crochet version, work a solid hdc rectangle.
Chain to the pillow width.
Row 1: Hdc across.
Row 2 onward: Ch 2, turn, hdc across.
Continue until the back matches the blocked dimensions of the decorative front.
Join three sides with sc.
Insert the pillow form.
Close the final side or add buttons if a removable cover is preferred.
Outer Bedspread Border
Border Round 1
Join yarn at one corner.
Work sc evenly around the entire bedspread.
At each corner work:
(2 sc, ch 2, 2 sc)
Border Round 2
Ch 3.
Dc in each stitch around.
At each corner:
(2 dc, ch 3, 2 dc)
Openwork Border Round
Work:
sc, ch 3, skip 2 sts
around the perimeter.
Adjust the final repeat on each side if necessary so the corners remain centered.
Geometric Scalloped Edge
The reference edge is more angular than a conventional rounded shell.
Sl st into the first ch-3 space.
Work:
sc, hdc, 2 dc, ch 2, sl st into second ch, 2 dc, hdc, sc
in the space.
Sl st into the next space.
Repeat around.
The ch-2 point gives each scallop a small geometric tip.
At corners, use a slightly larger shell or add one extra repeat if required for a flat turn.
Keeping Large Mesh Panels Square
Open crochet responds strongly to small tension changes.
Count the number of vertical posts after every row.
If the row loses one post, the panel will narrow immediately.
Check the width after approximately every five rows.
If it changes by more than 5 mm, identify the tension problem before continuing.
Blocking can correct minor differences. It should not be expected to repair a panel with missing mesh cells.
Controlling Chain Tension
Chain stitches form most of the visible grid.
If your chains are consistently tighter than your dc stitches, use a hook 0.5 mm larger for the mesh chains only.
Return to the main hook for the posts.
Another option is to deliberately lift each chain to full hook height before forming the next one.
Test the method on the master panel before applying it to dozens of motifs.
Preventing the Flowers from Sagging
A heavy layered flower should not hang from the open mesh.
Attach its center to a solid panel intersection.
Run several sewing stitches into the structural joining bands beneath the flower.
Anchor the bases of the leaves separately.
The mesh should carry almost none of the flower’s weight.
This becomes increasingly important on the sides of a bed, where gravity pulls the decorative motifs vertically.
Assembly
- Crochet one complete open mesh panel with its solid and textured frame, then block it to establish the master dimensions.
- Make the remaining panels while checking the number of mesh posts and comparing every few pieces with the blocked master.
- Join the panels into horizontal rows using a loose slip-stitch or flat single-crochet seam.
- Connect the completed rows to form the full bedspread grid and verify both diagonals before adding decorations.
- Crochet the required layered flowers and keep their outer petals uncompressed while storing them.
- Make four to six pointed leaves for each selected floral intersection and add the raised center ribs.
- Pin the leaf clusters over the panel intersections, then sew the leaf bases to the solid structural bands.
- Sew each layered flower over its leaf cluster, attaching the center firmly while leaving most outer petals free.
- Work the structural perimeter, openwork round and pointed geometric scallops around the complete bedspread.
- Block the finished coverlet to align the mesh grid, then reshape the flowers and leaves individually before drying.
The completed bedspread should form a level off-white lattice with dimensional flowers positioned over structurally reinforced intersections.
7 Technical Tips for Better Filet Flower Bedspreads
- Measure both diagonals of every master panel. A difference greater than about 1 cm means the mesh is skewed, even if the four sides appear equal.
- Count the vertical mesh posts after every row. One missing post narrows all subsequent rows and produces a panel that cannot align cleanly with its neighbors.
- Keep chain openings within approximately 3 mm of the master size. Uneven chains are highly visible because most of the bedspread surface consists of negative space.
- Sew flowers only to solid structural areas. Attaching a multi-layer flower directly to a chain loop can stretch that loop and produce a permanent sagging intersection.
- Attach only the first 2–3 cm of each long leaf. Sewing the entire leaf flat removes the raised botanical effect visible across the reference design.
- Compare every fifth panel with the blocked master. A repeated 5 mm gauge increase can add several centimeters across a seven- or eight-panel bedspread row.
- Weave joining tails through solid bands for at least 5 cm. Tails hidden only inside open mesh have too few friction points and can work loose during washing.
Why Off-White Works for This Design
The single-color palette puts the focus on structure instead of color changes.
Open mesh creates darker areas because the bedding underneath remains visible. Solid joining bands appear lighter. Raised flowers cast small shadows over both surfaces.
Those three depth levels create contrast even though every crocheted component uses the same yarn.
Choose warm ivory or creamy off-white if the bedroom contains beige, oak, walnut or warm neutral upholstery. A cooler white produces a sharper graphic effect but can make slight dye-lot differences more apparent.
Adjusting the Bedspread for Different Beds
Measure the mattress width first.
Add the desired drop on both sides.
Then divide that total measurement by the blocked panel width.
For example, if the required width is 182 cm and one panel measures 26 cm:
182 ÷ 26 = 7 panels.
Repeat the same calculation for length.
Always calculate from blocked measurements because open mesh can change dimensions noticeably after washing.
Making a Lighter Version
Reduce the number of flower intersections.
Use four leaves rather than six around each flower.
Keep the mesh panels unchanged.
This removes weight without changing the dimensions of the bedspread.
You can also use a finer cotton yarn with a correspondingly smaller hook, but that changes panel dimensions and requires a new grid calculation.
Making a Denser Version
Reduce the mesh chains from ch 3 to ch 2 and adjust the number of skipped stitches accordingly on a new sample.
Another method is to add a narrow solid dc band through the center of each panel.
Do not modify the complete bedspread without first testing a full panel. Even a small change in mesh width alters the finished repeat and the amount of yarn required.
Care and Final Blocking
Follow the care instructions printed on the yarn label.
Support the complete bedspread when wet because an open cotton coverlet becomes substantially heavier after absorbing water.
Dry flat whenever practical.
Align the major panel seams first.
Then square the outer edge.
Reshape the flowers after the main fabric has been positioned.
Lift each petal and separate the layers with your fingers.
Arrange the leaves so their center ribs remain straight.
Avoid pressing the dimensional flowers under a heavy iron.
Conclusion
The open lattice is the structural foundation of this 3D flower crochet bedspread pattern, while the layered flowers supply the depth visible in the off-white reference. Begin with one 24–28 cm master panel, block it and record its dimensions before making the full grid. Attach every flower to solid joining bands rather than unsupported chain loops, and keep the outer portions of the leaves and petals free. Your next step is to crochet one mesh sample and check its two diagonals before calculating the required panel count. Save the finished off-white coverlet to Pinterest or share it on Instagram with #IvoryFlowerMeshBedspread. Would you place a flower at every panel intersection or leave selected intersections open for a lighter design?